• Skip to primary navigation
  • Skip to content
  • Skip to primary sidebar
  • Skip to footer

The Paleo Mama

Homegrown and Handmade

  • About
  • Blog
    • Podcast
  • Meal Plans
  • Essential Oils
  • Our Farm
    • Great Pyrenees Puppies
    • Goats
      • Goats for Sale
      • Goat Sales Policy
      • Nigerian Dwarf Bucks
        • Ranchocabra Lunar Eclipse

Natural Living

7 Supplements to Subdue Hypothyroidism

May 5, 2014 by Jackie Ritz 5 Comments

7 Supplements to Subdue Hypothyroidism.001

I’ve been listening to this really great online FREE Thyroid Summit the past few days and I am just blown away at the wealth of information that I am getting FOR FREE!

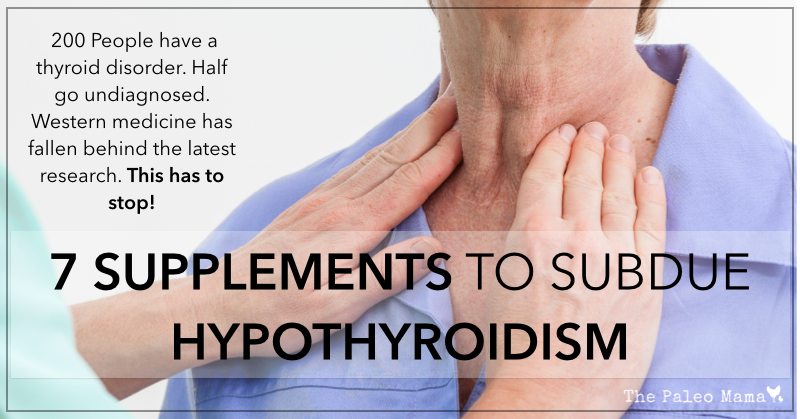
Did you know that 30 million Americans — and 200 million people worldwide — have a thyroid disorder?

Unfortunately, only half have been properly diagnosed. And even less are receiving proper treatment.

Despite showing up to the doctor’s office with obvious symptoms of thyroid dysfunction —- weight gain, fatigue, cold hands and feet, hair loss, brain fog, depression, constipation, and more — millions of people are being sent away with “normal” thyroid lab scores and with no real answers.

Once again, Western medicine has fallen behind the latest research. And patients are paying the price in unnecessary suffering and medical bills.

This has to stop.

That’s why my friend Sean Croxton of Underground Wellness put together a FREE online event called The Thyroid Sessions, with 23 expert interviews and cooking classes on all things thyroid — so you can get the answers you’ve been looking for.

Yesterday, Dr. Izabella Wentz, talked about Hypothyroidism and shared her personal testimony of how she has utilized 7 supplements and her hypothyroidism has gone into remission! This was such an informative session that I listened to and I wanted to share my notes with all of you.

This interview is STILL LIVE today to listen to but after today, Dr. Wentz’s interview will become part of the download package. The interviews are only live for 48 hours and then Sean Croxton moves onto the next session. If you can’t watch these interviews when they are posted, I highly recommend you purchase the download package. Otherwise, make sure you get up to watch them for free!

The advice in this Thyroid Summit is invaluable and you would pay LOTS OF MONEY for this! Hurry and sign up for the free summit and listen to Dr. Izabella NOW! 

Click here to order the download package of the Thyroid Summit. 

Click here to sign up and watch the videos for FREE! 

7 Supplements that Subdue Hypothyroidism:

(Cliffnotes I took from Dr. Izabella Wentz Thyroid Session) 

1. Low Dose Naltrexone – this actually isn’t a supplement. It is a low-dose medication that treats the autoimmune attack on the thyroid. She recommended you get this from a compound pharmacy.

2. Probiotics – to establish good bacteria in the gut

3. Selenium – selenium deficiency is known as the trigger to hashimoto’s. Listen to Dr. Izabella on the correct dosage.

4. Betaine with Pepsin – this is to help with low stomach acid.

5. Systemic Enzymes – these break down the immune complexes against the thyroid.

6. Moducare – this supplement helps to balance and strengthen the immune system.

7. Anatabine – this supplement calms the thyroid antibodies.

Dr. Izabella’s interview is LIVE right now for you to listen to! I HIGHLY recommend you listen to it to hear more information on these supplements and the correct dosage! After May 5th, the interview will not be live and you will need to order the download package to listen to her! Still an awesome deal!

Click here to order the download package of the Thyroid Summit. 

Click here to sign up and watch the videos for FREE! 

7 Supplements to Subdue Hypothyroidism | www.thepaleomama.com.001

Filed Under: Natural Living, Nutrition Tagged With: health, hypothyroidism, nutrition, supplements, thyroid

Cultured Dairy: How to Make 1 Stick of Butter, 1 Pint of Sour Cream, and 1 Pint of Buttermilk with JUST ONE Quart of Cream!

May 1, 2014 by Jackie Ritz 50 Comments

Cultured Dairy .001

Before you go jumping down my throat about posting this because it’s dairy, I want to make sure I mention that my family consumes raw dairy. I have always been open about that and I feel it is something that my family thrives on.

So, am I still Paleo? I don’t really like labeling myself as anything. We eat by a Paleo template and include raw dairy in our diet. You can click here to see why my family consumes raw milk. 

My goats are due to have babies in June, so the 2 months prior to birth, we are giving them a break from milking. It’s sad not to have fresh, raw goats milk everyday, but I am lucky to have lots of farms nearby that have raw milk. This past week I went with raw cow milk from Jersey’s….mostly cause raw goats milk is $12 a gallon! Yikes! I’ll just wait for my goats to kid in June!

Raw dairy is extremely nutritions, but cultured (fermented) dairy takes it to a whole new level. Culturing helps to break down casein, or milk proteins, one of the most difficult proteins to digest. It, also, restores enzymes that may have been destroyed during pasteurization including lactase, which helps to digest lactose (milk sugar) and numerous enzymes, which help the body absorb calcium and other minerals.

In addition, cultured dairy provides beneficial bacterial and lactic acid to help your digestive tract stay healthy. Click here to read all the benefits of raw cultured dairy. 

Fun with Cultured Dairy:

How to Make 1 Stick of Butter, 1 Pint of Sour Cream, and 1 Pint of Buttermilk with JUST ONE Quart of Cream! 

Tools Needed: 

  • Wooden Spoon
  • Food Processor 
  • One Quart of Cream (preferably raw, but not necessary)
  • 2 Pint sized mason jars
  • One Cheesecloth (not necessary, you can use your hands)

Directions: 

Step One: Culture Your Cream. Take your quart of cream and set it out on the counter for 8 hours to sour with the lid on.

IMG_9054

Step Two: Make the Cultured Butter. Take one pint (2 cups) of the cream and pour it into your food processor. Set the other 2 cups aside. Turn your food processor on high and allow the blades to “churn” the cream into cultured butter. This takes roughly 10 minutes. When you start to see clumps forming in your cream, turn off your food processor and use your wooden spoon to push the butter to one side.

IMG_9056

Scoop out the cultured butter and place it in a cheesecloth. Gently squeeze out all the cultured buttermilk back into the food processor bowl with the rest of the buttermilk.

IMG_9060

Place the butter in a bowl with ice water and use your spoon to really push out any more buttermilk. Make sure to get as much excess liquid out. The ice water helps to firm up your butter. Remove the butter and use your hands to squeeze out any more water and form into whatever shape you would like. You have cultured butter!

Step Three: Make Your Buttermilk. Pour all your buttermilk leftover from making the butter into a pint-sized mason jar. You have cultured buttermilk!

Step Four: Make Your Sour Cream, aka Cream Fraiche’: Now take the other 2 cups of cultured cream that you set aside, and pour it into a pint-sized mason jar. Take one tablespoon of the cultured buttermilk that you made and put it inside the jar with the cream. Put the lid on and shake the jar to incorporate the cultured buttermilk with the cream.

Leave your jar on your counter or in a warm spot for 12 hours to culture even more and thicken. Chill well! You have European Style Sour Cream!

You will love this European Style Sour Cream that is also known as Creme Fraiche’. It is just like sour cream but much tastier. Put it on your potatoes, in your soup, on your eggs, and anywhere else you like to put sour cream. To make more Creme Fraiche’, follow Step Four above but use one tablespoon of leftover Creme Fraiche’, instead of cultured buttermilk, to culture another pint of cream! You can do this 6-8 times before you need to start over with cultured buttermilk!

I hope you have fun doing this! Let your kids help you and make it a fun kitchen experiment! 

Cultured Dairy- How to Make butter, buttermilk, and sour cream from 1 quart of cream! .001


Filed Under: DIY, Homesteading, Living Sustainably, My Recipes, Natural Living

My Daily Essential Oil Routine

April 24, 2014 by Jackie Ritz 30 Comments

People are always surprised when I tell them that I don’t use face wash, moisturizers, shampoo, conditioner, deodorant, hair dye, lotions, creams, or any other over-the-counter products on my body (or on my kids). Many times they think I am gross or stink really bad, have greasy hair, and am some backwoods hippy. Those that finally meet me actually end up hugging my neck a little bit longer to breath in my Sandalwood essential oil, rubbing their hands through my naturally-dyed hair and complementing the color, and touching my cheek and telling me how baby butt soft my skin is.

You see, you don’t need all that stuff. When I finally gave up all those unnecessary products and started using natural essential oils to clean and freshen my body, I knew I was actually giving my body nourishment instead of toxic chemicals to try to unload.

We use essential oils for everything. Not only has our health improved, but our pocketbook has too!

Many have asked me how I use the oils daily on myself and on my family. This routine changes when there is a sickness or something else that we are trying to get rid of. So, I wanted to share a daily oil journal on which oils I used and why! I hope it inspires you to do the same.

CLICK HERE to learn more about essential oils

My Chemical-Free Daily Routine

Wake up and shower. I do the “No Poo” shampoo method on my hair using a baking soda wash to shampoo and an apple cider vinegar wash to condition. In my conditioning apple cider vinegar rinse, I add a few drops of Wild Orange essential oil. The oil acts as a serum and, also, leaves a nice, fresh smell in my hair. If I was to shave my legs on this particular day, I rub a scoop of coconut oil on my legs and use it like shaving cream! You will be impressed at how awesome coconut oil works for shaving!

Wash my face. I scoop out a marble-sized amount of coconut oil and put it on my hand. Then I add a drop of Cedarwood and a drop of Geranium essential oil to the coconut oil. I rub this mixture all over my face and let it sit on my face for a minute. I then take a HOT washcloth and set it over my face to lightly steam and open my pores. I then sure the washcloth to remove the oil and rub circular motions over my face. Pat dry with a towel and then make my husband feel how soft my skin is!

Get dressed. I have my favorite everyday oil on my dresser, Sandalwood! I love the woodsy smell of it and I add a few drops to my neck and wrists and sometimes my diffuser necklace.

Brush teeth. I use my homemade remineralizing toothpaste with Peppermint. Click here for the recipe. 

Get kids up and ready. I apply a roller bottle blend on my kids (to the back of their neck)as they are eating breakfast. I use a “focus” blend and it’s great for calming and for enhancing a healthy thought process throughout the day. I, also, apply this to myself when I am sitting at my desk and working (like right now!)

Turn on diffuser. I use a diffuser daily (I like this one) and add different essential oils to it. In the morning I like to diffuse citrus oils, which is a very uplifting blend that smells delicious. 

Morning supplements. I take a multi-vitamin, fish oil, and different essential oils in the morning. I apply 2 drops of grapefruit essential oil under my tongue and then swallow. Grapefruit helps to balance progesterone. When our bodies are under stress cortisol inhibits our production of progesterone; grapefruit prevents cortisol from blocking progesterone production. 

Throughout the day. I drink water a lot throughout my day and most the time I add lemon essential oil to it. Lemon helps to assist in riding your body of toxins and it tastes so good too! I use peppermint for head and neck tension and on my belly when it’s upset. If you are feeling unwell, I use OnGuard daily on my family till everyone is feeling better. I, also, use my homemade all purpose Salve for minor skin irritations. 

At night and for bedtime. My kids love their nightly oil routine. Some nights they get a detox bath using whatever oils I feel like putting in there. Click here to see how to do a detox bath for kids. When they get out of the tub, they each get Lavender on their feet. We used Cedarwood and Geranium to knock out my daughter’s dry and irritated skin on her hands and face, and use that as needed. I apply Frankincense on the back of their neck, down their spine to promote a healthy, growing body! When the kids are in bed I like to diffuse my calming and drink a hot tea with ginger essential oil and lemon essential oil added to it.

That’s it! Like I said above, we adjust this when there are things going on that we need to relieve with oils.

Why not give essential oils a try? I recommend taking it one step at a time. Slowly get rid of one item, like your face wash, and try my method! You will not be sorry!

Click here to start using essential oils on your family! 


My Daily Essential Oil Routine | www.thepaleomama.com.001


Filed Under: DIY Beauty Recipes, essential oils, Natural Living

How to Cut the Cable and Not Feel Deprived

April 15, 2014 by Jackie Ritz 20 Comments

How to Cut Your Cable and Not Feel Deprived.001

Have you recently taken a close look at your cable bill? Do you see lots of taxes, charges, and fees that kind of snuck their way into your bill? I remember the last time I looked at my cable bill and thought, “what a waste of money” and I called the company up and I cut the bill. I was tired of feeling like I was getting ripped off. What’s funny is that cable didn’t start off that way in the late 40’s, and what once was a small localized business, has turned into a ginormous industry of penny-pushing and trying to make as much as they can off the consumer.

According to Consumer Reports, the average household will spend $154 a month on cable. Over a year that is over $1,800! That is more than I spend on our family’s clothes and, quite possibly, it is more than what you spend on groceries every month.

I published this article about a year ago and mentioned that we decided to cut our cable because we were aggressively trying to pay off debt. Cutting our cable was a tough decision at the time. I dreamed of Little House on the Prairie nights in our house with our kids…but it never works out quite like that! However, in the 2 years that we have cut out cable, I have never felt deprived or felt like I missed out on the latest shows. Let me show you how to get around the cable pit so that you can start saving money on cable and start using that money for something much more necessary (organic produce, quality meats, or paying off debt).

How to Cut Your Cable in 5 Easy Steps

Step One:

Shop around in your area for the BEST internet provider. Most cable providers have the internet charges wrapped up like some fancy wording “triple play“. Look in your area and see who offers the best rates for internet service. WOW, Wave, and Verizon FiOS have the best ratings according to Consumer Reports. Work a deal with them. See what their charges are for just internet and phone (if you need that).

Step Two:

Call your provider and tell them YOU ARE DONE. This is a tricky step because the hagglers for cable companies ARE GOOD. Do not let them reel you in. Tell them you are tired of the added fees and service charges and that you want your cable to be done. If you found out that they offered the best deals on “strictly” internet, then keep the internet but ditch the cable. Make sure to work out a deal!

Step Three:

Get the no-cable essentials…unless you are going COMPLETE no cable. We love our Roku and we can stream shows, yes, even the latest Grey’s Anatomy shows, on it. The best thing about my Roku is that you do not even need a DVR anymore. You can play the shows at your convenience. Many new televisions have a built-in cable antenna. Check to see if yours does. If it doesn’t, then I recommend this Radio Shack antenna. This allows you to tap into FREE broadcast table which airs all the major channels like FOX, ABC and NBC. You thought you had to pay for those, huh?!

No-Cable Essentials: Roku and Radio Shack antenna.

Step Four:

Sign up for Netflix and/or Hulu. What’s the difference? Netflix has mostly older shows, but it is great for kids. My kids enjoy lots of shows from Netflix and lots of Disney movies too. Hulu has newer shows and episodes. What’s the caveat? You have to wait a day or so for them to load up the newer episode after it airs on television. But, if you are anxious and can’t wait, then you can always use your handy antenna and watch it!

Step Five:

Get rid of your extra tv’s! Ok, I know this isn’t for everyone, but we just have one TV in the house now. We have vowed never to put a TV in our bedroom or our kid’s bedroom. However, there are times when I would like to lay down in my own bed and watch the latest Revenge. This is where having an iPad comes in handy! Download the Hulu and Netflix app and watch it in your own bed on your own iPad!

Now relish in the fact that you are spending *maybe* $15 a month on Hulu and Netflix and you are saving over $130 a month! What can you do with $130 a month? 

How to Cut Your Cable and Not Feel Deprived | www.thepaleomama.com .001

Filed Under: Budget, Natural Living, Thoughts

Coconut-Lime Fruit Salad

April 10, 2014 by Jackie Ritz 1 Comment

coconut lime fruit salad horizontal

I’m so excited to have Arsy from Rubies & Radishes sharing a beautiful and delicious spring recipe with all my readers! Arsy creates some of the most amazing Paleo recipes I have ever seen! She has two Paleo cookbooks out, The Paleo Slow Cooker, and a BRAND new one, The Paleo Foodie! Her unique cultural flare gives all her recipes a distinct Arsy touch and I am so delighted that she is offering to share one of her favorites from The Paleo Foodie Cookbook!

Coconut-Lime Fruit Salad from The Paleo Foodie Cookbook

The coconut-lime dressing adds a tropical feel to this lightly dressed fruit salad, making it a perfect addition to a spring brunch or picnic. It’s also a great way for busy moms to prepare a healthy and exciting snack.

The coconut milk in this recipe adds a nourishing source of fat and additional nutrients to the fruit salad. The addition of the fat tends to keep you full longer too! I highly recommend using homemade coconut milk or choosing a brand of coconut milk that uses BPA-free packaging and does not add any gums or preservatives.

This recipe is easy to make and packed with flavor. It is a toddler favorite in our household.

This Coconut-Lime Fruit Salad is from the newly released cookbook, The Paleo Foodie. The Paleo Foodie is filled with gourmet yet simple to make Paleo recipes with fresh and vibrant flavors.

Click here to buy the newly released Paleo Foodie Cookbook today! 


Coconut-Lime Fruit Salad

Coconut Lime Fruit Salad

Ingredients

  • 2 cups strawberries, halved
  • 2 cups honeydew melon, chopped into 1-inch cubes
  • 1 mango, chopped
  • 1⁄4 cup coconut milk
  • 4 teaspoons fresh lime juice
  • 2 teaspoons fresh basil, chopped
  • 1⁄2 teaspoon raw honey
  • dash of sea salt

Cooking Instructions 

  • Combine strawberries, honeydew and mango in a medium-sized bowl.
  • In small bowl, whisk together coconut milk, lime juice, basil, honey and sea salt.
  • Pour over fruit and serve.

Click here to buy the newly released Paleo Foodie Cookbook today! 

arsy_RR_102

Arsy Vartanian is the founder and chef of the Paleo recipe and lifestyle blog, Rubies and Radishes and she is also the author of the cookbooks, The Paleo Foodie and The Paleo Slow Cooker. In an effort to achieve optimal health and wellness, she discovered the Paleo diet and Crossfit in 2008. Arsy started feeling better than ever and was eventually able to recover from health issues that she had struggled with for almost a decade. Arsy deeply enjoys spending time in her kitchen creating healthy, grain-free recipes for her family and her blog readers. She resides in a quaint beach town in California with her husband and daughter. Connect with her on Facebook and Instagram.


Paleo Coconut Lime Fruit Salad Vertical

Filed Under: Guest Posts, My Recipes, Natural Living Tagged With: coconut lime salad, fruit salad, gluten-free, paleo, primal

14 Benefits of Maca Powder and 14 Maca Recipes

April 8, 2014 by Jackie Ritz 13 Comments


“Maca is a plant that grows in central Peru in the high plateaus of the Andes mountains. It has been cultivated as a vegetable crop in Peru for at least 3000 years. Maca is a relative of the radish and has an odor similar to butterscotch. Its root is used to make medicine.” (1) The benefits of Maca have long been valued and has gained more and more popularity in recent years. Culture is awakening to the fact that Maca carries a long list of nourishment to the body. The amazing thing about Maca is that it is an adaptogen, meaning it adapts to the needs of your body.

14 Benefits of Maca Powder:

  1. Increases Energy – Maca has a reputation for boosting energy levels without stressing the adrenals (like coffee can)
  2. Increases Libido and Sexual Function – Maca is a known aphrodisiac among native Peruvian culture. It has been known to increase the libido among men and women!
  3. Improves Fertility – Black Maca has been known to increase sperm count and volume in men and Red Maca has been known to balance female hormones and ovulation cycles.
  4. Regulates Hormone Balance – Maca has a vast variety of amino acids, which are known as the building blocks of hormones.
  5. Reduces Depression – When you take Maca regularly, Maca can work to increase positive emotional moods. Maca has a very unique nutrient called macamides, which aid in decreasing depression and anxiety.
  6. Reduces Anxiety – Maca has a positive effect on your individual mood and can help to reduce any self-perceived anxiety.
  7. Helps with Menopause – Many Maca uses report a significant decrease in hot flashes after using Maca powder.
  8. Enhances Mental Clarity – Black Maca has been shown to have a beneficial effect on learning and memory. Maca is safe for both children and adults!
  9. Improves Blood Circulation – a very interesting property of Maca, is that it has been seen to improve blood circulation.
  10. Improves Acne – When acne is related to hormone imbalance, taking Maca can be very productive for improving hormonal acne.
  11. Improves Muscle Gain – More and more athletes and bodybuilders are using Maca powder to increase their athletic performance.
  12. Improves Thyroid Function – Due to the hormone balancing properties in Maca, it has been known to stimulate thyroid function.
  13. Improves Strong Teeth and Bones – Black Maca is great for increasing bone density and strength.
  14. Improves Skin Tone – Maca has a strong nutrient content and hormone balancing effect on our skin.
  15. Improves Hair Growth – Maca has been traditionally used to stimulate hair growth, as well as prevent hair loss.

Which Maca is Right for You?

There are several different types of Maca and choosing which one you should use can sometimes be overwhelming. Raw Maca has never been heated and all the enzymes and nutrients are left in tact at peak levels. This is the one that I prefer to use.

Gelantized Maca is heated to remove all the start content within the root. This makes it more concentrated, however, the high heat destroys some of the enzymes and alters the nutrients. If you have a sensitive stomach, gelantized maca would be the one for you.

Click here to see a great article on choosing which Maca you should take.

Where to Buy Quality Maca Powder:

After figuring out which Maca powder is right for you and your body’s needs, I, personally, use and recommend THIS brand of Maca. I find that The Maca Team carries very high quality Maca powder and they are willing to work with you to figure out which Maca you need. My husband takes the Black Maca and I take the Red Maca. I prefer to take 2 teaspoons daily in my morning smoothie! I don’t mind the taste of Maca, but if you do, The Maca Team sells capsules. Click here to check out The Maca Team products!

[box]The Maca Team is offering my readers a 10% discount using coupon code: PALEOMAMA. CLICK HERE to order quality Maca products! [/box]

14 Recipes Using Maca Powder

Raw Maca Truffles
Maca Energy Bars
Hormone Balancing Smoothie
Hot Chocolate with Maca
Dark Chocolate Maca Love Truffles
Almond Cacao Cookie with Salted Maca Caramel
Maple Maca Ice Cream
Maca Chocolate Pots De Creme
Enzyme Raw Pie
Superfood Smoothie
Peanut Butter and Jelly Smoothie
Superfood Bliss Balls
Cacao Hazelnut Ice Cream
Raw Maca PMS Smoothie
Coconut Maca Tonic

 Remember to use coupon code: PALEOMAMA to order Maca products today from The Maca Team! Click here to order!

14 Maca Powder Recipes and 14 Maca Benefits .001


Filed Under: My Recipes, Natural Living, Nutrition, Paleo Education, Round Up Tagged With: maca benefits, maca powder, paleo recipes

« Previous Page
Next Page »

Primary Sidebar

  • Facebook
  • Instagram
  • Pinterest
  • RSS
  • YouTube

Hi, I'm Jackie Ritz and welcome to The Paleo Mama! I'm a published author, certified herbalist, and voracious researcher of natural medicine and nutrition. I'm glad you're here and I hope you stick around for awhile!

Recent Posts

  • When God Says Pause: Why I Took a 5-Year Break from My Online Business
  • How to Quit Facebook but Keep Your Business Profile
  • Leaving the City for the Country
  • Natural Way to Heart Health

MEAL PLANS

Biblically clean meal plans that are for those love to cook real food

Read More

Footer

Our Blog

The Paleo Mama blog provides simple answers for healthier families through research, tutorials, recipes, and simple remedies for daily needs!

  • Health
  • Essential Oils
  • Recipes
  • Remedies
  • Natural Living
  • Meal Plans

Stick around!

You’ll get instant access to a library of natural remedies and real, paleo food, including our ebooks and free guides we send out.

  • Home
  • Disclosure/Disclaimer
  • Privacy Policy
  • Advertise
  • Contact Me

Copyright © 2025 · Wellness Pro on Genesis Framework · WordPress · Log in