• Skip to primary navigation
  • Skip to content
  • Skip to primary sidebar
  • Skip to footer

The Paleo Mama

Homegrown and Handmade

  • About
  • Blog
    • Podcast
  • Meal Plans
  • Essential Oils
  • Our Farm
    • Great Pyrenees Puppies
    • Goats
      • Goats for Sale
      • Goat Sales Policy
      • Nigerian Dwarf Bucks
        • Ranchocabra Lunar Eclipse

My Recipes

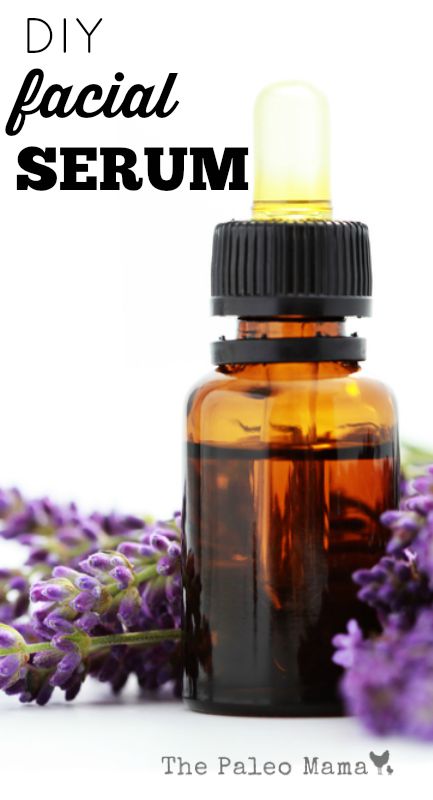
DIY Facial Serum

December 4, 2014 by Jackie Ritz 41 Comments

I’ve traded in my expensive over-the-counter facial products for simple and natural ingredients! Not only are they 100% natural, but they are, also, safer and MORE effective than anything you could purchase from the store.

I’ve been using the oil cleansing method on my face for years. I love it and will never go back to cleansers and moisturizers. CLICK HERE to see what the oil cleansing method is and learn more about this safe and effective way to cleanse your face.

Lately, as I’m getting a tad bit older, I’ve been using specific anti-aging essential oils to help promote healthy skin. I created a “facial serum” that uses my favorite essential oils and are known for their anti-aging benefits! Take a look at the oils below…

1) Lavender – Lavender is great for all skin types, but very powerful for mature skin. It is widely known for its calming and relaxing properties but also is great for soothing mild skin irritations. 

2) Frankincense – Frankincense is one of the most prized and valued essential oils.  It’s used in many beauty products to slow the signs of aging and to promote a youthful, radiant skin.

3) Geranium – Uses of Geranium essential oil date back to ancient Egypt when Egyptians used Geranium oil to beautify skin.  As an essential oil, Geranium has been used to promote clear, healthy skin—making it ideal for skin care products (source).

4) Myrrh – Ancient records show that Myrrh was deemed so valuable that at times it was valued at its weight in gold. It is also soothing to the skin—promoting a smooth, youthful looking complexion.

I buy only therapeutic-grade essential oils. You can click here to purchase your very own wholesale starter kit at wholesale prices!!!

DIY Facial Serum Recipe

INGREDIENTS:

  • 50ml glass dropper bottle (where to buy online) – we save old stevia bottles and use them for things like this!
  • 4 Tablespoons of Almond oil (where to buy) or Jojoba oil (where to buy)
  • 7 drops each of Lavender, Frankincense, Geranium, and Myrrh Essential Oils (where to buy)
  • Empty 2 capsules of Vitamin E (OPTIONAL)

DIRECTIONS: 

  1. Add everything to your glass dropper bottle. Shake.
  2. Apply at night before bed!
DIY Facial Serum


Filed Under: DIY, DIY Beauty Recipes, essential oils, My Recipes, Natural Living

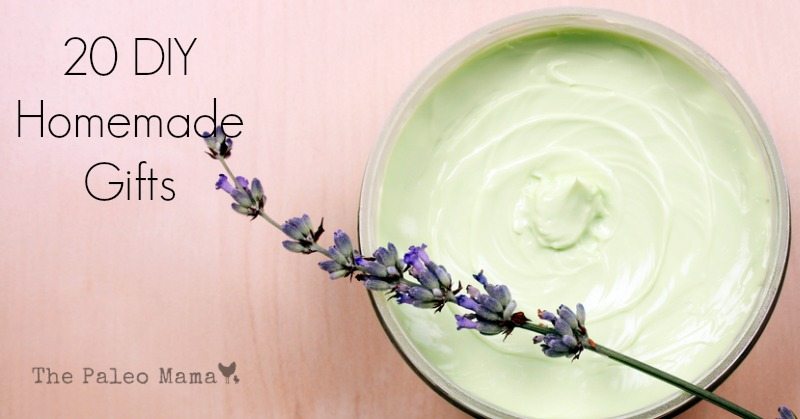
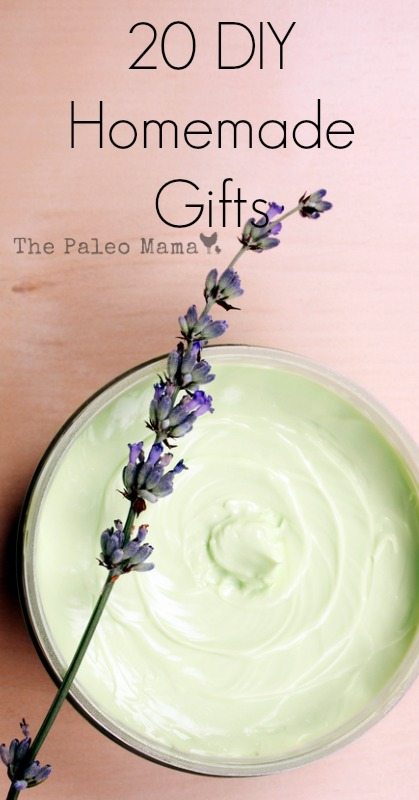
20 DIY Homemade Gifts

November 24, 2014 by Jackie Ritz 2 Comments

20 gifts

Lately there has been such a hype of essential oils, and rightly so! Essential oils are finally becoming recognized as great natural solutions!

This Christmas, I’m making all my own homemade gifts and many of the recipes use essential oils. I think most people love and appreciate the time and work you put into homemade gifts, so I love doing this for my friends and family.

Are you up for making homemade gifts for your friends and family this year? I’m including 20 recipes that are in my favorite essential oil starter kit. You can read more about the brand I stand behind and how to purchase a starter kit for yourself HERE. 

So, go on over HERE and grab your starter kit and you’ll be set to start making your own homemade gifts for Christmas! Not only will you have the essential oils you need, but you will, also, have a wholesale membership for your essential oil needs (so shop at wholesale price all year long), a support system for using your oils, and quality essential oils to use in your home. You will have a lot left over! Each bottle holds 250 drops!!!

What Essential Oils Do You Need? 

  1. Lavender
  2. Lemon
  3. Melaleuca
  4. Peppermint
  5. Frankincense
  6. Protective Blend
  7. Oregano
  8. Breathe
  9. Digestive Blend
  10. Soothing blend

Purchase your starter Kit HERE! 

20 DIY Homemade Gifts

  1. Lavender Oatmeal Facial Scrub – so simple and uses ground oatmeal!
  2. Peppermint Candy Cane Sugar Scrub – a wonderful holiday gift for your girlfriend!
  3. Homemade Frankincense Soap – by the soap base and you’re good to go!
  4. DIY Chest Rub – a homemade “vapor” rub alternative!
  5. Lavender Lemon Lip Balm – perfect for the winter season!
  6. Muscle Salve – feels wonderful on those aches and pains!
  7. DIY Coconut Salt Scrub – I recommend lavender or lemon!
  8. DIY Hand Gel – uses a protective blend to boost immunity!
  9. Fast Fizzing Bath Bombs – throw in the tub or shower for a spa-like experience!
  10. DIY Lotion Bars – easy to make and no junk ingredients!
  11. DIY Clay Mask – add lavender to this recipe because it’s great for the skin!
  12. All Purpose Salve – a salve that can be used for everything!
  13. Tallow Butt Balm – great for the little diaper rashes and sore bums!
  14. DIY Laundry Detergent – use Orange or Lemon to really clean those clothes!
  15. DIY Remineralizing Tooth Powder for Kids – a simple recipe that the kids will love!
  16. Detox Bath in a Jar – throw some epsom salt and essential oils in a mason jar!
  17. DIY Essential Lip Balm – another great recipe for the lips!
  18. Simple Peppermint Citrus Scrub – choose lemon and peppermint!
  19. DIY Aromatherapy Play-dough – great homemade gift for the kids!
  20. DIY Deodorant Stick – use melaleuca and lavender!

CLICK HERE to get started and purchase a wholesale starter kit and start making your own gifts for the Holidays!

20 Homemade Gifts

Filed Under: DIY Beauty Recipes, DIY Home Recipes, essential oils, My Recipes

2 Minute Paleo Porridge

November 3, 2014 by Jackie Ritz 3 Comments

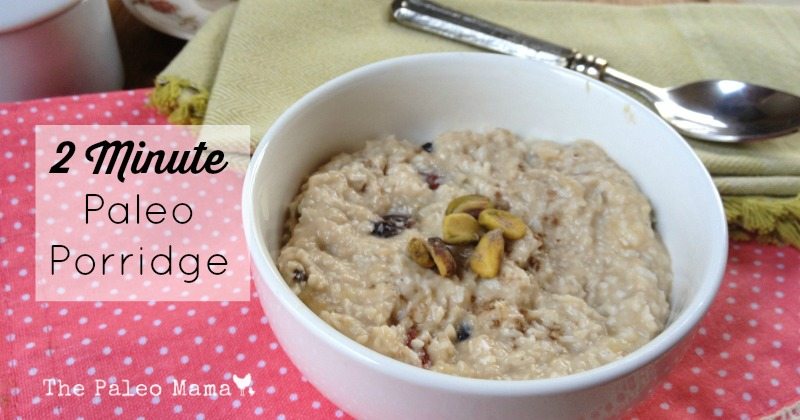
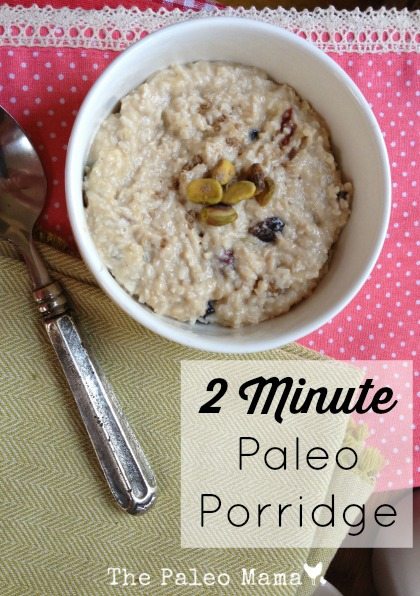
2 Minute Paleo Porridge

The biggest reservation people have expressed to me about the Paleo diet is: “What will I eat for breakfast?”
Protein heavy breakfasts like sausage, eggs, or bacon are fine for some but a bit heavy for everyone, especially those used to the lighter comforts of toast, cereal or oatmeal in the morning.
Of course there are homemade Paleo versions of toast and cereal but they require time, energy and baking skills to make. But this oatmeal porridge “taste-a-like” dish is much easier to throw together, and is bound to be a pleaser for children and adults alike.
The banana adds plenty of natural sweetness, the shredded coconut mimics the texture of oats and the cashew butter lends creaminess.
I topped my porridge with trail mix of salty nuts and dried fruit and cardamom spice, but you can add favorite toppings like fresh berries, a sprinkle of cinnamon, or coconut cream.
And if you’re in a festive pumpkin mood right now, add a tablespoon or two of pumpkin puree and some pumpkin spice for a pumpkin n’oatmeal!
This recipe is for one serving, so double or triple it to make more. It is also 21 Day Sugar Detox approved if you use a green-tipped banana!
Enjoy one of the easiest Paleo breakfast you make make! And heat it up if you like your breakfast to be warm.

Ingredients:

  • 1 very ripe banana
  • 1/3 cup of shredded coconut
  • 2 Tablespoons of cashew butter (you can substitute almond butter or sunflower seed butter)

TOPPINGS: 

  • Nuts
  • Dried fruit
  • fresh berries
  • Cinnamon
  • Coconut Butter 

Directions:

  1. Mash the banana together with the shredded coconut and cashew butter.
  2. I used a fork to mash everything together. Top with fresh berries or chopped nuts.


gravatarAngela Privin stumbled on the Paleo diet while trying to cure her symptoms from irritable bowel syndrome (IBS). After a year on a strict Paleo diet she was completely healed and her food allergies were reversed. She’ll always be grateful to her health challenges for making her learn to cook years ago. These days she’s Paleo because she loves the creative challenge of cooking delicious grain-free, real food. She spends much of her spare time experimenting in herPaleo Kitchen Lab and eating the experiments. You can check out her recipes here. 


2 Minute Paleo Breakfast Porridge

Filed Under: 21 Day Sugar Detox, essential oils, My Recipes, Natural Living Tagged With: 21 day sugar detox, 21DSD, paleo

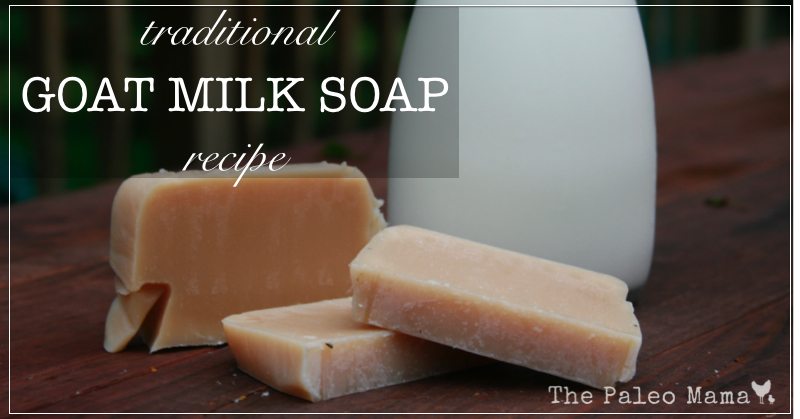
Traditional Goat Milk Soap Recipe

October 22, 2014 by Jackie Ritz 21 Comments

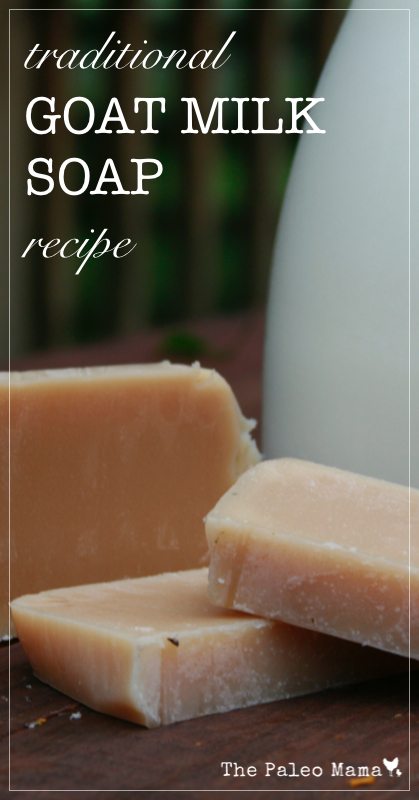
Goat Milk Soap Recipe .001

Why Goat’s Milk

Goat’s milk is packed with vitamins, minerals natural fats, and protein. It carries a pH of around 6.4 which is very similar to a normal skin pH of 5.6, which makes it great for skin tolerance. You can find vitamins A, B2, B6, B12, and Niacin in goat’s milk and many who cannot tolerate dairy, find that they have no problems with goat’s milk.

Those who have very sensitive skin, find that paying over $5 for a bar of goat’s milk soap is worth it! I’ve had several people come up to me and tell me that my soap was the one of the only bars of soap that they could use without breaking out or having a skin reaction.

Anyone Can Make Soap

Soap is NOT hard to make. What is hard to make is all that fancy soap…which I don’t understand anyways. It’s just you, naked in the shower or bath, rubbing a bar of soap on your body. Why do you need swirls and fun shapes? If you enjoy doing that, then by all means, go for it! But I make soap for my family and most the time the kids end up making holes in the bar and pretending like Spiderman can surf on it.

This is a very basic, traditional recipe that I created. I use lard and I use lye. This is NOT a vegan recipe. I also use the traditional method of cold-process. This process uses a short prep time and a long cure time. It’s the easiest, in my opinion, because you are mostly waiting on the soap to cure and harden. This is the way our ancestors prepared soap and it’s the way I prefer to make my soap. Since I use raw goat’s milk, I prefer to keep the milk unheated to prevent destroying any vitamins and minerals.

Why Lard and Lye

Lard was traditionally used in making soap and has a very long history of in soap-making.  I get my lard from a local farm for a really good price, but you can order pastured lard from here. Lard is the hardening fat in this soap – it’s what makes the bar hard so that it doesn’t turn into a big pile of glob while you are taking a shower.

I, also, like lard because of the aging time. When you make a cold-process soap, you are going to need to let your soap age (or cure) for 3-6 weeks. If you do not use a hardening fat, like lard, then it’s going to take your soap much longer to cure. I find that 3-4 weeks is perfect for this recipe.

Now lye is necessary for the alkali, when combined with the goats milk, loosens and attracts dirt, allowing it to be washed away. After 24 hours, the lye is not even present and by the time the 3-4 weeks is up, there is no trace of lye in the soap.

Supplies Needed:

For anything that touches the lye, you will need separate supplies and those supplies should never be used on anything else. Also, this is going to make an UNSCENTED bar. I have tried using essential oils and it requires way TOO MUCH. Alternatively, if you would like, you can add a few drops of essential oil to your bar of soap when you are washing in the shower.

  • Immersion blender
  • Glass bowls for mixing
  • Rubber spatulas
  • Digital Kitchen Scale
  • Tall stainless-steel pot for melting oils
  • 2 Thermometers
  • Safety Equipment – rubber gloves, long sleeve shirt, and goggles
  • Knife to cut the soap
  • Soap Molds or Old Loaf Pans – I prefer the rustic cut of the soap and prefer to use loaf pans.
  • Parchment paper

Ingredients Needed:

You can change your fats and oils if you would like. This is just the recipe that I created and enjoy the most. I have made several other recipes and I really prefer mine as it is very moisturizing, lathers very well, and includes sustainable fats.

  • 2 ounces of Beeswax
  • 18 ounces of Coconut oil
  • 5 ounces of Castor Oil
  • 26 ounces of pastured Lard
  • 6 ounces of Olive oil
  • 8.40 ounces (or 238.39 grams) of 100% pure Lye
  • 18.9 ounces of Frozen Goats Milk (raw or pasteurized) – easiest way to freeze goats milk for soap-making, is to pour the measured out goats milk into a gallon ziplock bag. Then freeze the bag flat.

Step-By-Step Instructions:

  1. Collect all your supplies and block off your kitchen. I usually do this when my kids are down for a nap because of the lye.
  2. Put parchment paper in your loaf pans to get them ready.
  3. Measure out all the fats and oils (everything but the lye and milk) and put in your tall stainless-steel pot.
  4. Put your stove on LOW and slowly melt the oils and the fats. Put a thermometer in and make sure it never goes above 100 degrees. Once melted, remove from stove.
  5. Take your bag of frozen goats milk and smash it up into smaller pieces. Add it to a large glass bowl.
  6. Slowly sprinkle your lye over the frozen milk and mix with a spatula at the same time. MAKE SURE you are wearing your safety gear!
  7. Mix until the frozen milk is melted. Check the temperature of the mixture with a thermometer and do not let it go over 110 degrees. If it does, no worries, just cool it down by placing the bowl in a larger bowl filled with ice water.
  8. Now check on your oils and make sure they are melted and the temp is not over 100 degrees. If it is, then cool it down by placing it in the bowl of ice water.
  9. You want your oil mixture and your lye mixture to be within 10 degrees of each other.
  10. Now slowly pour your lye mixture into your oil mixture. As you are pouring, put your immersion blender on LOW and start to mix.
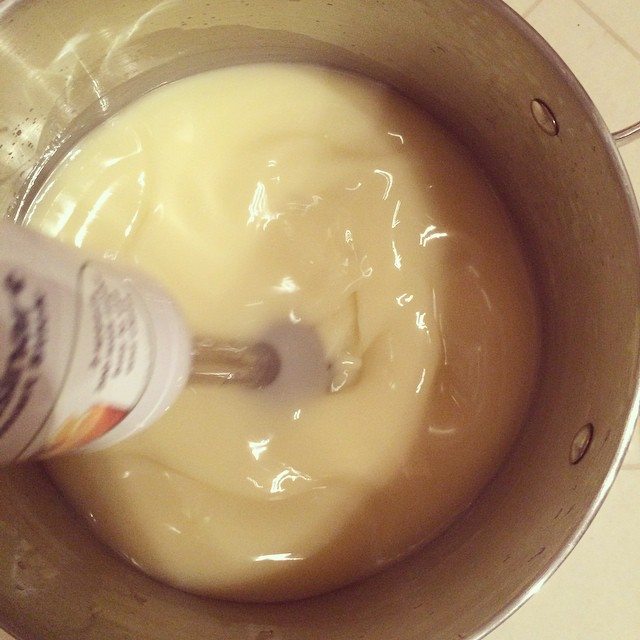
  11. When all the lye mixture is added, turn your immersion blender on HIGH and mix until you reach “trace”. Trace is when you can take a spoon or spatula and you can draw a line in your mixture. It usually takes me 2 minutes to reach trace with this recipe…sometimes less.
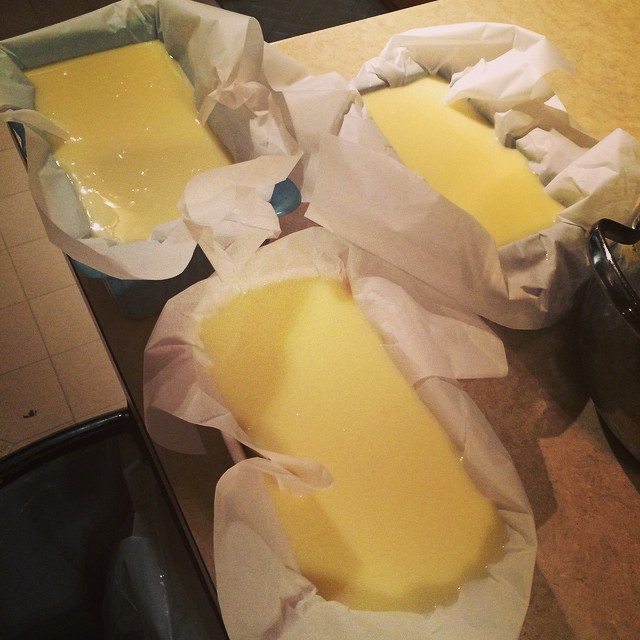
  12. Once you reach trace, you are going to need to move very fast. Immediately, pour your mixture into your 2 loaf pans or your soap molds. Use your rubber spatula to clean the bowl and smooth out the top of the loaf pan.
  13. Put the pans in a dark spot out of reach of kids. Leave it alone for 24 hours. After around 24 hours, the lye is inactive and you can touch the soap.
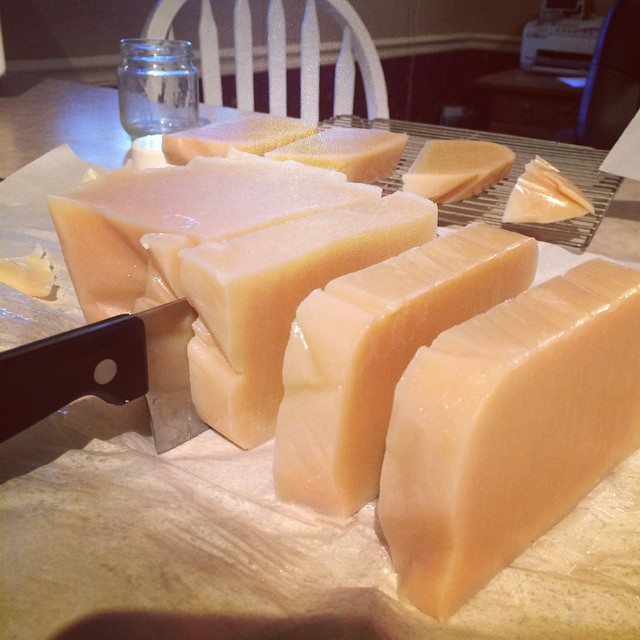
  14. After 24 hours, remove your soap from the loaf pans and cut into individual bars.
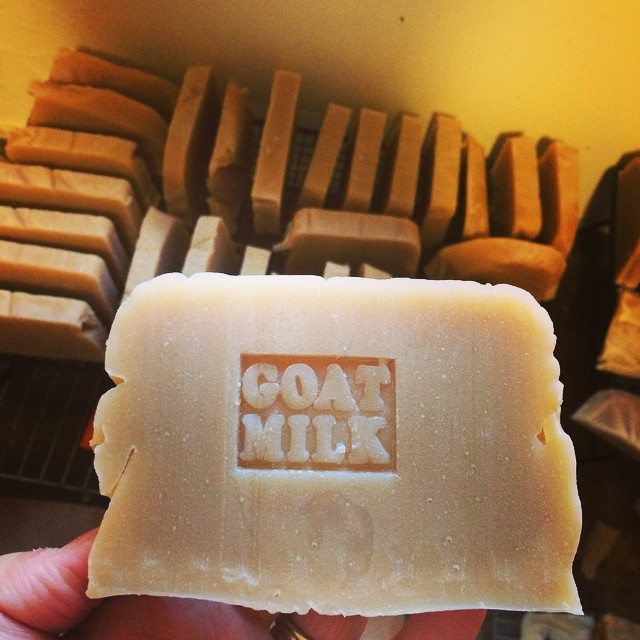
  15. Place the bars in a dark area and let them cure for 3-4 weeks! I know, it’s torture to wait, but it’s sooooo worth it!
  16. After 3-4 weeks the bars should be ready to go!

 See Picture Tutorial Below…..

Working on reaching trace. 

16081_10152632866727013_915759999358523822_n

After you reach trace, pour into your loaf pans and allow to sit for 24 hours. 

soap1

After 24 hours, cut into individual-sized soap bars and cure for 3-4 weeks. 

soap 2

Waiting 3-4 weeks for the soap to harden! It’s worth the wait! 

10703599_10152663692747013_4306114713772124454_n


I hope you enjoy this recipe as much as my family does! 

Traditional Goat Milk Soap Recipe .001

Filed Under: Budget, DIY Beauty Recipes, DIY Home Recipes, goats, Homesteading, Living Sustainably, My Recipes, Natural Living

Plantain Crust Cashew Cream Pie (Paleo & Gluten-Free)

October 15, 2014 by Jackie Ritz Leave a Comment

Cashew Cream Pie

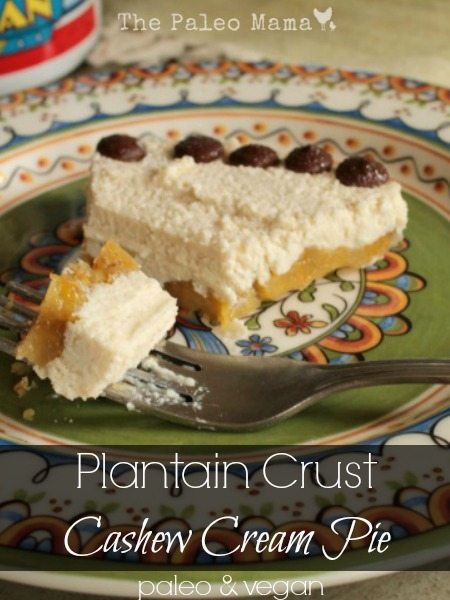
Paleo pie lovers are often crust challenged. You can roll out a grain free crust, but that’s a lot of work. Or you can mix nut flour and dates. But when that gets boring, I’ve got another option…a plantain and gelatin crust. It’s made of nothing but fruit and gut-healing gelatin and used in this recipe, it makes a delicious foundation to a paleo friendly, cashew cream pie.

 Not only does this add a health factor to your dessert but the plantain crust adds natural sweetness and holds up as a great crust. This no bake pie is super easy to make, it just takes a little patience and planning ahead because the crust has to set in the fridge like jello and the cashews need to be soaked (which coincidentally makes them easier to digest…bonus!).

This pie is perfect to bring to a party where it will please the gluten-free and paleo crowds alike. And if a nut allergy is a problem, fill the crust with cooked apples, figs, coconut cream, pumpkin or your favorite no-bake pie filling.

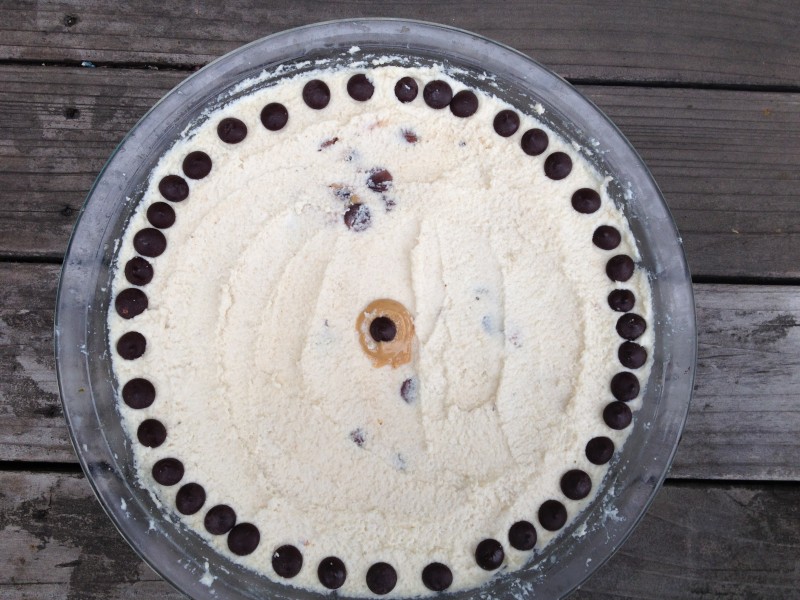
I garnished my pie with a ring of chocolate chips and a dollop of cashew butter in the middle, but you garnish with berries or banana slices.

Don’t like plantains? Experiment with adding jello to fruit like sliced pears or apples. I love to experiment in my kitchen lab (that’s how I came up with this recipe) so have some fun and try some experiments of your own.

Ingredients

  • One large plantain or two small, ripe, yellow plantains, sliced
  • 1 teaspoon of grass fed gelatin
  • 1 cup of cashews, soaked
  • Juice of one lemon
  • 1/2 cup of water divided into 1/4 cup portions
  • 1/2 teaspoon of vanilla
  • 2 tablespoons of maple syrup or raw honey (can also use 2 to 3 soaked dates)
  • 1/2 can of coconut cream (you can turn regular coconut milk into coconut cream by refrigerating overnight, scooping out the solid stuff and discarding the liquid).
  • 1/4 teaspoon of sea salt
  • optional: chocolate chips to decorate
  • optional: 1/2 teaspoon of cashew butter for garnish

How to Make the Crust:

  1. To make the crust slice the ripe plantains into rounds.
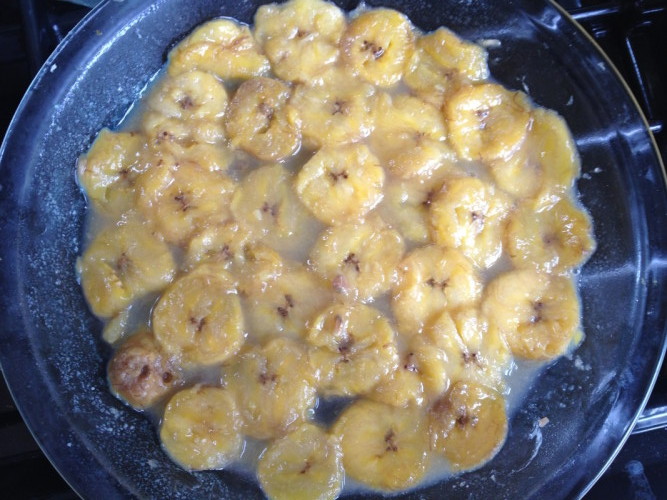
  2. Saute them in fat of choice until they darken in color, soften and caramelize. When you taste one it should be sweet and soft.
  3. Pour 1/4 cup of water in a shallow bowl and sprinkle gelatin on top and let it sit for 5 minutes. This is called “blooming” the gelatin and will soften it so it dissolves easier in hot water. Boil the other 1/4 cup of water and pour over the cold water and gelatin. Mix until the gelatin dissolves.
  4. If it doesn’t dissolve, you can pour the gelatin mixture into the pan with the plantains and heat the pan until the gelatin dissolves.
  5. Transfer the plantains and water to a pie tin. This is going to be your super healthy and sweet crust.
  6. Put in the fridge for 3 to 4 hours for the crust to set.

IMG_4524

How to Make the Filling:

  1. Submerge the cashews in water and leave it to soak while the crust is setting, or you can soak them overnight if you prefer.
  2. Drain the water from the cashews and throw the soaked cashews into the food processor and process until smooth.
  3. Add in coconut cream, lemon juice, sweetener, salt and vanilla. You can also used soaked dates instead of honey or maple syrup.
  4. Process until all the ingredients are well combined.
  5. Pour the cashew mixture into the set pie crust and return to the fridge for an hour.
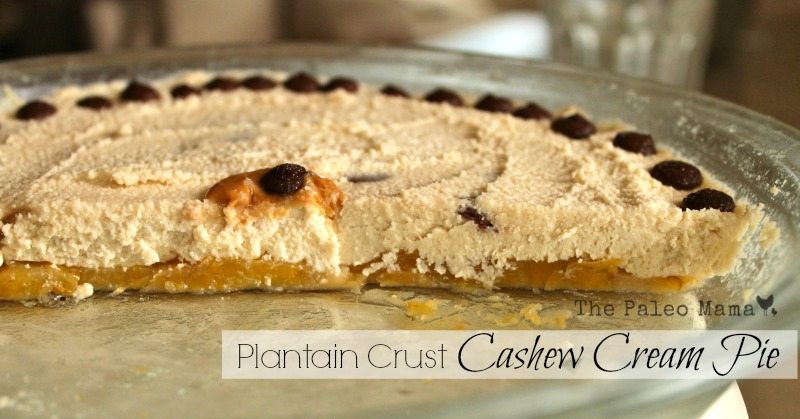
  6. You can decorate the pie with a dollop of cashew (or other nut butter) in the center and a ring of chocolate chips around the perimeter of the pie. You can even mix some chocolate chips into the cashew cream filling, by hand, before putting it into the pie crust.
  7. Enjoy this unique no bake pie with a sturdy crust that can be served to just about anyone.

IMG_4527


Plantain Crust Cashew Cream Pie


gravatarAngela Privin stumbled on the Paleo diet while trying to cure her symptoms from irritable bowel syndrome (IBS). After a year on a strict Paleo diet she was completely healed and her food allergies were reversed. She’ll always be grateful to her health challenges for making her learn to cook years ago. These days she’s Paleo because she loves the creative challenge of cooking delicious grain-free, real food. She spends much of her spare time experimenting in herPaleo Kitchen Lab and eating the experiments. You can check out her recipes here. 

Filed Under: My Recipes, Paleo Education

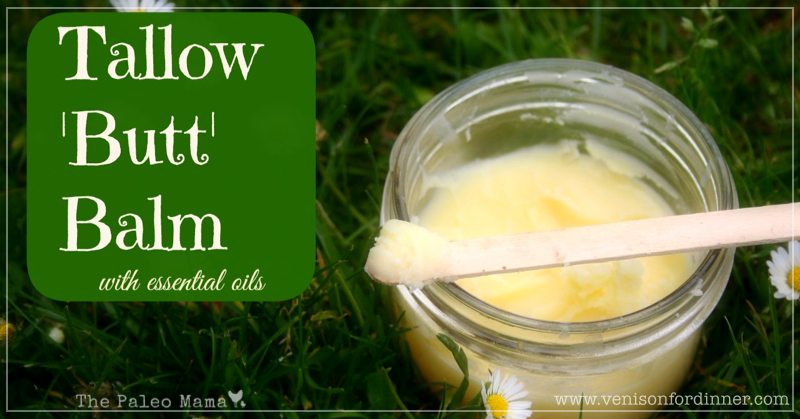
Tallow Butt Balm

June 3, 2014 by Jackie Ritz 5 Comments

Tallow Butt Balm | www.thepaleomama.com.001

I’m so excited to have my friend Kate from Venison for Dinner (don’t ya just love that name!) sharing this AWESOME recipe on my blog today. Kate is a stay at home mom of 2 little boys living a homemade life on the West Coast of British Columbia. She enjoys to cook and bake from scratch. Through hunting and homesteading, Kate and her family produce more than enough to fill their own meat and dairy needs, happily helping others start their own homesteading journey along the way. Kate also has a passion for essential oils and home healing with natural medicine. You can follow her on HER BLOG and Facebook page as she hones her homesteading skills, making her ‘whey’ through one mountain of raw milk at a time. Maybe you too will be inspired to butcher your own deer or try your hand at natural medicine!

Please welcome Kate…

You know the scene, you’re changing a diaper, you open it up and baby’s got a sore bum. It hurts YOU to see their bum all red and you want that pain GONE!

So what do you reach for? You grab the the diaper rash cream and you smear it all over. But did you know that many of those commercial creams contain petroleum products, as well as oils that are most likely rancid, alcohols, and so many more ingredients I can barely pronounce! (And I’m a good reader!) Here a popular diaper rash cream company discloses every ingredient. I was shocked at how these are allowed to be put on our precious babies skin! Your other option is to buy natural creams, which, lets be honest, aren’t always that natural, or cost you a good chunk of change.

IMG_7390

After our second child was born we got serious about making all our own natural personal care products! My sister made us a fancy salve that we used and while terrific, it was complicated to make. I then came up with my 3 ingredient Diaper Rash Ointment and while it’s such a basic and effective ointment to whip together…Mama’s got a new balm in town!

TALLOW!

IMG_7389

When we originally made tallow from the milk cow we had to butcher, we only used it for cooking. Then recently we were lucky enough to be gifted loads of grass-fed Jersey fat from a friends steer and since it was fresh I got to work processing it. (using the same process as this lard.) After it was cooled down I made a balm since I’d seen ideas for it all over the web, and before I knew it, it had become my go-to “Butt Balm”! The beauty of this thick salve is that it’s pretty much the same texture at all average room temperatures (unlike the coconut oil based diaper rash ointment I also use that drastically fluctuates) and it works as a barrier cream AND a ‘medicated’ cream for rashes.

So what is Tallow vs Lard? Tallow is the rendered fat from a ruminant (Cow, Deer, Sheep, etc) whereas Lard is the rendered fat from a single stomached mammal (Pig, Bear, etc). Tallow has a stronger taste that lard so while it doesn’t pair as well with sweet foods, its amazing for savoury cooking. Why is our Tallow so yellow? Jerseys (And Guernseys to my knowledge) can’t process Beta Carotene. That’s what makes carrots orange, and it’s also in the hay and grass they eat. Instead of digesting it, they deposit it in fat! That’s why jersey cream is especially yellow (even more so in time of lots of green grass) and in the fat in their meat!


Why would I want to smear beef fat on my baby’s bum?! I bet you won’t take me just saying “Because you should!!: So here’s the top reasons we choose to make our own Tallow Butt Balm;

  • Tallow is high in saturated fats with a similar profile to those just below our skin, therefore it’s easily absorbed leaving skin feeling well nourished. This helps regenerate new skin. It’s important to use GRASS FED tallow to really reap the benefits.
  • Quality Control! I recommend you purchase therapeutic-grade essential oils. 
  • Frugal! I save loads of money by making my own Butt Balm. Yes I was given the beef fat for free, but even if you tracked down and bought it I bet you’d still save money. Better yet, if you’re buying 1/4 or 1/2 a cow, ask to get the fat back with it! You’ll find more uses that just a butt balm.
  • I want to use natural/as close to nature, well raised, animal products wherever I can because I believe good fats are good for you! (And I know Jackie agrees!) Petroleum products have no place on a person’s body!
  • Let’s just say Mama takes a dab for her face and hands on a regular basis two 😉 Might as well kill two lotion birds with one stone right!?

Tallow Butt Balm

Makes enough to fill a 1 cup ‘Salmon’ or ‘Jam’ jar. The amount of essential oils makes it a just below 1% dilution.

INGREDIENTS:

  • 3/4 c+ a generous TB (200 mls) of Grass Fed Tallow
  • 4 tsp OR 1 generous TB (20 mls) of Organic, Cold Pressed Olive oil  (This helps it stay a wee bit softer)
  • 20 drops EACH Frankincense, Melaleuca and Lavender Essential oils. (See above note)


DIRECTIONS:

  1. GENTLY melt tallow and olive oil together over LOW heat, just until melted. If you’ve accidentally heated too much, no fear, but let it cool down until you can comfortably hold you finger in before adding in essential oils.
  2. Now slather away knowing you’ve made a terrific ‘butt balm’ for your baby! (I won’t tell if you put it on your own skin!)

tallow butt balm pinterest.jpg

Filed Under: DIY Beauty Recipes, essential oils, Homesteading, Living Sustainably, My Recipes, Natural Living, Paleo Baby Tagged With: babies, diaper rash cream, essential oils, natural, tallow butt balm

« Previous Page
Next Page »

Primary Sidebar

  • Facebook
  • Instagram
  • Pinterest
  • RSS
  • YouTube

Hi, I'm Jackie Ritz and welcome to The Paleo Mama! I'm a published author, certified herbalist, and voracious researcher of natural medicine and nutrition. I'm glad you're here and I hope you stick around for awhile!

Recent Posts

  • When God Says Pause: Why I Took a 5-Year Break from My Online Business
  • How to Quit Facebook but Keep Your Business Profile
  • Leaving the City for the Country
  • Natural Way to Heart Health

MEAL PLANS

Biblically clean meal plans that are for those love to cook real food

Read More

Footer

Our Blog

The Paleo Mama blog provides simple answers for healthier families through research, tutorials, recipes, and simple remedies for daily needs!

  • Health
  • Essential Oils
  • Recipes
  • Remedies
  • Natural Living
  • Meal Plans

Stick around!

You’ll get instant access to a library of natural remedies and real, paleo food, including our ebooks and free guides we send out.

  • Home
  • Disclosure/Disclaimer
  • Privacy Policy
  • Advertise
  • Contact Me

Copyright © 2025 · Wellness Pro on Genesis Framework · WordPress · Log in