• Skip to primary navigation
  • Skip to content
  • Skip to primary sidebar
  • Skip to footer

The Paleo Mama

Homegrown and Handmade

  • About
  • Blog
    • Podcast
  • Meal Plans
  • Essential Oils
  • Our Farm
    • Great Pyrenees Puppies
    • Goats
      • Goats for Sale
      • Goat Sales Policy
      • Nigerian Dwarf Bucks
        • Ranchocabra Lunar Eclipse

Homesteading

Top 5 Essential Oils for Back to School

July 25, 2014 by Jackie Ritz 5 Comments

Thinking kid

It’s just about that time again. Summer goes by so dang fast, doesn’t it? I went to the store the other day and saw moms and dads walking around with their shopping list in hand and a cart full of school supplies getting ready for their kids to go back to school.

But did you ever stop and think about how you can start to prepare your child’s body for school? Going from a safe home environment to a new class, new friends, new teachers, and new school is HARD on children. It’s a lot of NEW and lots of children do not do good with a lot of new.

So, I wanted to provide a list of essential oils that you can use to assist your child in settling into their new school environment.

A note on quality: I only use and recommend therapeutic-grade essential oils. All of these suggestions are based off the assumption that high-quality essential oils are being used. If you would like to get started using high-quality, therapeutic-grade essential oils, then you can CLICK HERE to learn how to get started!

Top 5 Essential Oils for Back to School:

  1. Peppermint & Wild Orange – this is a great blend to help your kids wake-up. They now have an alarm clock to wake up to, or you disturbing their slumber by turning on the light and singing, “school days, school days…good ole fashion rule days.” Put an essential oil diffuser in your kitchen and diffuse this “wake-up blend” while they are eating breakfast. Or you can put this blend in a roll-on bottle and roll it on their wrists and back of neck while you are “nicely” waking them up.
  2. Rosemary – Did you know rosemary can make you smarter? Rosemary is known to improve brain performance and mood. I recommend adding a drop or two to your children’s shampoo and using it to wash their hair, or rubbing a drop through their hair while they are eating breakfast before heading to school. You can, also, diffuse this oil before the kids leave for school or when they come home and work on homework.
  3. “Focus” Blend  – The focus blend contains oils that have been studied and used traditionally for their abilities to promote calmness, focus and a balanced state of mind. Many of these oils contain high levels of sesquiterpenes, which have been proven to pass the blood-brain barrier to reach the cells of the brain. It’s primarily used for helping ease stress and improve concentration. I like to apply this blend to the back of my children’s neck as they are eating breakfast. You can talk with your school about letting your children apply it during school hours.
  4. Lemon – Lemon is known as “The Oil of Focus“. It’s citrusy aroma nourishes the mind and aids in concentration. Lemon is a wonderful aid for children who are struggling with school. It is especially helpful in cases of learning disabilities. It pairs well with Rosemary, so you can make a roller bottle with Rosemary and Lemon and apply to the back of the neck or diffuse this powerful duo before school.
  5. “Calming” Blend  – Children who are hyperactive or have difficulty concentrating could really benefit from this blend. It contains essential oils that are often used to calm and soothe feelings of stress and excitement. It’s great to help wound up kids calm down and settle in for a restful sleep. I like to give my kids a detox bath at night using this blend or diffuse it in their room for an hour before bed. You can, also, apply it to the backs of their necks or feet before school (if they are very hyperactive) or at bedtime.

WHERE TO BUY THESE OILS: If you are wondering where to buy all these oils, you are in luck! I use all these oils on my children and started with purchasing a wholesale enrollment kit. I would love to help you start learning more about essential oils. You can CLICK HERE to see how so many have started their essential oil journey.

Top 5 Essential Oils for Back to School The Paleo Mama

Filed Under: DIY Beauty Recipes, essential oils, Homesteading, Natural Living

Tallow Butt Balm

June 3, 2014 by Jackie Ritz 5 Comments

Tallow Butt Balm | www.thepaleomama.com.001

I’m so excited to have my friend Kate from Venison for Dinner (don’t ya just love that name!) sharing this AWESOME recipe on my blog today. Kate is a stay at home mom of 2 little boys living a homemade life on the West Coast of British Columbia. She enjoys to cook and bake from scratch. Through hunting and homesteading, Kate and her family produce more than enough to fill their own meat and dairy needs, happily helping others start their own homesteading journey along the way. Kate also has a passion for essential oils and home healing with natural medicine. You can follow her on HER BLOG and Facebook page as she hones her homesteading skills, making her ‘whey’ through one mountain of raw milk at a time. Maybe you too will be inspired to butcher your own deer or try your hand at natural medicine!

Please welcome Kate…

You know the scene, you’re changing a diaper, you open it up and baby’s got a sore bum. It hurts YOU to see their bum all red and you want that pain GONE!

So what do you reach for? You grab the the diaper rash cream and you smear it all over. But did you know that many of those commercial creams contain petroleum products, as well as oils that are most likely rancid, alcohols, and so many more ingredients I can barely pronounce! (And I’m a good reader!) Here a popular diaper rash cream company discloses every ingredient. I was shocked at how these are allowed to be put on our precious babies skin! Your other option is to buy natural creams, which, lets be honest, aren’t always that natural, or cost you a good chunk of change.

IMG_7390

After our second child was born we got serious about making all our own natural personal care products! My sister made us a fancy salve that we used and while terrific, it was complicated to make. I then came up with my 3 ingredient Diaper Rash Ointment and while it’s such a basic and effective ointment to whip together…Mama’s got a new balm in town!

TALLOW!

IMG_7389

When we originally made tallow from the milk cow we had to butcher, we only used it for cooking. Then recently we were lucky enough to be gifted loads of grass-fed Jersey fat from a friends steer and since it was fresh I got to work processing it. (using the same process as this lard.) After it was cooled down I made a balm since I’d seen ideas for it all over the web, and before I knew it, it had become my go-to “Butt Balm”! The beauty of this thick salve is that it’s pretty much the same texture at all average room temperatures (unlike the coconut oil based diaper rash ointment I also use that drastically fluctuates) and it works as a barrier cream AND a ‘medicated’ cream for rashes.

So what is Tallow vs Lard? Tallow is the rendered fat from a ruminant (Cow, Deer, Sheep, etc) whereas Lard is the rendered fat from a single stomached mammal (Pig, Bear, etc). Tallow has a stronger taste that lard so while it doesn’t pair as well with sweet foods, its amazing for savoury cooking. Why is our Tallow so yellow? Jerseys (And Guernseys to my knowledge) can’t process Beta Carotene. That’s what makes carrots orange, and it’s also in the hay and grass they eat. Instead of digesting it, they deposit it in fat! That’s why jersey cream is especially yellow (even more so in time of lots of green grass) and in the fat in their meat!


Why would I want to smear beef fat on my baby’s bum?! I bet you won’t take me just saying “Because you should!!: So here’s the top reasons we choose to make our own Tallow Butt Balm;

  • Tallow is high in saturated fats with a similar profile to those just below our skin, therefore it’s easily absorbed leaving skin feeling well nourished. This helps regenerate new skin. It’s important to use GRASS FED tallow to really reap the benefits.
  • Quality Control! I recommend you purchase therapeutic-grade essential oils. 
  • Frugal! I save loads of money by making my own Butt Balm. Yes I was given the beef fat for free, but even if you tracked down and bought it I bet you’d still save money. Better yet, if you’re buying 1/4 or 1/2 a cow, ask to get the fat back with it! You’ll find more uses that just a butt balm.
  • I want to use natural/as close to nature, well raised, animal products wherever I can because I believe good fats are good for you! (And I know Jackie agrees!) Petroleum products have no place on a person’s body!
  • Let’s just say Mama takes a dab for her face and hands on a regular basis two 😉 Might as well kill two lotion birds with one stone right!?

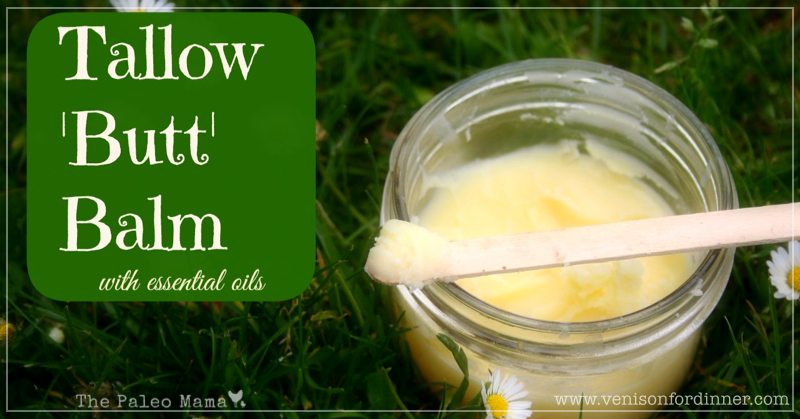
Tallow Butt Balm

Makes enough to fill a 1 cup ‘Salmon’ or ‘Jam’ jar. The amount of essential oils makes it a just below 1% dilution.

INGREDIENTS:

  • 3/4 c+ a generous TB (200 mls) of Grass Fed Tallow
  • 4 tsp OR 1 generous TB (20 mls) of Organic, Cold Pressed Olive oil  (This helps it stay a wee bit softer)
  • 20 drops EACH Frankincense, Melaleuca and Lavender Essential oils. (See above note)


DIRECTIONS:

  1. GENTLY melt tallow and olive oil together over LOW heat, just until melted. If you’ve accidentally heated too much, no fear, but let it cool down until you can comfortably hold you finger in before adding in essential oils.
  2. Now slather away knowing you’ve made a terrific ‘butt balm’ for your baby! (I won’t tell if you put it on your own skin!)

tallow butt balm pinterest.jpg

Filed Under: DIY Beauty Recipes, essential oils, Homesteading, Living Sustainably, My Recipes, Natural Living, Paleo Baby Tagged With: babies, diaper rash cream, essential oils, natural, tallow butt balm

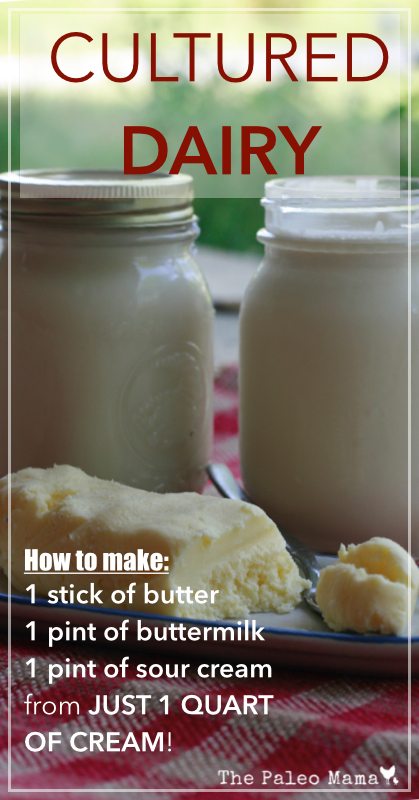
Cultured Dairy: How to Make 1 Stick of Butter, 1 Pint of Sour Cream, and 1 Pint of Buttermilk with JUST ONE Quart of Cream!

May 1, 2014 by Jackie Ritz 50 Comments

Cultured Dairy .001

Before you go jumping down my throat about posting this because it’s dairy, I want to make sure I mention that my family consumes raw dairy. I have always been open about that and I feel it is something that my family thrives on.

So, am I still Paleo? I don’t really like labeling myself as anything. We eat by a Paleo template and include raw dairy in our diet. You can click here to see why my family consumes raw milk. 

My goats are due to have babies in June, so the 2 months prior to birth, we are giving them a break from milking. It’s sad not to have fresh, raw goats milk everyday, but I am lucky to have lots of farms nearby that have raw milk. This past week I went with raw cow milk from Jersey’s….mostly cause raw goats milk is $12 a gallon! Yikes! I’ll just wait for my goats to kid in June!

Raw dairy is extremely nutritions, but cultured (fermented) dairy takes it to a whole new level. Culturing helps to break down casein, or milk proteins, one of the most difficult proteins to digest. It, also, restores enzymes that may have been destroyed during pasteurization including lactase, which helps to digest lactose (milk sugar) and numerous enzymes, which help the body absorb calcium and other minerals.

In addition, cultured dairy provides beneficial bacterial and lactic acid to help your digestive tract stay healthy. Click here to read all the benefits of raw cultured dairy. 

Fun with Cultured Dairy:

How to Make 1 Stick of Butter, 1 Pint of Sour Cream, and 1 Pint of Buttermilk with JUST ONE Quart of Cream! 

Tools Needed: 

  • Wooden Spoon
  • Food Processor 
  • One Quart of Cream (preferably raw, but not necessary)
  • 2 Pint sized mason jars
  • One Cheesecloth (not necessary, you can use your hands)

Directions: 

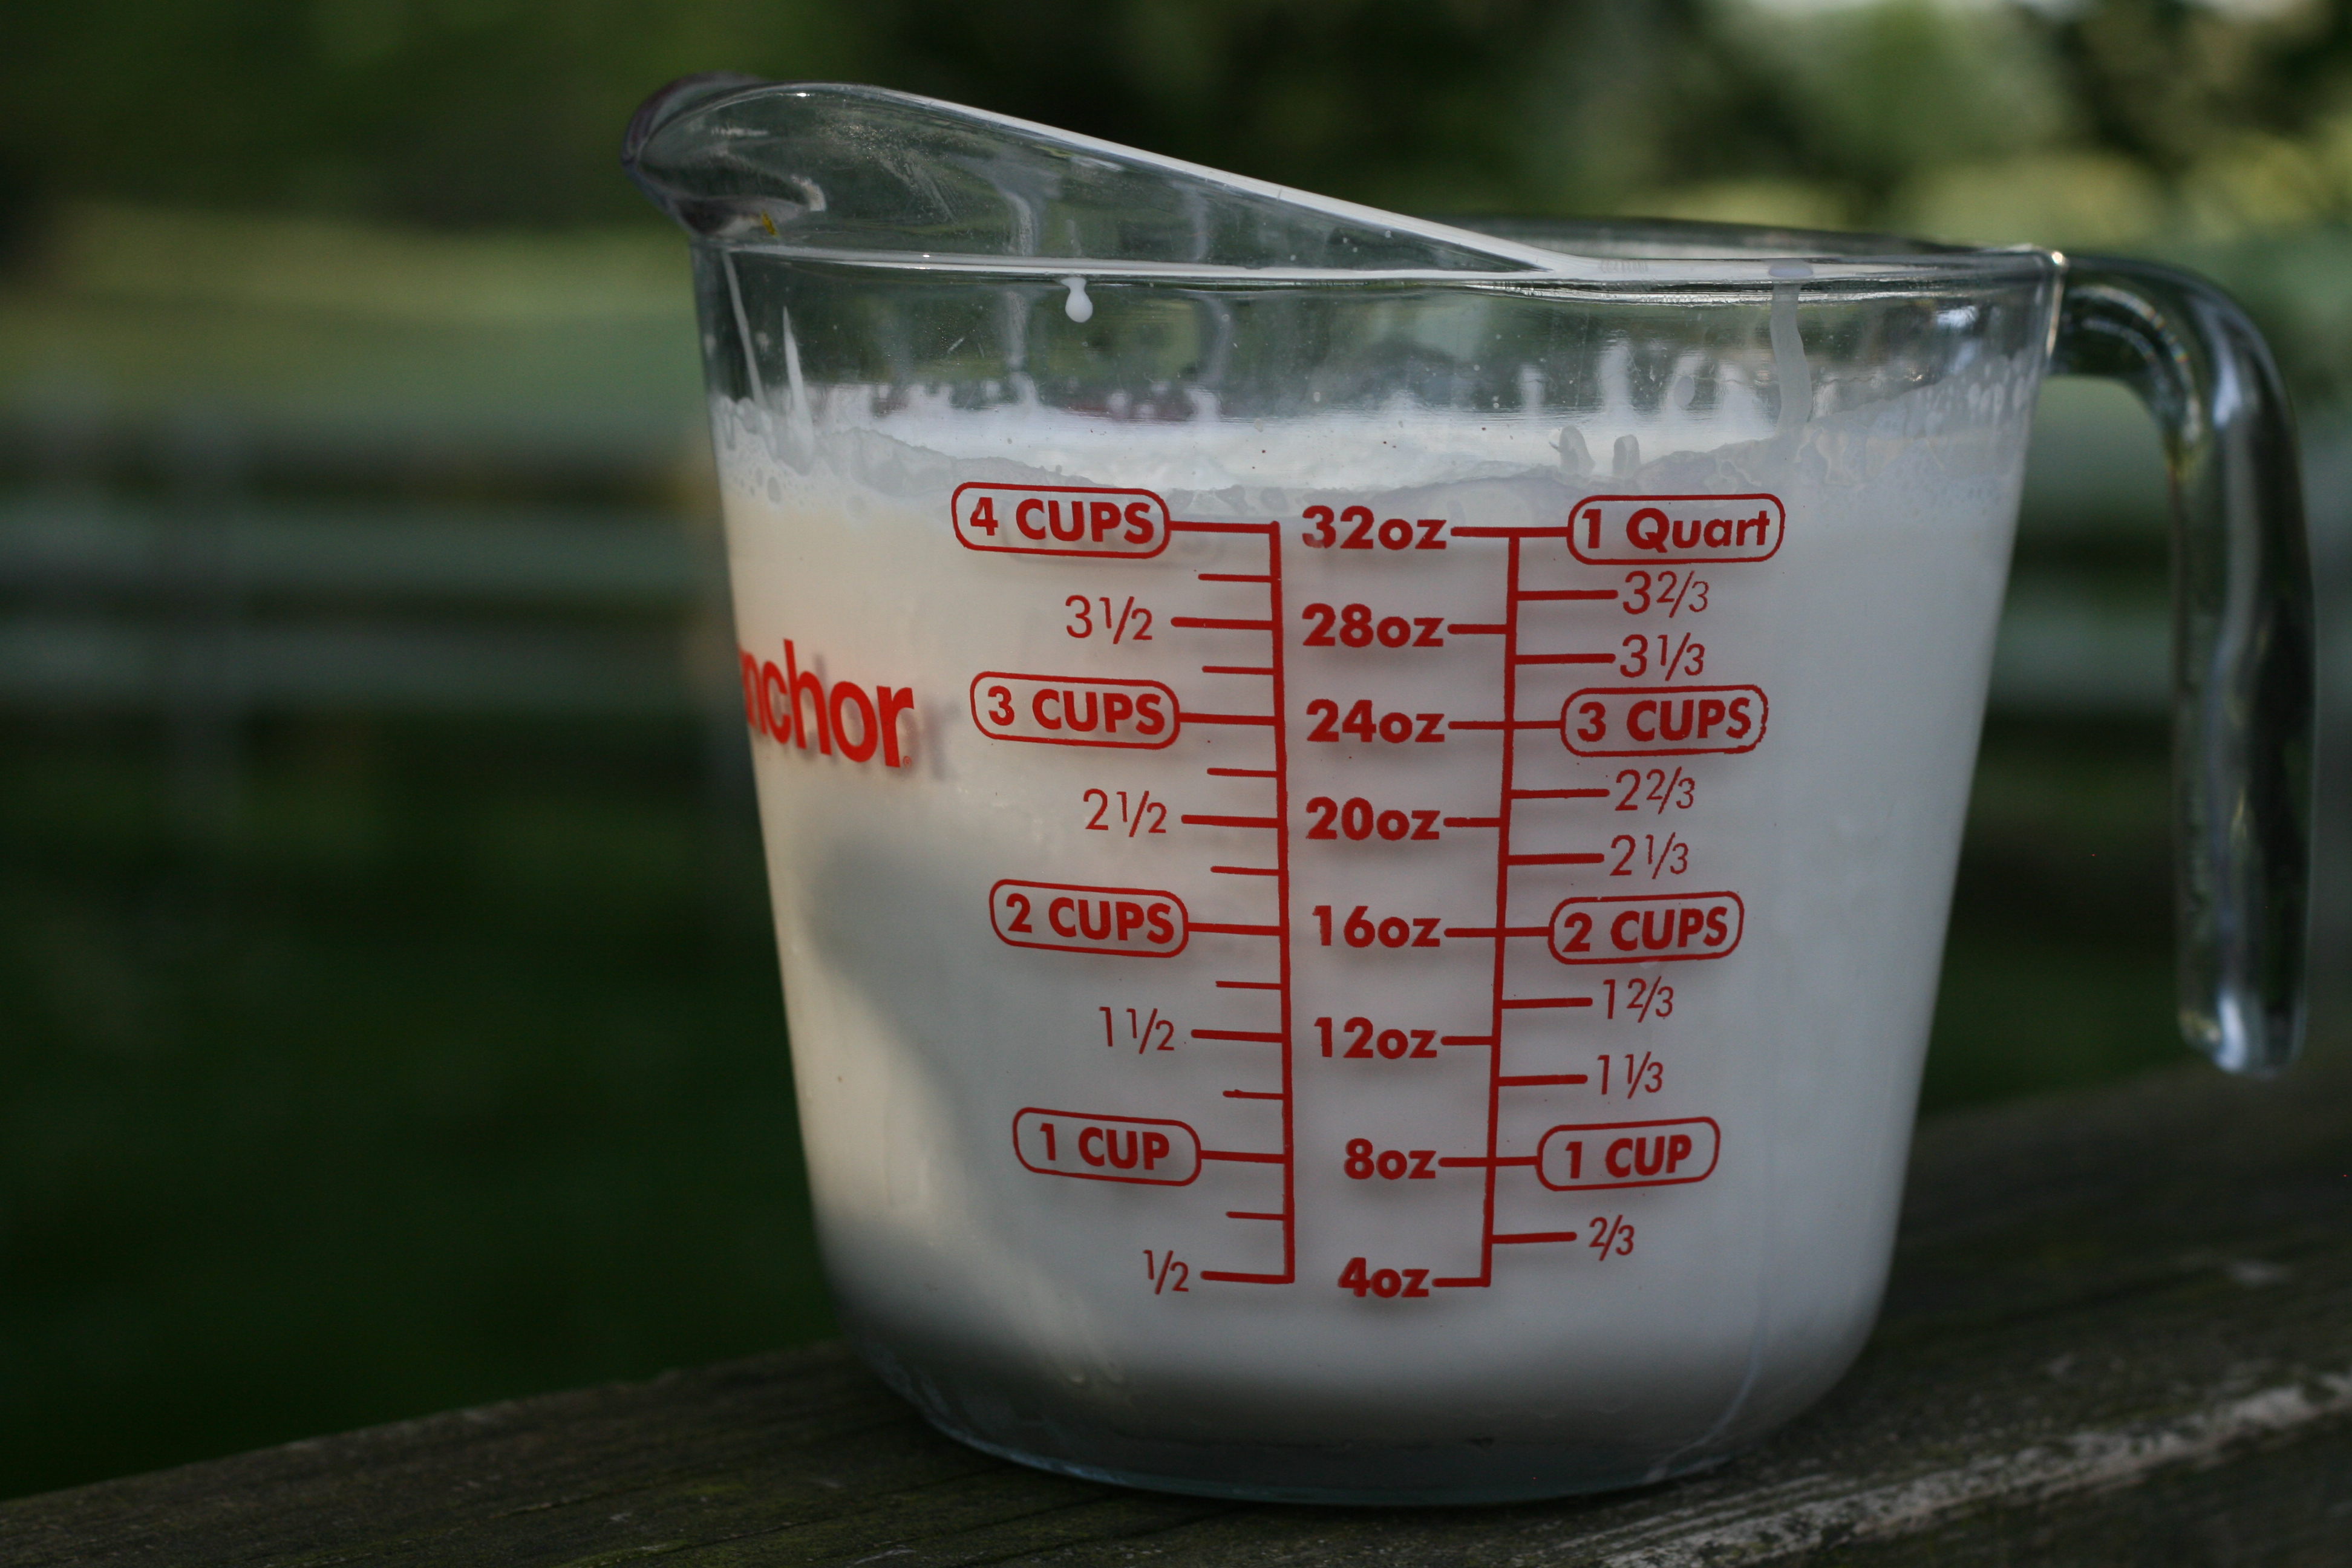
Step One: Culture Your Cream. Take your quart of cream and set it out on the counter for 8 hours to sour with the lid on.

IMG_9054

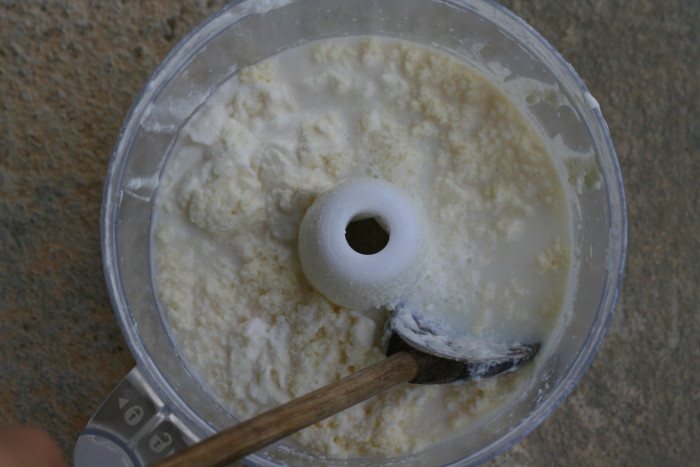
Step Two: Make the Cultured Butter. Take one pint (2 cups) of the cream and pour it into your food processor. Set the other 2 cups aside. Turn your food processor on high and allow the blades to “churn” the cream into cultured butter. This takes roughly 10 minutes. When you start to see clumps forming in your cream, turn off your food processor and use your wooden spoon to push the butter to one side.

IMG_9056

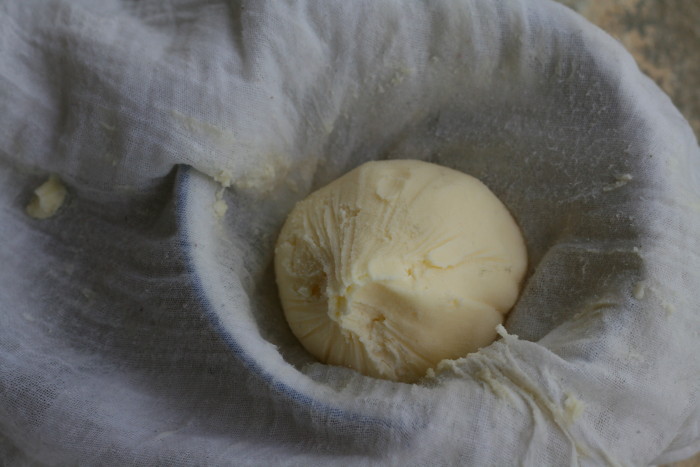
Scoop out the cultured butter and place it in a cheesecloth. Gently squeeze out all the cultured buttermilk back into the food processor bowl with the rest of the buttermilk.

IMG_9060

Place the butter in a bowl with ice water and use your spoon to really push out any more buttermilk. Make sure to get as much excess liquid out. The ice water helps to firm up your butter. Remove the butter and use your hands to squeeze out any more water and form into whatever shape you would like. You have cultured butter!

Step Three: Make Your Buttermilk. Pour all your buttermilk leftover from making the butter into a pint-sized mason jar. You have cultured buttermilk!

Step Four: Make Your Sour Cream, aka Cream Fraiche’: Now take the other 2 cups of cultured cream that you set aside, and pour it into a pint-sized mason jar. Take one tablespoon of the cultured buttermilk that you made and put it inside the jar with the cream. Put the lid on and shake the jar to incorporate the cultured buttermilk with the cream.

Leave your jar on your counter or in a warm spot for 12 hours to culture even more and thicken. Chill well! You have European Style Sour Cream!

You will love this European Style Sour Cream that is also known as Creme Fraiche’. It is just like sour cream but much tastier. Put it on your potatoes, in your soup, on your eggs, and anywhere else you like to put sour cream. To make more Creme Fraiche’, follow Step Four above but use one tablespoon of leftover Creme Fraiche’, instead of cultured buttermilk, to culture another pint of cream! You can do this 6-8 times before you need to start over with cultured buttermilk!

I hope you have fun doing this! Let your kids help you and make it a fun kitchen experiment! 

Cultured Dairy- How to Make butter, buttermilk, and sour cream from 1 quart of cream! .001


Filed Under: DIY, Homesteading, Living Sustainably, My Recipes, Natural Living

How to Ditch the City and Start a Farm

March 27, 2014 by Jackie Ritz 130 Comments

Well, it’s been nearly 8 months since we gave up our big city-living and moved to the backwoods of Western North Carolina. My husband and I were both raised in large cities, so raising our children the same way just felt normal.

However there always was this itch and this itch just started to grow and grow. It would be in small ways at first…like me traveling hours to visit small farms to let my kids play with the animals or to pick blueberries. Then it grew much bigger…we started searching for homes in the suburbs that allowed chickens and possibly goats. Our realtor thought we were crazy and didn’t understand us.  We hit roadblock after roadblock and after *almost* buying a very expensive house on ONE acre (which we thought was a lot of land), because that was all there was, we felt like our dreams of homesteading were crushed.

What If

I remember the first time we played the “what if” game. My husband said to me one night, “what if we moved somewhere else.” At first, I was caught off guard that he was entertaining the same thought I was. Then I played “devil’s advocate” and said that we were raised in Orlando, this is where our families live, this is where we *should* live……….right?

This went on for months and we started going deeper with our feelings. My husband asked me where I always dreamed of living…he knew my answer but it’s just a dream….right? I mean, it’s just a game you play, like MASH as a little girl. You don’t really go and live in your dream place. You just dream about it...right?

Ok, so you get the drift of how confusing of a time this was for us. We both loved Western North Carolina. We loved visiting it and we even rented a cute little cabin near Asheville one year. We finally agreed that WNC was our dream place to live and we finally entertained the thought that we had the choice to move there *one day*. Sigh….one day….there it is again.

And then I said it. I said, “Why one day?” And my husband looked at me and felt the same way. Let’s do this NOW! Life is too short to not live and do what you dream of doing! And that was how it all began!

1094975_10152282796887013_870159395_n

How We Ditched the City and Started Farming

1) We Found a Job

This is much harder for some people…I know that. But, it’s worth trying, right? So, we drew a 100 mile radius around our dream city, Asheville, NC on a map and my husband applied at all the jobs in that radius that fit his career. We heard back from a few and we chose one! We came and visited the nearby city and we fell in, complete, love with the place. Actually how it really happened when we sealed the deal was like this: we went to a nearby vineyard and sat down and looked out at the beautiful mountains. I looked over at my husband and said, “let’s do it“!

2) We Found a Rental Home

We still weren’t ready to buy. We have been aggressively paying off debt for a year now following the Dave Ramsey plan. So, we knew that we needed to find a rental home that allowed us to start doing our homestead dreams. We found a perfect home on Craigslist that had 4 acres of land, a barn, a huge chicken coop, and a beautiful fenced pasture. We plan on staying in this home for a few more months till we are ready to buy.

3) We Said Our Goodbyes & Sold a Ton of Stuff

This was the hardest part of the move. It’s hard to leave your family, but it’s so rewarding to follow your dreams. So, we downsized and sold a lot of stuff to make the move easier. We sold our king set (we just sleep on a mattress on the floor now!), dining room table, and all our large furniture. This isn’t necessary but we wanted a fresh start and we needed the money for the move. In fact, we are just now (8 months later) starting to buy furniture again! We waited till we were 100% out of debt, which we are now!

4) We Ordered Chickens!

1911727_10152300017457013_689404168_n

Seriously, I had the chicks ordered and planned for delivery before we were even in the state! I was so excited to start homesteading and couldn’t wait for my own pastured eggs! Chickens are the best way to start homesteading. They are the easiest animals to care for. It takes about 5 minutes in the morning and 5 minutes at night to care for my chickens. As chicks, you need a few things, like a brooder area (we use stacks of straw for this), a heating lamp, and food and water bowls. Start-up costs is under $100 and that is including ordering the chicks online and paying shipping. You usually can find chicks local at a feed store for pretty cheap too!

5) I Found My Goats

soph

I had my goats planned, as well, before we even were in North Carolina. I knew I wanted fresh, raw, goat milk. Goats are MUCH easier to keep than cows and I am more keen on goat’s milk than cow milk. I found a lady on Craigslist who was selling a goat-in-milk and her doeling. I arranged for us to pick them up about a week after we moved. It actually is a hilarious story if you would like to go read about it! I watched You Tube videos on how to milk a goat for hours but it did NO good. You have to just learn it hands-on and it does take a little practice! However, it’s so worth it. My goat has been giving us nearly a half gallon a day for the past 8 months that we have had her. Sadly, I’m drying her off right now because she is pregnant (and so is her baby!) and needs a little break before her babies come in the early summer.

6) We Started Composting

1149041_10152304668567013_1965001985_n

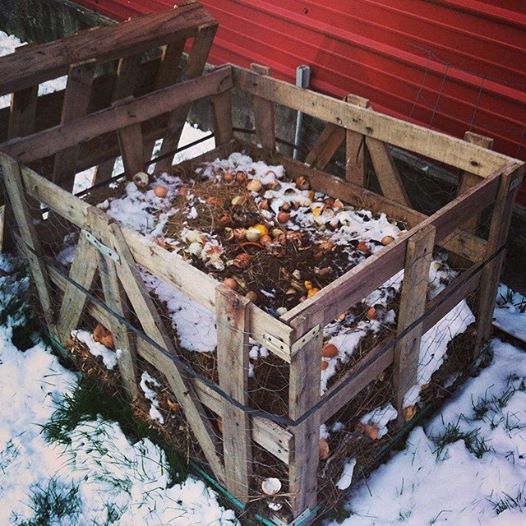
There is a local furniture store near us that gives away pallets and these large pallet containers. We grabbed them and started using it to hold our compost in. We definitely planned on a spring/summer vegetable garden so we started composting right away. We throw most our vegetable and fruit scraps to the chickens but we compost everything else! Composting is so easy.

7) We Started Raising Meat Rabbits

1503406_10152144268402013_545477526_n

I don’t even know how we started doing this but it has become my husband’s favorite thing so far. We have 3 does (the moms) and 2 bucks (the boys) and we breed them every other month or so. Actually they are due any minute now for this round! The benefit of meat rabbits is that they reproduce a ton and have short pregnancies. Their meat is like chicken too! One set of meat rabbits (one buck and one girl) can give you 400lbs of meat a year! We pasture the offspring before they are ready to be butchered, that way they are living as natural as possible and eating lots of fresh grass.

8) We Slowed Down & Relish Our Life

1014008_10152303278872013_2013805231_n

This has been THE HARDEST thing for me to do since we have moved away from our city life. You never would have thought that slowing down would be so difficult, but it really is…especially if you are used to hurry, hurry, hurry everywhere you go. The drivers here drive me crazy…they are so pokey! It’s all a mindset and just truly realizing that being rushed is pointless. It doesn’t’ get you anywhere any faster. It just stresses you out and causes anxiety.

Conclusion

How to Ditch the City and Start a Farm | www.thepaleomama.com .001

We couldn’t be happier with our decision to ditch the city and start a farm. Our kids absolutely adore their new life here. They miss their family, of course, but we are our own family now and it’s important to us to do what is best for them. The city was scaring me more-and-more and the thought of raising my kids there just kept me up at night.

Now they are able to cherish simple things like the joy of collection eggs, and planting seeds and watching them grow, and watching animals give birth! It is amazing to see how they thrive in this environment.

Books I Recommend: Raising Dairy Goats | Raising Chickens for Dummies | The Self Sufficient Life and How to Live It | Back to Basics | Let it Rot | Storey’s Guide to Raising Meat Rabbits

Websites I Recommend: The Prairie Homestead | Weed em’ & Reap | The Elliott Homestead | Blue Yurt Farms


Have you ever thought about ditching your city life and starting a homestead or a farm? Leave a comment and tell me about it! I’d love to connect with you!

Filed Under: Budget, Homesteading, Living Sustainably, Natural Living, Paleo Baby, Paleo Toddler, Shopping Local Tagged With: backyard chickens, eggs, farming, goats, homesteading, paleo, raw milk

10 Healing Herbs to Grow in Your Survival Garden

March 21, 2014 by Jackie Ritz 19 Comments

For many, the time has come to plan our summer gardens.   My interest is a bit self-serving in that I am in the process of rethinking my own garden and while I grow an abundance of rosemary, lavender and peppermint, this year will be an ideal time to replace some tired shrubs with plants that will work for me.  Healing herbs will fit the bill quote nicely.

Herbs have been used for centuries to sooth and to heal.  According to Wikipedia:

 Herbs have long been used as the basis of traditional Chinese herbal medicine, with usage dating as far back as the first century CE and before. Medicinal use of herbs in Western cultures has its roots in the Hippocratic (Greek) elemental healing system, based on a quaternary elemental healing metaphor.

With such a long history of use it makes perfect sense that you would want to include a selection of herbs in the survival garden.

Healing Herbs for the Healing Garden 

Basil:  People don’t usually think of basil as a healing herb and yet traditionally, it is called the “king of herbs”.  It is used medicinally as a natural anti-inflammatory and is thought to have mild antiseptic functions. Some healing uses are for flatulence, lack off appetite, nausea and cuts and scrapes.
It is also superb on spaghetti and in pesto but then you already knew that.  Basil is an annual plant so you will have to start anew each year.

German Chamomile:  Chamomile is one of the most popular herbs in the Western world.  Its flower heads are commonly used for infusions, teas and salves.  These in turn can be used to treat indigestion, anxiety and skin inflammations.  As a tea, it serves as a mild sedative to help with sleep.

Feverfew:  This perennial is a member of the sunflower family and has been used for centuries in European folk medicine as a remedy for headaches, arthritis, and fevers. The name feverfew comes from a Latin word meaning “fever reducer.”

Its  many uses include easing headache pains – especially migraines.  This is done by chewing on the leaves.  A tea made from the leaves and flowers is said to relieve the symptoms of arthritis.

Lemon Balm:  Lemon balm is a member of the mint family.  Considered a calming herb, it has been used as far back as the Middle Ages to reduce stress and anxiety, promote sleep, improve appetite, and ease pain and discomfort from indigestion.  Even before the Middle Ages, lemon balm was steeped in wine to lift the spirits, help heal wounds, and treat venomous insect bites and stings.

As with many other herbs in your healing garden, lemon balm promotes relaxation and a sense of calm.

Parsley:  While not one of my favorites, there is nothing like a sprig of parsley to take away bad breath.  It is no wonder that this biennial (meaning it lives for two years) is used to decorate and garnish plates in the fanciest of restaurants.

10 Healing Herbs to Grow in Your Survival Garden | www.thepaleomama.com .001

When brewed as a tea, parsley can help supplement iron in a person’s diet, particularly for those who are anemic. Drinking parsley tea also boosts energy and overall circulation of the body, and helps battle fatigue from lack of iron.  Other uses?  Parsley tea  fights gas and flatulence in the belly, kidney infections, and bladder infections.  It can also be an effective diuretic.

Sage:  Did you know that the genus name for sage is “salvia” which means “to heal”? In the first century C.E. Greek physician Dioscorides reported that sage stopped bleeding of wounds and cleaned ulcers and sores. He also recommended sage juice in warm water for hoarseness and cough. In modern times, a sage tea is used to sooth mouth, throat and gum inflammations.  This is because sage has excellent antibacterial and astringent properties.

Thyme:  Back during medieval times, thyme was given to knights before going in to battle.  The purpose was to infuse this manly man with vigor and courage.

These days, thyme used to relieve coughs, congestion, indigestion and gas.  This perennial is rich in thymol, a strong antiseptic, making thyme highly desirable in the treatment of wounds and even fungus infections.  Thyme is a perennial that does well, even in cooler, Pacific Northwest climates.

Rosemary:  Long ago, rosemary was known as ‘the herb of remembrance.’ Even today, in places like Australia and New Zealand, it is used as a symbol of remembrance since it is known to help sharpen mental clarity and stimulate brain function. You might recall that many statues of the ancient Greeks and Romans show men wearing sprigs of rosemary on their heads – signifying mental acuity.

The needles of the delightfully fragrant rosemary plant can be used in a tea to treat digestive problems.  The same tea can also be used as an expectorant and as a relaxing beverage that is helpful for headaches.  Other healing uses include improving memory, relieving muscle pain and spasms, stimulating hair growth, and supporting the circulatory and nervous systems.

Peppermint: Peppermint has a long tradition of medicinal use. Archaeological evidence places its use far back as ten thousand years ago. It is commonly used to soothe or treat symptoms such as nausea, vomiting, abdominal pain, indigestion, irritable bowel, and bloating and more.
The leaves and stems contain menthol which in addition to use medicinally, is used as a flavoring in food, and a fragrance in cosmetics.  The plant is prolific, growing well in moist, shaded areas as well as in sunnier locations.  The roots emit runners that can quickly overtake the garden so most gardeners prefer to plant peppermint in pots.

The easiest way to acquire a peppermint plant?  Find a friend or neighbor that is growing peppermint to break off a stem.  Place it is a glass of water and in a very short period of times, roots will form an you will have your own peppermint start.

Lavender:  I saved my personal favorite for last. Of course it helps that I have an abundant amount of fragrant lavender in my yard.

A tea made from lavender has many uses with one of the foremost being it’s ability to have a calming effect on a person’s mind and body. To that end, lavender can promote a sense of well-being and alleviate stress. It is also useful for dealing with various gastrointestinal issues such as upset stomachs and flatulence.

Because it is a strong antiseptic, lavender tea, when applied topically, can help heal cuts, wounds and sores. It can also be used to mitigate bad breath.

How Do I Get Started?

With so many to herbs to choose from, where do you start?  A lot will depend on the amount of space you have, the climate, and the availability of seeds, starts, or cuttings.  My recommendation is that you start with three or four herbs that appeal to you from a healing perspective.  Many can be grown in pots on a porch or deck so if space is a problem, you can start modestly.

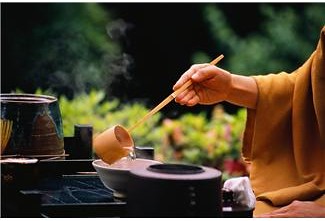
How to Make an Herbal Tea

The process of making a pot of herbal tea is in itself healing.  Perhaps that has something to do with the proactive effort involved in doing something positive for one’s own self and well-being.  And luckily, brewing an herbal tea is easy.

The Healing Garden: 10 Herbs To Grow in the Survival Garden Backdoor Survival
To make an herbal tea, first bring some cool water to a boil.  While waiting for the water to boil, fetch a non-mental container that will be used to brew the tea.  A quart mason jar works nicely for this purpose.  You do not want to use a metal container since the metal may interfere with the purity and taste of the tea.

Add 2 tablespoons of fresh (or 1 tablespoon of dried herb or crushed seed) to the empty pot or jar for each cup of water.  Then, and this is the important part, add an extra 2 tablespoons of fresh (or 1 tablespoon of dried) herbs “for the pot.”  So, for example, if you are making 2 cups of hot tea, you would use 6 tablespoons of fresh herbs or 3 tablespoons of dried herbs.

Pour the boiling water over the herbs and let them steep, covered, for about 5 minutes give or take.  There is no  exact time since everyone’s strength preference is difference.  When ready, strain the herbs and pour the tea into a cup.  At this point you may want to garnish your heavenly – and healing – cup of tea with honey, citrus fruits or addition herb sprigs.

For iced tea, increase the quantity of herbs in the basic recipe by 1 1/2 to allow for dilution from the melting ice.

The Final Word

In reading about these herbs, you may have noticed that many are reputed to have the same or similar healing qualities.  Do they work?  I can personally vouch for Rosemary and Lavender which I have used as both a tea and as an essential oil.

One thing that is true is that with a little time and for a nominal cost, you can grow the makings for healing teas, infusions and balms in your own garden. Add a dose of sun and some rich potting soil and you will be set to go.  Just keep in mind that while perennial plants will flourish over the winter and will be there for you the following spring, annual plants must be reseeded or restarted every year.

If you would like to learn more about the healing properties of various herbs, the University of Maryland Medical Center has an excellent web site with a lot of useful information about herbs and other alternative medicine topics.  Click on “herbs” then scroll down to the particular herb you would like to learn about.


Original Source: Natural Blaze

Filed Under: Budget, Homesteading, Living Sustainably, Natural Living, Nutrition Tagged With: gardening, healing, herbs, homesteading, natural living

How Not to Hurry: 9 Tips for a Slower Paced Life

February 14, 2014 by Jackie Ritz 1 Comment

How Not to Hurry.001

“Nature does not hurry, yet everything is accomplished.” ~ Lao Tzu

Consider the above quote from Lao Tzu, (perhaps mythical) father of Taoism: how can it be true?

Is it possible to never hurry, but to get everything done?

It seems contradictory to our modern world, where everything is a rush, where we try to cram as much into every minute of the day as possible, where if we are not busy, we feel unproductive and lazy.

In fact, often we compete by trying to show how busy we are. I have a thousand projects to do! Oh yeah? I have 10,000! The winner is the person who has the most insane schedule, who rushes from one thing to the next with the energy of a hummingbird, because obviously that means he’s the most successful and important.

Right?

Maybe not. Maybe we’re playing the wrong game — we’ve been conditioned to believe that busier is better, but actually the speed of doing is not as important as what we focus on doing.

Maybe we’re going at the wrong speed. Maybe if we are constantly rushing, we will miss out on life itself. Let’s let go of the obsession with speed, and instead slow down, stop rushing, and enjoy life.

And still get everything done.

Let’s look at how.

A Change of Mindset
The most important step is a realization that life is better when you move at a slower, more relaxed pace, instead of hurrying and rushing and trying to cram too much into every day. Instead, get the most out of every moment.

Is a book better if you speed read it, or if you take your time and get lost in it?

Is a song better if you skim through it, or if you take the time to really listen?

Is food better if you cram it down your throat, or if you savor every bite and really appreciate the flavor?

Is your work better if you’re trying to do 10 things at once, or if you really pour yourself into one important task?

Is your time spent with a friend or loved one better if you have a rushed meeting interrupted by your emails and text messages, or if you can relax and really focus on the person?

Life as a whole is better if you go slowly, and take the time to savor it, appreciate every moment. That’s the simplest reason to slow down.

And so, you’ll need to change your mindset (if you’ve been stuck in a rushed mindset until now). To do this, make the simple admission that life is better when savored, that work is better with focus. Then make the commitment to give that a try, to take some of the steps below.

But I Can’t Change!
There will be some among you who will admit that it would be nice to slow down, but you just can’t do it … your job won’t allow it, or you’ll lose income if you don’t do as many projects, or living in the city makes it too difficult to go slowly. It’s a nice ideal if you’re living on a tropical island, or out in the country, or if you have a job that allows control of your schedule … but it’s not realistic for your life.

I say NOT TRUE.

Take responsibility for your life. If your job forces you to rush, take control of it. Make changes in what you do, in how you work. Work with your boss to make changes if necessary. And if really necessary, you can eventually change jobs. You are responsible for your life.

If you live in a city where everyone rushes, realize that you don’t have to be like everyone else. You can be different. You can walk instead of driving in rush hour traffic. You can have fewer meetings. You can work on fewer but more important things. You can be on your iPhone or Blackberry less, and be disconnected sometimes. Your environment doesn’t control your life — you do.

I’m not going to tell you how to take responsibility for your life, but once you make the decision, the how will become apparent over time.

Tips for a Slower-Paced Life

How Not to Hurry- 9 Tips for a Slower Paced Life.001
I can’t give you a step-by-step guide to moving slower, but here are some things to consider and perhaps adopt, if they work for your life. Some things might require you to change some major things, but they can be done over time.

  1. Do less. Cut back on your projects, on your task list, on how much you try to do each day. Focus not on quantity but quality. Pick 2-3 important things — or even just one important thing — and work on those first. Save smaller, routine tasks for later in the day, but give yourself time to focus. Read more.
  2. Have fewer meetings. Meetings are usually a big waste of time. And they eat into your day, forcing you to squeeze the things you really need to do into small windows, and making you rush. Try to have blocks of time with no interruptions, so you don’t have to rush from one meeting to another.
  3. Practice disconnecting. Have times when you turn off your devices and your email notifications and whatnot. Time with no phone calls, when you’re just creating, or when you’re just spending time with someone, or just reading a book, or just taking a walk, or just eating mindfully. You can even disconnect for (gasp!) an entire day, and you won’t be hurt. I promise.
  4. Give yourself time to get ready and get there. If you’re constantly rushing to appointments or other places you have to be, it’s because you don’t allot enough time in your schedule for preparing and for traveling. Pad your schedule to allow time for this stuff. If you think it only takes you 10 minutes to get ready for work or a date, perhaps give yourself 30-45 minutes so you don’t have to shave in a rush or put on makeup in the car. If you think you can get there in 10 minutes, perhaps give yourself 2-3 times that amount so you can go at a leisurely pace and maybe even get there early.
  5. Practice being comfortable with sitting, doing nothing. One thing I’ve noticed is that when people have to wait, they become impatient or uncomfortable. They want their mobile device or at least a magazine, because standing and waiting is either a waste of time or something they’re not used to doing without feeling self-conscious. Instead, try just sitting there, looking around, soaking in your surroundings. Try standing in line and just watching and listening to people around you. It takes practice, but after awhile, you’ll do it with a smile.
  6. Realize that if it doesn’t get done, that’s OK. There’s always tomorrow. And yes, I know that’s a frustrating attitude for some of you who don’t like laziness or procrastination or living without firm deadlines, but it’s also reality. The world likely won’t end if you don’t get that task done today. Your boss might get mad, but the company won’t collapse and the life will inevitably go on. And the things that need to get done will.
  7. Start to eliminate the unnecessary. When you do the important things with focus, without rush, there will be things that get pushed back, that don’t get done. And you need to ask yourself: how necessary are these things? What would happen if I stopped doing them? How can I eliminate them, delegate them, automate them?
  8. Practice mindfulness. Simply learn to live in the present, rather than thinking so much about the future or the past. When you eat, fully appreciate your food. When you’re with someone, be with them fully. When you’re walking, appreciate your surroundings, no matter where you are. Read this for more, and also try The Mindfulist.
  9. Slowly eliminate commitments. We’re overcommitted, which is why we’re rushing around so much. I don’t just mean with work — projects and meetings and the like. Parents have tons of things to do with and for their kids, and we overcommit our kids as well. Many of us have busy social lives, or civic commitments, or are coaching or playing on sports teams. We have classes and groups and hobbies. But in trying to cram so much into our lives, we’re actually deteriorating the quality of those lives. Slowly eliminate commitments — pick 4-5 essential ones, and realize that the rest, while nice or important, just don’t fit right now. Politely inform people, over time, that you don’t have time to stick to those commitments.

Try these things out. Life is better when unrushed. And given the fleeting nature of this life, why waste even a moment by rushing through it?

Remember the quote above: if nature can get everything done without rushing, so can you.


Source: ZenHabits

Filed Under: Homesteading, Living Sustainably, Natural Living Tagged With: slow down, slow living

« Previous Page
Next Page »

Primary Sidebar

  • Facebook
  • Instagram
  • Pinterest
  • RSS
  • YouTube

Hi, I'm Jackie Ritz and welcome to The Paleo Mama! I'm a published author, certified herbalist, and voracious researcher of natural medicine and nutrition. I'm glad you're here and I hope you stick around for awhile!

Recent Posts

  • When God Says Pause: Why I Took a 5-Year Break from My Online Business
  • How to Quit Facebook but Keep Your Business Profile
  • Leaving the City for the Country
  • Natural Way to Heart Health

MEAL PLANS

Biblically clean meal plans that are for those love to cook real food

Read More

Footer

Our Blog

The Paleo Mama blog provides simple answers for healthier families through research, tutorials, recipes, and simple remedies for daily needs!

  • Health
  • Essential Oils
  • Recipes
  • Remedies
  • Natural Living
  • Meal Plans

Stick around!

You’ll get instant access to a library of natural remedies and real, paleo food, including our ebooks and free guides we send out.

  • Home
  • Disclosure/Disclaimer
  • Privacy Policy
  • Advertise
  • Contact Me

Copyright © 2025 · Wellness Pro on Genesis Framework · WordPress · Log in