• Skip to primary navigation
  • Skip to content
  • Skip to primary sidebar
  • Skip to footer

The Paleo Mama

Homegrown and Handmade

  • About
  • Blog
    • Podcast
  • Meal Plans
  • Essential Oils
  • Our Farm
    • Great Pyrenees Puppies
    • Goats
      • Goats for Sale
      • Goat Sales Policy
      • Nigerian Dwarf Bucks
        • Ranchocabra Lunar Eclipse

essential oils

Cleaning Your Floors with Essential Oils

March 18, 2014 by Jackie Ritz 32 Comments

Cleaning Your Floors With Essential Oils .001

Recently I published an article listing the cleaning products and ingredients that you MUST avoid when you are cleaning your house. Many of the common household cleaners that we use are not only extremely toxic and carcinogenic to us, but they are taking a toll on the environment as well. Is all these cleaning products really necessary anyway?

We have become so scared of germs and bacteria that we are leered in to using products labeled “kills 99.9% of bacteria” and “kills germs on target.” When I see products like this it always causes me to think about how this world must have been before commercial cleaning products and if germs was such a big deal back-in-the-day.

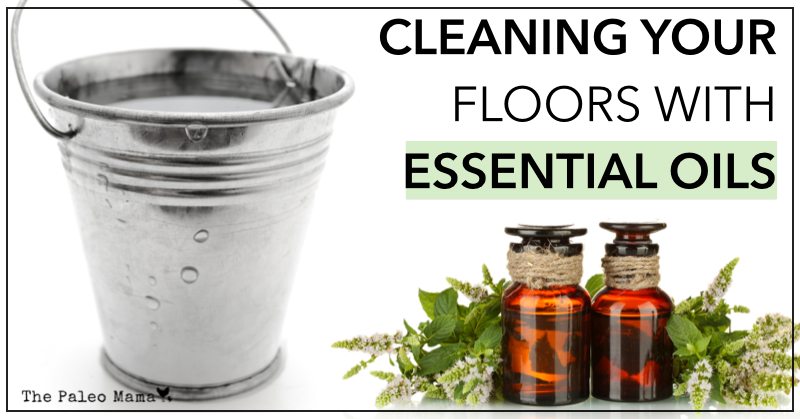
When it comes to cleaning your floors, you don’t need expensive products to do the job. Essential oils are great at cleaning up the dirt while leaving a refreshing, clean aroma in the air. Cleaning your floors with essential oils is completely safe, non-toxic, frugal, and easy!

Best Essential Oils to Clean Your Floors With:

1911684_10152286759639725_1234070701_n

  • Lavender + Lemon
  • Citrus Blend: Lemon, Lemongrass, Wild Orange, and Lime
  • Spicy Blend: Orange, Clove or Cinnamon
  • Protective blend
  • Cleansing Blend: Melaleuca + Eucalyptus
  • Minty Refresher: Peppermint + Wild Orange

Where to buy essential oils? (click here)

What Oils Are The Best for Your Needs:

  • Have ants and mice? Use Peppermint
  • Feeling poopy? Use Melaleuca
  • Want to disinfect? Use Lemon

How to Use Essential Oils on Your Floors:

1.  Multi-Purpose Floor Cleaner Recipe

The beauty of using essential oils on your floors, is that you don’t have to worry about using a specific oil on a specific service. Each essential oil will work on your floors. This recipe works if you have tile, hardwood, linoleum, ceramic, laminate, and vinyl. You can mix any of the oils I recommend above to make this recipe or use one single oil.

INGREDIENTS: 

  • 1 cup of white vinegar
  • 1 TB of castile soap
  • 15 drops of essential oils
  • One bucket of water

DIRECTIONS:

  • Put all the ingredients in a bucket and use to mop the floors.

2. Heavy Duty Floor Cleaner

This is a great recipe to whip up if you have a really messy, sticky spill. Most likely, you will want to use this in your kitchen under where your kids eat!

INGREDIENTS: 

  • Make the recipe above for my Multi-Purpose Floor Cleaner 
  • Mix in 1/4 cup of baking soda

DIRECTIONS: 

  • Mop the floor with the mixture above. Then go over with hot water to rinse any residue.


Click here to Pin this article!

Cleaning Your Floors with Essential Oils | www.thepaleomama.com .001


Filed Under: DIY, DIY Home Recipes, essential oils, Living Sustainably, Natural Living

Top 11 Spring Cleaning Products You Must Avoid

March 12, 2014 by Jackie Ritz 8 Comments

Top 11 Spring Cleaning Products You Must Avoid.001

Yes, it is almost that time of the year again. Time to bust out the cleaning supplies, open up the windows and freshen up your home! How about if this year we make an effort to do this the environmentally friendly way? Many of the common household cleaners that we use are not only extremely toxic and carcinogenic to us, but they are taking a toll on the environment as well. Where do you think all of the chemicals end up?

First off, let’s look at some of the chemicals that you should avoid during your spring cleaning, and well, whenever possible. Here are the top eleven conventional cleaning supplies that you should avoid:

Top Cleaning Products to Avoid

1. WINDOW OR GLASS CLEANER– These products typically contain ammonia. Ammonia can irritate the skin, eyes and respiratory system. It will react with chlorinated products to produce a fatal chloramine gas.

2.  CONVENTIONAL AIR FRESHENERS – Air fresheners coat your nasal passages with an oil film called methoxychlor, which will kill the nerves in your nose over time, and interfere with your ability to smell.

3. CONVENTIONAL ANTI-BACTERIAL CLEANERS – Along with the production of new antibiotic-resistant “super-bugs,” the Centers for Disease Control says that anti-bacterial cleaners can also interfere with immune system development in children and they also contain triclosan which can be absorbed by the skin and cause liver damage.

4.  BLEACH – Bleach is an extremely strong corrosive that can burn the skin, eyes and respiratory tract. NEVER mix bleach with ammonia products, as fatal fumes will be produced.

5. CONVENTIONAL LAUNDRY DETERGENT – Laundry detergents contain phosphorus, enzymes, ammonia, naphthalene, phenol, sodium nitilotriacetate, to name a few. These can cause rashes, itchiness, dryness and sinus problems. These chemicals are easily absorbed through your skin from your clothes and bed sheets.

6. CONVENTIONAL DRAIN CLEANER – Drain cleaner typically contains sodium hydroxide or sulfuric acid, which can cause blindness if splashed in the eyes.

7. CONVENTIONAL OVEN CLEANER – Most oven cleaners contain extremely corrosive bases of sodium hydroxide or potassium hydroxide.

8. BLEACH BASED CLEANING POWDERS – Many of these cleaning powders such as ‘Comet’ or ‘Ajax’ contain formaldehyde (a known human carcinogen recognized by the World Health Organization) benzene, chloroform among many others. Side effects can include: cancer, asthma and reproductive disorders.

9. FURNITURE POLISH – Furniture polish such as ‘Pledge’ contains nitrobenzene, which is extremely toxic and easily absorbed through the skin.

10. TOILET BOWL CLEANERS – Contains hydrochloric acid, which is corrosive to the skin and eyes.

11. DISHWASHER DETERGENT – Contain a highly concentrated form of dried chlorine, every time you wash your dishes there is some residue left, and when you use these dishes to eat with you actually consume these chemicals.

How to avoid the amount of chemicals we use

Top 11 Spring Cleaning Products You Must Avoid | www.thepaleomama.com .001

There are a few things that we can do to minimize the amount of chemicals that we use, and they are all very simple. If you spill something, clean it up right away. If you get a stain on your shirt, rinse it with water right away. If you make a mess of the toilet, you got it, take a brush and clean it up right away. By cleaning things as they get dirty, rather than waiting to clean and doing it all at once, spills won’t have as much time to stain and you can use very minimal, or often no chemicals to get things clean.

Another excellent thing we can do to reduce the amount of chemicals and cleaners that we use is to just use a little bit of elbow grease. Sometimes you really have to scrub out a pot, pan or stain from the carpet. It seems as though in this day and age we have become so lazy to the point where everything is about convenience rather than what we are doing to ourselves and the environment by using such toxic products and not even thinking twice about it. Also, I think that a lot of us have a skewed idea about what it means to be clean; all of these cleaners that are advertised to kill 99.9% of germs and bacteria, but do we need to be killing all of those germs and bacteria? Not all bacteria is harmful to us and, in fact, we are weakening our immune system by not giving it anything to fight off, so when we come into contact with bacteria we become ‘sick’ much easier.

Okay, so now we know what we shouldn’t be using, but what does that leave us with to get our cleaning done? Luckily, as more and more people in the world are growing more conscious about themselves, the environment and the globe as a whole, there are more eco-friendly  cleaning products that are made available to us today. More and more brands are emerging and even old companies known for using harsh chemicals are starting to change their ways.

There are also many natural common household items that can work wonders for cleaning products.

Top 3 All-Natural Cleaning Supplies: Baking Soda, Lemon and Vinegar.

Baking soda is a great way to freshen up fabrics and remove odors. You can place a box in your fridge and freezer to keep it smelling neutral. It is also great to sprinkle on fabrics like carpets, couches and mattresses and then vacuum up to keep these things smelling fresh! Put some in your laundry for an extra whitening boost. I always sprinkle it in the cat litter after I scoop out the clumps.

Lemon juice and lemon peel not only are great smelling natural cleaning products, but they actually get the job done and cut through grease with ease.

White Vinegar mixed with water is an excellent disinfectant cleaner, and also works great for cleaning windows.
Below I have included a basic recipe for an all-natural, all-purpose cleaner. Hope you enjoy!


NATURAL ORANGE ALL-PURPOSE CLEANER
 

STEP 1: Save enough orange peels to fill up a 1-liter mason jar. (If this is going to take you more than a day or 2 I would suggest storing them in either the fridge or freezer)

STEP 2: After you have done that, pour in 500 ml (2 Cups) white vinegar.

STEP 3: Seal the jar, and let it sit on your countertop or in a cupboard for 2 weeks.

STEP 4: After 2 weeks strain out the orange peels and keep the liquid in the jar.

STEP 5: Mix water with orange vinegar solution (4 parts water 1 part orange vinegar solution in a spray bottle)

Voila! All-natural, homemade all-purpose cleaner!

Happy Spring Cleaning!


Written by Alanna Ketler on Natural Blaze and republished with permission. 

ABOUT THE AUTHOR: Hi, I’m Alanna! I have been a contributor with CE, where this article first appeared, for about 3 years now and wow, has it been an incredible journey so far! I am passionate about animals and animal rights, I also enjoy writing about health, consciousness and I am very interested in psychedelics for healing purposes! Any questions? Feel free to email me: alanna@collective-evolution.com “If we could see the miracle of a single flower clearly, our whole life would change.” – Jack Kornfield 

Filed Under: DIY Home Recipes, essential oils, Living Sustainably, Natural Living Tagged With: cleaning, healthy cleaning, natural products

How to Love Someone Who is Grieving

February 24, 2014 by Jackie Ritz 24 Comments

How to Love Someone Who Is Grieving.001

It’s been almost four years since I lost my younger sister, Dinah. She passed away at the age of 27…much too young to leave this beautiful earth.

My sister felt this world was unbearable.

It collapsed on her.

She couldn’t breath. She couldn’t live.

If you don’t know what that feels like, then count your lucky stars. Many have been to that point. Few admit it. Some go through with it like my sister.

I don’t blame her anymore. I’m not mad at her for choosing to leave me, our family, the life that she had. I can’t say that I understand it. I guess I’ve just accepted it.

In a few days I’ll celebrate her 30th birthday. I might even make her a cake and let 30 balloons into the air. I’ll watch them as they float up and above. I’ll watch them as they move over the mountains and disappear into the sky. And as I squint to see how far they made it, I’ll thank God for the 27 years that I shared with my sister.

I’ve not only lost my sister, but I have been through a miscarriage, and I just recently lost my sister-in-law to breast cancer. Unfortunately, I know grief.

I know it’s hard to love someone who is grieving. You don’t what they want…what they need…their actions may confuse you. You’re scared to say something wrong and scared to say nothing at all.

It can be different for everyone, but, overall, I think humanity is very similar. We have basic needs and when someone that we love dies, we all need similar things.

Things You Can Do For Someone Who is Grieving:

How to Love Someone Who is Grieving | www.thepaleomama.com .001

1. Send Them a Hand Written Card

I still have every card that was sent me after my sister died. We tend to minimize things like this, but to the receiver it could mean so much. To know that someone is thinking about them and praying about them…well, it could get them through that moment, that hour, that day.

2. Bring them a Healthy Meal

A nutritious meal is so important when you are going through depression and loss. Your body is being abandoned, it’s an emotional mess, and the hormones are raging. A healthy meal can bring the spirits up and warm the soul. I love this free website Take Them a Meal. You can coordinate meals for someone and other people can sign up to bring meals too.

3. Clean Their House or Hire a Maid

Picking up the house and keeping things organized is not important to the person who has lost someone. Just washing a sink-ful of dishes could feel like an enormous task. If they have kids, laundry, and other household chores, then keeping a clean environment might be nearly impossible. Go over and help them or hire a maid to come for a few weeks or months.

4. Understand Their Perspective

When someone close passes away, it can, literally, change the way the world looks through their eyes. Understand this and empathize with it. Everything in life now compares to what they are going through. Be careful what you say and/or complain about around them. Everything seems incomparable to their circumstance.

5. Be There for Them (if needed)

But don’t be overbearing. Understand if they need space. Sometimes they want to talk about so-and-so’s life. Ask them about it. As someone who is grieving, their greatest fear may be the fainting memory of that person. Talk about their life and let them cry, laugh, scream in anger…whatever they need to do.

6. Be Selfless

My husband is a perfect testimony of this. He poured out his life for me during this dark season of my life. Not only was I grieving the loss of my sister, but I was a (2nd time) new mom. I had a newborn, a 2 year old, and I was overwhelmed. Life came crashing down on me and without my husband I am not sure how I would have survived. He cleaned, cooked, took care of the kids, took care of my family, and was a shoulder I cried on daily. He never did anything for himself. He was always there and I knew I could rely on his strength to pull me through.

7. Listen

Don’t offer advice. Don’t offer promises. Just sit there, grab their hand, and listen. Look them eyes. Don’t be afraid of their grief. Listen and love them.

8. Go Ahead and Invite Them

Don’t assume that they don’t want to be a part of anything going on or planned. Let them decide if they are up for a crowd or a party. Don’t leave them out…but don’t get hurt if they say no. I remember a few times I wish I would have been invited. I might not have gone, but the gesture to invite me would have made my day. It would have let me know that people are thinking about me.

9. Be Yourself

Don’t change yourself for your friend or loved one who is grieving. If you used to make them laugh till their peed themselves, then keep it up. If you used to be physical with them and give them lots of hugs…don’t stop. Be yourself around your friend…that is who they love!

Remember that grief has no timetable. It may take someone a month to get through the worst of it, but then it could take another person a year. Be sensitive to that.

If you want to offer more support, here are a few resources that I love:

  • Pruned: Blossoming Through Life’s Difficult Seasons (where to buy)
  • Rebuild From Depression: A Nutrient Guide (where to buy)
  • Tear Soup: A Recipe for Healing After Loss (where to buy)


Filed Under: essential oils, Grief, Natural Living, Thoughts

So You Wanna Start a Money Making Blog?

February 4, 2014 by Jackie Ritz 158 Comments

wanna blog fb.001

I’ve had so many people write me and ask me how to even begin blogging. This month I celebrate my 2 year blogiversary! I can’t believe that 2 years ago I wrote my first blog post. I cringe looking back at those early posts. I had no direction and my posts sound like one big run-on sentence.

I feel like I have learned a lot over the years and my love for blogging has turned from hobby to income. The last 2 years of blogging has been a roller coaster. There have been times where I wanted to quit, where I would beg or readers, and times when typing words on a screen was the best thing for letting go of stress and emotion.

So, to save some of you HOURS of research and HOURS of trial and error, let me put my thoughts and advice in one spot. Right here.

How Did The Paleo Mama Begin?

Every blog has a story. A beginning. An inspiration. My story began more than 2 years ago. I was a avid Weston A. Price (WAP) follower and ate very well whole foods, lots of animal fats, whole grains, and even ground my own grain. I had sourdough starter, kefir, kombucha, and water kefir. I knew about eating good. But….I ate good, healthy WAP yet carried around more weight then I liked. I was 70lbs heavier than what I am now. My blog began about 2 months after I began eating Paleo. My younger sister passed away and I was an overweight, depressed mess. My journey into blogging began when someone baked me a Paleo “sympathy” meal and since that day I have been Paleo. I started my blog about 6 months after I started eating Paleo. I had no idea what I was going to blog about. I just wrote random things and didn’t really worry about making any money.

This changed quickly. I wouldn’t call it greed, but you get to a point where you want to make money. I mean, if you are spending a few hours a day on the computer blogging, then you sure as hell better be making money. People were reading my stuff. Using my recipes. The idea of blogging for hobby turned into blogging for income about a year after I started my blog.

I never thought I could make a living off blogging, but now I know that if I needed to support my family, my income would be able to provide 100% of our needs. The money didn’t come easy. I used that first year of blogging to really build up my traffic and my readers. That first year I never advertised or threw marketing ads at anyone. I never promoted products or tried to sell e-books, summits, or anything else. I just wrote and I did it for free.

But as social media grew and became such an avenue for traffic, so did my demand to be on the computer. This is when I made the decision to use my blog as an avenue for income. It combined something that I loved to do with something that would meet the needs of my family. And you know what they say, “when you love what you do, you never work a day in your life. ” 

10 Tips to Successful Blogging:

wanna blog pinterest .001

1) WordPress.org – when I first started my blog I used wordpress.com. I didn’t know there was a difference between .com and .org but there actually is a BIG difference. With wordpress.com you CANNOT put any ads up. NONE. About a year into my blogging I wanted to start putting ads up. When I found out I couldn’t I decided to migrate my blog over to wordpress.org. So, for anyone starting out on blogging just go ahead and avoid the ABSOLUTE frustration of migrating a website over. It is really intricate and frustrating…especially if you do it on your own, like I did. My husband stayed away from me for about 3 days when I was going through the migration. At one point I thought I had lost over 100 blog articles.

TIP#1: Start with WordPress.org 

2) Hosting – you need to pick a host. I started out using Go Daddy and it was *okay*. Not the best but for $80 for the year it worked. I currently use WP Engine on The Paleo Mama. It is expensive but it is THE BEST.  I have around 500,000 page views a month, so I need a host that is reliable and can handle the traffic and possible peaks of traffic that can happen in hours. I, also, have used BlueHost and really do like them too. If you are serious about blogging, get a good host. WP Engine is incredible but, like I said before, they are pricey. I probably wouldn’t recommend going with them until you have around 100,000 page views a month.

TIP #2 Pick a good host. 

3) Keep it Simple Stupid (KISS) – my dad taught me to always follow the KISS method. When I named my blog, I was in the hype of eating Paleo. Now that Paleo has become a lifestyle and it doesn’t define me, I have some regret about naming my blog, “The Paleo Mama”. I feel like it really limits me. I know it is what has drawn a lot of people to my blog, but I, no longer, feel like Paleo is what I am 100% about. I want my blog to have a feeling of more than that. I want my blog to be, maybe, 10% Paleo, 10% homesteading, 10% recipes, 20% essential oils…and so on. So, pick a name that is broad but unique, if you know what I mean?

TIP #3 Pick a broad blog name

4) Affiliates – about 30-40% of my monthly income comes from affiliates. I love supporting my fellow bloggers and when they have an book, a program, or a product that I love, I sign up to be an affiliate with them. Most of my affiliates I find through the blogs or articles that I read that seem to really be on brand for my audience. Many websites offer affiliate programs, and all you have to do is sign up. I link to these affiliates in blog posts or I put them on my right sidebar on my homepage. A few of my favorite affiliates right now are Squeaky Clean Paleo, Toxic Free, Kickin the Weight with Keto, Natural Homestead, and these Paleo Meal Plans. PS. I have over 10 affiliate links in this blog post!.

TIP #4 Find On-Brand Affiliates

5) Amazon Associates – Amazon Associates has been a great avenue for income. Anyone can sign up and all you do is link to the product in the Amazon store. This is great for people who are writing recipes and articles with products in it. I try to not post an article or recipe without a few Amazon links in there. It’s a really simple affiliate program and one you don’t want to be without!

TIP #5 Sign up for Amazon Associates

6) Google Adsense & Media.net – Google Adsense is an advertising program that is a great source of passive income. It’s nice to make money without ever having to promote anything. Google Adsense gives you advertisements to place on your blog. There’s lots of ways to strategize about how to maximize your income from Adsense. I can’t really talk much about media.net because I was just approved for it and running a trial on it right now. But, there are several ways to make money with advertising and it’s a great income for doing practically nothing.

TIP #6 Sign up for Google Adsense 

7) Take Good Pictures – I cannot emphasize enough how important this is. My early pictures are SCARY. I used my phone to take them. When I got serious with blogging, I bought a used Cannon Rebel with a good lens and it has made a drastic difference. The big chunk of money to buy a camera is sometimes just NOT there. Don’t fret…I, absolutely, love Deposit Photos and recommend signing up for their monthly subscription. You get 5 downloads a day and there is thousands of photos to choose from (click here to check out depositphotos.com).

TIP #7 Take Good Pictures

8) Edit Those Pictures – I use picmonkey.com and Keynotes app on my Mac to edit my pictures. I like to make a horizontal picture (good Facebook sized picture is 800×419) and a vertical picture (good Pinterest size pic is 419×800) for each posts. The vertical pictures are mostly to stand out on Pinterest and the horizontal picture is for Facebook shares. I have stopped taking step-by -step pictures during recipes because it is just too much. I do it sometimes, but mostly I just use ONE good picture.

TIP #8 Make pictures stand out

9) Have a newsletter signup on your blog – I never understood the importance of this till about a year into blogging. You want to be able to give people this option if they LOVE your blog. Click here to check out my newsletter sign-up form. My newsletter sign-ups are my most devoted readers. They have signed up for my RSS feed and get my new posts delivered in their email inbox. I send out personal emails to all my readers once a week and, also, share specials and giveaways with them. I love MailChimp for this! It’s free until you start getting thousands of sign-ups. You can have a signup on your right sidebar or use a pop-up like Pippidy to grab emails.

TIP#9 Set up an RSS feed and/or Newsletter Signup

10) Get on the Social Media Train – you have to get good at social media. You just have to. Pinterest is my leading traffic source with Facebook following close behind. Make a Facebook page that runs along with your blog and share articles and posts. Encourage your readers to engage more and more on Facebook. Don’t forget Google+! Google+ is a huge asset to bring in traffic and it’s also great for Search Engine Optimization (SEO). Make a Pinterest, Facebook, and Google+ plus account. The thought of managing all these might stress you out. I got tips for you on that: Hootsuite sends out all my posts to all 3 of my social media outlets in ONE post. Saves me tons of time! Viral Tag pins images to my Pinterest page throughout the day. I just have to schedule my pins in the morning and that’s it.

TIP#10 Utilize Social Media

Other Tools I Love:

Google Analytics – Google analytics is something to use to really take a look at where your traffic is coming from, what articles they are looking at, and key words they used to find your blog.  It’s nice to watch to see how your traffic is growing and it’s, also, fun to look at the “real time” analytics! If you have a blog, you want to sign up for this free google service.

My favorite plugins – Plugins are programs you can download to your WordPress Dashboard. They are tools you can use to make your blog flow better or to customize your blog. A few of my favorite plugins are: Quick Adsense, Before and After Content, Pin it Pro, Shareholic, WordPress SEO by Yoast, Print Friendly, Pretty Link, Pippidy and Custom Content.

Design and Themes – for 2 years I used a free WordPress Theme on my website. It worked great until I really wanted to have my website stand out and give it a little personality. I wanted my personality to shine through it. Michelle Guzman Design made a custom web design for my blog! She is awesome to work with and made my website really stand out. Check out my new design (click here).

doTERRA Essential Oils – I am an Independent Product Consultant for doTERRA Essential Oils. I have a wonderful team that I have built and am growing with. I make a little extra income with doTERRA. My goal in signing up to sell doTERRA wasn’t to market. My goal was to be able to make great recipes for blog posts and link to a reputable essential oil. My love for oils grew so much that I decided to start building a team.

Networking with other bloggers – I have so many wonderful blogging friends that I have met over the years. I love supporting them, selling their e-books, meal plans, Amazon or Kindle books, etc. When the time comes around, they do the same for me. It’s a “scratch your back” mentality but, also, I have made some amazing friends.

Alright, where’s the cheese?

In all these things listed above you can make some money. How much can you make? Well, that depends on you. I started out getting excited about $50 checks from affiliates and it being a good little job on the side for spending money. Now, I can support my family if my husband was to ever lose his job. Blogging is NOT easy and it’s not a fast road to success. It took me 2 years to get to this point. However, I am so glad that I am doing something that I absolutely love, I’m making an income from it, I’m sharing my love for Paleo foods and natural living, and I work from home.

Working from home is the highlight for me. I’m so blessed to be able to stay home with my kids and make my own hours. It’s hard to find time to do everything…between milking the goat, making healthy Paleo meals, blogging, and maintaining a home, my life is a little chaotic. However, I’ve built discipline to make hours when the kids are in bed or napping.

Alright, there it is…so do you still wanna start a blog after reading this?! I say go for it!

Leave me a comment with your blog below so I can follow you! 


Filed Under: About Me, essential oils, Natural Living Tagged With: blogging, gluten-free, how to make money blog, how to start a blog, money making blog, paleo, primal

What’s in My Natural Postpartum Kit?

January 23, 2014 by Jackie Ritz 15 Comments


postpartum kit horizontalI’ve been blessed to have amazing births with both my kids. Both of them were very different. My first child was an induced hospital birth with an epidural. My second was a 100% natural birth in a bathtub with no meds or epidural. I’m sort of glad that I have been able to have both experiences because I’m able to talk about the differences in both. Many people think they can’t stand the pain of a natural birth, however, I found the pain very minimal compared to my hospital birth.

I plan on writing a comparison post on both these births to educate women and moms-to-be on my experience and the things that I went through. Regardless of if you plan on having an induction, epidural, caesarean, or natural birth, it’s important to be prepared for your body to heal. A woman’s body is incredible and as I went through labor and delivery naturally, I was able to experience what my body was capable of. With my first child, I was NOT prepared for the postpartum aches and pains, which made the healing process take forever. I was ready with my first and prepared a natural postpartum kit that helped remedy the experiences I had after birth.

My Natural Postpartum Kit:

  1. Mother’s Milk Tea (I like these) – this tea helps to promote healthy lactation and is made with high quality, organic herbs. I made sure I ordered a few boxes of this beforehand, however, if you want to, you can make this tea yourself.
  2. Perineum Spray – I could not get enough of this stuff when I was recovering from birth. It’s simple to make and I made a large batch before labor began. Take a empty spray bottle (I like this one cause it’s glass) and fill it to the top with witch hazel. Then add about 40 drops of essential oils. I recommend using a combination of frankincense and lavender (where to buy) to promote healing.
  3. Nipple Cream – I recommend using my All-Purpose Salve on your nipples. Apply after each nursing session so you don’t have to worry about washing it off for the next nursing session.
  4. Healing Sitz Bath (I like this one) – this is a blend of herbal ingredients that help to reduce swelling, speed healing, soothe vaginal soreness and perineal bruising and comforts hemorrhoids. You can make this yourself if you would like to!
  5. DIY Witch Hazel Pads – these were my ABSOLUTE favorite thing I had prepped and ready to go at home. Buy a box of overnight maxi pads (you’re gonna need them regardless from the bleeding). Take your prepped perineum spray (listed above) and spray the pad with the mixture. Get it all nice and damp. Then wrap the pad up in aluminum foil and throw it in the freezer. It feels unbelievable after birth! I only needed a few days worth…so about 10 pads.
  6. Essential Oils for Post Contractions – Contractions, are inevitable. Your uterus has grown the past nine months and your body needs to contract it back to it’s normal size. This can take from 4-6 weeks. Post labor contractions feel like menstrual cramps and can be very painful. With each child, it’s gets a little bit worse. It can feel very intense and uncomfortable, especially during breastfeeding sessions. I have found that using lavender and white fir essential oils (where to buy) can provide instant relief. No need to dilute, just apply a few drops of each directly to the abdomen. These are both very gentle oils so if your baby touches your belly, these oils won’t be too harsh for the baby’s tender skin.
  7. Chick Flick – order a movie that you know will make you cry and watch it on the fourth day after your baby is born. Sounds crazy, but trust me…this works to help release your feelings of being overwhelmed in a way that is normal to others, so you don’t have to explain them.  My go-to emotional release is The Notebook or a Walk to Remember…heck, anything buy Nicholas Sparks does it for me!
  8. Essential Oils for Baby Blues – The baby blues affects 10-15% of women. Essential oils are a great way to help you get through the Baby Blues. They can support and uplift you during this changing time. Some of the best oils for this would be: Tangerine, Grapefruit, Bergamot, geranium, wild orange, clary sage, cypress, frankincense, lavender, Roman chamomile, rosewood, or sandalwood. Use any of these as a personal perfume and wear it daily. Diffusing it is another way to get these oils into your system (I like this diffuser).
  9. Placenta Pills – more and more women are becoming open to the “not-so-new” idea of encapsulating your placenta. The placenta is an organ that has nourished your baby for the past 9 months. As hormones are going crazy, the placenta can give back to you what your body is needing. It helps to reduce the risk of postpartum depression and helps to increase your milk supply. Read one mother’s account on how placenta encapsulation saved her sanity.
  10. A Good Nursing Bra – you are definitely going to want to have this ready before your baby arrives. Some mothers prefer to wait till their milk comes in to find a good nursing bra, however, the first few weeks of breastfeeding are not a good time to determine what your new breast size will be. You are going to want to know how to size yourself and get 3-4 good nursing bras. Don’t go cheap on this!
  11. Meal Registry – If you don’t do anything above, DO THIS! This is a huge lifesaver. Go to Take Them a Meal and set this up. It’s free and easy and your friends will love you because they want to help, but just don’t know how to! Set up aschedule and post it on your FB page and email it to your friends who are asking to help.

CLICK HERE to Pin this!

postpartum kit vertical

Filed Under: breastfeeding, essential oils, Natural Living, Paleo Baby Tagged With: baby, birth, diy holistic remedies for pregnancy, l, labor, paleo, postpartum kit

All Purpose Healing Salve

January 21, 2014 by Jackie Ritz 163 Comments

When you have little ones in the house, there seems to be an endless supply off boo-boos, bug bites, and itchy skin.  I like to keep things very simple, which is why I really love essential oils. I have, literally, traded so many products over to a very minimalistic shelf with essential oils and some other holistic remedies.

This all-purpose salve is good for so many things. The coconut oil and olive oil bring nourishment, while the beeswax is known to lock in moisture, foster cells, and protect skin from damaging environmental factors. For children, the BEST two essential oils to have on hand are melaleuca and lavender.

Melaleuca (tea tree oil) is renowned for it’s cleansing and rejuvenating effect on the skin.  Lavender is known as a universal oil that is extremely beneficial to helping many conditions. Combine these two together and you have a powerful weapon to aid in relief.

This salve is cloth diaper safe and newborn-safe. The essential oil dosages in this recipe do not exceed the recommendations for a newborn. I highly recommend using a very safe essential oils with therapeutic benefits like these. Keep this salve on hand for ANYTHING!

All Purpose Healing Salve

INGREDIENTS:

  • 1/2 cup of Coconut Oil (where to buy)
  • 1/2 cup of Olive Oil (where to buy)
  • 1/4 Cup of Beeswax (where to buy online) – but find a local beekeeper! I got a 1 lb block for $6.99 at a local co-op!
  • 1 Cup of Calendula Flowers (where to buy online) – I got it for $.50 at a local co-op!
  • 15 drops of Melaleuca (add 10 drops more for children over 10)
  • 15 drops of Lavender  (add 10 drops more for children over 10)

DIRECTIONS:

  1. Put the coconut oil and olive oil in a double boiler. Melt the coconut oil if it isn’t melted already.
  2. Add the calendula flower petals (dried) and simmer on low for around 2 hours. Make sure to stir a few times during the process. You can also add the oil and calendula to a crockpot and put on low for up to 3 hours.
  3. Strain the mixture into a bowl through a cheesecloth.
  4. Now add the calendula oil back to the saucepan and add the beeswax. Melt the beeswax.
  5. Remove from heat and let cool for around 15 minutes.
  6. Add the essential oils and stir.
  7. Pour into a glass jar and store for up to a year! Makes 1 cup!

Healing Salve Recipe
2018-01-16 13:47:10
This all-purpose salve is good for so many things. The coconut oil and olive oil bring nourishment, while the beeswax is known to lock in moisture, foster cells, and protect skin from damaging environmental factors.
Write a review
Save Recipe
Print
Prep Time
5 min
Cook Time
2 hr
Prep Time
5 min
Cook Time
2 hr
Ingredients
  1. 1/2 cup of Coconut Oil
  2. 1/2 cup of Olive Oil
  3. 1/4 Cup of Beeswax
  4. 1 Cup of Calendula Flowers
  5. 15 drops of Melaleuca (add 10 drops more for children over 10)
  6. 15 drops of Lavender (add 10 drops more for children over 10)
Instructions
  1. Put the coconut oil and olive oil in a double boiler. Melt the coconut oil if it isn’t melted already.
  2. Add the calendula flower petals (dried) and simmer on low for around 2 hours. Make sure to stir a few times during the process. You can also add the oil and calendula to a crockpot and put on low for up to 3 hours.
  3. Strain the mixture into a bowl through a cheesecloth.
  4. Now add the calendula oil back to the saucepan and add the beeswax. Melt the beeswax.
  5. Remove from heat and let cool for around 15 minutes.
  6. Add the essential oils and stir.
  7. Pour into a glass jar and store for up to a year! Makes 1 cup!
Notes
  1. Source for therapeutic grade essential oils: www.thepaleomama.com/essential-oils
By The Paleo Mama
The Paleo Mama https://thepaleomama.com/


Filed Under: DIY Beauty Recipes, essential oils, Natural Living, Paleo Baby, Paleo Toddler Tagged With: all purpose healing salve, diaper rash salve, diy salve, featured, homemade salve

« Previous Page
Next Page »

Primary Sidebar

  • Facebook
  • Instagram
  • Pinterest
  • RSS
  • YouTube

Hi, I'm Jackie Ritz and welcome to The Paleo Mama! I'm a published author, certified herbalist, and voracious researcher of natural medicine and nutrition. I'm glad you're here and I hope you stick around for awhile!

Recent Posts

  • When God Says Pause: Why I Took a 5-Year Break from My Online Business
  • How to Quit Facebook but Keep Your Business Profile
  • Leaving the City for the Country
  • Natural Way to Heart Health

MEAL PLANS

Biblically clean meal plans that are for those love to cook real food

Read More

Footer

Our Blog

The Paleo Mama blog provides simple answers for healthier families through research, tutorials, recipes, and simple remedies for daily needs!

  • Health
  • Essential Oils
  • Recipes
  • Remedies
  • Natural Living
  • Meal Plans

Stick around!

You’ll get instant access to a library of natural remedies and real, paleo food, including our ebooks and free guides we send out.

  • Home
  • Disclosure/Disclaimer
  • Privacy Policy
  • Advertise
  • Contact Me

Copyright © 2025 · Wellness Pro on Genesis Framework · WordPress · Log in