• Skip to primary navigation
  • Skip to content
  • Skip to primary sidebar
  • Skip to footer

The Paleo Mama

Homegrown and Handmade

  • About
  • Blog
    • Podcast
  • Meal Plans
  • Essential Oils
  • Our Farm
    • Great Pyrenees Puppies
    • Goats
      • Goats for Sale
      • Goat Sales Policy
      • Nigerian Dwarf Bucks
        • Ranchocabra Lunar Eclipse

Jackie Ritz

Oil Pulling With Essential Oils

August 6, 2014 by Jackie Ritz 14 Comments


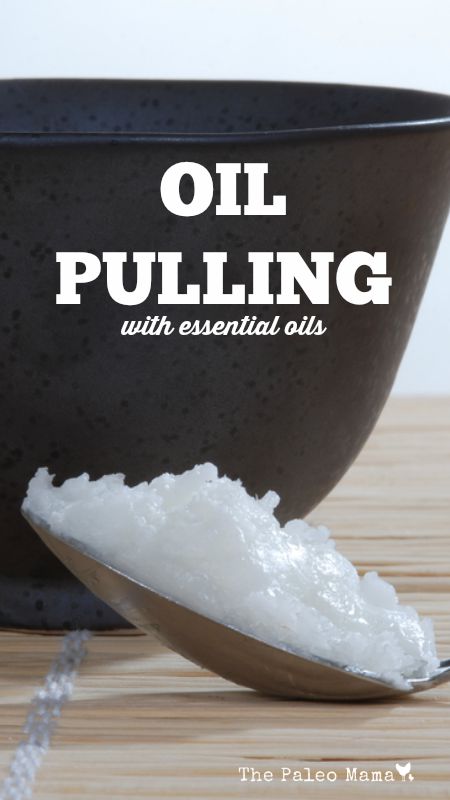
Oil Pulling is an ancient detoxification practice that involves swishing oil around in your mouth for 15-20 minutes. The benefit of doing this is to reduce the amount of harmful bacteria, reduce dental plaque, remineralize your teeth, help with gum issues, and strengthen your gums. You can give your teeth an extra boost by oil pulling with essential oils.

When you swish oil around in your mouth, plaque get stuck to the oil and dissolve in the liquid oil. So you are removing a lot of bacteria, which is found in plague and leads to all kinds of oral health problems, every time you oil pull.

I added oil pulling to my life when I found out I had 6 cavities! I was able to heal these cavities naturally by eating a traditional diet with the proper nutrients and supplements added. You can click here to read more about how I healed my tooth decay. 

What Oil to Use:

Traditionally, sesame seed or sunflower oil was used among the early oil-pullers, however, my personal favorite is coconut oil because it has so many health benefits. You can use any oil that you like, just stay away from canola or vegetable oil.

Adding Essential Oils to Your Oil Pulling Regime:

Adding in therapeutic-grade, 100% pure, essential oils into your oil pulling regime is a great way to give your health a supercharge!  I buy my essential oils at wholesale price and I encourage you to do the same! You can CLICK HERE and learn how to get your essential oils from me at wholesale cost!

Here’s a few suggestions to help with oral issues:

  1. Peppermint essential oil.
  2. Clove essential oil.
  3. Basil essential oil.
  4. Melaleuca essential oil.
  5. Myrrh essential oil.
  6. OnGuard essential oil (my favorite choice).

How to Oil Pull:

  1. First thing in the morning, put 1 teaspoon-1 tablespoon of coconut/or sesame oil in your mouth. Use 1 teaspoon if you are just starting out or if you have a gag reflex. Swish it around till it melts.
  2. Open your mouth and add 2 drops of your favorite essential oil.
  3. Swish the oil around in your mouth (like you would with mouthwash) for 15-20 minutes. I like to push it through my teeth and around the sides of my mouth. Don’t swish hard or your cheeks will start to hurt! I do this while I’m doing my morning chores and milking the goat! But you can also do it while your getting ready in the morning!
  4. Spit the oil out in your trash can! Do not swallow it…it is now loaded with bacteria and toxins.
  5. Brush your teeth with a safe toothpaste! I use my homemade toothpaste, but THIS ONE is great if you can’t make your own!
  6. Happy Oil-Pulling!

 CLICK here to Start Using Essential Oils! 

Oil Pulling


Filed Under: DIY, DIY Beauty Recipes, essential oils, Living Sustainably, Natural Living, Nutrition

Spiced Chai Lip Balm Recipe

August 4, 2014 by Jackie Ritz 26 Comments

I love chai tea and the way the spices in a chai tea smell. I have been making my own lip balm for years now, usually I just put my All Purpose Salve on my lips, but I wanted something a little “fancier” so I created a delicious Spiced Chai Lip Balm recipe that I know you will enjoy.

I wanted to stay away from citrus essential oils because they are photo toxic and it is the summer! You can easily double or triple this recipe to make extras to give away to your friends!

A NOTE OF ESSENTIAL OILS: I only recommend therapeutic-grade essential oils. You can purchase therapeutic-grade essential oils at wholesale cost (CLICK HERE to learn more!).

DIY Spiced Chai Lip Balm

makes 10 3ml jars

INGREDIENTS: 

  • 1 Tablespoon of Coconut Oil 
  • 1 Tablespoon of Cacao Butter or Raw Shea Butter (can leave this ingredient out in the winter but it helps hold the balm together during the hot summer months)
  • 1 Tablespoon of Beeswax Pastilles
  • 1/4 Teaspoon of Castor Oil for shine
  • 1/4 Teaspoon of Vanilla
  • Essential Oils: 4 drops of Cinnamon Bark or Cassia, 4 drops of Ginger, and 4 drops of Clove. You can also substitute Black Pepper essential oil and/or Coriander Essential oil if you want! (where to buy)
  • Small Containers or reused lip balm tubes

DIRECTIONS: 

  1. Add the coconut oil to a small pan and simmer till melted.
  2. Add the beeswax pellets and cacao/or shea butter and simmer for about 5-10 minutes till melted.
  3. Add the castor oil. Stir and remove from stove.
  4. Let sit till the mixture is warm to the touch, but not thick. It’s easier to pour into containers when it is still liquid.
  5. Add in the vanilla and essential oils. Stir.
  6. Pour into your containers and enjoy!

Spiced Chai Lip Balm www.thepaleomama.com

Filed Under: DIY, DIY Beauty Recipes, essential oils, Living Sustainably, Natural Living

Top 5 Essential Oils for Back to School

July 25, 2014 by Jackie Ritz 5 Comments

Thinking kid

It’s just about that time again. Summer goes by so dang fast, doesn’t it? I went to the store the other day and saw moms and dads walking around with their shopping list in hand and a cart full of school supplies getting ready for their kids to go back to school.

But did you ever stop and think about how you can start to prepare your child’s body for school? Going from a safe home environment to a new class, new friends, new teachers, and new school is HARD on children. It’s a lot of NEW and lots of children do not do good with a lot of new.

So, I wanted to provide a list of essential oils that you can use to assist your child in settling into their new school environment.

A note on quality: I only use and recommend therapeutic-grade essential oils. All of these suggestions are based off the assumption that high-quality essential oils are being used. If you would like to get started using high-quality, therapeutic-grade essential oils, then you can CLICK HERE to learn how to get started!

Top 5 Essential Oils for Back to School:

  1. Peppermint & Wild Orange – this is a great blend to help your kids wake-up. They now have an alarm clock to wake up to, or you disturbing their slumber by turning on the light and singing, “school days, school days…good ole fashion rule days.” Put an essential oil diffuser in your kitchen and diffuse this “wake-up blend” while they are eating breakfast. Or you can put this blend in a roll-on bottle and roll it on their wrists and back of neck while you are “nicely” waking them up.
  2. Rosemary – Did you know rosemary can make you smarter? Rosemary is known to improve brain performance and mood. I recommend adding a drop or two to your children’s shampoo and using it to wash their hair, or rubbing a drop through their hair while they are eating breakfast before heading to school. You can, also, diffuse this oil before the kids leave for school or when they come home and work on homework.
  3. “Focus” Blend  – The focus blend contains oils that have been studied and used traditionally for their abilities to promote calmness, focus and a balanced state of mind. Many of these oils contain high levels of sesquiterpenes, which have been proven to pass the blood-brain barrier to reach the cells of the brain. It’s primarily used for helping ease stress and improve concentration. I like to apply this blend to the back of my children’s neck as they are eating breakfast. You can talk with your school about letting your children apply it during school hours.
  4. Lemon – Lemon is known as “The Oil of Focus“. It’s citrusy aroma nourishes the mind and aids in concentration. Lemon is a wonderful aid for children who are struggling with school. It is especially helpful in cases of learning disabilities. It pairs well with Rosemary, so you can make a roller bottle with Rosemary and Lemon and apply to the back of the neck or diffuse this powerful duo before school.
  5. “Calming” Blend  – Children who are hyperactive or have difficulty concentrating could really benefit from this blend. It contains essential oils that are often used to calm and soothe feelings of stress and excitement. It’s great to help wound up kids calm down and settle in for a restful sleep. I like to give my kids a detox bath at night using this blend or diffuse it in their room for an hour before bed. You can, also, apply it to the backs of their necks or feet before school (if they are very hyperactive) or at bedtime.

WHERE TO BUY THESE OILS: If you are wondering where to buy all these oils, you are in luck! I use all these oils on my children and started with purchasing a wholesale enrollment kit. I would love to help you start learning more about essential oils. You can CLICK HERE to see how so many have started their essential oil journey.

Top 5 Essential Oils for Back to School The Paleo Mama

Filed Under: DIY Beauty Recipes, essential oils, Homesteading, Natural Living

Whipped Sleepytime Rub

July 3, 2014 by Jackie Ritz 125 Comments

Winding down at night can be tough at times. I know my mind keeps going for minutes and sometimes hours after I lay my head down on my pillow. The same goes for our kids.

Sometimes we expect that as soon as we shut the door, they are going to be sweet little angels and fall asleep. Most the time we are proven wrong!

Our nightly routine has become essential at our house. I notice that the nights we go from dinner to bed is CRAZY. The kids are not ready to rush rush rush and then get in bed. So, I stopped expecting it from them and started taking our bedtime routine a little more seriously.

Now we eat dinner at the table as family and then we slowly start getting ready for bed. The kids take a nice relaxing bath, sometimes a detox bath, with certain essential oils in it, and then we get all snuggled up in our pajamas and read books.

During our reading time I apply essential oils to my kids. They absolutely love this! The 3 main oils I choose to apply are Frankincense, Lavender, and Vetiver because these oils promote a nice, restful sleep.

Whipped Sleepytime Rub

makes 1/2 cup

INGREDIENTS: 

  • 1/4 cups of Cacao (or Cocoa) Butter (where to buy)
  • 1/4 cups of coconut oil (where to buy)
  • 20 drops of therapeutic grade Lavender (where to buy)
  • 12 drops of Vetiver (where to buy)
  • 10 drops of Frankincense (where to buy)

Other oils to use: you can substitute any of the above oils with Ylang Ylang, Roman Chamomile, Cedarwood, orClary Sage. All these oils promote relaxation and a restful night’s sleep!

DIRECTIONS: 

  1. Add the coconut oil and the cacao butter to a small pan and simmer till melted.
  2. Let rest on the counter for 10 minutes.
  3. Add the essential oils to the pan and then put it in the fridge for an hour.
  4. You want it to be firm but not too hard. Then whip it on high with an electric mixer until the mixture softens and forms peaks.

HOW TO APPLY: 

  • Take a small pea-sized amount and massage it into your feet or your children’s feet before bed.
  • Sleepy tight!

Whipped Sleepy-time Rub
2018-01-07 12:46:07
Yields 1
A luscious homemade body cream to apply to yourself before bedtime!
Write a review
Save Recipe
Print
Prep Time
15 min
Cook Time
10 min
Prep Time
15 min
Cook Time
10 min
Ingredients
  1. 1/4 cups of Cacao (or Cocoa) Butter
  2. 1/4 cups of coconut oil
  3. 20 drops of therapeutic grade Lavender
  4. 12 drops of Vetiver
  5. 10 drops of Frankincense
Instructions
  1. Add the coconut oil and the cacao butter to a small pan and simmer till melted.
  2. Let rest on the counter for 10 minutes.
  3. Add the essential oils to the pan and then put it in the fridge for an hour.
  4. You want it to be firm but not too hard. Then whip it on high with an electric mixer until the mixture softens and forms peaks.
By The Paleo Mama
The Paleo Mama https://thepaleomama.com/
Whipped-Sleepytime-Rub-www.thepaleomama.com_

Filed Under: DIY Beauty Recipes, essential oils, Natural Living, Paleo Baby Tagged With: bedtime, children, essential oils

Vitamix Giveaway – $479 Value

June 7, 2014 by Jackie Ritz Leave a Comment

Vitamix Turbo Giveaway

How to Enter for Your Chance to Win:

1. Click here to subscribe to the The Paleo Mama Newsletter or use the box below:


(If your already a subscriber just continue to step 2…)

2. Use the Rafflecopter widget at the bottom of this post to confirm these entries and unlock even more entries to increase your chances of winning!

***Make sure you visit all the blogs responsible for this giveaway!***

Healy Eats Real

Ditch the Wheat

The Paleo Mama

Rubies & Radishes

The Coconut Mama

Grass Fed Girl

All entries will be verified. This contest will be open until 6/30/2014 at 12am. This contest is only open to U.S. residents. The winner will be announced on all of the blogs mentioned above by July 2nd, 2014. The winner must claim his/her prize within 48 hours after he/she is announced. There is no purchase necessary to enter the giveaway. None of your information will be shared or sold to any third parties

I pay for these giveaways myself. These links are affiliate links meaning that I may receive a small commission if amazon makes sales from the resulting clicks. This will not change to the price of any amazon items for you. I only affiliate with products that I trust and believe would bring value to my readers.

a Rafflecopter giveaway

Vitamix Giveaway $479 Value

Filed Under: Giveaways

Tallow Butt Balm

June 3, 2014 by Jackie Ritz 5 Comments

Tallow Butt Balm | www.thepaleomama.com.001

I’m so excited to have my friend Kate from Venison for Dinner (don’t ya just love that name!) sharing this AWESOME recipe on my blog today. Kate is a stay at home mom of 2 little boys living a homemade life on the West Coast of British Columbia. She enjoys to cook and bake from scratch. Through hunting and homesteading, Kate and her family produce more than enough to fill their own meat and dairy needs, happily helping others start their own homesteading journey along the way. Kate also has a passion for essential oils and home healing with natural medicine. You can follow her on HER BLOG and Facebook page as she hones her homesteading skills, making her ‘whey’ through one mountain of raw milk at a time. Maybe you too will be inspired to butcher your own deer or try your hand at natural medicine!

Please welcome Kate…

You know the scene, you’re changing a diaper, you open it up and baby’s got a sore bum. It hurts YOU to see their bum all red and you want that pain GONE!

So what do you reach for? You grab the the diaper rash cream and you smear it all over. But did you know that many of those commercial creams contain petroleum products, as well as oils that are most likely rancid, alcohols, and so many more ingredients I can barely pronounce! (And I’m a good reader!) Here a popular diaper rash cream company discloses every ingredient. I was shocked at how these are allowed to be put on our precious babies skin! Your other option is to buy natural creams, which, lets be honest, aren’t always that natural, or cost you a good chunk of change.

IMG_7390

After our second child was born we got serious about making all our own natural personal care products! My sister made us a fancy salve that we used and while terrific, it was complicated to make. I then came up with my 3 ingredient Diaper Rash Ointment and while it’s such a basic and effective ointment to whip together…Mama’s got a new balm in town!

TALLOW!

IMG_7389

When we originally made tallow from the milk cow we had to butcher, we only used it for cooking. Then recently we were lucky enough to be gifted loads of grass-fed Jersey fat from a friends steer and since it was fresh I got to work processing it. (using the same process as this lard.) After it was cooled down I made a balm since I’d seen ideas for it all over the web, and before I knew it, it had become my go-to “Butt Balm”! The beauty of this thick salve is that it’s pretty much the same texture at all average room temperatures (unlike the coconut oil based diaper rash ointment I also use that drastically fluctuates) and it works as a barrier cream AND a ‘medicated’ cream for rashes.

So what is Tallow vs Lard? Tallow is the rendered fat from a ruminant (Cow, Deer, Sheep, etc) whereas Lard is the rendered fat from a single stomached mammal (Pig, Bear, etc). Tallow has a stronger taste that lard so while it doesn’t pair as well with sweet foods, its amazing for savoury cooking. Why is our Tallow so yellow? Jerseys (And Guernseys to my knowledge) can’t process Beta Carotene. That’s what makes carrots orange, and it’s also in the hay and grass they eat. Instead of digesting it, they deposit it in fat! That’s why jersey cream is especially yellow (even more so in time of lots of green grass) and in the fat in their meat!


Why would I want to smear beef fat on my baby’s bum?! I bet you won’t take me just saying “Because you should!!: So here’s the top reasons we choose to make our own Tallow Butt Balm;

  • Tallow is high in saturated fats with a similar profile to those just below our skin, therefore it’s easily absorbed leaving skin feeling well nourished. This helps regenerate new skin. It’s important to use GRASS FED tallow to really reap the benefits.
  • Quality Control! I recommend you purchase therapeutic-grade essential oils. 
  • Frugal! I save loads of money by making my own Butt Balm. Yes I was given the beef fat for free, but even if you tracked down and bought it I bet you’d still save money. Better yet, if you’re buying 1/4 or 1/2 a cow, ask to get the fat back with it! You’ll find more uses that just a butt balm.
  • I want to use natural/as close to nature, well raised, animal products wherever I can because I believe good fats are good for you! (And I know Jackie agrees!) Petroleum products have no place on a person’s body!
  • Let’s just say Mama takes a dab for her face and hands on a regular basis two 😉 Might as well kill two lotion birds with one stone right!?

Tallow Butt Balm

Makes enough to fill a 1 cup ‘Salmon’ or ‘Jam’ jar. The amount of essential oils makes it a just below 1% dilution.

INGREDIENTS:

  • 3/4 c+ a generous TB (200 mls) of Grass Fed Tallow
  • 4 tsp OR 1 generous TB (20 mls) of Organic, Cold Pressed Olive oil  (This helps it stay a wee bit softer)
  • 20 drops EACH Frankincense, Melaleuca and Lavender Essential oils. (See above note)


DIRECTIONS:

  1. GENTLY melt tallow and olive oil together over LOW heat, just until melted. If you’ve accidentally heated too much, no fear, but let it cool down until you can comfortably hold you finger in before adding in essential oils.
  2. Now slather away knowing you’ve made a terrific ‘butt balm’ for your baby! (I won’t tell if you put it on your own skin!)

tallow butt balm pinterest.jpg

Filed Under: DIY Beauty Recipes, essential oils, Homesteading, Living Sustainably, My Recipes, Natural Living, Paleo Baby Tagged With: babies, diaper rash cream, essential oils, natural, tallow butt balm

« Previous Page
Next Page »

Primary Sidebar

  • Facebook
  • Instagram
  • Pinterest
  • RSS
  • YouTube

Hi, I'm Jackie Ritz and welcome to The Paleo Mama! I'm a published author, certified herbalist, and voracious researcher of natural medicine and nutrition. I'm glad you're here and I hope you stick around for awhile!

Recent Posts

  • When God Says Pause: Why I Took a 5-Year Break from My Online Business
  • How to Quit Facebook but Keep Your Business Profile
  • Leaving the City for the Country
  • Natural Way to Heart Health

MEAL PLANS

Biblically clean meal plans that are for those love to cook real food

Read More

Footer

Our Blog

The Paleo Mama blog provides simple answers for healthier families through research, tutorials, recipes, and simple remedies for daily needs!

  • Health
  • Essential Oils
  • Recipes
  • Remedies
  • Natural Living
  • Meal Plans

Stick around!

You’ll get instant access to a library of natural remedies and real, paleo food, including our ebooks and free guides we send out.

  • Home
  • Disclosure/Disclaimer
  • Privacy Policy
  • Advertise
  • Contact Me

Copyright © 2025 · Wellness Pro on Genesis Framework · WordPress · Log in