• Skip to primary navigation
  • Skip to content
  • Skip to primary sidebar
  • Skip to footer

The Paleo Mama

Homegrown and Handmade

  • About
  • Blog
    • Podcast
  • Meal Plans
  • Essential Oils
  • Our Farm
    • Great Pyrenees Puppies
    • Goats
      • Goats for Sale
      • Goat Sales Policy
      • Nigerian Dwarf Bucks
        • Ranchocabra Lunar Eclipse

Jackie Ritz

Oxtail Soup

February 18, 2015 by Jackie Ritz 6 Comments

Oxtail Soup
Today I am so excited to welcome Ashley from Crowe About Farm on The Paleo Mama blog! Ashley and her husband raise grass-fed beef and pastured chickens, turkeys, ducks and eggs.  She is also taming her first milk cow. You are going to love this delicious recipe for Oxtail Soup! 
 
Wait…don’t leave!  I promise you this will be good.  Three years ago I would have promptly clicked the “x” the second I saw the title of this post…but, my friends, my life is forever changed due to one pot of soup.
 

Do you know that cattle have boney tails?  It’s true.  Do you also know that those boney tails contain delicious, marbley chunks of meat that can be used to create one killer pot of soup?  Also true!

Lucky for me I have a husband who pushes me to be the best version of myself, culinarily speaking, otherwise my palate would’ve never have had the pleasure of experiencing this tasty soup.  
 
You see, we are beyond organic farmers who raise most of our own food.  We become friends with the animals that bless us, and others, with nourishment.  Out of respect for those animals, we don’t waste one. single. thing.  
 
When I brought the first beef we raised home from the butcher, I stuck all of the “weird parts” in the back of the freezer.  I didn’t know what to do with them, and I was secretly hoping my husband would forget they were in there.  
 
That didn’t happen.  
 
Instead, and fortunately for me, he would pick one “weird part” to cook each Sunday.  Over the past 3 years, we have been experiencing some of the best, most nourishing meals of our lives…all from cuts that most people would never try.  
 
photo1
 
That first Sunday, I reluctantly tasted the tail…and it was out of this world!  I couldn’t wait for the next steer to make it home from the butcher.  I needed another oxtail STAT!
 
Now, don’t worry.  If you don’t have packages of tail residing in your freezer, you can easily substitute a roast or any other tough cut of meat.  It will still be mighty tasty!  
 
BUT…if you ever have the chance to get your hands on an oxtail, or any organ meat for matter, grab it, get yourself to the nearest kitchen and get cookin’!
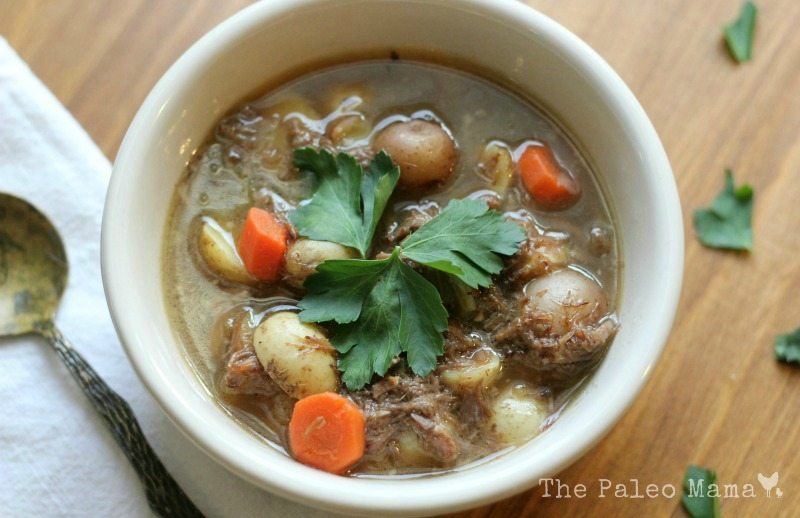
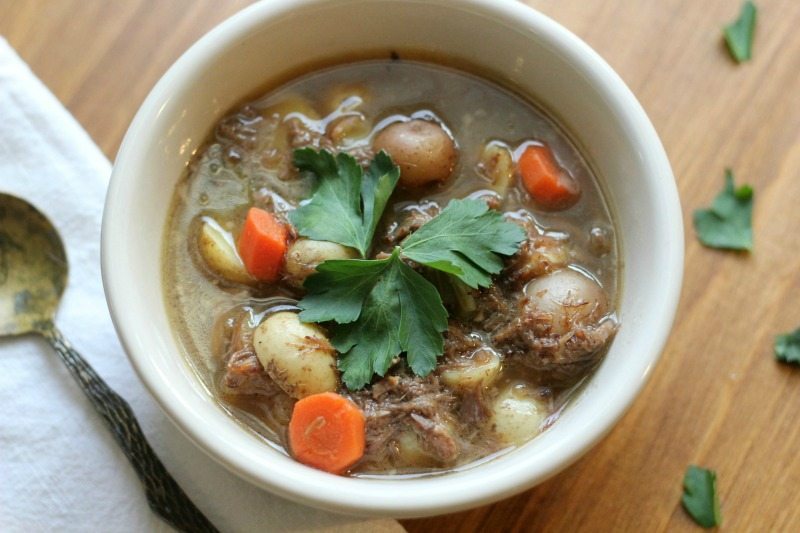
Oxtail Soup

You Will Need:
  • 3-4 lbs. Oxtail (Beef Tail) or Roast
  • 1 Medium Onion
  • 8 Carrots
  • 6 Stalks of Celery
  • 4 Cups Diced Potatoes (I used Yukon Gold & Red, but you can use any kind including Sweet Potatoes)
  • 2 Bay Leaves
  • 4 Sprigs of Parsely
  • 2 Tbs. Butter
  • 4 Tbs. Ghee, Coconut Oil or Tallow-melted
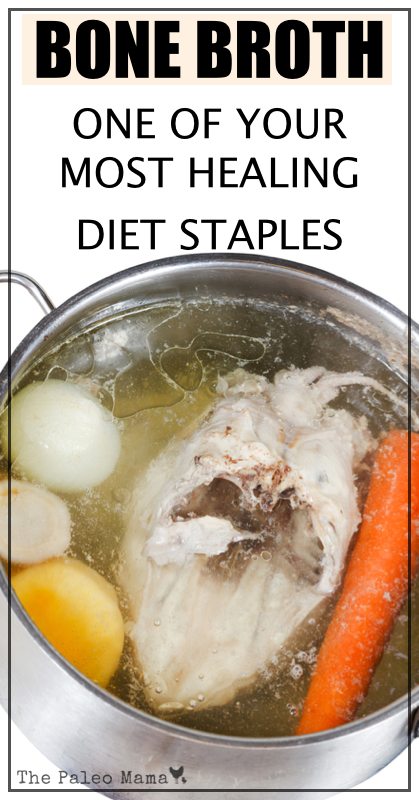
  • 8-10 Cups Beef Broth (see my recipe)
  • 12 Oz. Dark Beer
  • Salt & Pepper
Cooking Instructions:
 
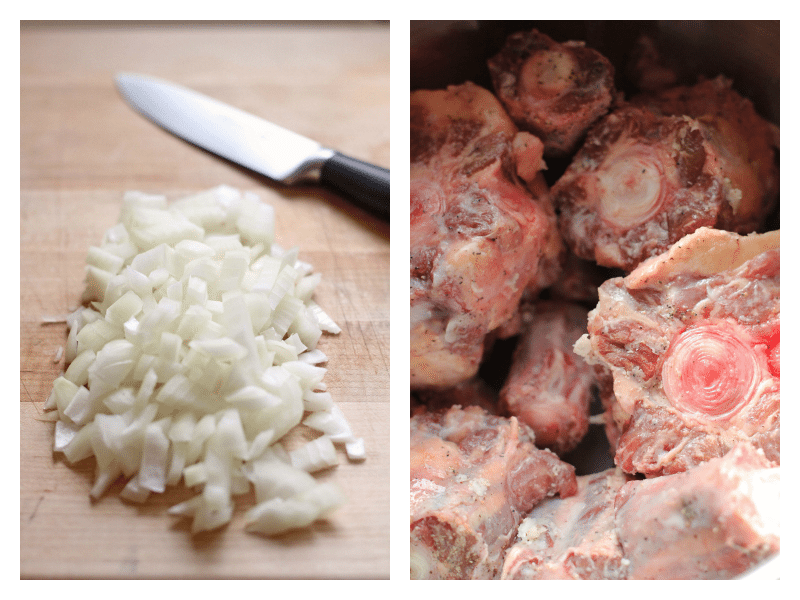
Step 1: Dice the onion.  In a large pot, sauté the onion in 2 Tbs. of butter until translucent.  Meanwhile, place the oxtail in a bowl and cover with melted oil (or ghee/tallow), salt and pepper.  Mix well with your hands.
 
photo2
 
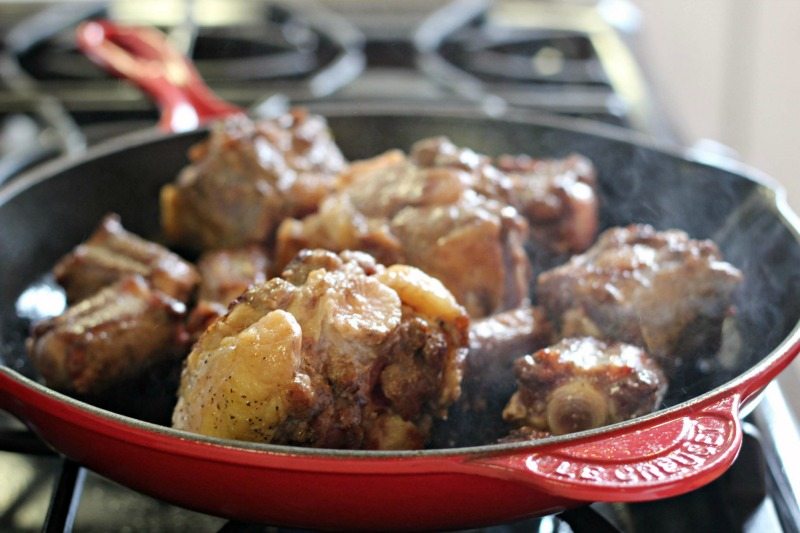
Step 2: Heat a skillet over high heat, add the oxtail and sear all sides (about 2 minutes per side).
 
photo3
 
Step 3: Add the seared oxtail to the pot.  Add about a half of a cup of beef broth to the skillet and deglaze, scraping up all of those brown bits.  Add to the pot and cover the oxtail with about 8 cups of beef broth and beer.  Add bay leaves and parsley to the pot.
 
photo4
 
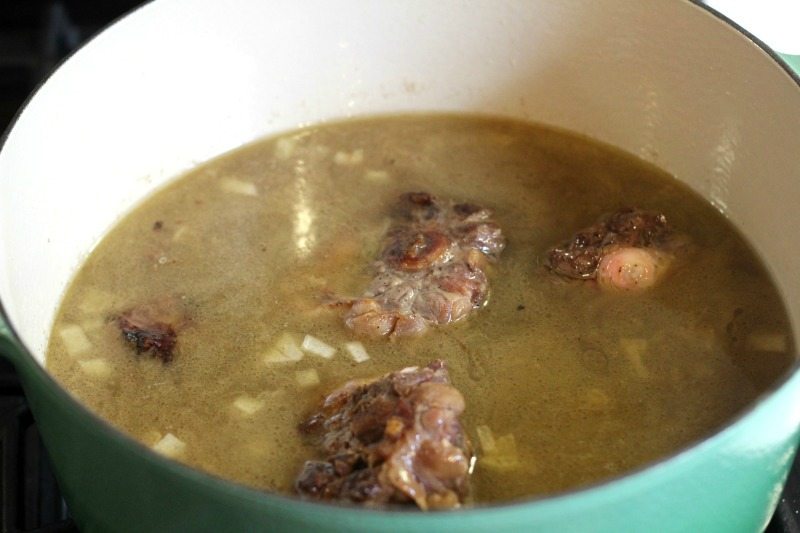
Step 4: Simmer on low for about 6 hours until the meat falls off the bones.  Add more beef broth as necessary as it cooks down.
 
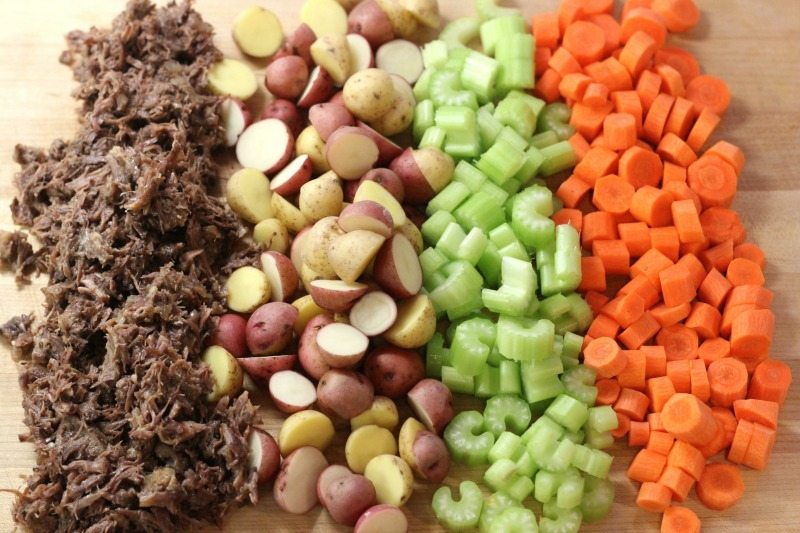
Step 5: When the meat is falling off the bones, remove the oxtail from the pot, pick off the meat and shred.  
 
photo5
 
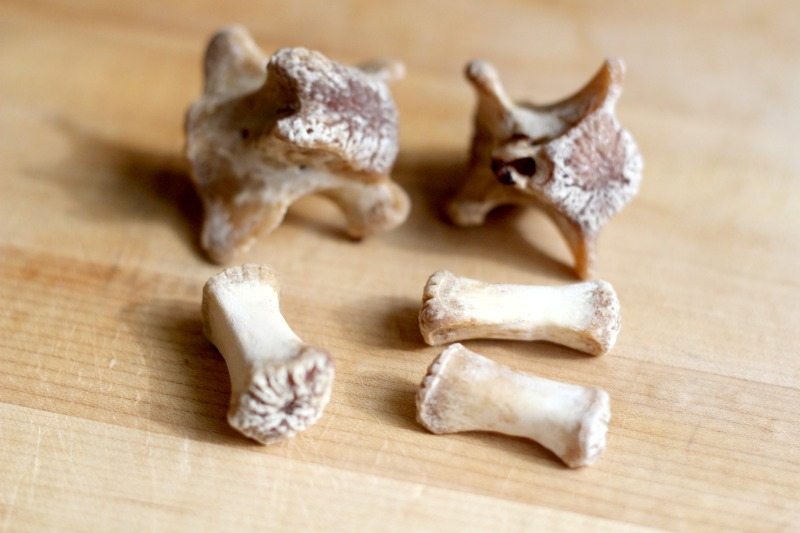
Wanna see what the bones look like?
 
bones
 
Step 6: Add the meat, carrots, and celery to the pot and simmer for 10 minutes.  Add the potatoes and simmer until potatoes are fork tender.
 
Step 7: Season with salt and pepper and ENJOY! CLICK HERE to print this recipe.
 
photo6
 
Will you be taking the “taste the tail challenge?”  I double dog dare you ;)!!  And if tasting the tail isn’t adventurous enough for you, I will be sharing my toddler approved tongue recipe on my blog very soon.    
 
ABOUT THE AUTHOR:
 
headshotAshley Crowe is a wife, mama, farmer and blogger at Crowe About Farm.  She and her husband raise grass-fed beef and pastured chickens, turkeys, ducks and eggs.  She is also taming her first milk cow.  
 
Ashley thinks producing food is a beautiful process and that it is important we have a connection with our food.  She is passionate about sharing her connection with her animals from pasture to plate. Hop on over to Ashey’s Facebook page, Blog, Pinterest page, or Twitter and follow her for more recipes and homesteading goodies! 


Oxtail Soup  The Paleo Mama

Filed Under: Grassfed Beef, Homesteading, Living Sustainably, My Recipes, Natural Living

You Can Grow Blueberries No Matter Where You Live

February 17, 2015 by Jackie Ritz 10 Comments

You Can Grow Blueberries

Today I’m welcoming Sally from Garden Valley Homestead as she shares her knowledge on how to grow blueberries ANYWHERE! 

Ever have one of those moments when you think, “I wish I knew that sooner!”. That’s what I thought when I learned you can grow blueberries just about anywhere in the United States. I was under the impression that blueberries only grow in cold climates of the northeastern United States. 

Not so! 

Know Your Chill Hours

Well, yes, it’s true they grow well—very well, in the northeastern United States. But, guess what? They grow very well in a lot of other states, too! You simply need to know your average number of chill hours for your area and choose a blueberry bush accordingly. 

What’s A Chill Hour and Where Can I Find One?

A “chill hour” is any hour where the temperature is under 45 degrees Fahrenheit. (If you’re growing any kind of fruit tree, it’s good to know your chill hours.)

If you’re a weather geek and own a fancy weather station, you can track it yourself. (I mean that in a nice way. Gardeners are usually interested in the weather. We kinda have to be….) Or, do what I do: contact your local agriculture extension department. They keep track of that sort of information for you.

Chill Hour Cheat Sheet

  • If you live in Zones 5-9, your average number of chill hours is 500
  • If you live in Zones 4-7, your average number of chill hours is 1000+

Why is this important? Blueberries need a specific number of cold hours each winter to regulate their growth. If a blueberry bush doesn’t experience enough cold in the winter, the flower buds might not open at all in spring, or they might open unevenly.

Your best bet to ensure your successful blueberry growing experience is to call your local agriculture extension office or Master Gardener’s program to ask for the average number of chill hours. They might publish the information on their web site. Look and see. 

Match Your Blueberry Plant to Your Chill Hours

Now that you have a firm grip on the chill hours for your area, choose blueberry plants that thrives in that environment. Most likely, you’ll choose a Northern Highbush or a Southern Highbush. I recommend buying bare root plants from a reliable grower. I order bare root plants and trees from Peaceful Valley Nursery 

  • If your chill hours average 800-1,000, choose a Northern Highbush.
  • If you chill  hours average 150-700, choose a Southern Highbush.

Rabbiteye variety is native to the southern United States. Chill hours needed for this type of blueberry bush are 350-700. 

However, Northern Highbush and Southern Highbush are the two most common varieties. Blueberries from these plants varieties are those you most often find in stores.

Pick Two or Three Varieties for Cross-Pollination

Blueberry plants need to be cross-pollinated with other blueberry plants of a different variety. So when you’re choosing your Northern or Southern Highbush plants, pick two or three different kinds to ensure they will bear fruit. Also, study the plants to learn whether they are early-, mid-, or late-bearing plants. Pick a variety to extend your growing and harvesting season. 

Now you know how many chill hours you have in your garden and which plants thrive in your environment. Next, you need to prepare your soil.

Blueberry Bushes Like Acidic Soil

Blueberry bushes of all kinds are acid-loving plants. They like a pH level of 4.0-5.0. If you don’t live in the arid West, your soil pH is probably near the 4.0-5.0 range already. But, if you live in the West, your soil is probably alkaline and you need to amend it to bring down the pH level. 

Use a simple soil testing kit like this one  to discover the pH level of your soil. You should be able find soil testing kits at your local garden center.

Growing blueberries in containers makes it easy to maintain soil pH. Bonus: You don’t have to dig a hole! I grow just about everything in SmartPots.  

Blueberry bushes like this soil recipe:

  • 1 part organic potting soil for nutrients
  • 1 part peat moss or coco peat for moisture
  • ½ lb. Acidic mix per cubic foot of soil.

Plant Your Bare Root Plant in Containers or Directly Into The Ground

  • If you’re using a container, choose one the allows for 20 inches of root depth. I plant blueberries in 30 gallon SmartPots. 
  • Fill your pot with soil and amendments. Use the recipe above, if you like.
  • Plant your blueberry bush to the same depth it was planted when you received it.
  • Mulch well (3 inches deep) with straw, shredded leaves, pine needles, wood chips or well-aged sawdust from wood NOT treated with a preservative. 
  • Water well. Blueberries need one-to-two inches of water each week.

If you’re planting straight into the ground:

  • Work up a planting area approximately 2-1/2 feet in diameter and one foot deep. 
  • Remove 1/3 to 1/2 of the soil. Add the soil recipe above.
  • Plant your blueberry bush to the same depth it was previously planted.
  • Water and mulch.
  • Don’t fertilize until spring.

Caring for Your Blueberry Bushes’ During It’s First Year in Your Garden

Blueberry bushes are moisture sensitive. They like their soil to stay moist, but not soaking wet. Your plant’s leave will tell you if the water content is too much of too little.

Things To Do:

  1. When your plant’s flowers begin to bud in the late winter or early spring, pinch off the flowers to encourage a strong root system. Sorry. You have to wait for the second or third season to begin harvesting your beautifully nutritious berries. Blueberry  blossoms
  2. Prune away any damaged, blotchy and dead branches, twigs, or side shoots.
  3. Fertilize your plant(s) in the early and late spring with an acid fertilizer like this one, and again in the fall. But, use half as much fertilizer in the fall.
  4. Freshen up the mulch.
  5. When the berries start to “show color”, protect them from birds with netting. I like to create PVC arches over the plants and secure them so the nets don’t blow away and birds can’t sneak inside the nets. Pinwheels stuck inside the beds next to the bushes seem to work to scare birds away. You can buy pinwheels from the Dollar Store then “plant” them with blueberries.
  6. If deer cross through your property, you already know to keep your blueberry bushes behind deer fencing.

If you follow these steps, you should enjoy a delicious harvest of berries to eat fresh or preserve any number of ways. Hint: Flash freezing washed berries on trays is EASY and maintains the most nutritional value. Plus, you’ll have a stash of fresh berries available well beyond the growing season.

ABOUT THE AUTHOR: 

Profile Pic_RoundSally Olson is a homesteader, writer, wife, homeschool mom, and an idealist. She blogs to encourage others to pursue their homestead-DIY-healthy living dreams. All her posts are gluten-free at Garden Valley Homestead. Sally, her husband of 25 years, two sons, horses, Labradors, and hens are blessed to call the Sierra-Nevada Foothills home. You can find her on Facebook, Pinterest, and Twitter! 

You Can Grow Blueberries | The Paleo Mama

Filed Under: Homesteading, Living Sustainably, Natural Living, Shopping Local

Homemade Bone Broth Recipe

February 11, 2015 by Jackie Ritz 3 Comments

This recipe was generously shared by Sylvie McCracken, author of The Gelatin Secret. CLICK HERE to check out this amazing book filled with simple, gelatin recipes! 

According to an old South American proverb, “good broth will resurrect the dead.” While that’s undoubtedly an exaggeration, it speaks to the value placed on this wholesome food, going back through the annals of time.

First and foremost, homemade bone broth is excellent for speeding healing and recuperation from illness. You’ve undoubtedly heard the old adage that chicken soup will help cure a cold, and there’s scientific support for such a statement. However, there are so many more benefits of homemade bone broth. 

Homemade bone broth benefits: 

  • Helps heal and seal your gut, and promotes healthy digestion
  • Inhibits infection
  • Reduces joint pain and inflammation
  • Fights inflammation
  • Promotes healthy hair and nail growth
  • Promotes strong and healthy bones

Sylvie McCracken, author of The Geletin Secret, stresses the importance of gelatin-rich bone broth. Using bones from pastured or wild ruminants and poultry will give you the most nutritious bone broth. 

If you are new to making bone broth, then Sylvie recommends you start with chicken bones, since it is the most palatable for beginners. 

What kind of bones to use: 

  • Chicken 
  • Beef 
  • Lamb
  • Fish

Homemade Bone Broth Recipe

shared from The Gelatin Secret! 

What you will need:

  • Slow cooker
  • 1–2 Tbsp Organic unfiltered Apple Cider Vinegar
  • Filtered water Quality bones: as little or as many as you want — 2lbs is a good starting point, either frozen or thawed


Slow Cooker Directions:

1. Turn the slow cooker on “High”

2. Add your bones to the slow cooker. They can be frozen or thawed. The more bones you add, the thicker the broth will be. I typically add the carcasses of 2 roast chickens and some extra chicken heads and feet I get from my local farmer.

3. If you’d like, add some vegetable scraps like onions, carrots, and celery for flavor. I usually keep it pretty minimal so I can salt and flavor later as needed depending on what I’ll be using it for.

4. Add 1–2 Tbsp apple cider vinegar. This is optional but recommended because the vinegar helps extract the minerals from the bones, but it also makes the broth slightly less palatable so don’t go overboard.

5. Add filtered water to the slow cooker until the bones are covered, leaving about an inch of room at the top.

6. Let it cook for at least 24 hours, ideally 48 or even longer!

7. Once you’re ready to harvest your broth, pour it through a strainer into a pot or bowl and allow it to cool.

8. Use it or freeze it for later! (See How to Store Bone Broth).

9. When it cools it may have a thick layer of fat at the top. You can certainly eat it but sometimes I find it tough to digest so I skim it off and cook with it instead.

10. If you’ve used a good amount of bones, your broth will likely gel in the fridge. This is great! Don’t fret if your broth doesn’t gel after cooling.

CLICK HERE to see more gelatin-rich recipes that are simple and nutritious! 

Bone-Broth-One-of-Your-Most-Healing-Diet-Staples-www.thepaleomama.com-.001

Filed Under: My Recipes

Homemade Baby Powder

January 20, 2015 by Jackie Ritz 15 Comments

Homemade Baby Powder

Sometimes you just need a dry barrier on your little ones bums and making your own homemade baby powder is so easy. Plus, the store-bought baby powders have TALC in them. Let me tell you about talc….

Think asbestos. 

Think cancer.

Don’t believe me? Go to Cancer.org and see for yourself. Breathing in talc is TERRIBLE for your lungs and your putting it on a baby’s genital area, is even worse. 

Now, now– don’t go feeling all guilty on me and start thinking you are a bad mom. You are now an informed mom, so you can make the changes you need! 

This recipe is simple, easy, and nourishing to your baby’s bottom and it’s cloth diaper safe (see my cloth diaper system HERE)! 

If you have a really irritated bum, then you might want to try my Healing Salve or Tallow Butt Balm recipe! 

Homemade Baby Powder 

makes a little over a cup! 

INGREDIENTS:

  • 1/4 cup of calendula flowers (where to buy)
  • 1/4 cup oatmeal (where to buy)
  • 1/2 cup of bentonite clay (where to buy) 
  • 1/4 cup of arrowroot powder (where to buy) 
  • 5 drops of therapeutic-grade lavender or chamomile essential oil (where to buy at a discount)

DIRECTIONS: 

  1. Put the calendula flowers and the oatmeal in a food processor and process until it is finely ground. 
  2. Add the clay and the arrowroot to the food process and pulse a few times to combine. 
  3. Put in a shaker bottle and apply as needed! 
  4. Let’s face it — some adults might need this too! 

Homemade Baby Powder  The Paleo Mama

Filed Under: DIY Beauty Recipes, essential oils, Living Sustainably, My Recipes, Natural Living, Paleo Baby

How to Homestead on a Rental Property

January 19, 2015 by Jackie Ritz 6 Comments

Homestead on a Rental Property

Laura Coppelman Photography took all these pictures for us! Aren’t they amazing?! 

It’s been nearly 1.5 years since we ditched the city to start a farm! Many people don’t realize that we don’t actually own our home. We are renting and have been able to successfully tap into our farming dreams while we live here and save up to purchase our dream farm!

So far, we have had meat rabbits, meat chickens, egg layer chickens, and goats. In the next month we are getting Katahdin sheep! Oh, and we have a Great Pyrenees who is our “livestock guardian dog” and keeps on eye on all these animals for us.

Laura_Coppelman_141213-2

We live on 3 acres in our rental home. It has 2 acres that are fenced, a HUGE chicken coop, and a 3 stall barn! We just fenced a small paddock area that we are planning on keeping a future breeder buck for 5 Alpine does. We found this place on Craiglist and pay $1,250 a month for it!

So, my friends, as you can see, you can pursue your homesteading and farming dreams on a rental property! In fact, I highly, recommend it as I think it’s a great way to get your feet wet and get a better understanding on what actually goes into homesteading….cause, guess what, it ain’t aways that pretty! 

 How to Homestead on a Rental Property

Laura_Coppelman_-13

Search Craigslist, Zillow, and Trulia 

First step is finding a place that is going to let you do this. We spent hours upon hours searching these websites. We had a criteria that we searched and used keywords like “farm, barn, chicken coop, acres, etc“. We, also, made sure that we that we only searched homes that had over 1 acre. We wanted something with 5-10 acres but we settled on 3 acres. It’s enough to really get started! 

Laura_Coppelman_-4724

Check Local Animal Laws and Ordinances

Please, oh please, make sure you don’t move somewhere and hope to purchase livestock and then realize that you can’t have it in that area! Check, and then double check, that livestock, chickens, and goats are allowed at that address. Drive around the home and check out homes and neighbors. Do you see chickens? How about a pig? Even better! 

Call the Home Owner and Tell Them Your Ambitions

This is super important. We disclosed immediately that we were wanting to have a small farm on the property. In our case, this was no issue since our rental property was previously used as a small farm. In the Craigslist ad that we found for our rental property, there were pictures of the red barn, the chicken coop, and the fenced pasture. So, I figured, they were okay with us using it the same way. 

However, don’t assume from looking at the pictures, that farming is permitted. Make sure you ask about it! 

Laura_Coppelman_141213-3

Start with Just a Few New Animals

We have 3 acres so we haven’t been able to do everything that we want to do. However, we are BUSY so this rental home has been perfect and kept us from making some stupid decisions….um, yes I almost purchased a Jersey cow. I can’t believe I nearly cheated on my dairy goats! 

If you have more than 5 acres, then you, pretty much, have the land for any livestock, however, I recommend that you start slow. 

For us, that mean with chickens and goats. We purchased our first chickens from a hatchery. We, quickly, thought that 15 chickens weren’t enough so we added 10 more. Chickens are such good pets! This year, we will be incubating more! Chickens, are so entertaining and addicting! 

Next we got dairy goats (read my 1st experience milking them) and then start our journey into breeding meat rabbits. All of these animals take up smaller amounts of space and don’t tear up the property. As much as I LONG with all my heart for adding pigs — I just don’t know how our landlord would like that idea. They do tear up the grass and land, plus they require better fencing then what we have. Pigs are escape artists! 

 Make Temporary Improvements to the Homestead

Laura_Coppelman_-5

Consider making any fencing you do easily removable. Thankfully, our rental home already had a really good fence, but we put in a small paddock using chain link that we will remove when we move out. 

We use pallets for EVERYTHING! They are free from our local furniture store and you can do so much with them. 

Conclusion

See — you can homestead on a land that you don’t own!  You might enjoy it more than owning your own home and farm…it’s nice to, simply, pick up the phone and call the landlord when we have any issues! We aren’t spending money on home repairs or home improvements…we are saving that money and putting it towards the purchase of our dream farm! We, also, refuse to get into debt again after paying off more than $50,000 of debt in just under a year, so everything we do is with cash! 

We are so happy that made me this decision! I know you will be too! 


Filed Under: Homesteading, Living Sustainably, Natural Living

Fancy Bacon Peas

January 13, 2015 by Jackie Ritz 5 Comments


Fancy Bacon Peas

Have you ever ate something that made you angry? Like it was so good that it made you make a face that said, “Holy moly…how did you make this?“. Yea, that is the kind of reaction I get to my Fancy Bacon Peas. This simple, side-dish is sure to impress your family and friends…and it has bacon in it, so you can’t go wrong!

 Fancy Bacon Peas: 

INGREDIENTS: 

  • 16oz package of frozen peas, thawed out
  • 4 slices of thick-sliced bacon 
  • 1 shallot or 1/4th of a sweet onion
  • 1/4 cup of Mayonnaise (make it yourself)
  • 2 teaspoons of Lemon Juice 
  • 1/4 teaspoon of Pepper 
  • 1/4 teaspoon of Sea Salt 

 DIRECTIONS: 

  1.  Cook the bacon in a cast iron skillet over medium-high heat. 
  2. Remove bacon when crisp but leave the heavenly bacon grease.
  3. Saute the onions for 3-5 minutes until soft and tender. 
  4. Add the peas and cook for 3 minutes until soft and cooked. Remove from heat and put in a serving bowl. 
  5. Toss the mayo, pepper, salt and lemon juice till combined and smooth. 
  6. Add bacon to the serving bowl with the peas. 
  7. Pour the dressing over the peas, bacon and onions and toss. 
  8. Serve warm! 

Fancy Bacon Peas  The Paleo Mama

Filed Under: 21 Day Sugar Detox, My Recipes, Nutrition, Paleo Education

« Previous Page
Next Page »

Primary Sidebar

  • Facebook
  • Instagram
  • Pinterest
  • RSS
  • YouTube

Hi, I'm Jackie Ritz and welcome to The Paleo Mama! I'm a published author, certified herbalist, and voracious researcher of natural medicine and nutrition. I'm glad you're here and I hope you stick around for awhile!

Recent Posts

  • When God Says Pause: Why I Took a 5-Year Break from My Online Business
  • How to Quit Facebook but Keep Your Business Profile
  • Leaving the City for the Country
  • Natural Way to Heart Health

MEAL PLANS

Biblically clean meal plans that are for those love to cook real food

Read More

Footer

Our Blog

The Paleo Mama blog provides simple answers for healthier families through research, tutorials, recipes, and simple remedies for daily needs!

  • Health
  • Essential Oils
  • Recipes
  • Remedies
  • Natural Living
  • Meal Plans

Stick around!

You’ll get instant access to a library of natural remedies and real, paleo food, including our ebooks and free guides we send out.

  • Home
  • Disclosure/Disclaimer
  • Privacy Policy
  • Advertise
  • Contact Me

Copyright © 2025 · Wellness Pro on Genesis Framework · WordPress · Log in