• Skip to primary navigation
  • Skip to content
  • Skip to primary sidebar
  • Skip to footer

The Paleo Mama

Homegrown and Handmade

  • About
  • Blog
    • Podcast
  • Meal Plans
  • Essential Oils
  • Our Farm
    • Great Pyrenees Puppies
    • Goats
      • Goats for Sale
      • Goat Sales Policy
      • Nigerian Dwarf Bucks
        • Ranchocabra Lunar Eclipse

Natural Living

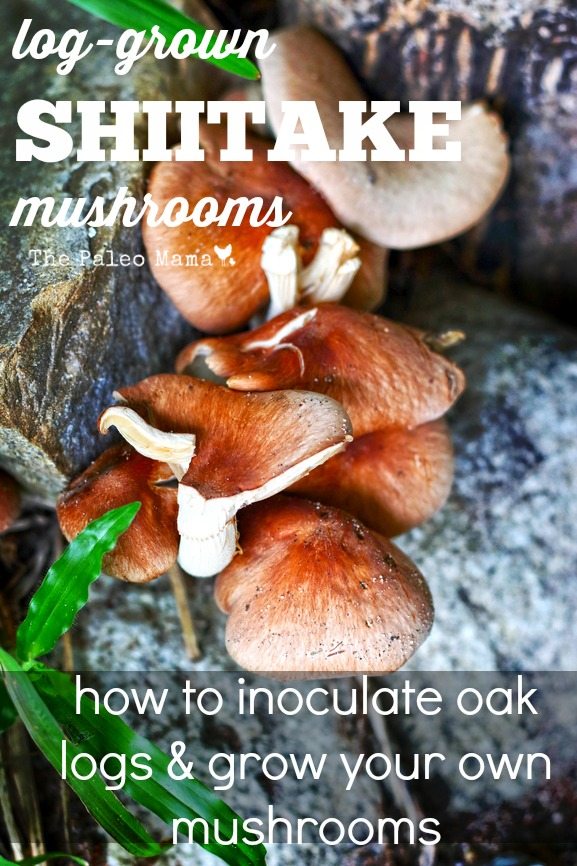
Log-Grown Shiitake Mushrooms

June 22, 2015 by Jackie Ritz 6 Comments

Moving onto a beautiful, fully-functioning farm like Frank and I just did is a bit like having your first child; it needs your love and care immediately—even if it didn’t come with a Farming for Dummies instructional manual. That’s what happened when we went for a walk on our land; we found oak logs already inoculated with lots of potentially tasty Shiitake mushrooms, and not much “this is how to take care of them” from the former owners on how to take care of these log-grown shiitake mushrooms. 

So, as with many other farming chores, we began our own research into raising Shiitake mushrooms successfully. I want to share some of the basic information we have uncovered that should allow us—and you, if you would like to join us by growing your own—to harvest some delicious and healthy log-grown Shiitake mushrooms.

In this blog post I will provide some basic, practical answers to these five important questions:

  1. Why grow Shiitake mushrooms?
  2. How do I prepare my logs for growing Shiitakes?
  3. What do I do with my inoculated logs?
  4. Why do I have to shock my inoculated logs before harvest?
  5. When can I harvest my Shiitakes?

By following the information in these answers, we will be able to reap a bountiful harvest of these delicious and healthy Shiitake mushrooms.

1. Why grow Shiitake mushrooms?

Are you thinking, “Why on earth would I want to grow fungi?” If you’ve never learned to appreciate the taste of the many different kinds of edible mushrooms, that’s the place for you to start! Get beyond your knowledge that mushrooms are fungi, and get some sample tastes of how delicious and healthy these mushrooms are. Shiitake mushrooms are the third most popular mushroom in the world, and they are perphaps the healthiest of them all! Here are four unbelievable benefits to Shiitakes:

  • They are loaded with B-Complex vitamins.
  • They are believed to deliver anti-cancer properties to your body when you eat them.
  • They are low in calories, yet high in fiber content and loaded with protein.
  • They contain a multitude of minerals. Just one raw serving contains 1/20 of the magnesium and potassium you need each day, along with 10 percent of the phosphorus. But eat them dried or raw because they lose up to ¾ of their nutritional value.

2. How do I prepare my logs for growing Shiitakes?

The name shiitake mean “mushroom of the oak,” but shiitake mushrooms will also grow on sugar maple, hophornbeam, ironweed, alder, poplars, and yellow birch. But the mycelium’s (the vegetative part of a fungus, consisting of a network of fine white filaments) favorite food for producing a flush of lovely brown shiitake caps is oak, either white or red.

It’s not necessary to cut down an oak tree in order to get the logs you need for your mushroom growing. You can read some expert tips for acquiring logs from unique sources here (page 10). However you cannot grow shiitake on dead wood, such as old logs in your yard or woodland, or on firewood, because local fungi have contaminated these logs or the logs have dried out.

Early spring, before the trees leaf out, is the season most suggested for inoculating bolts for mushroom production. The logs should be 4-6 inches in diameter, which gives a prime amount of sapwood (the lighter colored outer layer), which is the primary part of the log where the fungi will colonize.

You will need to have a supply of shiitake mushroom spawn (mushroom mycelium) which is already impregnated in wooden dowel plugs, either in liquid form or mixed with sawdust. If you are using impregnated wooden plugs, use a 3/8-inch drill bit to drill to a depth of 1-1/4 inches before pressing in the plugs. Drill in 10-inch intervals down the length of the log. Leave 2 inches between each row, and stagger the holes from one row to the next. Then you will need to cover each plugged hole with very hot food grade wax (cheese wax or even beeswax will work) to ensure an airtight, flexible seal. CLICK HERE to order mushroom spawn. 

3. What do I do with my inoculated logs?

Now you are ready to create your laying yard—the place where the inoculated logs will incubate, and where you can give routine maintenance to them. This should be in a place of year-round shade to keep the logs from drying out due to sun and wind. A laying yard under the canopy of a forest is best. If you have just a small number of logs and no wooded area, behind the north side of a house or shed, along with a shade cloth, can provide year-round shade. Remember that you need to be relatively close to both electricity (for drilling), and water (necessary to irrigate and soak the logs).

shrooms

There are several ways you can lay out your logs. A stack of criss-crossed logs works well, as well as forming an X-pattern by stacking logs end to end, leaning each log against a strong wire. Be sure to label each log with the date of inoculation, spawn type, and force date (see below). Keep the logs off the ground, stacking them on pallets or non-inoculated logs.

Your logs need an incubation period of 8 to 18 months, or spawn run, during which the fungus colonize the wood. You will need to maintain favorable conditions so the mycelium can spread through the logs as quickly and evenly as possible. Your maintenance will include:

  • Keeping the moisture content well above 30 percent.
  • Using artificial shading if the natural canopy of trees thins out.
  • Protect the logs against competing fungi.

There are at least five common fungi competitors you may encounter: Black Bulgur or Bachelor’s Buttons, Trichoderma, Hypoxlyon, Turkey Tail, Split Gill fungus. You can find further information about fungi competitors here (pages 28-29). 

4. Why do I have to shock my inoculated logs before harvest?

Shocking your logs, or forcing bolts, is a matter of speeding up Mother Nature. Shiitake mushrooms are one of the few mushrooms that can be made to fruit on demand. Shocking involves soaking logs in cold water for an extended period of time (12-24 hours) to induce fruiting. By shocking your logs on a schedule, you can generate a steady supply of shiitake mushrooms on a predictable rotation.

There are several ways to determine if your logs are ready for shocking. One option is to observe the mycelium growth (white discoloration) on the end of the bolt. During March-April, and October-November, logs are allowed to fruit naturally with being soaked. During the warmer months, May-August, groups of logs are forced by shocking them every seven weeks. You will find complete information for these shocking procedures here (pages 30-34). We shocked our logs this week by putting all 20 of them in the creek that runs through our property. You can, also, use a child’s swimming pool or a livestock trough. 

5. When can I harvest my Shiitakes?

Shiitake mushrooms are usually ready to be harvested 7-10 days after shocking. Gills should be visible, and the outer edge of the mushroom should be slightly curled under. It’s normal to expect ¼ to ½ pound of mushrooms per log, or a higher yield with two shockings per season. Over the course of five years, each log should produce 3-4 pounds of fresh mushrooms.

When harvesting mushrooms, the goal is to efficiently remove the mushrooms without damaging the bark. Most experiences growers simply twist and pull the mushrooms off the log using their hands. Gently brush off any dirt and place each mushroom in an open basket or paper sack or other vented container. If you see thrips (tiny, slender black insects crowing in the gills) on your mushroom, they will usually dislodge by tapping lightly on the top of the cap.

For high-quality mushrooms, it’s important to get the in the refrigerator as quickly as possible, certainly within one hour of harvesting. Do not seal them in an airtight container. If you want to freeze your mushrooms, you must steam them first with a mixture of 1 teaspoon lemon juice or 1/5 teaspoons of citric acid per pint of water for 5 minutes to reduce darkening. Steam whole mushrooms for 5 minutes, pieces for 3.5 minutes. Cool promptly, drain and package, leaving ½ inch headroom.

You can also dry shiitakes, which will preserve them for up to a year. You will find great information on storing and preserving mushrooms here (pages 43-44). 

Now all that is left…

…is enjoying these wonderfully tasty and healthy shiitake mushrooms. While you are waiting to harvest your Shiitake mushrooms, start collecting some delicious recipes for ways to add them to your diet. One of the first things I want to make when we harvest our first crop of Shiitake mushrooms is some delicious Shiitake Soup!
How to Grow Shiitake Mushrooms

Sources:

  1. https://www.healthy-holistic-living.com/mushroom-information.html
  2. https://www.treehugger.com/green-food/how-to-grow-shiitake-mushrooms.html
  3. https://northernwoodlands.org/articles/article/growing_shiitake_mushrooms
  4. https://www.uvm.edu/~susagctr/resources/ShiitakeGuide.pdf
  5. https://www2.ca.uky.edu/agc/pubs/for/for81/for81.pdf
  6. https://www.centerforagroforestry.org/pubs/mushguide.pdf

Filed Under: Homesteading, Living Sustainably, Natural Living

Ylang Ylang Essential Oil

May 27, 2015 by Jackie Ritz 4 Comments

Ylang Ylang Essential Oil

Ylang Ylang essential oil is derived from the star-shaped flowers of the tropical Ylang Ylang tree and is used extensively in making perfumes and in aromatherapy. Similar to Jasmine, Ylang Ylang is considered an aphrodisiac and has been used for centuries in religious and wedding ceremonies. The essential oil of ylang-ylang is extracted by steam distillation of fresh flowers of the ylang-ylang tree.

The primary chemical components of Ylang Ylang essential oil are: germacrene, caryophyllene, linalool, and sesquiterpenes.  Along with its widespread use in perfumes and aromatherapy treatments due to its very pleasing and delicate fragrance, ylang-ylang essential oil is also used for a variety of purposes.

What are the benefits of Ylang Ylang Essential Oil?

Some of the primary benefits of Ylang Ylang essential oil are:

  • It reduces sad and anxious feelings and relaxes both the body and soul, thereby driving away tension, sadness, and tension. It also has an uplifting effect on mood and induces feelings of joy and hope.
  • It cleanses the skin, protecting it from environmental threats and supporting the immune system. 
  • Helps to balance hormones. 
  • It can be used effectively to treat mild acne.

What are Ylang Ylang’s cautions?

Some cases of sensitivity, nausea and headache have been observed when taken in excessive amounts. Otherwise, when taken in recommended doses, it is non-toxic and is not reported to cause any irritation.

Top Uses for Ylang Ylang Essential Oil

  1. Ylang Ylang can be used as a healthy skin toner. The antioxidants in it will help to protect your skin from the onset of the signs of wrinkles. Mix a cup of chamomile tea with 5 drops of Ylang Ylang essential oil, allow it to cool, and use it as you would any other skin toner.
  2. Using Ylang Ylang essential oil as a hair treatment will promote the growth and health of your hair.  You can either add 2-3 drops of the oil to your regular shampoo, or you can massage a mixture with 2-3 drops of Ylang Ylang essential oil with about a tablespoon of coconut oil into your hair and scalp, leave it in for 20 minutes and then, wash out with warm water and a mild shampoo.
  3. It can be used to make a homemade exfoliating body scrub. Add 5-6 drops of Ylang Ylang, and 5-6 drops of Clary Sage oils to a mixture of ¼ cup sea salt and 2 tablespoons or raw honey. Mix well with a spatula, and store in a glass jar. Use this as a part of your bathing routine.
  4. It can have a very calming effect when you are tense, stressed or faced with negative circumstances. Mix 2-3 drops in a carrier oil and massage into the shoulders or back, and apply to the feet. Add 3-4 drops to your diffuser and diffuse it aromatically to promote peace.
  5. It can be used to calm down children and promotes digestive support in a kids. Dilute 1 drop in a teaspoon of coconut oil and massage into the baby’s feet. You can also diffuse 2-3 drops in the baby’s room throughout the day and night.
  6. It can help your body balance hormones. Make a rollerball by filling it ¾ full with fractionated coconut oil and then adding 3-4 drops of Ylang Ylang. Use this to apply topically to your lower abdomen every day.
  7. It is a great oil to use to encourage relaxation even when you are working and or busy. Add 3-4 drops to your diffuse and diffuse throughout the room. You can also apply a drop before bed or add a drop to your shirt collar to promote relaxation.
  8. It is very effective at relieving tension. Massage a single drop into the muscle area of tension; this will give you both the topical and aromatic benefits of Ylang Ylang essential oil.

Where to  purchase Ylang Ylang essential oil

Home-made Ylang Ylang Essential Oil Recipe

Essential oils are a wonderful gift and so beneficial to all of us—including our kids. I regularly use essential oils with my children, and they love them. Their nightly ritual includes a relaxing bath, followed by rubbing essential oils on their feet before bed. Ylang, Ylang is one of the gentler essential oils that are perfect for using with your children. Read my blog on Kids and Essential Oils for general guidelines for use and information on what oils blend well for specific purposes.

Ylang Ylang and Emotions

Ylang Ylang is the oil of the inner child. It is a powerful remedy for the heart. It encourages play and restores a childlike nature and innocence. Ylang Ylang is also a powerful remedy for releasing emotional trauma from the past. It allows emotional healing to flow naturally, nurturing the heart through the process. (source) 

Companion Oils: Tangerine, Wild Orange, Geranium, Rose

So tell me?! How do you like to use Ylang Ylang essential oil?

Ylang Ylang Essential Oil

Filed Under: DIY Beauty Recipes, DIY Home Recipes, essential oils, Natural Living

Sugar Scrub Bars

May 22, 2015 by Jackie Ritz 14 Comments

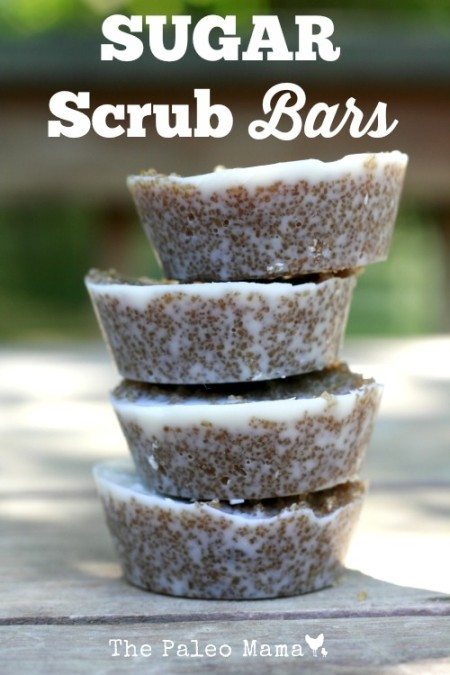
I love making my own sugar scrub. I, also, love making my life easier which is why I made these sugar scrub bars. All I have to do is grab a bar before getting in the bath or shower. No more opening up a mason jar and scooping out the scrub and letting water get into the scrub. Now I just take a bar and start lathering it over my body. It’s easy to hold and easy to make! 

Sugar Scrub Bars

makes 8 large bars (can cut bars in half) 

  • 2 cups of white or Turbinado sugar (where to buy) 
  • 30 drops of essential oil (where to buy) – you pick what fragrance you want. Be careful with citrus oils during the summer months since it is photosensitive. 
  • 1/2 cup of brown sugar
  • 1 cup of coconut oil (where to buy)
  • 2 teaspoon of vanilla 
  • 2 tablespoons of honey
  • silicone muffin mold  

Directions: 

  1. Mix the sugars up in a bowl. 
  2. Melt the coconut oil over low heat. Don’t let it get too hot. If it does, set aside to cool before adding to sugars. You don’t want it to melt the sugar. 
  3. Add the vanilla, essential oil, honey, and coconut oil. 
  4. Scoop into your silicone muffin mold and pop in the freezer for 20-30 minutes. 
  5. DONE! I keep mine in the fridge during the summer months when my house is warmer.

Sugar Scrub Bars

Filed Under: DIY Beauty Recipes, essential oils, Natural Living

Lavender Body Butter

May 20, 2015 by Jackie Ritz 21 Comments

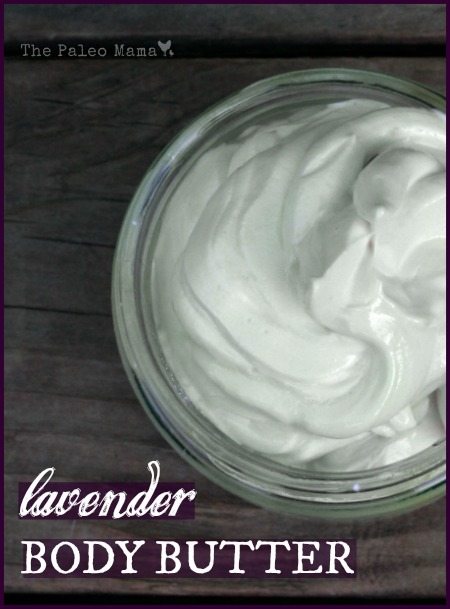
I have an obsession with making body butter. There’s something about putting together the simplest of ingredients and then whipping it up into this luxurious, natural, and nourishing lotion. This Lavender Body Butter does just that; it’s simple to make, only four ingredients and uses lavender essential oil. 

I’ve listened to many of you in a few other of my whipped butter recipes and I see that many of you do not like the greasy feeling that coconut oil can leave. If you add in a few tablespoons of arrowroot powder into this recipe, it will cut the greasy feeling and absorb quicker into you skin! 

CLICK HERE to see the 10 uses and benefits of lavender essential oil! 

Lavender Body Butter

  • 2 cups of coconut oil (where to buy) 
  • 1/2 cup of shea butter (where to buy) 
  • 2 Tablespoons of Jojoba or Almond oil 
  • 25 drops of Lavender (where to buy) 
  • OPTIONAL: 1 Tablespoon of Arrowroot (where to buy) – as mentioned above, it cuts the greasy feeling on your skin.
  • BONUS RECIPE: Add 2 Tablespoons of Non-Nano Zinc Oxide and substitute beeswax for the almond oil  and you got yourself a healthy sunscreen recipe! 

Directions: 

  1. Melt the coconut oil and shea butter over medium – low heat. 
  2. Stick in a fridge (around 30 minutes) or a freezer (around 15 minutes) till the mixture becomes opaque and starts to harden along the sides. 
  3. Using a stand mixer, whip the mixture till it becomes creamy, light, and fluffy. 
  4. As you are mixing the mixture, drizzle the 2 tablespoons of almond or jojoba into the bowl. 
  5. Add the 25 drops of lavender essential oil and sprinkle the arrowroot into the bowl
  6. Turn off mixer. 
  7. Store in a glass mason jar and lather all over your body! 

Lavender Body Butter Pin

Filed Under: DIY Beauty Recipes, essential oils, My Recipes, Natural Living

8 Strategic Steps for Staying Out of Debt

May 12, 2015 by Jackie Ritz 2 Comments

If you have been following The Paleo Mama for a while you have probably read my blog post about how we paid off more than $27,000 of debt in just 6 months! It’s been one of my most-followed posts, and I know it’s because so many people feel buried in a pit of debt and just don’t know how to get out of the debt. We have now paid off more than $50,000 worth of debt and are proud to say that we are DEBT-FREE! 

We started the journey to financial freedom nearly 2 years ago, and we have realized that staying out of debt is just as important as getting out of debt. We believe that everyone can do this, but it takes real effort, and not everyone will be able to use the same principles as everyone else. We have different lifestyles, different sources of income, different family needs, and different dreams and goals for our lives.

However, in this blog post I want to give you 8 strategic steps for staying out of debt that we think will work for just about everyone. 

1. Make an honest assessment of your spending and develop a budget that supports your family on the income you have available.

A lot of people dread the idea of living on a budget that tells them when and how to spend every penny they make. But that’s not really what a budget does. A budget is your fastest way to take control of your money, get out of debt, and begin moving toward your goals and dreams for your future.

When we became debt-free and were ready to create a realistic budget for our debt-free life, we followed Dave Ramsey’s principles in his book The Total Money Makeover.  He has a great “Guide to Budgeting” Tool available online that you can use to set up your budget. There are others available, but this is the one that works best for us.

2. Use the “envelope” system for your weekly cash needs.

envelope

Every week we put the budgeted amount we have for weekly needs in envelopes—one envelope for each need. There is an envelope for my personal needs, my husband’s personal needs, groceries, entertainment, and dining out. When the money runs out…it’s out.

3. Carefully plan your grocery spending and meal planning for each week.

As you know, we are an 80 percent “Paleo Family.” It is important to me to provide my family with whole foods that are nutritious, as natural as possible, and free of preservatives and other junk. I’ve developed some secrets to saving money while eating Paleo. Some of these include: 

  1. Doing an online meal plan service where they send me recipes each week and a grocery list! 
  2. Raising our own meat chickens and egg-laying chickens. Before we raised chickens, I bought only whole chickens. I use every part—even the bones, which makes delicious, healthy broth.
  3. We buy our beef in bulk, purchasing 1/4th-half of a grassfed cow at a time.
  4. I shop local and in season, using coupons wherever possible.
  5. We grow as many of our own fruits and veggies as possible, and if we don’t have them in our garden, we pick our own produce. 
  6. I save money in other areas of our life so that I have money to splurge on healthy food.

4. Find economical ways to meet your family’s wardrobe and home decorating desires.

Frank and I are very frugal with our money, and we both come from homes who felt the same. My mother dragged my sister and me with her nearly every Saturday as she made the garage sale circuit. Most of our play clothes, toys, and home decorating items came from garage sales. No, they weren’t old hand-me-downs—many of them were originally high-priced items that had barely been used. 

Even today, when it is much more possible for us to shop at first-rate stores, I buy much of what we purchase USED from consignment shops, outlets, local thrift stores, and online websites.

5.  Learn to make many of your personal care products and your home cleaning products. 

I make as many home products as possible. This is such an important money-saving step, and will free up your budget money for some of those saving and dreaming goals you need to have. Some of the products I make myself include: 

  • Mouthwash and coconut oil bites for oil pulling
  • Toothpaste
  • Wool dryer balls
  • Body lotions, rubs and salves
  • Facial lotions and beauty products
  • Shaving cream
  • Deodorant
  • Soap
  • Floor cleaner and other Household cleaners
  • Laundry detergent

6. Establish a regular method for having an emergency fund and savings plan

Frank and I are not only concerned with having enough money to meet our needs today—we are so determined that we will have a plan for emergencies big and small, and savings for important things like paying off our house, investing for our kid’s college expenses, and preparing for our own retirement. 

We have learned that we will only save money when it becomes an emotional priority. It doesn’t matter what you make—you can save money! We were motivated to start saving by studying Dave Ramsey’s Financial Peace University. Here is one online lesson to whet your appetite for saving.

7.Find an additional source of income that is home-based and potentially income-producing.

Think about finding a creative way to bring more income into your life. When I first considered this, I began blogging, not sure how profitable it would be, but wanting to do it not only to earn income, but because I was passionate about the things I wanted to blog about. This is something you may want to try also.

When I was introduced to essential oils I became just as passionate about their value to my life, and their potential for providing me with more income. It’s important for you know that it is their health-giving potential that fuels my passion to this day. They have indeed provided me with income far beyond what I anticipated, but it only comes with determination, passion, and hard work! Working with this company has helped retire my husband from his job and come home and join the business. If you are ready to take on a new potentially financially rewarding venture, I can help you get started.

8. Get rid of your credit cards.

Credit card usage has become a way of life in America. Debt is the most aggressively market product in the history of the world. We are not suggesting that you get rid of every single credit card you have, but we are advising you to get rid of most of them and set boundaries on the 1-3 that you hang on to. That includes:

  • Only buy on credit when you have the cash to pay for it.
  • Pay off your credit card debt in full each month
  • Consider only using a credit card for recurring payments like utility bills, cell phones, and other similar expenses.

By doing that, you will not get imprisoned in credit card debt and the high interest rates that steal your money.

I want to close this blog with Dave Ramsey’s “7 Characteristics of Debt-Free people.” This describes who Frank and I want to be, and I hope you will want to have these characteristics also.

  1. They are wise.
  2. They are patient.
  3. They are confident.
  4. They are goal-driven.
  5. They are responsible.
  6. They are not materialistic.
  7. They are willing to make sacrifices

Filed Under: Budget, Budget Shopping, essential oils, Living Sustainably, Natural Living

Turmeric — Nature’s Powerhouse Spice

May 11, 2015 by Jackie Ritz 6 Comments

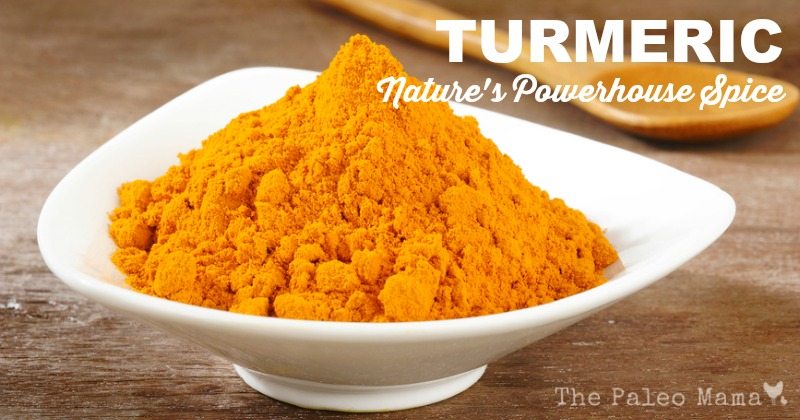
 turmeric powder in white dish on wooden background

Eating natural, organic, non-processed foods is one of the best ways to ensure that we are doing all we can to get and keep our bodies healthy. But as we all know, a good meal is more than a piece of meat, a baked sweet potato, and a salad of organic romaine lettuce, cucumber and tomato. There’s something we can do that will greatly improve the taste of our food while it provides our bodies with healthy, powerful quantities of antioxidants and nutrients to support our body’s systems. What is it? It’s the amazing herbs and spices that we can use that are very low in calories but dense in vitamins and minerals; like turmeric! 

I want to talk about one of these powerhouse spices in this blog post. It’s turmeric, often called the “Queen of Spices,” a member of the ginger family and a main ingredient in curry. Turmeric has been used as a healthy spice for thousands of years. As far back as AD 1280, Marco Polo discovered it while he was in China, saying: “There is also a vegetable which has all the properties of true saffron, as well as the smell and the color, and yet it is not really saffron.”¹

One of main ingredients in turmeric is curcumin, which gives turmeric its yellow color. 

There are so many good benefits to this powerhouse spice that we cannot cover them all in this short post. But I would like to answer these three questions:

  1. What kind of turmeric should I purchase?
  2. How should I use turmeric?
  3. What are 7 benefits I can get from turmeric.

What kind of turmeric should I purchase?

You can find turmeric in the spice aisle of your local grocery store, but you cannot guarantee the quality you may find. It’s very difficult to verify the purity and potency of grocery store spices. You should search for a high-quality, 100 percent organic-based turmeric supplement. Male sure your herbal supplement comes from a certified organic producer committed to quality processes. 

Use this checklist to find the best:

  • Contains only 100 percent certified organic ingredients
  • Comes in supplement form
  • Avoids fillers, additives, and other ingredients

Be careful to research thoroughly to find the best turmeric. There are two forms of turmeric you will want. As a supplement you take daily to reduce inflammation in your heart, joints, liver, and for cellular health, I recommend this one in liquid capsule formulation. 

How should I use turmeric?

 There are many uses for turmeric, including those I mentioned earlier. Let’s talk about just a few specific things I would recommend you try.

  1. It can be used in lotions, rubs and salves to sooth skin and reduce inflammation. It often can be found in preparations for eczema or psoriasis. If you are experiencing skin breakouts or dry, scaly skin I would recommend that you add 1 teaspoon of powdered turmeric spice to my Whipped Sleepytime Rub. You should get relief from some of the skin problems within a few days. 
  2. Whenever you feel a cold coming on, or are experiencing the symptoms of flu and bronchitis, get your crock pot out and make some of my Soothing Elixir for Colds and Flu. Be sure to add about 1 tablespoon of turmeric powder to the recipe.
  3. When you or one of your family members is having a hard time sleeping through the night, or is suffering from an illness that keeps you awake at night, try a cup of soothing Turmeric Tea. This is one of the most helpful uses for this powerhouse spice. You can find a great recipe for this healthy tea here.
  4. Did you know that research has proven that chocolate is good not only for the soul, but for your mind and body as well? Dark chocolate, along with turmeric, are great inflammation fighters, and help to reduce the inflammatory processes underlying chronic, degenerative diseases. Try adding a  half teaspoon of turmeric powder to this delicious Two-Minute Mug Brownie. The spicy, warm flavor of the turmeric will blend well with the smooth texture of the brownie and provide you with some great healthy benefits.
  5. Turmeric is a wonderful spice to add to soups and stews, and will give them a rich, warm flavor and a beautiful color. The next time you make Homemade Bone Broth, add a couple teaspoons of Turmeric.

What are 7 benefits I can get from turmeric?

 There are many benefits to this “Queen of Spices” Turmeric, so do your own research to discover the specific ways this spice could bring better health to your family’s needs. I want to list 7 benefits that I think are worth considering as motivation to add this spice to your own recipes and homemade products. 

  1. The powerful anti-inflammatory and antioxidant qualities of turmeric can help to build a wall of defense against colds, viruses, and other seasonal illnesses. Most studies indicate that to get the most benefits from turmeric, you need a dosage of at least 1 gram per day. Use this excellent extra strength product I recommended earlier.
  2. The curcumin in turmeric has been suggested as a better option for people dealing with blood clotting issues than several of the OTC products available.
  3. To support your liver as it works to  unload the toxins that are built up over time, which cause weight gain, fatigue, headaches, irritability, anxiety, constipation, heartburn, PMS, infertility and insomnia, I recommend this three-week liver-cleansing program, which includes the addition of organic turmeric. 
  4. Turmeric has proven to be very beneficial to people who are suffering from the painful joints and inflammation of arthritis. A study published in The Journal of Alternative and Complementary Medicine in 2009 compared the active ingredient in turmeric, curcumin, with ibuprofen for pain relief in 107 people with knee osteoarthritis. The curcumin eased pain and improved function about as well as the ibuprofen.³ To increase absorption and get the therapeutic dose necessary for maximum benefit, add 1 tablespoon of turmeric powder to a quart of boiling water, boil for 10 minutes and drink the turmeric water within six hours. 
  5.  Cancer is one of the most thoroughly researched studies related to curcumin and its ability to reverse disease. Studies have shown that curcumin has anticancer effects and is able to kill cancer cells and prevent more from growing. The American Cancer Society has stated: “Laboratory studies have also shown that curcumin interferes with cancer development, growth, and spread. Recently, curcumin has received a great deal of focus because of it’s ability to reduce tumor size and kill cancer cells.”²
  6. There may be no better natural treatment for lowering blood sugar and reversing insulin resistance than adding 500 to 2,000 mg of tumeric to your diet daily. In addition to correcting the causes of diabetes, curcumin has also been proven to help reverse many of the issues related to insulin resistance and hyperglycemia. 
  7. Studies have shown curcumin to be equally as effective as other medications in the treatment of high cholesterol. You can add turmeric spice to curries, use it to flavor lentil soups, spice up sautéed onions and/or cauliflower or add it to homemade salad dressing and dips. Try this delicious Turmeric Cinnamon Roasted Cauliflower.

This powerhouse “Queen of Spices”—Turmeric—is one of nature’s healthiest foods. It can be used to treat a wide variety of conditions. Do your research and begin adding turmeric to your daily diet.  

Resources

  •  https://organicindia.mercola.com/herbal-supplements/turmeric.aspx
  • https://draxe.com/turmeric-benefits/
  • https://well.blogs.nytimes.com/2011/10/19/the-doctors-remedy-turmeric-for-joint-pain/?_r=0
  •  https://www.webmd.com/vitamins-supplements/ingredientmono-662-turmeric.aspx?activeingredientid=662&activeingredientname=turmeric
  • https://authoritynutrition.com/top-10-evidence-based-health-benefits-of-turmeric/
  •  https://wellnessmama.com/5297/turmeric-herb-profile/

Filed Under: Living Sustainably, Natural Living, Nutrition

« Previous Page
Next Page »

Primary Sidebar

  • Facebook
  • Instagram
  • Pinterest
  • RSS
  • YouTube

Hi, I'm Jackie Ritz and welcome to The Paleo Mama! I'm a published author, certified herbalist, and voracious researcher of natural medicine and nutrition. I'm glad you're here and I hope you stick around for awhile!

Recent Posts

  • When God Says Pause: Why I Took a 5-Year Break from My Online Business
  • How to Quit Facebook but Keep Your Business Profile
  • Leaving the City for the Country
  • Natural Way to Heart Health

MEAL PLANS

Biblically clean meal plans that are for those love to cook real food

Read More

Footer

Our Blog

The Paleo Mama blog provides simple answers for healthier families through research, tutorials, recipes, and simple remedies for daily needs!

  • Health
  • Essential Oils
  • Recipes
  • Remedies
  • Natural Living
  • Meal Plans

Stick around!

You’ll get instant access to a library of natural remedies and real, paleo food, including our ebooks and free guides we send out.

  • Home
  • Disclosure/Disclaimer
  • Privacy Policy
  • Advertise
  • Contact Me

Copyright © 2025 · Wellness Pro on Genesis Framework · WordPress · Log in