• Skip to primary navigation
  • Skip to content
  • Skip to primary sidebar
  • Skip to footer

The Paleo Mama

Homegrown and Handmade

  • About
  • Blog
    • Podcast
  • Meal Plans
  • Essential Oils
  • Our Farm
    • Great Pyrenees Puppies
    • Goats
      • Goats for Sale
      • Goat Sales Policy
      • Nigerian Dwarf Bucks
        • Ranchocabra Lunar Eclipse

My Recipes

Butternut and Sweet Potato Puree

November 15, 2013 by Jackie Ritz Leave a Comment

Squash-Sweet Potato Puree 2-1

Today I’m excited forJennifer of Sweet Plantains to share her Butternut and Sweet Potato Puree recipe with us.  Jennifer shared her Chocolate Pecan Pie Energy Bars with us a few months ago and it has been a HIT. Please head over to Sweet Plantains and check out Jennifer’s amazing recipes and don’t forget to follow Sweet Plantains on Facebook! Please welcome Jennifer! 
I just love butternut squash – of all the squashes…it’s my favorite. When Fall rolls around, I’m always the most excited to break open a lovely butternut squash and let that sweet scent fill the air around me. Mmm…

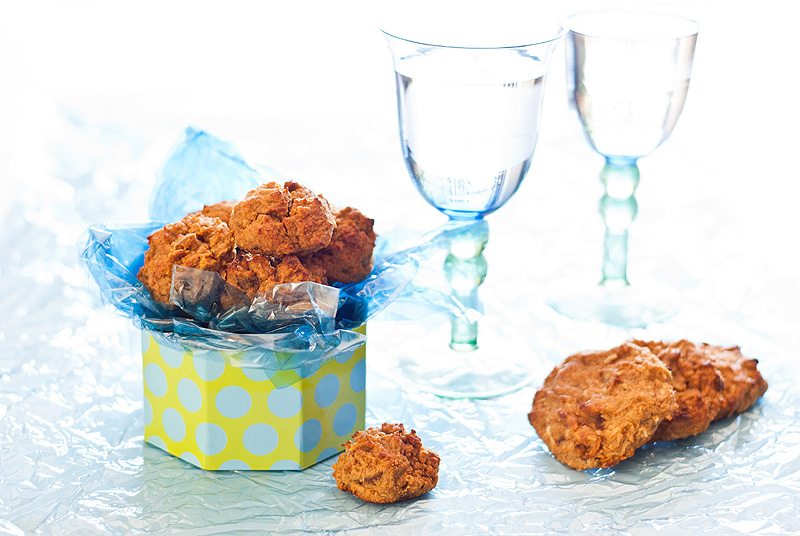
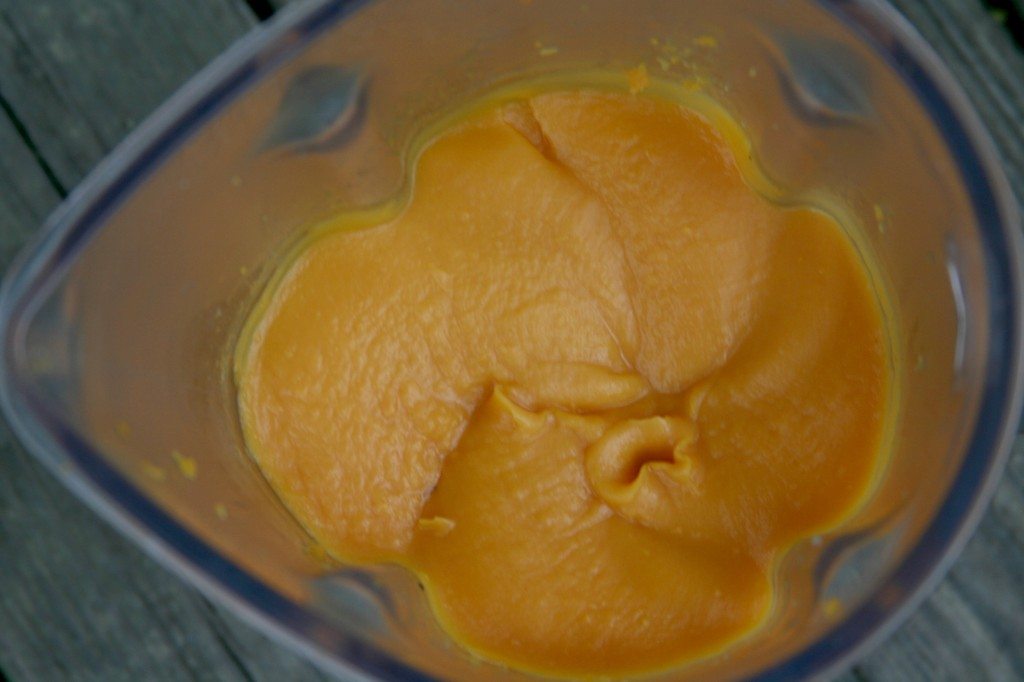
One of the first dishes I made this season was this Butternut and Sweet Potato Puree. A complete experiment, it was the perfect accompaniment to my beef stew one weekend. Now it’s made a weekly appearance at our table!

At first, I called this a mashed potato substitute, but I had to stop myself. Sure, it’s got an amazing thick texture reminiscent to that old standby. And it’s perfect to serve with almost any main course. But this delicious Fall side dish has a personality all it’s own…how could I do it such a disservice, I ask you?

This recipe makes such a nice big batch, that it’s just the thing to serve for the holidays – and unlike mashed potatoes, it’s perfect to make ahead! Just pull it all together the day before, and it’s just as wonderful the next day. How awesome is that?

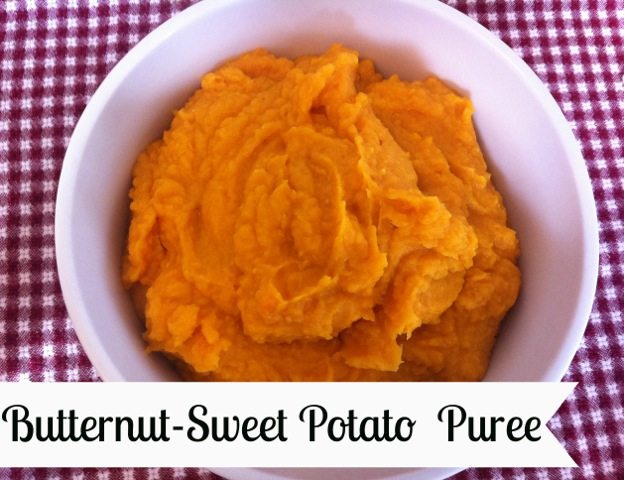
Butternut-Sweet Potato Puree

INGREDIENTS:

2 lb Sweet Potato, peeled and cut into 1″ chunks
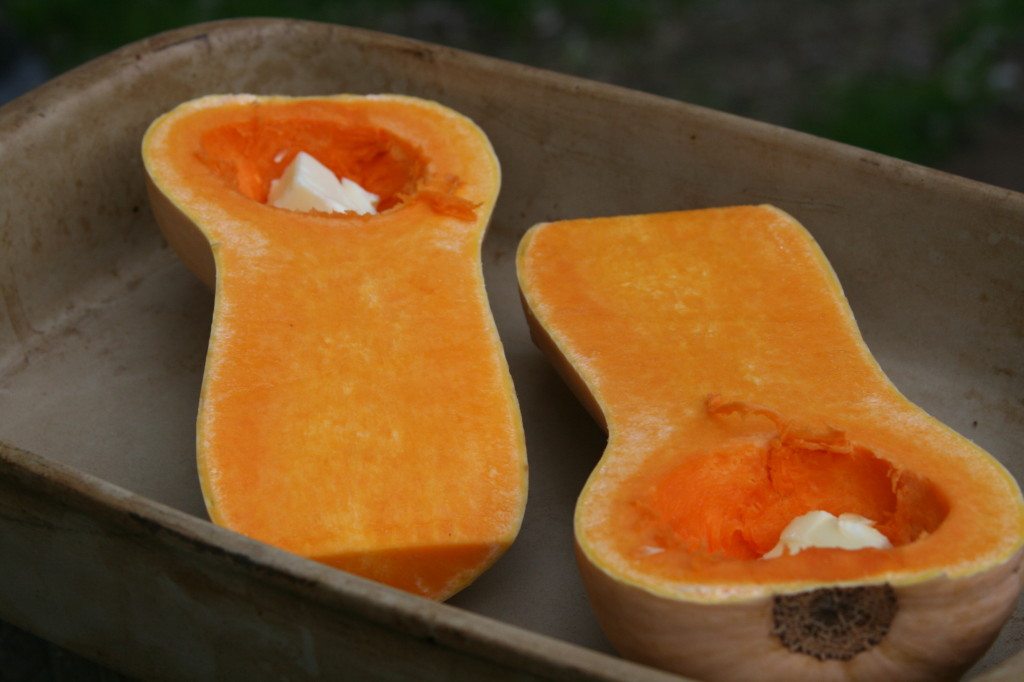
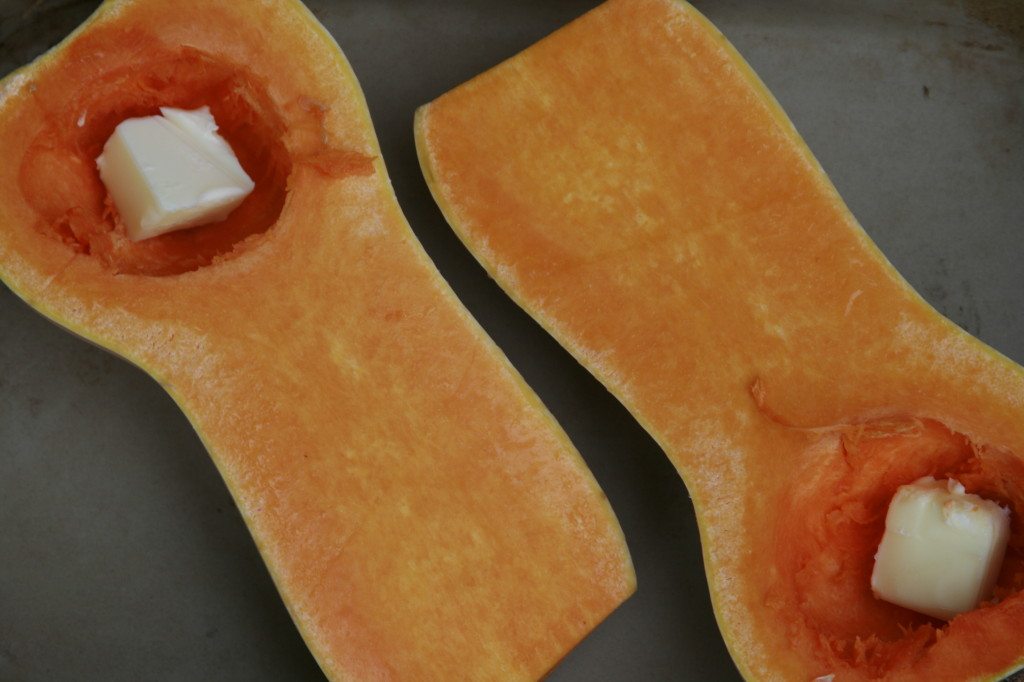
3 lb Butternut Squash, peeled, de-seeded and cut into 1″ chunks
1 t. dried, ground Lemongrass
1/2 t. ground Cumin
3 T. Butter or Ghee
Salt and Pepper

INSTRUCTIONS:

1. Combine the sweet potatoes and squash in a large pot and cover with water. Bring to a boil, and let simmer until both the potatoes and squash are easily pierced with a fork. Drain. Wipe down the pot with a cloth or paper towel to remove any remaining pieces.

2. Working in batches, if necessary, puree the potatoes and squash in a food processor until quite smooth. Pour the puree into the pot.

3. Add the lemongrass, cumin, and butter/or ghee to the puree and stir vigorously with a wooden spoon or whisk until the butter is melted. Season to taste with salt and pepper, and serve.

Enjoy!

Jennifer is a stay-at-home, homeschooling mom of four. She is an avid cook, health enthusiast, and lover of all things homemade! At Sweet Plantains she shares original recipes, homeschooling tips, parenting thoughts, and anything else that strikes her fancy. In her spare time she enjoys experimenting in the kitchen, reading nutrition books, and being barefoot outdoors with her little ones!

  • Follow Sweet Plantains Blog!
  • Follow Sweet Plantains on Facebook !
  • Follow Sweet Plantains on Twitter!
  • Follow Sweet Plantains on Pinterest! 

Filed Under: My Recipes Tagged With: butternut puree, gluten-free, paleo, primal, sweet potato puree, thanksgiving paleo recipes

How to Dye Your Hair with Henna

November 11, 2013 by Jackie Ritz 55 Comments

Henna is the safest way to color your hair. Henna is a plant that grows in hot, dry climates. It’s leaves are harvest, dehydrated, and then made into powder. When Henna is mixed with an acid medium, henna will stain your nails, skin, or hair into a reddish-brown color. This makes it a safe, non-toxic way to dye your hair. Henna has been used for thousands of years to keep hair healthy and to color white or gray hair. There is only ONE color of Henna, however, there are different ranges of that color depending on the climate and soil of that plant and I’m happy to show you how to dye your hair with henna! 

There are so many amazing benefits of using Henna…

hennameme

What Kind of Henna Should I Avoid?

You may have seen various types of commercially produced “boxed” Henna treatments that specifies for “blond hair”, “black hair” or strawberry-blonde hair”. I’ve learned over the years of doing Henna on my hair that these are very poor quality of Henna. They are produced by adding synthetic dyes, metallic salts, and other plant dyes to a poor quality of Henna. You want to steer very clear of anything that is labeled for a specific hair color. Look for Henna that is 100% Henna. The best quality you can get is Henna that is labeled “body-art Henna.” It has the highest dye content of Henna.

What will Henna Look Like On My Hair? 

See all my white/gray hair?

Because the red-orange dye molecule is binding to the keratin that surrounds the pigmented hair core, the resulting color is different for every strand of hair, and for every person. The henna stain is translucent, and blends with your own color. Hennaed hair looks like you grew it yourself! The color you get on your hair will vary depending on your hair color you have now and the chemicals you already have on your hair. Many ask if it is safe to apply Henna on color-treated hair and the answer is YES! But it’s only safe to use high quality, body-art quality Henna.

My Hair: Henna IS permanent if you use 100% Henna. See the pic below. Kinda embarrassing that I waited so long to color my roots, but you can see my white roots coming out and you can see the red Henna “highlights”. It had been 3 months since my last Henna treatment and the color was still going strong (other than my new roots). I do want to add, I use a natural shampoo and conditioner. It is wild-crafted, raw and vegan and I love it on my hair!

_MG_7395

If you have course hair, Henna will be amazing for it! It won’t dye your hair completely red, but it will give it red highlights, loosen the curl, and make it silky!

How to Apply Henna to Your Hair 

You can purchase your high-quality henna from here. 

You need to use a acid medium to apply henna. Lemon juice does this very well. When mixed together it releases the dye and bind to the keratin in your hair. This makes Henna permanent.

Step One:  MIX IT! Mix enough henna with lemon juice to make it like the consistency of mashed potatoes (see photo below). If lemon juice is too harsh on your skin, use something less acidic like grapefruit or orange juice. You could use vinegar or wine, but your hair will be a little stinky for awhile. Don’t use boiling water or your Henna will fade and be an ugly orange.

  • Short Hair (use 100g or 1 cup)
  • Collar Length Hair (use 200g or 2 cups)
  • Shoulder Length Hair (use 300g or 3 cups)
  • Waist Length Hair (use 500g or 5 cups)

If you have thick hair, add an extra 1/2 cup to a cup of Henna powder. 

_MG_7376

Step Two: REST IT. You need to let your Henna paste rest for several hours. I usually mix the Henna in the morning and apply to my hair at night. Letting it rest allows the slow dye release and will give you the BEST results. Cover your Henna with a plastic wrap and let it stew.

Step Three: MIX IT AGAIN. It’s been several hours and you are ready to apply. Mix some more lemon juice with the paste mixture until it is the consistency of yogurt.

_MG_7398

Step Four: APPLY IT. WEAR GLOVES. Henna is permanent and it will stain everything it comes in contact with. This is the messy step. I have a few suggestions to make it easier. Get in your bathtub and fill it up with water. Apply the Henna while standing in your tub. Or, you can go outside and apply. Bring a mirror.

  • Do not be stingy. Apply generously and thick for a deep, rich color.
  • Comb your hair and divide it into sections.
  • You can put the Henna in a piping back, squeeze bottle, or just use your fingers and apply. I find the latter to be the easiest.
  • Start at the back and work the Henna down to the scalp. Apply it thick! Then bring down the next section and Henna it. Make sure every bit of hair is THICKLY coated…like cake frosting. Don’t be afraid to use plenty of Henna and don’t be afraid to get messy.

hennasteps

Step Five: RELAX. When all your hair is covered with Henna, wipe your skin clean of any Henna, and wrap everything up in a plastic wrap. This keeps the Henna warm and moist and allows the hair to take in the dye. I then wrap a large DARK towel (remember Henna will stain anything it touches) around my head. This is when I go to bed. Yes, I sleep with the Henna on my head all night. This is not necessary but I have found that it covers my gray hair the best when I leave it on for, at least, 6 hours. The recommendation is 2-4 hours, but if you know that your hair is resistant to dye or has gray, then you may want to leave it on a little longer. I lay a dark towel over my pillow and sleep. I actually sleep really well with Henna on my head and it is also known that Henna can soothe headaches. So, just relax and enjoy the full benefit that Henna can give you.

wrapped head

Step Six: RINSE IT. Time to rinse out the Henna. I have shorter hair so this step isn’t too difficult. I take a nice long shower and rinse it out completely. I follow it with a wash and condition. When my hair was much longer, I used to fill up the bathtub and lay down in the water. This helped get the Henna out of my hair.

A few things…

  • Henna may seem really bright at first. Do not panic…it will darken over the next few days if you used the acidic mix. It will take about 3 days to settle into the true color.
  • Once again, DO NOT be stingy with the mix. More is always better with Henna.
  • You can use this on beards too if you would like!
  • Some people can’t stand the smell of Henna. I, personally, love it. It’s earthy and sultry. If you can’t stand the smell, you can add 1 TB of powdered ginger, clove, or cinnamon to your Henna mix.

Where to Buy Henna: 

  1. Order high quality henna from HERE.
  2. Check a local Indian store to buy it SUPER cheap!!! Just make sure it’s 100% Henna!

The day after I slept in Henna.


https://www.hennaforhair.com/techniques/deb/

https://www.hennaforhair.com/freebooks/hennaforhair.pdf

Filed Under: Living Sustainably, My Recipes, Natural Living Tagged With: gluten-free, henna hair dye, how to color your hair with henna, natural hair dye, non toxic hair dye, paleo, primal

Fig & Orange Drops

November 5, 2013 by Jackie Ritz Leave a Comment

fih_729x90

Good morning everyone! I’m so excited to have Suzanne from Strands of My Life sharing a delicious recipe from her cookbook, Paleo Treats! Paleo Treats came about as part of her research in finding the root of her lifelong digestive issues. Paleo Treats is a cookbook of healthy, grain-free recipes that will satisfy that need for something sweet without eating any sugar. Every recipe in her cookbook is grain-free, gluten-free, dairy-free, sugar-free, and NUT-FREE! I know this is important for so many of you who need to stay away from nuts.

You can order her cookbook HERE…or get it ridiculously cheap as part of the Fall into Health Sale!  Check out some of her cooking creations below…drool!!!

paleotreats
Recipes from Paleo Treats

Paleo Treats is just ONE of the many cookbooks included in the Fall into Health Autumn sale. The sale includes 47 e-books (Paleo cookbooks and health/wellness books), 3 online classes (one is a Paleo cooking class), 2 meal plans (both are Paleo), and so much more. CLICK HERE to see what it all entails and check out all the delicious cookbooks!

orange_button_learn_more

And now please welcome my friend Suzanne from Stands of My Life as she, graciously, shares a beautiful recipe from Paleo Treats! 

Thank you so much, Jackie, for having me on your lovely blog. These are the simplest of cookies to put together as long as you have some date puree stored away in your fridge. Otherwise you will need a food processor to grind the dates up until they form a mush. I soak my dates in boiling water for an hour first and this makes it easier to puree.  These are healthy little drops of heaven for when you need that sweet hit.

Orange Fig Drops from Paleo Treats: 

Fig & Orange Drops 2 800

Preparation Time: 10 mins

Cooking Time: 10 mins

Makes 30 drops

INGREDIENTS

  • 1/4 cup coconut flour
  • 1/2 cup oil
  • 2-3 tbsp date puree (depends how sweet you want your cookies)- Read instructions above for making the puree.
  • 1 ripe banana
  • 2 eggs
  • 1 tsp cinnamon
  • 1 tsp vanilla
  • pinch salt
  • 1/2 tsp baking soda
  • Grated rind of 1 orange
  • 7 figs, chopped up

INSTRUCTIONS

  1. Heat the oven to 350°F/180°C.
  2. Mix the flour, baking soda, salt, cinnamon, oil, banana and date puree in a food processor.
  3. Add the eggs and vanilla and mix.
  4. Remove the mixture from the food processor to a bowl and add the rind and figs.
  5. Place a sheet of baking paper on an oven tray.
  6. Drop spoonfuls of the dough onto the paper, making sure they are rounded and not messy.
  7. Bake about 10 minutes until they are golden but still soft.
  8. Remove from the oven and leave to cool on the tray for half an hour so they firm up.

Fig & Orange Drops 800

For more delicious recipes from Suzanne, please make sure you follow her on her social media sites!

  • https://www.strandsofmylife.com/
  • https://www.facebook.com/StrandsOfMyLife
  • https://twitter.com/Suzanneper
  • https://www.pinterest.com/suzanneper

Filed Under: My Recipes Tagged With: dairy free, gluten-free, grain-free, nut free, orange fig drops, paleo, sugar free

Chocolate Zucchini Bread

November 3, 2013 by Jackie Ritz 26 Comments

chocolate zucchini bread

I’ve been reading and cooking for so many awesome Paleo cookbooks lately! Having resources like this at your fingertips is going to help you stay focused and successful at eating Paleo. There are so many delicious recipes and so many talented bloggers who are creating food art!

Oh did I mention Chocolate Mini Zucchini Bread??? Halle from Whole Lifestyle Nutrition has put together this DELICIOUS cookbook, Gluten-Free & Grain-Free Breads, Batters, and Doughs! I am blown away by some of the recipes in this cookbook.  Here’s a few that will amaze you…

Halle has, graciously, let me share her Chocolate Mini Zucchini Bread with you….just one of the many Paleo recipes you can find in her new cookbook, Gluten-Free & Grain-Free Breads, Batters, and Doughs! 

Chocolate Mini Zucchini Bread 

zucchinibread2

  • Yields: 6 pieces Serving Size: 1 piece
  • Nutritional Information: Calories: 225, Fat 14.6g, Carbs: 17.6g, Protein: 7.8g
  • NOTE: This recipe can be doubled for a full 5″x9″ loaf of bread; bake for an hour. 

INGREDIENTS:

  • 1 cup of almond butter but you can easily make your own (I like this recipe)
  • 1-2 TB cocoa powder
  • 1 cup shredded zucchini (squeeze excess water out of the shredded zucchini)
  • 2 large eggs
  • 1/4 cup grade b maple syrup
  • 1 TB pure vanilla extract
  • 1 tsp apple cider vinegar
  • 1/2 tsp baking soda
  • 1/4 tsp sea salt
  • 2 TB mini chocolate chips

INSTRUCTIONS:

1. Preheat oven to 350F. Make your almond butter or use store-bought. I made my own cause I had a ton of almonds and it’s so stinkin easy!

_MG_7966

2. In a medium bowl combine the almond butter, eggs, maple syrup, vanilla, cocoa powder, and sea salt and blend with a hand held mixer for 2 minutes on medium speed. *whoops, I forgot to do this and just stirred it with a wooden spoon and it came out great still!*

3. Add baking soda and vinegar (will fizz up) and fold into the batter.

4. Stir in shredded zucchini. If really watery, squeeze out excess water.

_MG_7980

5. Place in a (parchment paper) lined or greased 3.5″x7.5″ loaf pan. You can use mini loaf pans too, just fill 3/4 full. *I used a full loaf pan since I doubled the recipe.*

6. Top with 1-2 TB of mini chocolate chips. *I leaned more towards the 2 TB 🙂 *

7. Bake for 23-28 minutes if you have mini loaf pans and 35-50 minutes for large loaf pan. Start testing with toothpick at 35 minutes and when it comes out clean when inserted in the center, it is done.

8. Allow to cool on a cooling rack and serve!

ENJOY! I topped mine with Kerrygold butter and drank it back with some fresh raw milk! It was THE BEST Paleo bread recipe I have EVER made!


_MG_7993

_MG_8007

Click here to check out Gluten-Free & Grain-Free Breads, Batters, and Doughs cookbook!!!!!


Filed Under: My Recipes Tagged With: ancestral nutrition, chocolate zucchini bread, dairy free, gluten free chocolate bread, grain-free, primal

Smoky Roasted Butternut Soup

October 29, 2013 by Jackie Ritz Leave a Comment

These cool autumn days in Western North Carolina have me wishing that I had a freezer stash of my homemade chicken stock. It seems that as soon as I make chicken stock, it is gone the next day! We love soup in our house and this particular soup, Smoky Roasted Butternut Soup, is one of our favorites. It’s a deeply nourishing soup to go with the chilly fall air. It’s loaded with nutrition (homemade stock, ginger, cumin) to help fight off colds and keep the immune system healthy.

There are many ways and methods to make stock, but I do mine a very simple way in my crockpot. I throw the bones and organs in my crockpot, along with a few carrots, a few sticks of celery, an onion, a few garlic cloves, and a inch-long piece of ginger. I fill it up with water and cook on low for, at least, 24 hours. For step-by-step directions you can check out this post I wrote, “Good Broth Resurrects the Dead.” 

With the autumn chill rolling in, you will find a beautiful assortment of squashes and pumpkins at your grocer or Farmer’s Market. This past week I picked up a delicious, organic butternut squash and made one of my favorite soups with it. We like to throw a protein on top of our soups since soup is the main dish of our meals. Some great protein sources to throw on soup is leftover chicken, boiled eggs, or ground meat. Chicken really compliments the smooth, sweet taste of the butternut, so that is my recommendation!

Smoky Roasted Butternut Soup

Ingredients: 

  • 9 cups of chicken stock (this is how I make mine), divided use
  • 1 butternut squash
  • 6 TB of butter/ghee/bacon fat/coconut oil
  • 1 onion, diced
  • 4 cloves of garlic, crushed
  • 1 TB of sea salt
  • 1/4 teaspoon of pepper
  • 1/2 teaspoon of ginger
  • 2 TB cumin
  • Protein of choice: boiled eggs or leftover chicken
  • Top with sour cream (optional)

Items Needed:

  • Crockpot (I like this one)
  • Heavy stock pot or Dutch Oven (I like this one)
  • Blender (I have this one)

Instructions: 

1. Preheat oven to 350 degrees. Cut the butternut squash in half. Scrape out the seeds. Put the butternut squash with the cut side up on a baking tray. Put a tablespoon of butter or ghee in each cavity. Place in the oven, uncovered, and bake until fork-tender; about an hour.

IMG_7716 _MG_7721

2. Remove the squash from the oven and allow it to cool until you can handle it. Use a spoon and scrape the squash out.

3. Put the squash and 1 cup of chicken stock in a blender and puree till smooth. Set aside.

squash

4. In a heavy stock pot or dutch oven, heat 4 TB of your fat of choice (I use butter) over medium-high heat.

5. Add the onions and the garlic and sauté until soft and translucent; about 5 minutes.

6. Add the squash puree, stock, cumin, ginger, salt and pepper. Bring to a boil, then cover and simmer for 20-30 minutes to allow the spices to blend.

7. Top with your protein of choice and serve with a dollop of sour cream (optional).

Enjoy!

_MG_7735

Filed Under: My Recipes Tagged With: gluten-free, homemade autumn soup, homemade stock, paleo, paleo butternut soup, primal, roasted butternut, roasted butternut squash soup

Raspberry Chocolates

October 24, 2013 by Jackie Ritz 7 Comments


I’m excited to post this delicious recipe that Stephanie from Good Girl Gone Green has offered to share with my readers! Make sure you check out Stephanie’s Facebook page to stay up-to-date on all the delicious recipes she is posting! I know you are going to love this recipe for Raspberry Chocolates! Please welcome my friend Stephanie! 

Homemade chocolate tastes better than any store bought on the market and you have control over all the ingredients. No soy lecithin or milk or unrecognizable ingredients that sometimes sneak up you without warning.

They are a pinch to make- it is just waiting for the chocolate to set that can be cumbersome. But totally worth it. Add some creamy raspberry filling to your chocolate experience and you have a wining combination and healthy treat for you and your family.

Do you make your own chocolates?

RASPBERRY CHOCOLATES

Yield: 12 chocolate raspberry cups depending on the size of your molds

Ingredients

Chocolate

  • 1 cups of solid cacao butter
  • 1 cup of raw cacao powder
  • 1 Tbsp of vanilla powder (optional)
  • 1/2 cup of liquid sweetener like honey, maple syrup or coconut nectar

Raspberry Filling

  • 2 cups of raspberries
  • 5-6 medjool dates
  • 1/2 cup of cashews, soaked for 4 hours

What you need

  • High powered blender or food processor
  • Silicone muffins cups or chocolate molds
  • Muffin tins

Method

Chocolate

  1. Gently melt the cacao butter in a pot or double boiler.
  2. Once melted, add the cacao powder, vanilla powder to the pot and stir to combined.
  3. Next, add your liquid sweetener of choice. Stir.
  4. Set aside

Raspberry Filling

  1. Add the raspberries to a high powered blend and blend until completely smooth.
  2. Add the dates. Blend together until the dates are broken up
  3. Now add the cashews and blend up until a creamy texture.

Assembling the chocolates

  1. Take your silicone cupcakes liners and place them in muffin tins.
  2. Spoon the chocolate mixture into each muffin liner. Place in the freezer until solid, which should take about 10 minutes.
  3. Spoon the raspberry mixture over the solid chocolate. Place back in the freezer. This will take several hours to become solid.
  4. Spoon the remaining chocolate over the raspberry mixture and place in the freezer until hard. Another 10 minutes.

Tips and Notes

  • You can sub macadamia nuts for cashews, but it will lend a slightly different taste.
  • You can use coconut oil instead of cacao butter, but the chocolate will be more brittle and hard. The chocolate containing coconut oil will will melt faster once taken out of the freezer. The cacao butter chocolate has a more chewy texture.
  • Experiment with any berry! I have used blueberries and they are tasty. They just don’t make as nice a picture with the contrast.
  • You can substitute carob for the cacao, but the taste will most definitely be different.
  • You will most probably have some extra raspberry filling left and potentially some chocolate. I just pilled it all in a small dish and froze the left overs.

Raspberry Chocolates

StephMoram 125x125

Stephanie is a tree hugger and plant-based real foodie trying her best to make a difference on this planet. To say she is passionate about “all things green” and simply calling her passion environmentalism is an understatement! You can find her collecting trash on the streets or along the water, creating raw treats in the kitchen or simply making a difference over on her blog, Facebook, Google Plus, Twitter and Pinterest.


Filed Under: Guest Posts, My Recipes Tagged With: cocoa butter recipes, dessert recipes, gluten-free, homemade chocolate, paleo, primal, raspberry recipes, vegan recipes

« Previous Page
Next Page »

Primary Sidebar

  • Facebook
  • Instagram
  • Pinterest
  • RSS
  • YouTube

Hi, I'm Jackie Ritz and welcome to The Paleo Mama! I'm a published author, certified herbalist, and voracious researcher of natural medicine and nutrition. I'm glad you're here and I hope you stick around for awhile!

Recent Posts

  • When God Says Pause: Why I Took a 5-Year Break from My Online Business
  • How to Quit Facebook but Keep Your Business Profile
  • Leaving the City for the Country
  • Natural Way to Heart Health

MEAL PLANS

Biblically clean meal plans that are for those love to cook real food

Read More

Footer

Our Blog

The Paleo Mama blog provides simple answers for healthier families through research, tutorials, recipes, and simple remedies for daily needs!

  • Health
  • Essential Oils
  • Recipes
  • Remedies
  • Natural Living
  • Meal Plans

Stick around!

You’ll get instant access to a library of natural remedies and real, paleo food, including our ebooks and free guides we send out.

  • Home
  • Disclosure/Disclaimer
  • Privacy Policy
  • Advertise
  • Contact Me

Copyright © 2025 · Wellness Pro on Genesis Framework · WordPress · Log in