• Skip to primary navigation
  • Skip to content
  • Skip to primary sidebar
  • Skip to footer

The Paleo Mama

Homegrown and Handmade

  • About
  • Blog
    • Podcast
  • Meal Plans
  • Essential Oils
  • Our Farm
    • Great Pyrenees Puppies
    • Goats
      • Goats for Sale
      • Goat Sales Policy
      • Nigerian Dwarf Bucks
        • Ranchocabra Lunar Eclipse

Living Sustainably

Jackie’s Money-saving Paleo tricks

June 21, 2012 by Jackie Ritz 6 Comments

I’ve been doing Paleo for awhile now. It’s become a part of us, who we are. We are also very frugal people. We like to save and hoard our money instead of shopping for things we really don’t need. In fact, I hate shopping. However, I love grocery shopping and planning our meals. I love making it strategic to see how I can save, but also to see how much I can woo my family with the taste of delicious Paleo food.

So many are people are hesitant to give Paleo a try because they think it’s going to cost a lot of money. Which, honestly, doesn’t make sense to me because, eating Paleo, you are eating REAL FOOD. You’re not buying the crap in between, in the aisles of the supermarket…you’re just buying food. So, once you take all that processed crap away, you are left with a lot of extra money. So, no more “meals in a bag”, no more blown up air…I mean bread, no more pasta, and no more gluten-laden snacks. Trust me, it looks like you are missing a lot, but you really aren’t.

Anyways, I’ve put together a little list of how I save money eating Paleo!

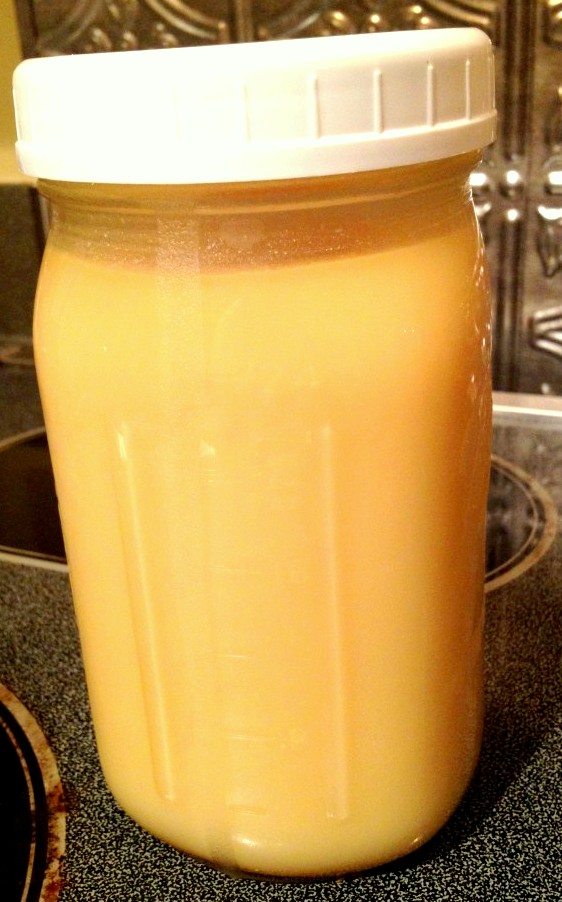
1) I buy the whole chickens. I cook it in my crockpot and then I use the bones to make stock. We usually just eat 1 whole chicken a week. This is for my family of 2 adults and 2 kids. Then I make stock. I either make a soup that week or I freeze it (flat in a gallon ziploc bag). Read my post, “Good Broth Resurrects the Dead”: https://thepaleomama.com/2012/02/18/good-broth-resurrects-the-dead/

Chicken stock simmering away in my crockpot!

2) I buy my beef in bulk. I buy 1/4th of a grassfed cow at a time. For 1/4th of a cow we get: 64lbs of ground meat, 8 rib eye, 9 TBone(some look like they may have NY strip attached), 3 Liver, 7 Sirloin, 4 roasts, and 7 cube steak. The cost was $4.50lb. This saves us a ton of money! https://thepaleomama.com/2012/02/15/my-first-cave-mama-kill/

Meat of a whole cow

3) I shop local and in season. I get lots of produce at the Farmer’s Market. I, also, keep the Publix and Kroger weekly ads and I plan my meals around what is on sale. I also use www.southernsavers.com to see what is on sale and if there are any online coupons I can print for things like coconut milk, cleaning supplies, toilet paper, paper towels, and some food items. I usually have 3-5 coupons for each weekly grocery trip. Nothing like I used to have when I was extreme couponing! However, we were eating crap food.

4) I pick my own produce. This is a great way to save money and also to spend some good time outdoors. A great website to find local farms that you can pick at is www.pickyourown.org.

5) I shop on Amazon A LOT! My UPS driver knows me now and he is, literally, at my door 3-5 times a week. When you buy through there Subscribe & Save option, you really save some good money.

6) I shop at Sam’s Club to get things like nuts, Lara Bars, frozen fruit for smoothies, almond milk, olive oil, and spices.

7) I don’t buy much organic. I save my money that I would spend on overpriced organic produce that has traveled halfway around the world and I buy local meat and produce instead.

8) I prepare things myself. I make my own mayo, salad dressings,  and stocks. I also make our own Paleo treats, like popsicles, cookies (on occasion), pancakes, and muffins.

9) I grow things myself. Last year I had a full garden with lots of vegetables and spices. It really does save a ton of money!

10) I shop at the local Asian market for things like coconut milk, tapioca, some seed oils, sweet potato noodles, fish sauce, etc.

11) I save money in other areas of our life so that I have money to splurge on food. I make my own cleaners, laundry soap, and skin care soaps.

I hope these ideas help you get started and show you that eating healthy doesn’t have to be so complicated and expensive.

Filed Under: Living Sustainably, Natural Living, Shopping Local, Starting Paleo

25 lbs down and some before and after!

April 2, 2012 by Jackie Ritz 6 Comments

I thought it was time to write about how I am actually feeling and doing on Paleo. It has been nearly 6 months since I started my own personal Paleo journey. It’s been 3 months since my whole family has been eating Paleo. Since I started in October, I have lost a total of 25 lbs!!! My husband has lost 31 lbs since he started January 1st and has lowered his cholesterol enough to come off his statin drugs! I have noticed huge behavior changes in my 3-year-old daughter since we took gluten, sugar, and dairy out of her diet. And my 8 month old son, who weighed in at 20lbs a month ago, is thriving, happy, content and such a joy to be around. He eats everything I give him. His recent favorites are Paleo chicken nuggets, roasted asparagus, and grilled squash.

So I’m going to show my current before and after pictures. Seeing these are motivation in itself to keep going!

BEFORE
AFTER

I tell people all the time that I feel amazing. I really do. There is no other way to describe how I feel with our new lifestyle. I have so much energy throughout the day…much needed energy since I’m chasing around a highly energetic 3-year-old and an 8 month old army crawler! My mind feels clearer. I haven’t had a headache since I started Paleo. This is now such a part of our life that I NEVER want to go back to what we were before. It’s become second nature and easy.

Do I cheat? Hmm, I like to call it indulging and, yes, I do indulge once a week on one meal. This week I had chips, dip, and Mojitos with my girlfriends and it was GREAT! Last week I had wings and pizza.

Do I let my kids cheat? I am not going to be able to watch every, single thing my kids put in their mouth. I’m also not going to be so strict that I don’t let them indulge in something that they love. Geez, I do! So, yes, I let my daughter eat gluten snacks at her preschool. I let her Papa give her ice cream every day that we were home a few weeks ago. I let my son have those organic puffs when I see them on sale. Life is too short to not have a little bit of indulgences in our life when it comes to food. You have to be able to find that balance to where you can indulge and be done with it. It took a few months for me to be able to do that without being tempted for more or without my body telling me I need more.

Do I workout? If you mean “going to the gym working out”, then no. I just love to be home with my kids. Our mornings are so great together and Frankie is in such a routine with his morning nap that I just don’t even want to mess that up. However, I am on my feet ALL day. So, I wouldn’t say that I don’t exercise, I just don’t do strenuous exercise. And I’m ok with that. Obviously my body is ok with that because I’m losing weight. I cannot devote the time to do any kind of crazy workout schedule, that’s why I could never do a diet that requires me to. Another reason why I love Paleo. It works with your body like nature intended.

What the heck do I eat if I can’t have gluten, diary, or sugar? LOTS!!! I have so many different types of new foods these last few months that I have never tried! I used to just make side salads to go with dinners before we were eating Paleo, but now I am making so many different types of vegetable dishes! We’ve had things like: coconut-almond green beans, roasted Brussel sprouts, kale chips, marinated and roasted beets, creamy cucumbers, mashed cauliflower, cauliflower rice, spaghetti squash, squash fries, sweet potato chips, roasted turnips, parsnip fries, leeks, fennel salads, Jicama home fries, and SO MUCH MORE! Does that sound restrictive to you? Eating Paleo has opened up my eyes to so many new kinds of foods. Once you get out of the “American” way of thinking that every meal needs bread, or that sweets can’t taste good without sugar, you can really start to see that there is so much more to food than starch and sugar. Eating Paleo has also liberated me. I have gone through times where I was obsessed about the number of calories I ate, or the amount of fat something had in it. I now know that fat-free means LOADED with sugar…and that fat is not bad for us. I have lost 25lbs eating fat. I eat lots of fat. I cook with coconut oil liberally. I eat avocados. I don’t feel guilty for reaching for a 3rd or 4th piece of bacon. I even sometimes don’t trim the fat on our steak off. Fat is good. Our brains are mostly fat. Our bodies need fat.

Do I spend more money on food every week? If you are comparing our weekly budget to what I spent when I was crazy couponing a few years ago, then yes. I spend much more. If you compare our budget to what I spent when we were eating real, unprocessed (but not completely Paleo) foods, then no. I spend the same. Thankfully, I do not have to be really strict with our budget. We are extremely frugal in many areas of our life. We buy everything used. We sell things we don’t use. I also try to live very naturally, so I make a lot of our cleaning and daily hygiene products from scratch. If we spend more than $100 one week, I don’t freak out. I spent $150 this week, which is on the higher end of what I spend weekly, however, we needed things like toilet paper, a few cleaning products, and paper towels (which we mostly use for the animals and our new, litter-training kitty is burning through them). I haven’t been able to convince my husband to give up toilet paper yet!

Do I eat all organic? Nope. In fact, I would venture to say that I eat mostly “un”organic. I do get organic vegetables IF they are on sale. We do eat grass-fed beef because we bought a whole cow and split it with a few families keeping 1/4th of the cow for ourselves. This costs us $4.50lb and will last us all year. I sometimes find pastured chickens on sale at a nearby grocery store and I snag a few. Thankfully, we don’t have to worry about dairy anymore. I buy the So Delicious or Silk brand of coconut milk for my daughter to drink a few times during the day and for us also to use in our smoothies. I transitioned my daughter from raw cow milk to coconut milk when we went Paleo. Our eggs come from a local farmer (the same one we get our grass-fed beef from) that has free-range chickens and costs $2.50 dozen. We go through about 10 dozen eggs a month.

How do I feed my working husband? I boil eggs every week for him to grab. I have fruit always handy and ready to grab on the way out the door. I make a larger dinner and he takes the leftovers to work for lunch. I make hash, egg cupcakes, meat and spinach muffins for quick breakfasts on the go.

How do I have time to cook 3 meals a day and spend time with my kids? We eat easy breakfasts together. I grab our griddle throw things on it for breakfasts like eggs, bacon, sausage, or ham lunch meat. If we don’t have a griddle breakfast, then I usually make a smoothie for everyone. Even my 8 month old enjoys these. I always have frozen bananas or strawberries on hand and I just make a simple smoothie. I sometimes sneak in coconut oil, flax-seed, or raw egg yolks for added nutrition.

What do we drink? That’s easy…LOTS of water and an occasional milk. Me and my husband take a Fiberblend every night and we use apple juice for that (only because we CANNOT take it without juice…it’s really disgusting, like dirt). Our 3-year-old loves her coconut milk and I give her that about twice a day.

What do we snack on? Honestly, we don’t snack anymore. Our 3-year-old does, but me and my husband find that our protein and veggie packed meals really keep us full for a long time. For my 3-year-old I keep beef jerky, nuts, fruit leather, and fresh fruit on hand for when she is hungry. Her preschool teacher had a little meeting with me last week and told me that she has never seen a 3-year-old eat so much and so many kinds of healthy foods. She agreed that kids will eat what you give them, especially if you start them off right when they are young, like we did with Arianna. If interested, you can see some great kid lunch ideas on my Pinterest page: https://pinterest.com/jackieritz/arianna-s-lunches/ .

So there…there’s a look inside some of our Paleo life. I hope it helps you, encourages you, and motivates you to make some changes in your life, or to continue on the path you are on!

Filed Under: About Me, Cholesterol, Grassfed Beef, Living Sustainably, Paleo Baby, Paleo Toddler, Shopping Local, Starting Paleo Tagged With: free-range eggs, grass-fed beef, losing weight, paleo

Henna Hair Dye

April 1, 2012 by Jackie Ritz 13 Comments

Update: 4/4/12

Last night I applied the other package of Henna that I have. I read a lot about Henna these past few days and believe I was more uneducated the last time I applied it. I’ve learned alot from this free booklet that I found online: https://www.hennaforhair.com/freebooks/hennaforhair.pdf . I did several things different this time. First, I mixed the Henna with lemon juice, not boiling water. I read that you need to use something acidic to release the dye. Instead of letting it sit overnight, I placed the bowl of mixed Henna outside for a few hours. When it started to rain I placed it inside next to a window to cure. The booklet says to let it cure overnight or if you are in a hurry to put it outside for a few hours.

After about 5 hours of curing and after the kids were in bed I took the bowl of Henna and added a little more lemon juice to it to get it to the consistency of mashed potatoes. I also added about a teaspoon of cloves to it to give it a nice smell. The first time I applied Henna a few days ago I mentioned how messy it was. Well this time it was so much easier. I filled up my bathtub about ankle deep with water. I got all my supplies ready and put it near the bathtub. I got in the bathtub and applied the Henna in there. It made it much easier cause I wasn’t flinging Henna all over the bathroom. I had a washcloth ready to wipe off any Henna that fell on my shoulders or on the bathtub sides. I used a mirror while I was standing in there and applied all the Henna from back to front. Dividing it up in sections made this MUCH easier. Next I took my gloves off and grabbed saran wrap and wrapped my head up really well.

I cleaned up the small mess I made, which was easy since it was all in the bathtub. All-in-all, this took me about 20 minutes. Then I layed a dark towel over my pillow and hung out with my hubby till we fell asleep. I also wrapped a towel around the saran wrap to help keep the heat in more. Heat helps release the dye onto your hair.

When I woke up I got in the shower and rinsed the Henna out. This takes a few minutes, so enjoy the hot shower and let it completely rinse out. I washed my hair with baking soda and conditioned with apple cider vinegar (No Poo Method) and got out and styled my hair.

I went out in the sunlight to see what a difference it was. I figured if it was too red I would apply the Indigo, however, I am very happy with the color. My hair is so dark that I really didn’t expect it to lighten it up very much. But, I was surprised how auburn it now looks, especially in the sunlight!

I read that Henna is permanent in the hair but fades over time. I am hoping I can go about 2 months till the next time I need to use Henna again, but I will let you all know!

I also want to recommend EVERYONE do Henna, even if you don’t need color. They have a neutral Henna that has no color, just the conditioning properties. It is so nourishing to your hair. My hair feels so soft and I love the smell. I read some people hate the smell, but I think it smells so earthy and sexy. I really like the clove smell too that I added to it.

Update: 4/2/11

I really don’t think I left the Henna on long enough when I applied it. I left it on for about 10 minutes and then I applied the Step 2 to my hair. I’ve learned that the Step 2 was Indigo, another natural dye. This tones down the Henna and makes it darker and not so red. I left the Indigo on for about an hour. My white hair was covered and it turned it a nice golden blond color. I don’t believe it did anything to the rest of my hair. I really wasn’t expecting it to because my hair is very dark. I think I’m going to use my other box and do just the Henna application (which is the Step 1) and not use the Indigo. I would like more of a red in my hair.

I felt like Cleopatra last night! I had henna all over my head and I was reminded how the last Pharaoh of Egypt, the beautiful and exquisite Cleopatra, was known for her use of henna. For thousands of years women have used henna, which comes from a plant, to dye and condition their hair, skin, and nails. Henna is completely natural and chemical free, unlike commercial dyes that strip the hair with harsh chemicals like ammonia and hydrogen peroxide so that it is then able to absorb the color.

I never knew you could use henna on your hair. I’ve had henna done to my body before. The most recent time being when I was pregnant with my little 8 month old son. My friends at my baby shower had a blast decorating my full belly!

9 months pregnant

I never knew you could do henna on your hair. I was researching some natural and chemical-free ways to dye your hair. Since I have been doing the “no-poo” (no shampoo) method on my hair the past week, I was wondering how I would dye my hair now since I was avoiding chemicals. I looked it up and saw that women the past thousands of years had put henna on their hair. My hair was needing some color. The only reason I dye my hair is because I have premature WHITE hair…not gray…stark white.

My white roots

I found a henna brand on Amazon and ordered it. I couldn’t wait for it to get here. As soon as it arrived I started my experiment. It was a pretty long process but, I do believe, worth the end result.

The directions that came in the package were pretty clear. What I liked about this brand was that it is not a compound henna pack, which you do want to avoid. It’s not 100% true henna. I thought for my first time I would do something like this since it had directions and was pretty easy. Next time I might actually go into an Indian store and get the henna powder that I have to mix myself. I was also thinking about ordering the henna bricks from Lush. I love Lush! Have you seen their products?! They are so clean and delicious!

The process of putting the henna in your hair is messy. The directions did not warn me about this. Next time I will either do it outside or put newspaper all over my bathroom. I didn’t stain anything because my husband was quickly picking up my mess! Gotta love a clean freak hubby! This box came with a 2 step process because it is targeted towards those needing gray coverage. I let the mixtures of both powders that came with the box cure for 3 hours. The step 1 mixture was the henna that I put on my hair for a total of 10 minutes. I rinsed that out and put the step 2 mixture on, which is the conditioner. I added a raw egg to the mixture for extra conditioning. You can also add a teaspoon of ginger, nutmeg or sage for smell if you want. The smell of the henna didn’t bother me. It smells natural, like earth. My hair still has a faint smell of henna…and it’s the next morning. I plan on not washing my hair for 3 days so the henna can set and start to darken a little bit more.

watching my Roku while waiting for henna

Henna could be considered “semi-permanent” because it lasts for 4-8 weeks depending on how often you wash your hair. I figured since I won’t be using shampoo on my hair and am using baking soda and apple cider vinegar, then it might last a little longer.

So, I love the outcome! Not only does my hair feel amazing, look shiny, and covered my gray pretty, darn well, but I didn’t even have to use harsh chemicals at all! I also have not used shampoo in over a week and my hair feels so clean and looks very healthy. I am thoroughly enjoying experimenting with more natural skin care and hair techniques. It’s nice to feel more self-sustainable!

No more white!

Filed Under: DIY, Living Sustainably, Natural Living Tagged With: chemical, hair dye, henna, light mountain, no poo, no shampoo, white hair

Homemade Body Wash and Toothpaste

March 30, 2012 by Jackie Ritz 10 Comments

I’ve been buying Kirk’s castile soap for my family. It’s very safe, hypoallergenic, and has like 5 ingredients in it. I love that it’s coconut based too! The only thing though, is that we have been going through almost a bar every week. I am used to body wash…liquid soap. I’m not digging the bar soap. So, I found a recipe online on how to turn a bar soap into body wash! Score! I love Dr. Bronner’s liquid castile soap, but it’s kind of expensive. I keep it on hand to clean the kids with, and to mop the floor with. A little goes a long way with Dr. Bronner’s, but I had 2 bars of Kirk’s soap so I thought I would see how a homemade recipe would turn out. I modified this recipe I found online and here is what I did.

First I grated the bar of soap.

Then I put 6 cups of water in a pot and turned it on. Once it was almost boiling, I added in the grated soap (about 2 cups). I stirred it until it was melted and set it aside to cool for about an hour.

At this point I added in a few TB of coconut oil and about 15 drops of Lavender essential oil. It made a quart-sized mason jar and a pint-sized jar!

I used some of this the other day when showering. It’s nice and works well.  If you’ve ever used Dr. Bronner’s liquid castile soap, then you know that natural liquid body wash has a more “watery” consistency. I am on the look-out for those foaming hand soap dispensers because I would really like to use this soap I made for washing hands too. It should foam up nicely with one of those foaming dispensers!

Homemade Toothpaste

On to homemade toothpaste! Ok so this was a big step for me. To make something I lather on my body is one thing, but to make something that I actually put inside my mouth is another. Then I realized how silly this logic is. I’m trying to live more sustainably, so I need to trust myself more and trust that God gave us all we needed when He made us and the earth. I’m really trying to live more sustainably for many reasons. One, I want to be ready in the even of a Zombie Apocalypse. Two, I want to never run out of things and have to run to the store. And three, I want to show my kids to be dependent on themselves and not the grocery store. So, I found a recipe on Pinterest that uses: 5 Tbs baking soda -4 Tbs coconut oil -About 10 drops of essential oil -Container (Make sure it has a lid. Baking soda will absorb smells if left to open air.) -*You can also add a bit of stevia or other natural sweetener if you’re used to a sweeter toothpaste. I added some stevia and it did make it more palatable. It is definitely different tasting. I didn’t have any peppermint essential oil so I used my lavender essential oil. Gross! It smells good but the taste is hard to take. However, I am going to use it for myself. I know my husband will never use it. He couldn’t even use the Tom’s toothpaste without gagging. I really do like how clean it makes my teeth feel. It doesn’t bubble up and lather like commercial toothpaste does, but those do that because of all the toxic chemicals in it.

I’m really happy with all my homemade, natural products! I’m ordering a few “peri” bottles from Amazon to store them in. I have a bunch of glass mason jars in the shower right now and we all know how dangerous that can be.

All-in-all, I’m excited about my all my new products I’m making. I’m on my first week of doing the “No Poo” hair method, which is using no shampoo to wash with, however, that is a whole new post in itself. I am documenting it and after a month or so I will update you all!

Filed Under: About Me, DIY, Living Sustainably, Natural Living Tagged With: body wash, castile soap, dr. bronner's, homemade body soap, homemade toothpaste, no poo, toothpaste

I Rendered Lard!

March 26, 2012 by Jackie Ritz 11 Comments

all-done-lard-e13327214053441-768x1024

Before eating Paleo, we were “real food” eaters, following the guidelines and traditions of the Weston A. Price foundation and Nourishing Traditions cookbook. The use of lard was introduced to me as being healthy 3-4 years ago. Before that, you wouldn’t be able to convince me it was beneficial. However, I am now a believer in pig fat and cow fat (tallow). Not only is lard the original shortening that our grandmothers used to use, but it is also very high in Vitamin D, and anyone who has had their vitamin D levels checked recently, can tell you that we all are lacking in this essential vitamin.

Good lard is only 40% SATURATED fat, with 48% MONOUNSATURATED and 12% POLYUNSATURATED fat. Another interesting point to make is that lard’s fatty-acid composition is very comparable to breast milk which is 48% SATURATED 35% MONOUNSATURATED and 10% POLYUNSATURATED.

WE NEED SATURATED FAT IN OUR DIET: “It makes up over half of all cell membranes and gives cells stiffness and integrity. Bones require about 50% of the dietary fat to be saturated so calcium can be absorbed. SF lowers Lipoprotein-a in the blood, an inflammatory marker directly associated with the risk of heart disease. SF protects the liver from alcohol, toxins and drugs and they enhance the immune system. Omega 3 fats are retained in the tissue when the diet is rich in SF. Heart muscle contains rich deposits of stearic acid and palmitic fatty acids as they are foods the heart muscle uses and which are drawn upon in time of stress. Many SF have antimicrobial properties and protect us from harmful pathogens in the intestine. There is no scientific evidence to back up claims that SF causes “artery clogging” in fact arterial plaque is only 26% SF the rest unsaturated fat, over half of the plaque is polyunsaturated fat!

WE NEED CHOLESTEROL- it is only found in animal fat. In spite of being falsely accused of being the cause of atherosclerosis, heart attack and stork, cholesterol is actually a necessary substance in every body. It is a strong anti-oxidant and free radical scavenger. This is why cholesterol levels go up as we get older since we need more protection. Cholesterol makes up a large portion of the brain, is the root of all corticosteroids and hormones in the body, it is the precursor to vitamin D. It keeps our skin soft and moist, and makes the bile which we need to digest fat. Mother’s breast milk is very high in it (which should tell us something!). Our bodies make over 2000mg daily whereas a maximum of only 100mg can be absorbed from the diet, so it’s pretty clear how shaky and wrong the connection of heart disease to dietary cholesterol intake. It is oxidative stress that causes cholesterol to elevate in the bloodstream in response to excessive free radicals. In the skin, uv light causes the production of free radicals, known carcinogens and aging factor, which damage the vital phospholipids of the skin unless the cholesterol is there in adequate supplies to protect it. Cholesterol is required for proper function of serotonin (the “feel good” brain chemical) such that low cholesterol levels are associated with aggression, violence, depression and suicidal tendencies. Cholesterol lowering drugs, especially the statins, are intrinsically toxic to the liver, they deplete CoQ10, an enzyme needed by all muscles by (note that the heart is a muscle), and ultimately leaves us dangerously exposed to oxidizers, free radicals and other damaging agents” (quoted from here).

Ok, so enough trying to make you a believer, here’s my process of rendering lard:

1. First I pulled the frozen lard and chopped it into pieces.

Pork fatback from local, pastured piggies.

All chopped up.

2. I used my dutch oven and put the chopped lard on my stove top and cooked it on medium-low heat. I stirred every few minutes until the big portion of the lard was cooked and melted.

Just started melting


about 15 minutes into cooking

3. This took about 20 minutes. At about this point you will start to see the “cracklings” form. This is when everything starts spattering, so be careful. Once the cracklings are done splattering all over, they will begin to rise to the top of the bowl. This means you’re done!

All done and cracklings rose to the top

4. Next, I placed a colander over a bowl and poured my hot bowl of rendered lard into it. The cracklings were caught by the colander and the lard drained through into my bowl.

cracklings

5. I transferred to a mason jar and admired my beautiful fat. The lard was yellowish/brownish color when hot and turned a nice, smooth white color once it cooled!

Just drained lard…hot and brownish in color
Cooling my lard. Picture taken a couple of hours after I put it in the mason jar. See how it’s changing colors!
Still cooling and changing into a beautiful white color. Picture taken 12 hours after the whole process.

These cracklings or pork rinds are delicious and a wonderful Paleo alternative to bread crumbs (all crunched up). My daughter couldn’t get enough!!!

What do I do with my lard?

  • I use it to fry homemade chicken nuggets.
  • I use it in place of shortening in baking recipes.
  • I use it to saute vegetables.

***I have also rendered tallow the same way and it turned out delicious!

Filed Under: Cholesterol, DIY, Living Sustainably, Nutrition, Paleo Toddler, Shopping Local Tagged With: cholesterol, diy, fatback, pig, pork, rendering lard

Wool Dryer Balls

February 23, 2012 by Jackie Ritz 11 Comments

Not too pretty but they work!

I haven’t used dryer sheets or fabric softener in years. I use my homemade wool dryer balls! They are awesome! Don’t mind the battle wounds in the picture, these balls can handle the heat! But, seriously, I love my dryer balls. I have 8 of them. One is missing in the picture because they get lost in the clean clothes sometimes and the dogs enjoy playing with them. Wool absorbs liquid, so that’s what makes them so handy in the dryer. I keep them in the dryer and throw in a load of wet, clean clothes. The wool absorbs the liquid from the wet clothes and cuts my drying time in (almost) half! I also love the sound of the “clunk, clunk, clunk” of the balls going round-and-round in the dryer!

Not only do they cut drying time in half, but they also help reduce static…not sure how, but they do! They, also, fluff up the clothes nicely! So, no need for chemical-laden dryer sheets.

How to Make Wool Dryer Balls

Items needed:

  • recycled wool
  • wool yarn
  • knee high nylon
  • essential oils (optional)

Step 1) Save the money and go buy a few wool sweaters from Goodwill. Then go to your nearby craft store and get a big roll of wool yarn or order this nice autumn one.

Step 2) Cut the wool sweaters up in scrap pieces and ball them up in your hand. *If you are adding essential oils, pour a few drops onto the wool scraps. Then take the wool yarn and start wrapping it around the scrap wool until you have a large softball-size bundle of yarn. Some people make them the size of tennis balls but I say go BIG! I also think you need 5-8 of them to really notice a difference. So, make a bunch!

Step 3) Then when you’re done rolling them into balls, tie a knot, then throw the ball in a knee-high nylon, or in a sock. Tie off the end with a rubber band (a hair rubber band) and run them through a hot wash cycle and then a hot dry cycle. This makes the wool come together.

Step 4) Then take them out and you’re done!

*The essential oils added to the wool scraps give your clothes a nice smell in the dryer.

Happy ball-making!

Filed Under: Living Sustainably Tagged With: dryer balls, dryer sheets, eco-friendly

« Previous Page
Next Page »

Primary Sidebar

  • Facebook
  • Instagram
  • Pinterest
  • RSS
  • YouTube

Hi, I'm Jackie Ritz and welcome to The Paleo Mama! I'm a published author, certified herbalist, and voracious researcher of natural medicine and nutrition. I'm glad you're here and I hope you stick around for awhile!

Recent Posts

  • When God Says Pause: Why I Took a 5-Year Break from My Online Business
  • How to Quit Facebook but Keep Your Business Profile
  • Leaving the City for the Country
  • Natural Way to Heart Health

MEAL PLANS

Biblically clean meal plans that are for those love to cook real food

Read More

Footer

Our Blog

The Paleo Mama blog provides simple answers for healthier families through research, tutorials, recipes, and simple remedies for daily needs!

  • Health
  • Essential Oils
  • Recipes
  • Remedies
  • Natural Living
  • Meal Plans

Stick around!

You’ll get instant access to a library of natural remedies and real, paleo food, including our ebooks and free guides we send out.

  • Home
  • Disclosure/Disclaimer
  • Privacy Policy
  • Advertise
  • Contact Me

Copyright © 2025 · Wellness Pro on Genesis Framework · WordPress · Log in