• Skip to primary navigation
  • Skip to content
  • Skip to primary sidebar
  • Skip to footer

The Paleo Mama

Homegrown and Handmade

  • About
  • Blog
    • Podcast
  • Meal Plans
  • Essential Oils
  • Our Farm
    • Great Pyrenees Puppies
    • Goats
      • Goats for Sale
      • Goat Sales Policy
      • Nigerian Dwarf Bucks
        • Ranchocabra Lunar Eclipse

essential oils

DIY Laundry Detergent – $0.02 a Load!

January 20, 2014 by Jackie Ritz 66 Comments

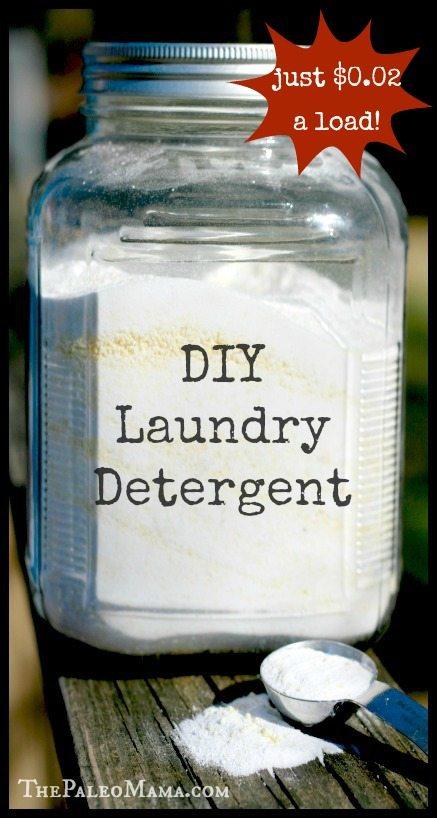
I’ve been making my own laundry detergent for years now. I was so scared at first to switch over to natural-homemade detergent because there was this mindset that store-bought is best…store-bought smells better…store-bought makes my clothes fresher. However, when we did our budget makeover, I decided to take homemade detergent into my own hands and come up with a DIY laundry detergent recipe that saves a TON of money.

You can see the cost breakdown on the bottom of this post, but it comes out to less than $7 to make a batch of this and each load is under $0.02! That is crazy! When you use Tide you are spending about $0.12 a load!

I’ve gone back and forth about using Borax. However, after asking my Facebook fans what they think a few weeks ago, and reading up a little on it on the internet, I’ve decided to keep using it for laundry uses. I’ve included essential oils in this recipe, which is optional. I love the smell and the way essential oils make my clothes feel.

DIY Laundry Detergent

INGREDIENTS: 

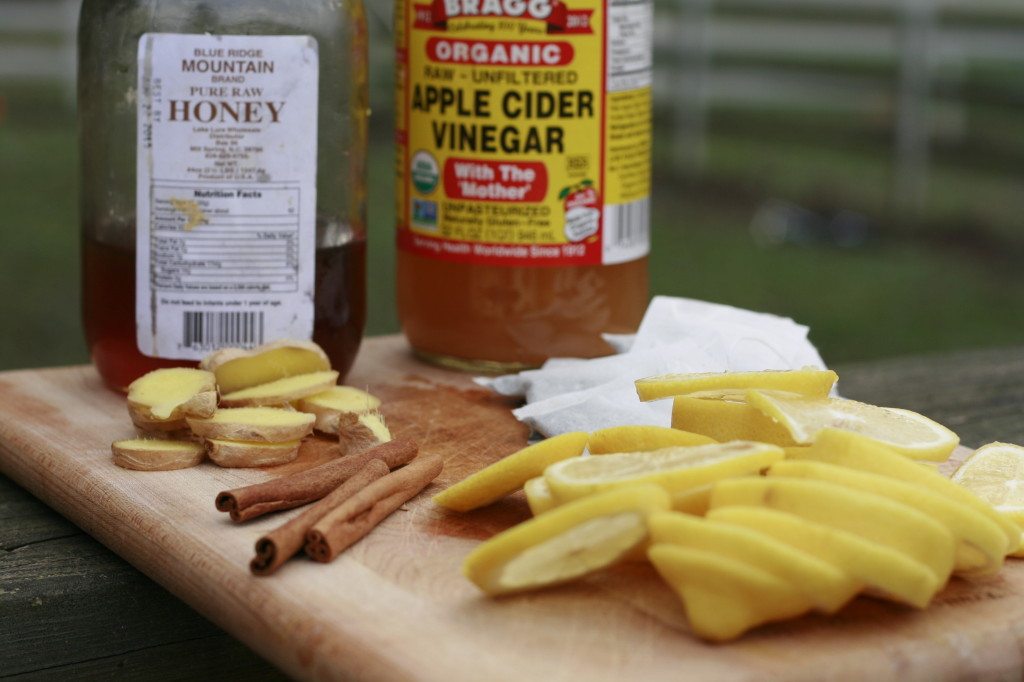
  • 3 Cups of Borax (where to buy)
  • 3 Cups Washing Soda (where to buy)
  • 3 Cups of Baking Soda (where to buy)
  • 2 Bars of Soap (like this one or this one) or Fels Naptha (ingredients are questionable though). I sometimes throw in a stain stick too!
  • 30 Drops of Essential Oil (where to buy) – I use a 50:50 mix of wild orange and lemon, but you can add whatever you like.

DIRECTIONS: 

  1. Grate the soap with a cheese grater.
  2. In a large bowl, mix the borax, washing soda, and baking soda.
  3. Toss the grated soap into a food processor. Now, add about 1 cup of the powdered mixture from the bowl. This allows you the food processor to process the soap into smaller pieces without sticking to the blades.
  4. While the food processor is on, drop the essential oil into it. This allows the essential oil to blend into the soap.
  5. Take the grated soap mixture out of the food processor and add it to the large bowl.
  6. All done! Add 1-2 tablespoons to each load of laundry! I, also, add about 1/4 cup of white vinegar to the load as a fabric softener.
  7. Makes almost a gallon.

COST Per Load: 

I’m gonna break down the cost for you so you can see how cheap this really is. If you buy the ingredients from your local store, you will get it much cheaper than ordering online.

  • 3 cups of Borax = $1.20
  • 3 cups of Washing Soda = $1.12
  • 3 cups of Baking Soda = $1.00 (we buy 50lbs at a time from a local feed store)
  • 2 Bars of Soap = $2.00
  • 30 drops of Essential Oil = $.05 per drop = $1.50

TOTAL COST PER BATCH = $6.82 !!! …or $0.02 a LOAD!!! 

CLICK HERE to Pin this Recipe

laundry detergent vertical


Filed Under: DIY Home Recipes, essential oils, Living Sustainably, Natural Living Tagged With: diy laundry detergent, essential oil detergent, gluten-free, homemade laundry detergent, paleo, primal

DIY Remineralizing Tooth Powder for Kids

January 10, 2014 by Jackie Ritz 118 Comments

After many, many requests to make a kid-friendly, remineralizing toothpaste for kids, I have this kid-tested recipe ready for you all! My DIY Remineralizing Toothpaste has been a hit and I’m so glad that you all love it. However, I agree that it is not kid-friendly. It’s paste-y and chunky when you get it in your month and kids have so many texture issues. So, I’ve created a tooth powder recipe from it and my kids love it. I know yours will too!

This is a great recipe to use if you are doing the Cure Tooth Decay protocol to heal any existing cavities naturally. And, yes, eliminating your cavities is 100% possible. I am proof! I eliminated 6 cavities naturally with proper diet and nutrition. Both my remineralizing recipes contain ZERO xylitol. Xylitol is NOT safe for you if you are trying to remineralize your teeth. It’s really hard to find a xylitol-free, glycerin-free, and fluoride-free toothpaste recipe, so I really hope you enjoy this one!

DIY Remineralizing Tooth Powder for Kids

INGREDIENTS: 

  • 1/4 cup of Bentonite Clay (where to buy) – this comes from pure sources of undisturbed deposits in the ground. What is special about bentonite clay is that it draws toxins out of the body.
  • 1 1/2 Teaspoons of Cinnamon (where to buy) – cinnamon is antibacterial, kids love it, and it helps discourage bacterial growth in the mouth.
  • 1 1/2 Teaspoons of Stevia herb (where to buy) – this is the dry herb that is green and unprocessed in it’s natural form.
  • 1/4 Teaspoon of Real Salt or Himalayan Salt (where to buy) – real salt is unrefined and full of natural minerals.
  • 6 Drops of Peppermint Essential Oil (where to buy) – this gives the toothpaste a great flavor and helps to freshen breath
  • 4 Drops of OnGuard Essential Oil (where to buy) – this blend is full of immune boosting properties and is known for eliminating germs (or cavities)! CLICK here to learn more about what brand I recommend

DIRECTIONS: 

  1. Mix all the ingredients, except the essential oils, in a bowl.
  2. Add the drops of essential oil directly to the top of the powder mixture.
  3. Grab a fork and mix the clumps of essential oil into the powder. You may need to use your fingers to mash the clumps together and break them apart.
  4. Store in a bowl with a lid. ***do not use a metal bowl like the one in the pic. Bentonite clay pulls toxins and metal is a big no-no. I only used this container to make the picture prettier, but don’t do this! ***

TO USE: 

  1. Wet your child’s toothbrush and dip the tip of the toothbrush into the powder. You don’t want too much. A little goes a long way.
  2. Then brush the powder into your child’s gums and teeth.

Some tips: 

  • This recipe is great for adults too!
  • This powder can be used to rub on gums to promote good oral health throughout the day.
  • You may want to make separate bowls for each child.
  • Kids have texture issues, so don’t use too much powder at one time. I find that I need to make sure the powder is wet before I give the toothbrush to my kids.
  • Only use quality essential oils.

Remineralizing Tooth Powder for Kids


 Did you enjoy this post? Give it a +1 for me on Google+! Thank!


Filed Under: essential oils, My Recipes, Natural Living, Paleo Toddler Tagged With: cure tooth decay, flouride free, healing cavities, remineralizing toothpaste, safe toothpaste for kids, tooth powder, xylitol free

How To Give Your Kids a Detox Bath

January 7, 2014 by Jackie Ritz 127 Comments

Lately, my kids and I have become quite addicted to our nightly detox baths. There’s nothing like taking a hot bath, lighting a few candles, and allowing the troubles of the day to simmer away. This is my ultimate way to unwind. Kids benefit from the nightly ritual, as well. And when you throw in some epsom salt or magnesium flakes, some coconut oil, and a little bit of some essential oils, you have a recipe for a deeply healing bath that promotes healing and relaxation. Before I explain how to give your kids a detox bath, let me dive into why you should be giving them detox baths.

Why Give Your Kids a Detox Bath?

  1. To flush out toxins that have built up in our body. THIS is a great article on how and why we should take detox baths.
  2. To strengthen our immune system. 
  3. To promote sleep and relaxation. 
  4. Help muscles and nerves function properly. Great for growing kids.
  5. Helps promote concentration.

“While increasing your magnesium levels, Epsom Salt also delivers sulfates, which are extremely difficult to get through food but which readily absorb through the skin. Sulfates serve a wide variety of functions in the body, playing a vital role in the formation of brain tissue, joint proteins and the mucin proteins that line the walls of the digestive tract. Sulfates also stimulate the pancreas to generate digestive enzymes and are believed to help detoxify the body’s residue of medicines and environmental contaminants.” (source)

How to Give Kids a Detox Bath:

Materials Needed: 

  • Epsom Salt (where to buy) or Magnesium Flakes (where to buy)
  • Hot tub of water
  • Baking soda if water is unfiltered
  • High Quality Essential Oils (where to buy)
  • Coconut Oil or Olive Oil (where to buy)
  • cranky, wired, sick and adorable kids!

STEP ONE: Add the Epsom Salt to a tub of hot water

Epsom salt dosage: 

  • For children under 60 lbs, add 1/2 cup to a standard bath.
  • For children 60 lbs to 100 lbs, add 1 cup to a standard bath.
  • For people 100 lbs and up, add 2 cups or more to a standard bath. (source)

STEP TWO: Add the baking soda (optional)

Adding baking soda to a detox bath helps to neutralize the chemicals in the water, especially chlorine. I have well water, so I don’t need to do this. But, if you unsure about your water, or if you know that it is not filtered, then add in some baking soda.

Baking Soda Dosage:

  • For children under 60 lbs, add 1/4th cup to a standard bath.
  • For children 60 lbs to 100 lbs, add 1/2 cup to a standard bath.
  • For people 100 lbs and up, add 1 cup to a standard bath.

STEP THREE: Add the coconut oil (or extra virgin olive oil)

I like adding coconut oil or olive oil to our detox baths for a few reasons. One, it helps the essential oils to bind to the coconut oil and stick to my kids skin which helps moisturize their skin. Two, it keeps the essential oils from sticking to the side of the tub. And lastly, it clings to skin even after you get out of the tub.

Coconut Oil or Olive Oil Dosage: 

  • For children under 60 lbs, add 1 tablespoon to a standard bath.
  • For children 60 lbs to 100 lbs, add 2 tablespoons to a standard bath.
  • For people 100 lbs and up, add 3 tablespoons to a standard bath.

STEP FOUR: Add the Essential Oils

Whenever I mention essential oils, I am referring to only the top quality, therapeutic grade oils. I don’t recommend purchasing any other kind. Click here to see which oils I recommend. The great thing about essential oils is that they can be used for a variety of different reasons.

Essential Oil Dosage: 

  • For children under 60 lbs and over 2 years old, add 4 drops to a standard bath.
  • For children 60 lbs to 100 lbs, add 6 drops  to a standard bath.
  • For people 100 lbs and up, add 10 drops to a standard bath.

Here are a few of my favorite ways to use essential oils in a detox bath for my kids.

Essential Oil Suggestions: 

  • Calming and Relaxing: Lavender, Ylang Ylang, Roman Chamomile, or Cedarwood 
  • Bonding: if you would like to jump in with your baby or child, I recommend frankincense to help promote bonding.
  • Immune Boosting: Protective blend or Wild Orange
  • Respiratory Support: Eucalyptus, Peppermint, or a respiratory blend
  • Digestive Support: Peppermint, Cardamom, Lemon or Peppermint.

 *A Few Tips: 

  • Don’t wash your children’s hair on detox bath night! The coconut/olive oil makes it very greasy and hard to get out.
  • Don’t wash their body with any soaps or harsh cleansers with chemicals. Their pores are open and you want them to absorb the magnesium and oils. I recommend using something like Dr. Bronner’s Baby Soap or a bar of castile soap if you must wash them. Otherwise skip the soap.
  • Try to keep them in the bath for 20 minutes to get all the benefits of the bath.
  • Lather them up, if you wish, with a natural moisturizer like coconut oil. I add in a few drops of lavender and give them a light massage as I’m putting on their clothes.
  • Give them some water or leave some beside their bed. Detox baths can make you thirsty.
  • Cuddle on the couch and read a good book before kissing them goodnight! Magnesium promotes sleep so they should sleep very good for you!
Detox Bath Recipe
2018-01-24 11:20:56
Throw in some epsom salt or magnesium flakes, some coconut oil, and a little bit of some essential oils, you have a recipe for a deeply healing bath that promotes healing and relaxation.
Write a review
Save Recipe
Print
Ingredients
  1. Epsom Salt or Magnesium Flakes
  2. Hot tub of water
  3. Baking soda if water is unfiltered
  4. High Quality Essential Oils
  5. Coconut Oil or Olive Oil
  6. cranky, wired, sick and adorable kids!
Instructions
  1. STEP ONE: Add the Epsom Salt to a tub of hot water. Epsom Salt Dosage: for children under 60 lbs, add 1/2 cup to a standard bath. For children 60 lbs to 100 lbs, add 1 cup to a standard bath. For people 100 lbs and up, add 2 cups or more to a standard bath.
  2. STEP TWO: Add the baking soda (optional). Adding baking soda to a detox bath helps to neutralize the chemicals in the water, especially chlorine. I have well water, so I don't need to do this. But, if you unsure about your water, or if you know that it is not filtered, then add in some baking soda.
  3. Baking Soda Dosage: for children under 60 lbs, add 1/4th cup to a standard bath. For children 60 lbs to 100 lbs, add 1/2 cup to a standard bath. For people 100 lbs and up, add 1 cup to a standard bath.
  4. STEP THREE: Add the coconut oil (or extra virgin olive oil). I like adding coconut oil or olive oil to our detox baths for a few reasons. One, it helps the essential oils to bind to the coconut oil and stick to my kids skin which helps moisturize their skin. Two, it keeps the essential oils from sticking to the side of the tub. And lastly, it clings to skin even after you get out of the tub.
  5. Coconut Oil or Olive Oil Dosage:  For children under 60 lbs, add 1 tablespoon to a standard bath. For children 60 lbs to 100 lbs, add 2 tablespoons to a standard bath. For people 100 lbs and up, add 3 tablespoons to a standard bath.
  6. STEP FOUR: Add the Essential Oils.
  7. Essential Oil Dosage: For children under 60 lbs and over 2 years old, add 4 drops to a standard bath. For children 60 lbs to 100 lbs, add 6 drops  to a standard bath. For people 100 lbs and up, add 10 drops to a standard bath.
Essential Oil Suggestions
  1. Calming and Relaxing: Lavender, Ylang Ylang, Roman Chamomile, or Cedarwood
  2. Bonding: if you would like to jump in with your baby or child, I recommend frankincense to help promote bonding.
  3. Immune Boosting: OnGuard or Wild Orange
  4. Respiratory Support: Eucalyptus, Peppermint, or a respiratory blend like Breathe.
  5. Digestive Support: Peppermint, Cardamom, Lemon or Peppermint.
By The Paleo Mama
The Paleo Mama https://thepaleomama.com/

 CLICK HERE to Pin this Article!

detox bath vertical kids

(Photo Credit: Flickr)

 Did you enjoy this post? Give it a +1 on Google+ for me! Thanks!


Filed Under: essential oils, Natural Living, Paleo Baby, Paleo Toddler Tagged With: featured

DIY Remineralizing Toothpaste

December 16, 2013 by Jackie Ritz 196 Comments

Six months ago I went to the dentist and found out that I had six cavities. I could not believe it. It didn’t make sense because I eat a very clean, Paleo diet. I pinpointed some of the things that caused my cavities in this post that I wrote, “How I’m Healing My Cavities Without Dentistry.” This post has received a lot of attention and I’ve received many emails and messages about various things that I’m doing to heal my cavities. Well, good news…I went for a 6 month check-up at this dentist a few days ago to see how my cavities looked and to see if the remineralizing process was working…AND…I HAVE ZERO CAVITIES!!! I healed my teeth naturally with proper diet and nutrition and I did not have to pay a hefty dentist bill to have my teeth drilled and filled!

I mention in that post that I use a homemade toothpaste and because I have received so many emails about what that recipe is, I thought I would share my DIY Remineralizing Toothpaste recipe. I was having a hard time finding a toothpaste that did not have certain ingredients in them. When you are trying to remineralizing your teeth, you need to make sure you are not using a toothpaste with glycerin or xylitol in it. Glycerin coats your teeth and counteracts the remineralization process and this article explains why we don’t use xylitol. Our family avoids toothpaste with fluoride and preservatives, as well.

This recipe is great for remineralizing your teeth if you are following the Cure Tooth Decay protocol and have some cavities you are trying to reverse but it’s, also, a wonderful recipe to use just to maintain optimal oral health for your day-to-day life.

DIY Remineralizing Toothpaste:

INGREDIENTS: 

  • 1/3 cup of Bentonite Clay (where to buy)- this comes from pure sources of undisturbed deposits in the ground. What is special about bentonite clay is that it draws toxins out of the body.
  • 1/4 cup of boiling water
  • 1 Tablespoon of coconut Oil (where to buy) – coconut oil is amazing for oral health. It is highly effective with getting rid of viruses and bacteria in the mouth
  • 1/4 teaspoon of Real Salt (where to buy) – real salt is unrefined and full of natural minerals.
  • 1/2 teaspoon of REAL stevia  (where to buy)- this is the dry herb that is green and unprocessed in it’s natural form.
  • 15 Drops of Protective blend Essential oil (where to buy) 
  • 10 Drops of Peppermint Essential oil (where to buy) 

DIRECTIONS:

  • Step One: Put your bentonite clay in a bowl. Heat the water on the stove and then stir in the coconut oil till it is melted.
  • Step Two: With a hand mixer, mix on medium speed the bentonite clay and the water/oil mixture till blended through.
  • Step Three: Add the salt, stevia, and essential oils and continue to blend until it is completely blended.
  • Step Four: Keep in a covered jar!
  • *The mixture will harden a little bit as it sits because of the coconut oil. This makes it easier to add a bit to your toothbrush when you brush.

For more information on healing your cavities naturally, read this post and check out Cure Tooth Decay!

Want a kid-friendly version of this recipe? Check out my DIY Remineralizing Tooth Powder for KIDS! 


DIY Toothpaste

Filed Under: essential oils, My Recipes, Natural Living Tagged With: bentonite clay recipes, DIY remineralizing toothpaste, essential oils, gluten-free, heal cavities naturally, homemade toothpaste, paleo, primal, real salt

DIY Cooling Cucumber Mask

December 3, 2013 by Jackie Ritz 13 Comments

I started my natural living experience nearly 5 years ago! I remember how daunting it was to get rid of all the chemicals in my house and how overwhelming it was learning about toxins in my skin care products. I was so happy to follow so many wonderful bloggers who generously shared their home remedies and recipes. After 5 years, I still feel like an amateur when it comes to creating DIY beauty products for myself or my blog! I love the learning experience, but when someone like Jenni from Jenni Raincloud comes along and offers to do a guest post for a DIY Cooling Cucumber Mask…I am thrilled to allow it! So, please welcome Jenni!  – Jackie 

Hi everyone!  I’m Jenni, from Jenni Raincloud Homebody Extraordinaire!  I am an aesthetician and have been in the skin care industry for over a decade!  After taking a break from my career to start a family I started realizing how my favorite skin care products were full of false promises and CHEMICALS!  I started to search for alternatives to my favorite lines and came up with very few choices of skin care companies that were charging an arm and a leg for organic, pure products.  So, I decided to take control and make my own!  I immediately fell in love with the wonders of nature in skin care.  My blog is all about my adventures in do it yourself skin care!  Thanks for having me and I hope you enjoy today’s post!
2013-11-12 15.47.58 HDR-1
Anyone have issues with dark circles, crows feet, and puffy bags under your eyes?  My hand is up.  Let’s just get real for a second-Sometimes drinking 10 tons of water a day just doesn’t happen.  Sometimes you just don’t get a full night’s sleep-baby is screaming, 5 year old had a bad dream, husband snores, dog is trying to get underneath you, bladder is shot (thanks Sofie and Heidi for that) weird noises outside, cell phone mysteriously vibrates-you get the picture, the older you get the less you sleep through stuff, but that’s a whole other post, huh?!  More often then not, stress is a daily annoyance-that breeds and multiplies itself while reeking havoc on our bodies.  These annoying issues all contribute to worn out, tired eyes.  So, let’s fix it.  Let’s take 10 minutes to do something for ourselves?  It’s easy and relaxing-You in?

2013-11-12 15.37.13 HDR
I always love to use food on my face.  Seriously-nature is full of remedies.  This is an easy way to relax those tired eyes with out adding chemicals to your body or breaking the bank!  All you need is a cucumber, coconut oil and aloe vera gel!  If you really want to get fancy, Carrot Seed Oil is my go to essential oil for the eyes.  It regenerates and renews-I talk more about it in my DIY Anti Wrinkle Eye Stick post. Now, I like to not waste.  So, I use a whole cucumber, 2 TBSP of coconut oil and 1/4 cup of aloe vera gel.  I put it in an ice cube tray and freeze (hence the cooling part).  This will give you many applications without wasting your cucumber and will also save time and effort in the long run!

2013-11-13 12.10.03 HDR-2

 Cooling Cucumber Mask

  • 1 large cucumber
  • 2 TBSP Unrefined Coconut Oil
  • 1/4 cup Aloe Vera Gel
  • 8 drops of Carrot Seed Essential Oil (optional)

Blend all ingredients together until all ingredients form a smooth cream.  Transfer to ice cube tray and freeze.  You might hold a bit back and pop it in the fridge so you can use your mask now!

Apply all around the eyes.  Leave on for 10-15 minutes.  It feels HEAVENLY!  So refreshing-you can just feel the puffiness disappearing!  If you are using the Carrot Seed oil be very careful-if it gets in your eyes it will burn.  If the oil gets in your eyes, rinse out your eye with cool water immediately.

2013-11-12 15.42.47 HDR-1

So there you have it!  A fast and easy remedy for those pesky tired, puffy eyes!

Cucumbers rock!

2011-08-14 09.37.27-1

Jennifer lives in Edmond Oklahoma with her husband and 2 daughters. She has been in the skin care world for over a decade. She believes beautiful skin comes from the inside out. In order to achieve youthful skin a healthy lifestyle must be in place. If you can’t eat it, don’t put it on your skin are her words to live by! She sells her skin care products on Etsy, runs her “at home spa” for close clients and blogs full time. She is happiest staying home with her family and cooking up healthy skin care products in the kitchen! You can follow Jenni Raincloud on Facebook, Pinterest and Twitter!

Filed Under: essential oils, Guest Posts, My Recipes, Natural Living Tagged With: cooling cucumber mask, DIY beauty, DIY Cucumber mask, paleo, primal, toxic free

Soothing Elixir for Cold and Flu Season

November 25, 2013 by Jackie Ritz 36 Comments

The moment I feel myself getting the sniffles, I grab a few lemons, some ginger, some green tea, cinnamon, and some local, raw honey and I make myself this Soothing Elixir for cold and flu season.  It’s so deeply nourishing and easy to make and helps to boost immunity. 

You can make it in the crockpot and let it simmer all day, ladle a hot glass when you want, or you can make it on the stovetop. Either way works great and there are many “add-ins” you can put it in to add more nutrition.

Soothing Elixir for Cold and Flu Season

Ingredients: 

  • 2 lemons, sliced in circles
  • 8 echinacea tea bags (I use this tea)
  • 3 cinnamon sticks (I use these sticks)
  • 2 inch piece of ginger, sliced thin
  • 1/4-1/2 cup of raw apple cider vinegar (I use this one)
  • 6 cups of water
  • Raw Honey
  • OPTIONAL: turmeric, coconut oil, or gelatin.

_MG_8112

Instructions: 

  1. Pour the water in a pot and bring to a boil.
  2. Add the lemons, ginger, tea bags, and cinnamon sticks. Cover and let steep for 20-30 minutes.
  3. Pour the apple cider vinegar into a pitcher or a large half gallon mason jar .
  4. Dump the tea into the mason jar. You can keep the lemons and ginger in, but remove the tea bags.
  5. When ready to drink, warm up, and add in a teaspoon or two of raw honey.
  6. OPTIONAL Add-ins: tumeric, coconut oil, and gelatin.

Soothing Elixir for Colds and Flus
2017-10-25 14:54:55
Serves 8
Write a review
Save Recipe
Print
Prep Time
5 min
Cook Time
20 min
Total Time
25 min
Prep Time
5 min
Cook Time
20 min
Total Time
25 min
Ingredients
  1. 2 lemons, sliced in circles
  2. 8 Echinacea tea bags
  3. 3 cinnamon sticks
  4. 2 inch piece of ginger, sliced thin
  5. 1/4-1/2 cup of raw apple cider vinegar
  6. 6 cups of water
  7. Raw Honey
  8. OPTIONAL: turmeric, coconut oil, or gelatin.
Instructions
  1. Pour the water in a pot and bring to a boil.
  2. Add the lemons, ginger, tea bags, and cinnamon sticks. Cover and let steep for 20-30 minutes.
  3. Pour the apple cider vinegar into a pitcher or a large half gallon mason jar .
  4. Dump the tea into the mason jar. You can keep the lemons and ginger in, but remove the tea bags.
  5. When ready to drink, warm up, and add in a teaspoon or two of raw honey.
  6. OPTIONAL Add-ins: tumeric, coconut oil, and gelatin.
By The Paleo Mama
The Paleo Mama https://thepaleomama.com/

Filed Under: essential oils, My Recipes, Natural Living Tagged With: cold elixir, gluten-free, grain-free, green tea, lemon tea, paleo, primal, soothing tonic, tea for sickness, turmeric tea

« Previous Page

Primary Sidebar

  • Facebook
  • Instagram
  • Pinterest
  • RSS
  • YouTube

Hi, I'm Jackie Ritz and welcome to The Paleo Mama! I'm a published author, certified herbalist, and voracious researcher of natural medicine and nutrition. I'm glad you're here and I hope you stick around for awhile!

Recent Posts

  • When God Says Pause: Why I Took a 5-Year Break from My Online Business
  • How to Quit Facebook but Keep Your Business Profile
  • Leaving the City for the Country
  • Natural Way to Heart Health

MEAL PLANS

Biblically clean meal plans that are for those love to cook real food

Read More

Footer

Our Blog

The Paleo Mama blog provides simple answers for healthier families through research, tutorials, recipes, and simple remedies for daily needs!

  • Health
  • Essential Oils
  • Recipes
  • Remedies
  • Natural Living
  • Meal Plans

Stick around!

You’ll get instant access to a library of natural remedies and real, paleo food, including our ebooks and free guides we send out.

  • Home
  • Disclosure/Disclaimer
  • Privacy Policy
  • Advertise
  • Contact Me

Copyright © 2025 · Wellness Pro on Genesis Framework · WordPress · Log in