• Skip to primary navigation
  • Skip to content
  • Skip to primary sidebar
  • Skip to footer

The Paleo Mama

Homegrown and Handmade

  • About
  • Blog
    • Podcast
  • Meal Plans
  • Essential Oils
  • Our Farm
    • Great Pyrenees Puppies
    • Goats
      • Goats for Sale
      • Goat Sales Policy
      • Nigerian Dwarf Bucks
        • Ranchocabra Lunar Eclipse

Budget

Emergency Paleo Food Storage on $10 a Week

May 7, 2015 by Jackie Ritz 3 Comments

Emergency Paleo Food Storage

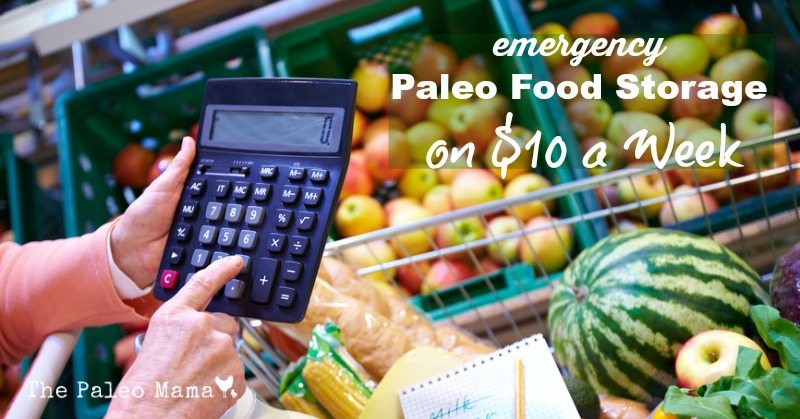
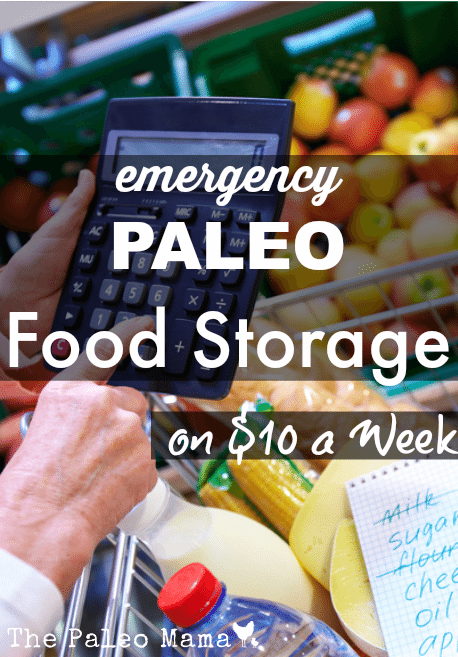
In a recent blog post we introduced you to the concept of stockpiling enough food to feed your family for a full year. We are beginning to do this ourselves, and we recommend it to you. We don’t want you to have a “Mother Hubbard Experience” of not having enough food in your cupboard so we want to take a further step to help you actually be able to do this without busting your budget. If you can budget just $10 per week to accumulate your stockpile, we will show you how to have the full year of  emergency paleo food storage by spending just $10 a week for 52 weeks.

How do I set up my budget for this?

This way of stockpiling food is the “low and slow” method. It takes time, 52 weeks, but it also only requires a low financial burden. If you are on a tight budget, this is the perfect plan for you. Remember that this plan begins by developing a master plan. You will need to:

  • Determine what you eat
  • Determine how much you need
  • Determine what you will use your $10 for each week.

It is our plan to grow and provide as much of our own food needs as possible. We will not need to purchase as many items at the grocer, but will be preserving and storing the bounty from our own harvested fruits and veggies, and the livestock and poultry from our own farm animals. If you also plan to grow as much of your own produce as possible, you may want to begin your 52-week accumulation by using the first 4 weeks, or $40, to stock up or save your seeds for the next planting year. It would be ideal to begin this process in the spring with the start-up of your planting year. 

I recommend that you use an envelope system for your weekly $10 and saving for your emergency paleo food storage. Make an envelope and label it, “Food Storage”. Each week you will purchase $10 worth of food items for your food storage and ONLY use the $10 you have in that envelope. If you have money left over from last week, move it over and use it for future food storage purchases. What the weekly envelope achieves for you is an easy way for you to roll over any spare change each week into the next week’s envelope. Don’t use credit cards for this process; interest rates are self-defeating and just create a bigger problem. To budget for this new process, you may need only to forego one restaurant meal a month or decide to rent a video to watch at home rather than paying full admission for your family at the theater. 

It will be very important for you to watch for seasonal sales, holiday sales, special offers at local co-ops or farms, and other money-saving opportunities.

How do I ensure that I am getting the specific foods we will need to continue our Paleo or gluten-free lifestyle.

I know that the majority of those who follow my blogs have very specialized eating styles, most of whom follow a Paleo lifestyle. Not all the information you can research on this subject takes into account the specialized Paleo needs. That’s why we want to help you do that with information we will share in this blog. 

As you develop your list, be sure to list the approved foods you are willing to use. For example, you will need a grain-free substitute for the flour grains that may be listed in an online proposed master list. Determine what you are willing to use: almond and coconut flours, flaxseed and quinoa, dairy substitutions like almond or coconut milk, cheese substitutes like nutritional yeast, and ghee as a storage ready butter substitute. 

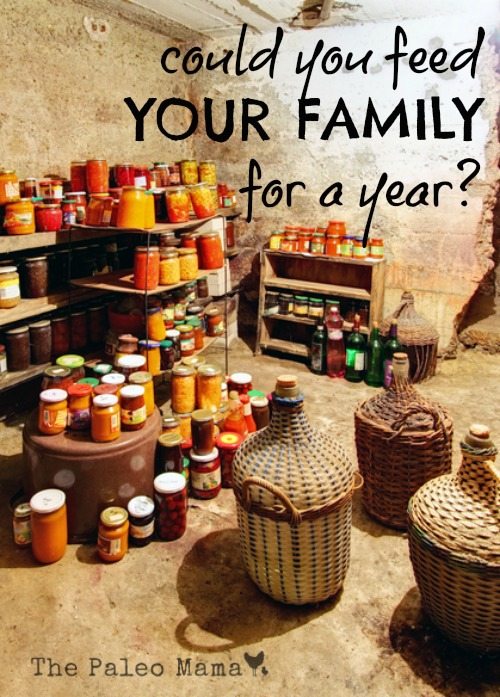
Be sure that your emergency paleo food storage is weighted toward wonderful fruits and veggies that can keep well in a root cellar, and plan in advance the kinds of grain-free, dairy-free (unless you are primal) and protein-dense meals you can make from your storage foods. Stockpile your recipes also, including delicious soups and stews along with your favorite menu items.

What specific foods should I purchase each week to have a one-year supply in 52 weeks?

It will take you some time to thoughtfully plan out how you will accumulate the foods for your one-year storage plan. There are many proposed lists that  you can review, but ultimately your master list will be specific to your family’s needs, favorite foods, and what foods you will grow or produce yourself as opposed to those you need to purchase. 

There is a wonderful list available that is specific to the Paleo diet, and we recommend that you begin with that list. You will purchase the listed item for each week. For example, on week one, when you do your grocery shopping, you will purchase one refill pouch of Real Salt. The second week you will purchase 3-4 cans ($10 worth) of full-fat coconut milk. You can use the suggested purchases in that list to plan your own purchases, taking into account your family preferences, local and seasonal sales in your area, and relationships you may have already developed with co-ops, produce stands, or local farmers.

Your list will also need to be adapted to the preparation and preservation you can accomplish for your own home-grown fruits and vegetables, or home-raised livestock and poultry.

If you are not quite Paleo, but you eat real, whole food, then I recommend you take a look at this list. 

Hints from Experienced Food Storage “Addicts”

You can learn from those who have been doing this for some time. They have gone through the trial and error periods and have developed time-tested ways to be successful at storing food for a year. Here are just a few snippets of the advice they can provide to the novice stockpiler.

  1. “In the beginning when I started to plan for a year’s worth of household needs, I had absolutely no idea about how many…pounds of hamburger or coffee were used in my home in any given year. The way that I was able to determine that information was with a wall calendar diary and pen. Every time I’d open a package of chicken…or jar of peanut butter I’d note it on the calendar. I was determined and faithful about recording all food, supplies and ordinary household sundries. By the end of the first year I had a pretty good idea of what I was and wasn’t using and how much of each item I was consuming.” – Granny Miller
  2. “When living off food storage adequate vitamin and mineral consumption can be a problem.  Fresh sprouts pack an enormous punch relative to their size.  In a long term emergency situation, they may be the only fresh food you can get your hands on.  You don’t need a fancy sprouter, a simple canning jar with nylons, or cheesecloth in place of the lid will work beautifully.” – Eating Food Storage
  3. “Take the amount of food you would need to purchase to feed your family for a day and multiply that by 7. That is how much food you would need for a one-week supply. Once you have a week’s supply, you can gradually expand it to a month, and eventually three months.” – LDS
  4. “Every June I start anew the annual cycle of putting aside a year’s worth of food and supplies. The goal is to have all the food and supplies I need in my pantry, cupboards, closets and cellar by Halloween. My practical food storage education first began in the mid 1980’s when I attempted to store a winter’s worth of food and household sundries. I live in the snow belt on a rural back road and in those days it was not at all unusual for us to be literally snowed in and house bound for a week at a time; a few times every winter. My winter pantry proved to be such a wonderful convenience, and time and money saver, that by 1990 I extended my pantry and household stores to last 1 year. I took a lesson from my husband’s Appalachian grandmother and coincided the beginning of my food storage efforts with each year’s new gardening and growing season. For my household, the food year begins with planting the garden in spring and ends with the final harvest in the fall.” – Granny Miller
  5. “There are actually 2 types of food storage. When I finally realized that I need to have 2 plans it was like a light bulb went on. First, a shorter term emergency food supply. Short term emergency food supply is what will be used on a continuing basis. I consider my 3 – 12 month supply of food to be short term food storage. This food is used on a regular basis and is rotated and restocked regularly. A longer term emergency food supply. Figure out how much food you need to collect for your long term food storage. These foods will be the types of items that can be the basics of survival food.” – Simply Canning

Resources

  • https://www.intentionallydomestic.com/real-food-storage-on-10-a-week-paleo-diet-edition/
  • https://www.intentionallydomestic.com/build-your-food-storage-on-10-a-week-general-real-food/
  • https://www.thekitchn.com/how-to-start-a-food-storage-on-138765
  • https://www.backwoodshome.com/articles/hagan59.html
  • https://www.grainfreeliving.com/list-of-grain-and-grain-free-foods/
  • https://www.kitchenstewardship.com/2013/07/29/eating-grain-free-resources-and-recipes-all-in-one-place/

Emergency Paleo Food Storage on 10 a Week

Filed Under: Budget, Budget Shopping, Homesteading, Living Sustainably, Natural Living

Could You Feed Your Family for a Year?

May 6, 2015 by Jackie Ritz Leave a Comment


There are many people today who are talking about the importance of storing enough food to feed your family for a year. TV talk show host Glenn Beck has said that he feels “it is critical for Americans to be ready for whatever life might throw their way. He and fellow Fox News host Sean Hannity are promoting a program from which you can purchase kits containing survival food for yourself or your entire family—however it will cost you thousands of dollars.

Nearly everyone we know is not prepared to pay that kind of money to stockpile food for an emergency, even one lasting as long as 12 months. But we have begun to feel the urgency of having such a plan, and are starting to take “baby steps” toward the goal of just such a stockpile of food for our family. In this post we want to share with you some of the things we have discovered that will help us to reach that goal eventually. We are much more interested in economical ways that promote the possibility of developing the ability to grow, harvest, and prepare for storage many of the foods we would need. And we are discovering great recommendations for how to economically purchase those we cannot produce ourselves.  In this blog post, we want to share five factors about stockpiling food that may be important for you to consider also.

5 Factors About Stockpiling Food That is Important for You to Consider

1. Why consider preparing a one-year supply of emergency food?

The current world situation is, at best, unstable and scary! All it would take for our grocery stores to have empty shelves is a shortage of fuel, economic collapse, wide-spread electronic power failure, civil unrest or devastating natural disasters. In addition to these big considerations, maybe you haven’t noticed how expensive a trip to the grocery store is becoming. 

It is our desire to begin growing most of our own food, and preserving and storing it in our root cellar or other storage areas. Living without our weekly or monthly trips to the grocery stores sounds wonderful, but it is important to remember that being in charge of our own pantry is time-consuming and needs to be carefully organized. For example, I love making goat cheese for my family, but it takes a whole lot more time to do that than a quick trip to pick up cheese from the grocer.

2. How much food will it take to feed my family for a year?

Our family will need to figure out exactly how much food we need to store to feed two adults and two children (and a myriad of farm animals) for a year. No two households will have the same food preferences, living arrangements, or dietary needs or restrictions. If we really are anticipating some kind of emergency that could end all grocery purchases for a year, then we need to be including the household supplies, medicine, personal care, and food preparation tools I’ll need to be using. This post will not address those additional supplies, but you should do your own research to discover what these are. Be sure that you are cataloging your favorite recipes along with your master list of foods.

A simple but effective way of figuring out your family’s food needs is to carefully compile a list of all food (including spices, sauces, or other recipe items) your family eats in one week. Then you can multiply that by 12 to make your list for three months, and again my 4 to arrive at a total for a year. 

There are some food storage calculators available online to help you figure out the exact quantities you need to be considering of some food items. Here’s one that is great, but keep in mind this is a basic one that is NOT made of real food, but instead, highly processed. 

On your master list, you will need to include food items in the following categories:

  • Meat (protein sources)
  • Vegetables and fruits from your own home-grown garden
  • Additional fresh or frozen food from the grocery store
  • Dairy (or your Paleo dairy substitutions like cans of coconut milk)
  • Condiments, sauces and jellies
  • Pantry mainstays (vinegars, oils, Almond butter, spices, etc.)
  • Probable non-Paleo items such as beans or lentils, nuts and seeds (because let’s face it, in a crisis, eating beans and lentils is OKAY)
  • Baking supplies and natural sweeteners. Honey can last up to 10 years if stored properly
  • Water and other drinks supply

CLICK HERE to go to my follow up post and see how to spend $10 to build up your emergency paleo food storage. 

3. How much will it cost, what storage space will I need, and what kind of containers do I need to store my food?

There are examples online of several people who recommend starting your food storage plan with just $10 per week. Others have written about their one-year storage food, which cost in the neighborhood of just $300. Considering the fact that many of us spend an average of $100 for just one-week’s supply of food, $300 for an entire year is mind-boggling. You can begin with the simple step of picking up a few extra items each time you head to the store.

If you are allowing yourself about $10 a week to accumulate your non-homegrown food items, you will want to decide in advance what extra items you’ll pick up. Be sure you are watching for sales (such as seasonal sales and holiday sales), and researching opportunities through co-ops, farm stands, and local farmers. Don’t forget to date each item before adding it to your storage. 

You will want to get creative with where you keep your food storage. The ideal space would be a root cellar , but we’ve heard of people who keep things stored under a bed, in an extra closet, or in an unused room in the basement. The key is to keep all foods in a space that is clean, dry, and low in humidity.

There are many food grade storage containers that can be used for long-term food storage. These include:

  • glass
  • plastic (make sure it’s BPA-free)
  • buckets
  • liners

Each of these type containers are good for most dry foods. Remember that you must store dry foods without any moisture. Think about the BPA-free plastic bottles that you can recycle for food storage. Use only plastics that contained food. Also consider getting recycled empty plastic buckets from your local grocer or bakery store. Most bakeries have 3-gallon buckets, which will be much easier to move around than the 5-gallon buckets. Be sure that your buckets have a tightly fitting cover. There are also many glass jars that make great storage containers, including the canning jars you will be using. Don’t forget the number 10 can, which can keep foods fresh and rodent and bug proof for several years. To assure that your storage containers are airtight and pest free, you can use mylar bags, foil pouches, and oxygen absorbers.

4. How do I preserve my home-grown harvested food to keep for at least one year?

Another important step for you to take is to learn how to preserve your home-grown food supplies by canning, freezing, freeze-drying, or safely storing in your designated root cellar or food storage location.

Canning and preserving can go a long way towards filling up your master list of foods to store for one year. It will also ensure that you are using your home-grown bounty in the most economical way. As I mentioned earlier, you should have first carefully planned for what you wanted to grow in your garden, and how much food it will take to feel your family for a year. Now figure out the approximate number of pounds of food you will harvest, and calculate how many pounds of each fruit or vegetable per quart jar. (Two links that can help you with this are HERE and HERE.)

There are several different methods you can use to preserve your garden bounty for storage.  There are also many, many websites that can help you learn the methods of preserving your food. I’m listing some of these below with one link you can use to begin learning how to use each one.

  • Water Bath Canning 
  • Pressure Canning 
  • Freezing 
  • Dehydrating 
  • Preserving Jams and Jellies 
  • Step-by-step pickling
  • Lacto-fermenting

Your master list should also include the type and quantity of livestock or poultry you need to have to add to your food storage. If you raise your own livestock or poultry, determine how much butchering you will need to do. (If you do not raise your own livestock and poultry, research your options for purchasing this economically from local co-ops, butchers, or local farmers.)

Much of your livestock and poultry can be frozen and stored in a freezer. But there are other ways to preserve meat that you could use also. Some of these are:

  • Canning
  • Curing
  • Smoking
  • Dehydrating
  • Biltong (marinating meat in a vinegar solution and then rubbing it with a spice mix)

5. Most importantly, how can I be sure I’m storing food that will support my grain-free, dairy-free, preservative-free natural, Paleo lifestyle?

One of the first things to consider is to begin your food storage efforts at the start of your gardening an growing season, and to end at the time of your last garden harvest. You need to be sure you are growing the foods that fit your Paleo or gluten-free lifestyle, and that are the actual foods your family will enjoy. 

In a food storage plan for a year, it may be difficult to store only foods that are 100 percent Paleo or Gaps approved. I know for our family we are already only about 80 percent Paleo, and I would consider storing some non-Paleo items like grain-free seeds, Quinoa, and other grain-free things like sprouted amaranth, buckwheat or millet. I would also be willing to store beans and lentils as a protein source. 

 Other grain-free supplies could include: 

  • Almond and Coconut flours (but keep in mind that if we were in an emergency situation, you won’t see me making baked Paleo goods) 
  • Chia seed
  • Flaxseed
  • Cooking staples like Almond and Coconut Milk, oils, Ghee (shelf stable form of butter) 
  • Flavor enhancers like Cocoa powder or chocolate, coconut shreds, and extracts
  • Nuts and seeds, including nut and seed butters

Our family purchases most of our food in bulk and we are gradually building our one-year stockpile by purchasing items we need from Azure Standard. Check to see if Azure delivers to your area! 

Make a decision to start now

This has been a longer blog post, but one we hope has whet your appetite for researching and preparing to gather and store some food supplies that will be available to you for a protracted period of time if necessary. If Old Mother Hubbard had done her research and prepared a food storage plan for her family, she would not have had a cupboard so bare there was not even a bone for her dog. 

 Remember these two cardinal rules for successful food storage:

  1. Store what you eat and eat what you store.
  2. Rotate, rotate, ROTATE!

By developing your master plan, and being willing to make a moderate investment of time and effort, you will have a successful food storage program for eating in good times or bad.

Be sure to check out the follow-up post to this on how you can store a year’s worth of food for your family on only $10 a week! 

Resources:

  • https://billyandanuttama.wordpress.com/2010/12/07/how-to-have-a-years-worth-of-food-stored-what-to-store-and-why-you-should-do-it/
  • https://www.thekitchn.com/how-to-start-a-food-storage-on-138765
  • https://lds.about.com/library/bl/faq/blcalculator.htm
  • https://pubs.ext.vt.edu/426/426-331/426-331_pdf.pdf
  • https://www.oldfashionedfamilies.com/how-much-canning-do-you-need-for-a-full-year/
  • https://www.granny-miller.com/use-this-tool-to-help-plan-a-years-worth-of-food-supplies/
  • https://modernsurvivalblog.com/survival-skills/old-methods-of-meat-preservation/
  • https://www.rodalenews.com/grain-free-shopping-list
  • https://www.backwoodshome.com/articles/hagan59.html

Could You Feed Your Family For a Year The Paleo Mama


Filed Under: Budget, Budget Shopping, Homesteading, Living Sustainably, Natural Living

Root Cellars—5 Time-Tested Storage Ideas for Your Garden Bounty

May 2, 2015 by Jackie Ritz 4 Comments

Food storage

Root cellars have been around for hundreds of years. They have one purpose—to enable long-term storage for your harvested fruits and vegetables. History tells us that native Australians were the first to preserved large amounts of yams and other produce deep in the cooling and insulation of earth. Underground storage facilities from the Iron Age have been discovered, and the early colonists in North America came prepared with the knowledge of how to preserve their crops. Our ancestors knew the benefit of keeping a root cellar and used these 5 time-tested storage ideas for their garden bounty. 

I have access to our family’s geneology going back to the 1400’s. Many of my ancestors were farmers, and each generation used a form of root cellar to store their bounty during the winter. Before refrigeration, the root cellar was an essential way to keep turnips, carrots, potatoes, carrots, beets, parsnips and other root vegetables fresh through the winter months. My mother grew up in Michigan, and remembers vividly the root cellar in her basement, built by her father right next to the playhouse he built for my mother and her sister. It was her job to get potatoes out of the potato bin, and bring up various cans stored there by her mother who was an avid canner.

Root cellars are making a comeback, and are highly appreciated by homesteaders and natural living advocates who want to reduce expenses by growing and storing their self-grown harvests. I am so fortunate to have a root cellar waiting for me in our new “forever farm,” which we move in to at the end of this month. I’m doing my best to learn how to maximize its usage, and I want to share some of this information with you so you can consider doing the same thing.

1. What Is a Root Cellar?

Technically, a root cellar is any storage location that uses natural cooling, insulating, and humidifying properties of the earth. Today’s root cellars are often found in basements, or are dug down in the ground or horizontally into a hillside. You don’t need an elaborate root cellar to store vegetables, even for months at a time. You can easily extend the fresh life of root crops using whatever storage space you currently have. 

2. Twenty-two Foods You Can Store in a Root Cellar

Your root cellar will work for you as long as you pay close attention to the crop varieties you choose, on your timing for harvest, and learning the best storage conditions for each type of fruit or vegetable. Contact your cooperative extension office for advice on specific storage varieties for your region. Here is a list of 22 crop varieties you may choose to store.

Cold and Damp Storage

Store these at 32 to 40 degrees F, with 90-95 percent humidity. Research each of these to discover when to harvest and how to store.

  • Apples
  • Beets
  • Broccoli
  • Brussels Sprouts
  • Cabbage
  • Carrots
  • Jerusalem Artichokes
  • Leeks
  • Parsnips
  • Pears
  • Potatoes
  • Rutabagas
  • Turnips
  • Winter Radishes

Cool and Dry Storage

Store these varieties at 50-60 degrees F, with 60-70 percent humidity.

  • Beans (dried)
  • Garlic
  • Onions
  • Pumpkins
  • Squash
  • Sweet Potatoes
  • Tomatilllos
  • Tomatoes

3. Root Cellar Basics

There are three basic conditions a root cellar should provide. The closer you come to matching these ideal conditions in your vegetable-storage area, the better your vegetables will keep.

  1. Humidity—High humidity is essential. Most root crops and leafy veggies keep best in humidity of 90-95 percent. There are three ways to assure this humidity: install a dirt floor, adding water when needed such as pans of water or damp burlap over the produce, pack the veggies in damp sawdust, sand, or moss.
  2. Ventilation—Air needs to be circulated through your root cellar. Because warm air rises and cool air falls, put an air intake down low, and the outlet up high.
  3. Temperature—This is the most important thing. You can borrow cold from the ground, or by letting cold night air into the cellar.

4. Root Cellar Design

Screen Shot 2015-05-02 at 10.07.38 AM
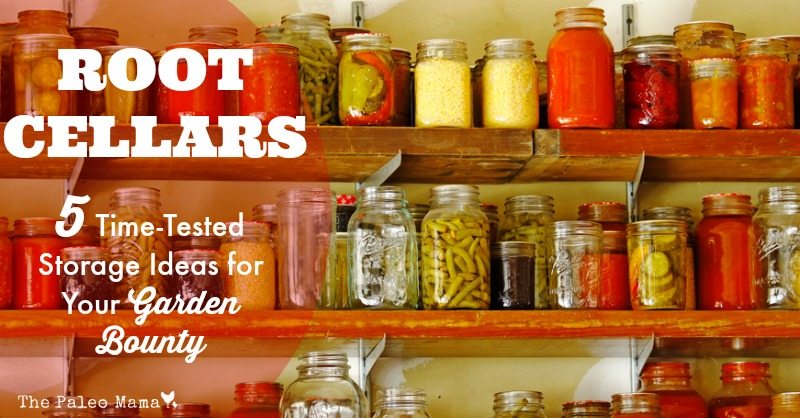
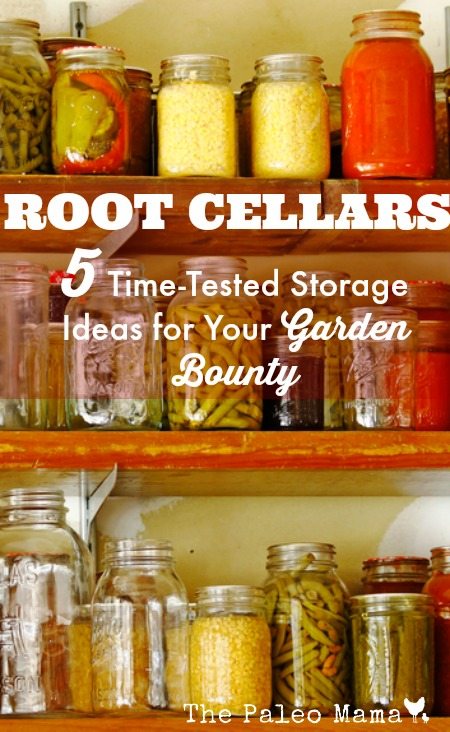
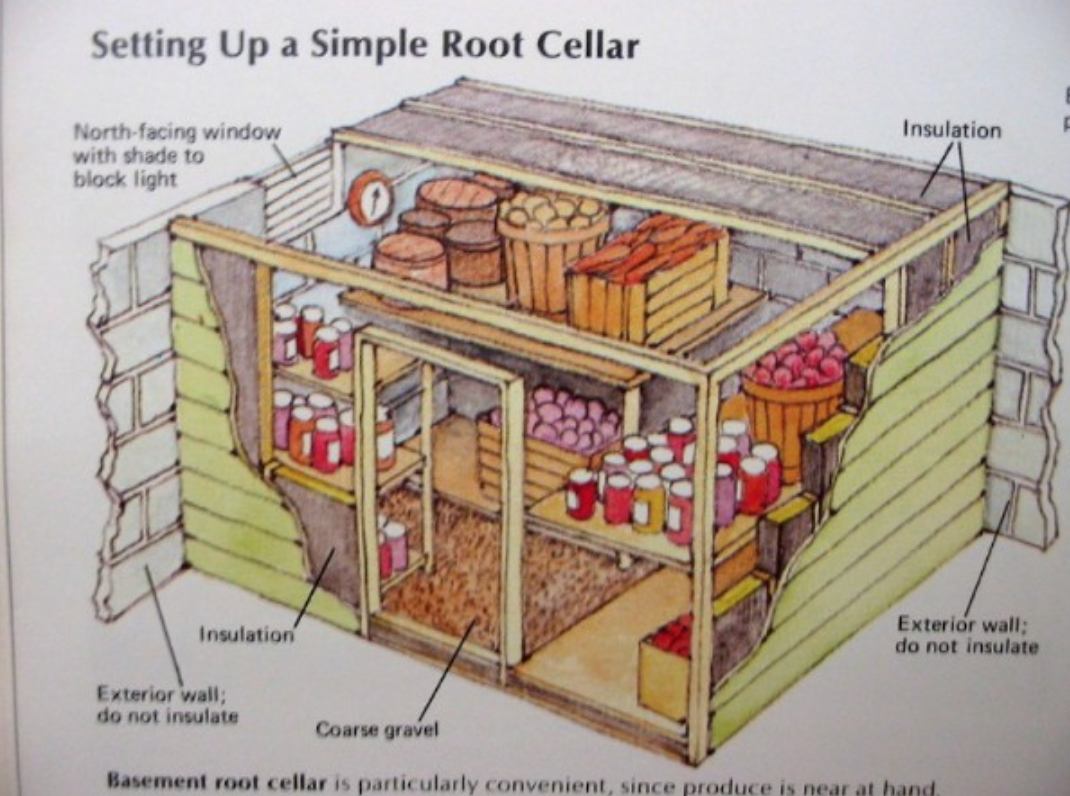
Root cellar designs run the gamut from rough and rugged to designer worthy. Some ideas that are inexpensive but useful include:

  • Simple shelving created from rough cut boards and cement blocks
  • Stackable trays that circulate air
  • Simple wood boxes with burlap covers to keep out the light.
  • Buckets, bins, or boxes with lightly dampened leaves.
  • Sawdust or sand

5. What Can My Root Cellar Do for Me?

What can root cellaring do for you? Simply this: make it possible for you to enjoy fresh endive in December; tender, savory Chinese cabbage in January; juicy apples in February; crisp carrots in March; and sturdy, unsprayed potatoes in April — all without boiling a jar, blanching a vegetable or filling a freezer bag. A root cellar can save you time, money and supplies. Your gas and electric bills will be lower because you are not heating 2-gallon kettles of water for canning. You won’t have to stuff so much into the freezer, and you won’t need to buy new jar lids or freezer bags.Growing your own food can be very rewarding, especially during the summer months when veggies can be washed, cooked and on the table the very same day they’re picked (nothing fresher than that!). If you plan ahead and plant more than your family and friends can consume during the growing season, you can still enjoy your bumper crop over the long, cold winter months through the wonderful benefits of root cellaring.

Food storage

Resources:

  • https://www.hobbyfarms.com/food-and-kitchen/root-cellars-14908.aspx
  • https://www.almanac.com/root-cellar-build
  • https://www.hobbyfarms.com/food-and-kitchen/how-to-store-food-in-root-cellars.aspx
  • https://www.motherearthnews.com/real-food/fundamentals-of-root-cellaring-zm0z91zsie.aspx
  • https://commonsensehome.com/root-cellars-101/
  • https://tipnut.com/cold-storage-projects/

Filed Under: Budget, DIY, Homesteading, Living Sustainably, Natural Living

Get a Month’s Worth of Paleo Meal Plans for FREE!

February 25, 2015 by Jackie Ritz 14 Comments

Fresh raw food ingredients for Paleo diet

Are you thinking about trying Paleo but you aren’t sure how to make it work for your family? 

Are you on a budget and think that eating Paleo is too expensive? 

Or maybe you have been eating Paleo for awhile and would like some more guidance and simplicity on meal planning. 

You are in the right place! 

I’ve created a WHOLE MONTH of budget-friendly meal plans for you! The best part? These are EASY to make. You will not be in the kitchen forever…maybe 30 minutes max to prep a healthy and whole meal for your family! 

To get 4 weeks of meals plans PLUS a printable grocery list, sign up below by leaving your name and email. 

You will get your first week of meal plans TODAY and then, one email a week, for four weeks! If you don’t see the form below, click here. 

SUBSCRIBE TO OUR FREE MEAL PLANS!

* indicates required


Fresh raw food ingredients for Paleo diet

Filed Under: Budget, Budget Shopping, Living Sustainably, My Recipes, Natural Living, Starting Paleo

Traditional Goat Milk Soap Recipe

October 22, 2014 by Jackie Ritz 21 Comments

Goat Milk Soap Recipe .001

Why Goat’s Milk

Goat’s milk is packed with vitamins, minerals natural fats, and protein. It carries a pH of around 6.4 which is very similar to a normal skin pH of 5.6, which makes it great for skin tolerance. You can find vitamins A, B2, B6, B12, and Niacin in goat’s milk and many who cannot tolerate dairy, find that they have no problems with goat’s milk.

Those who have very sensitive skin, find that paying over $5 for a bar of goat’s milk soap is worth it! I’ve had several people come up to me and tell me that my soap was the one of the only bars of soap that they could use without breaking out or having a skin reaction.

Anyone Can Make Soap

Soap is NOT hard to make. What is hard to make is all that fancy soap…which I don’t understand anyways. It’s just you, naked in the shower or bath, rubbing a bar of soap on your body. Why do you need swirls and fun shapes? If you enjoy doing that, then by all means, go for it! But I make soap for my family and most the time the kids end up making holes in the bar and pretending like Spiderman can surf on it.

This is a very basic, traditional recipe that I created. I use lard and I use lye. This is NOT a vegan recipe. I also use the traditional method of cold-process. This process uses a short prep time and a long cure time. It’s the easiest, in my opinion, because you are mostly waiting on the soap to cure and harden. This is the way our ancestors prepared soap and it’s the way I prefer to make my soap. Since I use raw goat’s milk, I prefer to keep the milk unheated to prevent destroying any vitamins and minerals.

Why Lard and Lye

Lard was traditionally used in making soap and has a very long history of in soap-making.  I get my lard from a local farm for a really good price, but you can order pastured lard from here. Lard is the hardening fat in this soap – it’s what makes the bar hard so that it doesn’t turn into a big pile of glob while you are taking a shower.

I, also, like lard because of the aging time. When you make a cold-process soap, you are going to need to let your soap age (or cure) for 3-6 weeks. If you do not use a hardening fat, like lard, then it’s going to take your soap much longer to cure. I find that 3-4 weeks is perfect for this recipe.

Now lye is necessary for the alkali, when combined with the goats milk, loosens and attracts dirt, allowing it to be washed away. After 24 hours, the lye is not even present and by the time the 3-4 weeks is up, there is no trace of lye in the soap.

Supplies Needed:

For anything that touches the lye, you will need separate supplies and those supplies should never be used on anything else. Also, this is going to make an UNSCENTED bar. I have tried using essential oils and it requires way TOO MUCH. Alternatively, if you would like, you can add a few drops of essential oil to your bar of soap when you are washing in the shower.

  • Immersion blender
  • Glass bowls for mixing
  • Rubber spatulas
  • Digital Kitchen Scale
  • Tall stainless-steel pot for melting oils
  • 2 Thermometers
  • Safety Equipment – rubber gloves, long sleeve shirt, and goggles
  • Knife to cut the soap
  • Soap Molds or Old Loaf Pans – I prefer the rustic cut of the soap and prefer to use loaf pans.
  • Parchment paper

Ingredients Needed:

You can change your fats and oils if you would like. This is just the recipe that I created and enjoy the most. I have made several other recipes and I really prefer mine as it is very moisturizing, lathers very well, and includes sustainable fats.

  • 2 ounces of Beeswax
  • 18 ounces of Coconut oil
  • 5 ounces of Castor Oil
  • 26 ounces of pastured Lard
  • 6 ounces of Olive oil
  • 8.40 ounces (or 238.39 grams) of 100% pure Lye
  • 18.9 ounces of Frozen Goats Milk (raw or pasteurized) – easiest way to freeze goats milk for soap-making, is to pour the measured out goats milk into a gallon ziplock bag. Then freeze the bag flat.

Step-By-Step Instructions:

  1. Collect all your supplies and block off your kitchen. I usually do this when my kids are down for a nap because of the lye.
  2. Put parchment paper in your loaf pans to get them ready.
  3. Measure out all the fats and oils (everything but the lye and milk) and put in your tall stainless-steel pot.
  4. Put your stove on LOW and slowly melt the oils and the fats. Put a thermometer in and make sure it never goes above 100 degrees. Once melted, remove from stove.
  5. Take your bag of frozen goats milk and smash it up into smaller pieces. Add it to a large glass bowl.
  6. Slowly sprinkle your lye over the frozen milk and mix with a spatula at the same time. MAKE SURE you are wearing your safety gear!
  7. Mix until the frozen milk is melted. Check the temperature of the mixture with a thermometer and do not let it go over 110 degrees. If it does, no worries, just cool it down by placing the bowl in a larger bowl filled with ice water.
  8. Now check on your oils and make sure they are melted and the temp is not over 100 degrees. If it is, then cool it down by placing it in the bowl of ice water.
  9. You want your oil mixture and your lye mixture to be within 10 degrees of each other.
  10. Now slowly pour your lye mixture into your oil mixture. As you are pouring, put your immersion blender on LOW and start to mix.
  11. When all the lye mixture is added, turn your immersion blender on HIGH and mix until you reach “trace”. Trace is when you can take a spoon or spatula and you can draw a line in your mixture. It usually takes me 2 minutes to reach trace with this recipe…sometimes less.
  12. Once you reach trace, you are going to need to move very fast. Immediately, pour your mixture into your 2 loaf pans or your soap molds. Use your rubber spatula to clean the bowl and smooth out the top of the loaf pan.
  13. Put the pans in a dark spot out of reach of kids. Leave it alone for 24 hours. After around 24 hours, the lye is inactive and you can touch the soap.
  14. After 24 hours, remove your soap from the loaf pans and cut into individual bars.
  15. Place the bars in a dark area and let them cure for 3-4 weeks! I know, it’s torture to wait, but it’s sooooo worth it!
  16. After 3-4 weeks the bars should be ready to go!

 See Picture Tutorial Below…..

Working on reaching trace. 

16081_10152632866727013_915759999358523822_n

After you reach trace, pour into your loaf pans and allow to sit for 24 hours. 

soap1

After 24 hours, cut into individual-sized soap bars and cure for 3-4 weeks. 

soap 2

Waiting 3-4 weeks for the soap to harden! It’s worth the wait! 

10703599_10152663692747013_4306114713772124454_n


I hope you enjoy this recipe as much as my family does! 

Traditional Goat Milk Soap Recipe .001

Filed Under: Budget, DIY Beauty Recipes, DIY Home Recipes, goats, Homesteading, Living Sustainably, My Recipes, Natural Living

How to Cut the Cable and Not Feel Deprived

April 15, 2014 by Jackie Ritz 20 Comments

How to Cut Your Cable and Not Feel Deprived.001

Have you recently taken a close look at your cable bill? Do you see lots of taxes, charges, and fees that kind of snuck their way into your bill? I remember the last time I looked at my cable bill and thought, “what a waste of money” and I called the company up and I cut the bill. I was tired of feeling like I was getting ripped off. What’s funny is that cable didn’t start off that way in the late 40’s, and what once was a small localized business, has turned into a ginormous industry of penny-pushing and trying to make as much as they can off the consumer.

According to Consumer Reports, the average household will spend $154 a month on cable. Over a year that is over $1,800! That is more than I spend on our family’s clothes and, quite possibly, it is more than what you spend on groceries every month.

I published this article about a year ago and mentioned that we decided to cut our cable because we were aggressively trying to pay off debt. Cutting our cable was a tough decision at the time. I dreamed of Little House on the Prairie nights in our house with our kids…but it never works out quite like that! However, in the 2 years that we have cut out cable, I have never felt deprived or felt like I missed out on the latest shows. Let me show you how to get around the cable pit so that you can start saving money on cable and start using that money for something much more necessary (organic produce, quality meats, or paying off debt).

How to Cut Your Cable in 5 Easy Steps

Step One:

Shop around in your area for the BEST internet provider. Most cable providers have the internet charges wrapped up like some fancy wording “triple play“. Look in your area and see who offers the best rates for internet service. WOW, Wave, and Verizon FiOS have the best ratings according to Consumer Reports. Work a deal with them. See what their charges are for just internet and phone (if you need that).

Step Two:

Call your provider and tell them YOU ARE DONE. This is a tricky step because the hagglers for cable companies ARE GOOD. Do not let them reel you in. Tell them you are tired of the added fees and service charges and that you want your cable to be done. If you found out that they offered the best deals on “strictly” internet, then keep the internet but ditch the cable. Make sure to work out a deal!

Step Three:

Get the no-cable essentials…unless you are going COMPLETE no cable. We love our Roku and we can stream shows, yes, even the latest Grey’s Anatomy shows, on it. The best thing about my Roku is that you do not even need a DVR anymore. You can play the shows at your convenience. Many new televisions have a built-in cable antenna. Check to see if yours does. If it doesn’t, then I recommend this Radio Shack antenna. This allows you to tap into FREE broadcast table which airs all the major channels like FOX, ABC and NBC. You thought you had to pay for those, huh?!

No-Cable Essentials: Roku and Radio Shack antenna.

Step Four:

Sign up for Netflix and/or Hulu. What’s the difference? Netflix has mostly older shows, but it is great for kids. My kids enjoy lots of shows from Netflix and lots of Disney movies too. Hulu has newer shows and episodes. What’s the caveat? You have to wait a day or so for them to load up the newer episode after it airs on television. But, if you are anxious and can’t wait, then you can always use your handy antenna and watch it!

Step Five:

Get rid of your extra tv’s! Ok, I know this isn’t for everyone, but we just have one TV in the house now. We have vowed never to put a TV in our bedroom or our kid’s bedroom. However, there are times when I would like to lay down in my own bed and watch the latest Revenge. This is where having an iPad comes in handy! Download the Hulu and Netflix app and watch it in your own bed on your own iPad!

Now relish in the fact that you are spending *maybe* $15 a month on Hulu and Netflix and you are saving over $130 a month! What can you do with $130 a month? 

How to Cut Your Cable and Not Feel Deprived | www.thepaleomama.com .001

Filed Under: Budget, Natural Living, Thoughts

« Previous Page
Next Page »

Primary Sidebar

  • Facebook
  • Instagram
  • Pinterest
  • RSS
  • YouTube

Hi, I'm Jackie Ritz and welcome to The Paleo Mama! I'm a published author, certified herbalist, and voracious researcher of natural medicine and nutrition. I'm glad you're here and I hope you stick around for awhile!

Recent Posts

  • When God Says Pause: Why I Took a 5-Year Break from My Online Business
  • How to Quit Facebook but Keep Your Business Profile
  • Leaving the City for the Country
  • Natural Way to Heart Health

MEAL PLANS

Biblically clean meal plans that are for those love to cook real food

Read More

Footer

Our Blog

The Paleo Mama blog provides simple answers for healthier families through research, tutorials, recipes, and simple remedies for daily needs!

  • Health
  • Essential Oils
  • Recipes
  • Remedies
  • Natural Living
  • Meal Plans

Stick around!

You’ll get instant access to a library of natural remedies and real, paleo food, including our ebooks and free guides we send out.

  • Home
  • Disclosure/Disclaimer
  • Privacy Policy
  • Advertise
  • Contact Me

Copyright © 2025 · Wellness Pro on Genesis Framework · WordPress · Log in