Today I’m welcoming Darla from Dear Darla on the blog! You are going to love this post from Darla and see how easy it is to make your own “Fauxby” Moby Wrap (don’t you just love saying that?!). Mama’s, she is giving you your hands back and your little ones are going to love being safe and snug next to your heartbeat again!
“Help! My Baby refuses to be put down!” Oh Mama, I have been in your skin. You have this new baby that you have waited so long for and you are beaming with love for your little one, but you’re also starving and you have to do a load of laundry or your daughter is going to have to wear her Elsa dress to church (again). This is when we choose between making a salad with one hand, or put the baby down and risk waking him and hearing him cry in protest. Well, there is another option. You can wear your baby.
It is growing in popularity to wear our babies. Not just because of the cute wraps and carriers available but also because of our baby’s needs and how they develop after birth. The concept of the “Fourth Trimester” is a helpful way of looking at it. My son, for example, spent 40 weeks happy and comfortable in the womb. He got to hear my heartbeat, breathing, speaking and singing. He was able to feel the ebb and flow of my body as it naturally moved throughout my day. It’s the only comfort he has ever known up to this point. Then, he was born. There were bright lights and the noises were much louder. All of a sudden, his world went from the close and quiet quarters of the womb, to the infinite and terrifying open air. It’s no wonder his instincts drove him right to mother’s skin. It is no wonder he “refuses to be put down” sometimes. It’s no wonder he screams in protest and fear when he can’t find me.
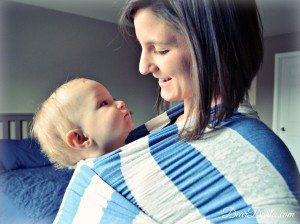 The transition from ‘Womb to World” takes a long time. Our patience and sympathy will help our babies along the way. You cannot spoil a newborn. They don’t have the cognition to muster manipulation, they just need your comfort and to know they can trust you. Wearing our babies kissably close helps them feel secure while helping us eat more than granola bars for the first few months.
My favorite carrier is the Faux Moby Wrap I made at home. The “Fauxby”, if you will. It’s lightweight and easily transitions to fit as your and your baby’s bodies change. It’s easy to make, cheaper and you get to customize it for yourself. If I had to put it in terms we can all understand, it’s about as easy to make as putting a king size duvet cover on. It takes a little math and calculated fineness, but it can be done and you’ll feel really proud of yourself afterwards.
I didn’t need much. I have this rotary cutting set. These are essential for crafting because I can’t cut a straight line to save my life. I would highly suggest using one for this project because we aren’t sewing so our edges will remain raw and visible.
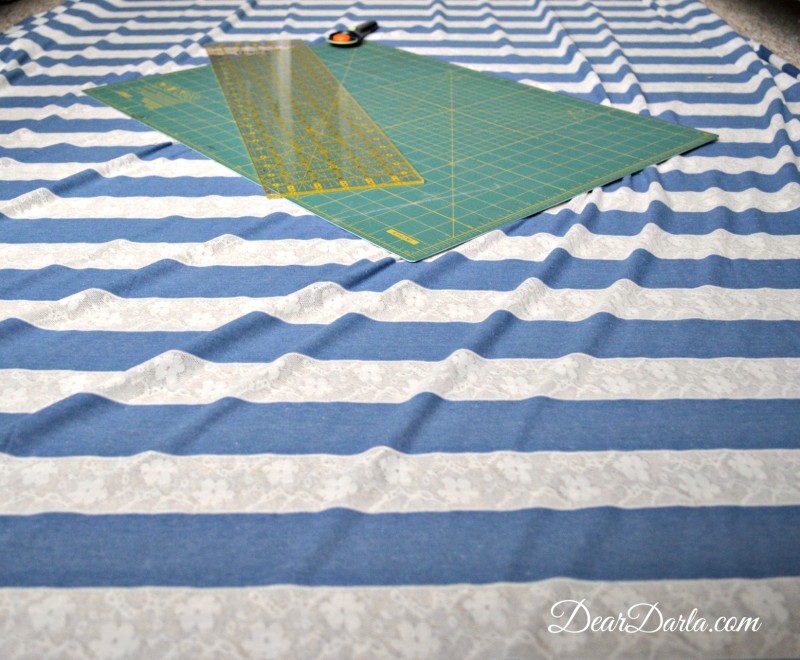
You’ll need 5-6 yards of a fabric of your choice. I made this wrap for a summer baby so I was looking for something lightweight and breathable. You want something stretchy, like a t-shirt or a jersey skirt. This is the hardest part of making your wrap! I know. Don’t be discouraged, there are so many options and it’s pretty intuitive and easy to figure it out once you get to the store. A few key words to look for in the fabric descriptions are: knit, rayon, polyester blends. Basically, anything stretchy in that section will work. The original Moby is 6 yards long, I’ve found that to be too long for my small frame, so I trimmed mine to about 5 yards. Anywhere between 5 and 6 should be fine. The fabric comes wide enough to get three wraps out of the deal too! So, you can be a really great friend and give a couple away as humble brag baby shower gifts. You’re awesome.
One more note on buying fabric, check coupons! There is always a sale going on!
Ok, enough chatting…let me show you how to make your own moby wrap!
How to Make Your Own Moby Wrap:
ITEMS NEEDED:
- 5-6 yards of fabric
- Rotary Cutting Set
Step #1:
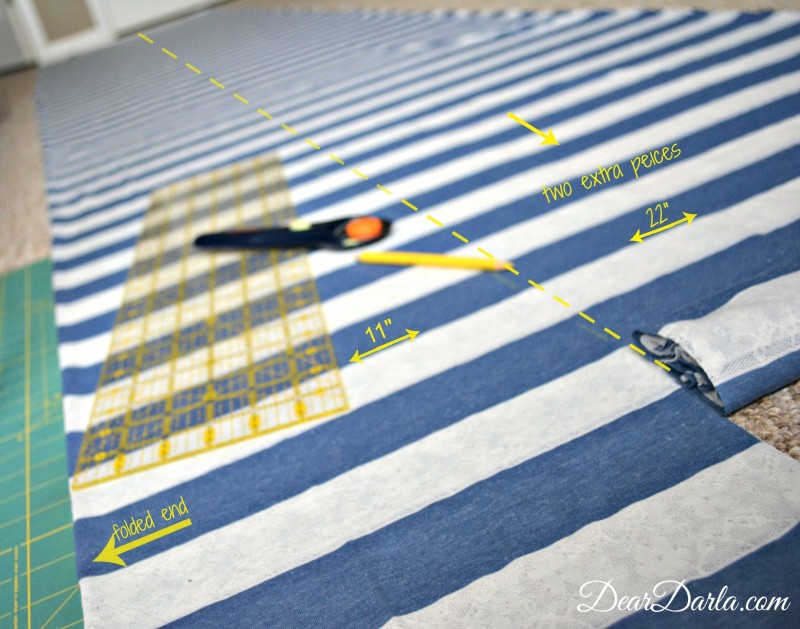
Measure the width of your fabric and then fold your fabric in half “hot dog style” so your salvage ends are together. Divide the width by three. (Mine was 66 inches wide so I had enough for three 22-inch-wide wraps.) Take the folded end, and measure and mark in half of that number from the edge towards the lose ends. For me, that was 11 inches. Cut the whole length of the fabric 11 inches from the fold so when it opens up, you have three 22 inch wide strips of 5-6 yards.
Step #2:
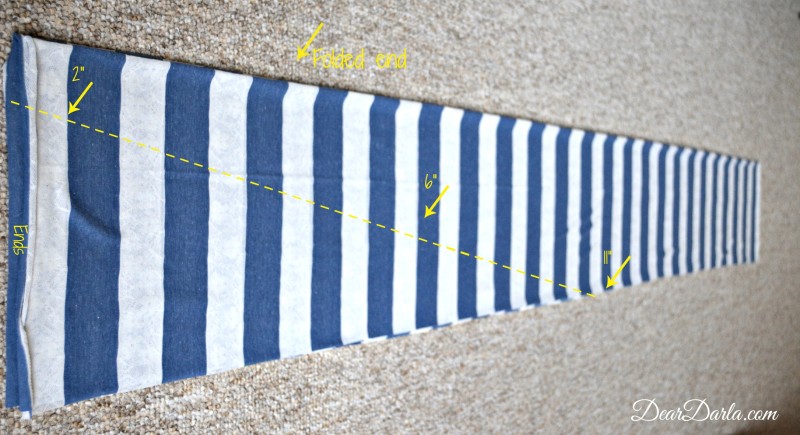
Now you taper the ends so that they are more manageable to tie up. Leave your first cut folded “hot dog style” and then fold it “hamburger style” so now the ends of your wrap are together and you have 4 pieces of fabric you’re cutting through.
Step #3:
At this point, my wrap had to taper from 11” to 2”. I did this over the course of 4’. I marked the ends at 2“, then 2’ in made a mark at 6” and then 2’ in again I marked the top at 11”. I drew a line to connect each mark and cut.
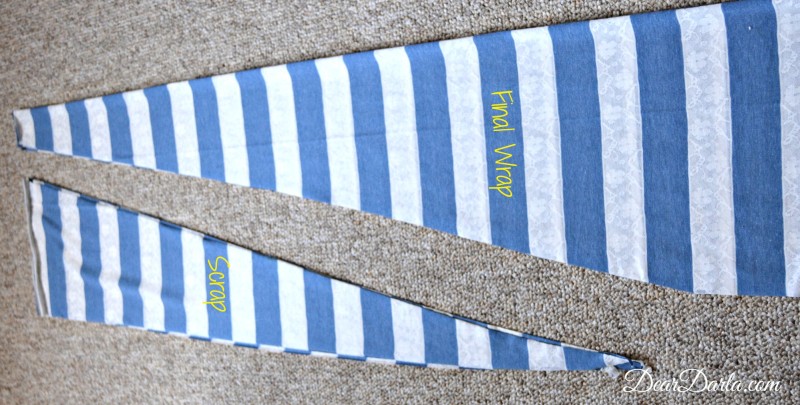
That is it! All you have to do now is check out the video below to learn how to put it on and carry your baby safely and you’re all set! It only took two cuts and now you have your own Fauxby wrap! You can cuddle and bond with your baby and eat a meal with both hands, you may even fold some laundry if you’re feeling bold. I’m excited for you.
ABOUT THE AUTHOR:
My name is Darla. I’m a lover and pursuer of many things. In the stage of life I’m in, there is so much to try and so much life to experience. The time is flying. The days are long but the months seem so short. I want to remember it all. I want to share what has worked for me. I want to process and protest some things that I used to just accept. Mostly, I long to grow. To become a stronger wife, a wiser, more intuitive mother and a daring and brave woman after Gods gracious heart.
Follow Darla:
- DearDarla.com
- Facebook.com/Deardarlajean
- Instagram @DearDarlaJean
- www.pinterest.com/DearDarlaJean/



 Jennifer Fountain is the founder of
  I’ve been blessed to have amazing births with both my kids. Both of them were very different. My first child was an induced hospital birth with an epidural. My second was a 100% natural birth in a bathtub with no meds or epidural. I’m sort of glad that I have been able to have both experiences because I’m able to talk about the differences in both. Many people think they can’t stand the pain of a natural birth, however, I found the pain very minimal compared to my hospital birth.