• Skip to primary navigation
  • Skip to content
  • Skip to footer

The Paleo Mama

Homegrown and Handmade

  • About
  • Blog
    • Podcast
  • Meal Plans
  • Essential Oils
  • Our Farm
    • Great Pyrenees Puppies
    • Goats
      • Goats for Sale
      • Goat Sales Policy
      • Nigerian Dwarf Bucks
        • Ranchocabra Lunar Eclipse

Blog

Xennial Introverts: How to Survive the Digital Age

January 23, 2019 by Jackie Ritz 1 Comment

This post has been brewing in my brain for a few months now and I am finally sitting down, next to the fireplace and, of course, a dog, to put my thoughts down for you…dear reader.

I’m gonna go out on a limb here and guess that I’m not the only Xennial (someone born between 1975-1985) introvert who is struggling to find true connections in this day of age.

I’m probably not the only one who can go days (ok, let’s be honest…weeks) without talking to another human.

And it’s not that I don’t like other humans, I mean I did grow and birth a few…it’s just that I’m content. But am I?

It’s NEVER been an introverts world. NEVER. From the get-go, children are placed in classrooms and are rewarded for their contribution to the day. They are rewarded for raising their hand, speaking up, and for asking questions.

It never has been an introverts world.

As an introverted pastor’s kid in the 90’s, I remember sneaking into my parents room one night and finding a letter that a member of the congregation wrote to them. It read…

“Dear Pastor Jim and Barb,

Today during Sunday service, your daughter, Jackie, didn’t even smile back at me or offer to shake my hand. I just thought you should know.”

This still happens to this day. I give off the vibe of being a hardass, unemotional, or distant.

It’s always been easy to point out the societal negatives of introvert-ism, but let’s point out the beautiful positives of being an introvert .

Introverts:

  • Make amazing entrepreneurs
  • Are incredible authors and writers
  • Get straight to the point and avoid small talk (thank you!)
  • Love to build close relationships and make the bestest of friends
  • Can carry on deep, meaningful conversations

As a Xennial and an introvert, I find this digital age even tougher to navigate. I lived an analog childhood, and my first experience with technology was my clear purple beeper in high school. I had 3-5 incredible close friends and we texted “80081355” to each other. I’m a memory bank for what life was like before the digital age, but am 100% self taught and have kept up with the fastest of millennials.

Xennial introverts are patient…who remembers waiting for your favorite song to come on the radio and hitting record on your cassette tape?

Xennial have a childhood free of social media or cellphones. I’m a little bias, but I believe I had the best childhood filled with climbing trees, ramping various things, rollerblading, swimming in random ponds, and drinking out of the hose.

There’s so many other great aspects of being a Xennial introvert…

Xennial Introverts:

  • Have a love/hate relationship with social media. We can go a long time without posting, but we stalk our close friends who can’t.
  • Can go to the bathroom without their cellphone.
  • Are very aware if someone else is paying more attention to their cellphone than to you.
  • Get offended if they are called a millennial.
  • Don’t understand why you need to document your entire life on social media.

Challenges for Xennial introverts in this digital age.

  • Xennial introverts hate the telephone (I mean why do people have to call you anyways? hehe). They remember when it was the only way to get in touch with someone, but are grateful for advanced technology like texting and Facebook messaging.
  • Xennial introverts can go online when they need social interaction.
  • Xennial introverts feel a false sense of community if they are a part of online groups.
  • Xennial introverts are grateful, yet annoyed, that so many people play on their phone.

So how does a Xennial introvert survive in this digital age?

  1. Xennial introverts need to be brave. You probably have a large comfort zone thanks to social media. You can hang out in your social media comfort zone all day and you love it. It’s warm and fuzzy…and lonely. It’s unbelievably lonely…but not at first. But after awhile, your introverted self starts to crave true, authentic human interaction. You must be brave and get out there and connect. Call an old friend up. Go out to coffee or tacos. But get your butt out of that comfort zone before you fall into a deep, dark, lonely hole.
  2. Xennial introverts hate shallow socializing. You don’t hate people (yes you probably thought you did)! You just hate all the shallow small talk. You just want to dive right into talking about life goals, creative aspirations, dreams and beliefs in God. You scare people sometimes. Small talk is necessary to get into the meat of the conversation. I’ll be the first to admit that the reason I feel I don’t have many close friends is because I hate the “getting to know you phase”.
  3. Xennial introverts need to challenge themselves by taking social media breaks. Put down the computer and phone and force yourself to go out. Think about where you met some of your closest friends. It probably wasn’t in your house. Whether you do a 6-week digital detox like I did, or you just take a weekend off of social media, you will find this to be a good challenge.

And, lastly, Xennial introverts can ramble on and on about being a Xennial introvert, so for now, I’m going to go ahead and sign off.

Much love from this introvert!

Jackie

Filed Under: Uncategorized

Natural Remedies for Back Discomfort

January 18, 2019 by Jackie Ritz Leave a Comment

Most adults experience back discomfort at some time in their adult life. Whether the cause is work-related, new exercise routine, or stress, back discomfort can be debilitating, stopping full participation in work or everyday activities. Well-functioning bones, joints, and muscles require strength and flexibility. Natural remedies for back discomfort can help to relieve the pain and to restore movement.

Let’s dive into what some of the best herbs, essential oils, supplements and lifestyle habits can be if you are suffering from back pain.

Herbs for Back Discomfort:

1. Valerian

Valerian helps to relax the nerves and muscles and can help ease spasms. Valerian has a pretty earthy taste to it. You can take it as a tea, but you might need to use a large spoonful of honey to mask the flavor. Valerian is best known as a sleep aid but it, also, is great as a antispasmodic herb.

The best way to take Valerian is by taking the tincture or tea. Here’s the recommended dosage below…

Tincture dosage: 1–4 ml, up to three times a day

Tea dosage: Decoction of 1 to 2 teaspoons of the dried root per 1 cup of boiling water, up to three times a day

*Avoid if taking any sleep inducing medication

2. St. John’s Wort Topical Oil

St. John’s Wort is excellent at reducing nerve inflammation and helps to soothe discomfort locally. It’s not recommended to use if you are pregnant, out in the sun, or on certain prescription medication.

I recommend using the macerated flowers on your back or the affected area a few times a day.

Essential Oils for Back Discomfort

Certain essential oils, just like herbs, can increase local blood circulation (known as rubefacient oils) and can be very beneficial in massage blends to help ease the discomfort. I, also, recommend taking a epsom salt bath with these oils too.

  • Rosemary – releases tension in stiff and overworked muscles.
  • Marjoram – warming and great for muscle spasms.
  • Lavender – helps to ease tension and relax muscles.

How to Use:

  • Topical. Add 10 drops of the essential oil to a Tablespoon of of almond oil. Massage on the area of concern.
  • Bath. Take 2 cups of epsom salt and put in a glass jar. Add 10 drops of essential oil to the salt. Stir and pour into hot bath. Stay in the bath for at least 20 minutes.

You can purchase essential oils directly from me by going here.

Supplements for Back Discomfort:

  • Vitamins B1, B6 & B12 taken together may help the relapse of back discomfort linked to vertebral problems.
  • Proteolytic enzyme bromelain is an enzyme found in pineapple juice and in the pineapple stem. It helps to reduce discomfort and promotes faster regeneration of the muscles and bones.

Lifestyle Changes to Support Your Back:

  • Stay active and do yoga to keep your spine flexible
  • Sleep on a medium-firm mattress
  • Wear flat shoes
  • Stop smoking
  • See a chiropractor regularly
  • Check out the Alexander technique
  • Look into acupuncture

Filed Under: Uncategorized

Top 5 Herbs for Your Immune System

January 16, 2019 by Jackie Ritz Leave a Comment

When your immune system is working well, it becomes the frontline defense against toxins, environmental threats, and other harmful microorganisms. There are key nutrients and herbs that can help to bolster defenses and keep them in peak form. Today, I’m going to share with you my top 5 herbs for staying well and give you tips for using them.

But before we dive into all the herbal goodness, let’s talk a little bit about some nutrients and foods we can incorporate into our diet to keep us healthy all year long.

If herbs interest you, I have a brand new book, The Home Apothecary: Home Crafted Recipes Using Herbs & Essential Oils, that might interest you.

3 Immune Supporting Foods:

  1. Probiotics. A healthy gut plays a vital role in supporting our immune systems. Our gut has a good number of healthy bacteria and also bad bacteria. When our bad bacteria outnumber the good, disease causing organisms gain a foothold on our health. Make sure that you eat a lot of “live” foods: yogurt, kefir, sauerkraut, kimchi and other lacto-fermented foods.
  2. Anti-fungal Foods. Overuse of antibiotics or eating a high sugar/high carbohydrate diet can lead to an unbalanced gut flora. Foods that have anti fungal properties are: coconut oil (because of the caprylic acid in it) and cruciferous vegetables such as kale, cabbage and broccoli. Brussels sprouts, cabbage, radishes and arugula contain sulfur and nitrogen compounds (called isothiocyanates) which fight overgrowth and fungal issues.
  3. Anti-microbial Foods. Mushrooms contain a soluble fiber known as beta-glucan. Beta-glucan enhances the action of bacteria destroying white blood sets and helps to boost immunity. Ginger is another food that has shogaols or gingerols which help to stimulate circulation and fight infection.

Top 5 Herbs for Your Immune System

1. Astragalus Root

Astragalus is a very popular Chinese herb that is primarily used as an adaptogen – which is a type of herb that helps the body to function during periods of stress, which can impact the immune system. Astragalus can be used as a daily remedy to build immune strength rather than to fight an acute immune issue.

It is most common to use the pressed roots of the astragalus roots which look like tongue depressors. I love to add these sliced roots to my bone broths, soups, stews and even marinara sauce. When you are ready to serve the food, you simply remove the astragalus and discard.

You can purchase powdered astragalus and add a teaspoon to some hot tea, smoothies, or homemade energy bars.

2. Goldenseal

Goldenseal is an American woodland, medicinal heirloom. Because of over harvesting, Goldenseal is on the United Plant Savers “At-Risk List” and should not be purchased from or gathered from the wild. The whole plant is used as medicine, but the roots or rhizomes are the most potent part.

Goldenseal contains several powerful alkaloids that are shown to be strongly antimicrobial against a range of pathogens.

Goldenseal should not be used daily as a tonic herb. It’s appropriate when the symptoms of a cold or flu move deeper into the body or become more serious. (basically when thick, green-yellow mucous are present).

Goldenseal can be used as a tea decoction, tincture, capsule, eyewash, gargle, and sitz bath.

Tincture and teas are the most common and used way to take Goldenseal and it is sold in an alcohol base or a alcohol-free (glycerin) base. I have no problem giving my kids the alcohol one. I, simply, add the dosage to a hot cup of tea, which allows much of the alcohol to evaporate.

Tincture ratios and dosage: 

  • Rhizome and roots: 2–4 ml three times a day
  • Leaf:  2-4 ml three times a day (higher doses can be considered because alkaloids are less concentrated in the leaves)

Tea dosage: 

  • Rhizome: Decoction of 4–6 g of the rhizome per day in divided doses
  • Leaf: Infusion of 2 teaspoons to 1 Tablespoon of the cut and sifted dried leaves per 1 cup of boiling water three times a day

3. Elderberry

Elder is one of the most popular and traditional immune system herbs. It’s berries are rich in antioxidants and it’s medicine is a powerful household remedy for colds and flus.

We have 2 elderberry bushes that yields a generous 5 gallon harvest for us once a year, that we freeze and use when we need it. Warning: the seeds and unripe series contain cyanogenic glycosides that can cause upset stomach. These glycosides are neutralized by cooking or drying.

My favorite way to take Elder’s delicious medicine, is through a honey syrup. You can make it by following this recipe, but if you have a hard time sourcing dried elderberries, you might need to purchase the pre-made syrup. This is the one that I recommend.

In my book, The Home Apothecary, I include 2 different elderberry syrup recipes!

4. Nettles

Nettles isn’t usually known for it’s immune boosting capabilities, but I’m including this powerful blood building herb in this list because of it is truly an immune-regulating herb.

It has a very high iron content, making it useful for those who struggle with iron-deficiency. It’s safe during pregnancy and postpartum and helps to promote breastmilk production.

Nettle is packed with vitamins, minerals and chlorophyll. Her sting is disarmed when you cook or dry the leaves.

My favorite way to use Nettle is in a tea or broth. I, always, throw a few handfuls of dried nettles in my bone broth to infuse it’s rich minerals into the healing soups.

For tea and tincture dosage, see below…

Tincture dosage: 2–4 ml, three times a day

Tea dosage: Infusion of 2 teaspoons to 2 Tablespoons of the cut and sifted dried leaves per 1 cup of boiling water, three times a day

5. Echinacea

We can’t forget to include Echinacea, also known as Purple Coneflower. Echinacea is primarily valued for it’s ability to shorten the duration of upper respiratory issues, but’s healing medicine goes far beyond just that.

Echinacea’s flowering tops can be sprinkled on salads for both flavor and display. It’s leaves can be juiced or added to green smoothies. The flowering tops of echinacea are a mirror of the chemical constituents of the roots, however the flowering tops contain volatile essential oil components that may help antioxidant and inflammatory response in the body.

I prefer to use echinacea as a short-term remedy for warding off colds and flue. It’s particularly beneficial when you are traveling or are around someone who is sick. You want to use echinacea right away — in the initial stages of a sickness. It helps to shorten the duration of a cold. Echinacea helps us to fight off the sickness quicker, so it should be taken during the entire duration of a cold.

There’s so many ways to take echinacea: tea, tincture, powdered root, flowering tops, capsules, compresses, and salves.

The most easiest and readily available way to take echinacea is tea or tincture.

Tincture dosage:  0.5 to 1 teaspoon three times a day. At the onset of cold and flu symptoms, double the dose during the first 24 hours.

Tea dosage: 3 to 5 grams a day of the recently dried root, prepared as a decoction, and ingested in divided doses. Use double the dose for fresh root.

Filed Under: Uncategorized

Keto Instant Pot Chicken Drumsticks

January 9, 2019 by Jackie Ritz Leave a Comment

We adore chicken drumsticks and love making a huge batch of them each week. They are easy to warm up, taste phenomenal, and are kid-friendly. These Keto Instant Pot Chicken Drumsticks are going to have you screaming YES in umami ecstasy.

This recipe is from a brand new book on the Keto block called, Keto Cooking with Your InstantPot. Seriously, Dr. Karen, you had me at InstantPot.

As y’all know, I use the Instant Pot on the daily! We, also, eat low-carb, Keto so when the author, Dr. Karen, let me share a sneak peak of this beautiful cookbook with all of my readers, I had to get the word out there. I’m all for making your life easier (and healthier) so that you stick with this real-food thing for the rest of your life!

Anyways, let’s get to it.

Keto Instant Pot Chicken Drumsticks

Recipe reprinted with permission from Keto Cooking With Your Instant Pot by Dr. Karen S. Lee, Page Street Publishing Co. 2018. Photo Credit: Donna Crous

Cooking Time: 20 :: Servings: 4

Nutrition Per Serving: 270 calories; 14g fat; 30g protein; 5g total carbs; 2g dietary fiber 

  • 2 tbsp (14 g) paprika
  • 1 tbsp (7 g) black pepper
  • 1 tbsp (15 g) sea salt
  • 1 tsp celery seeds 
  • 1 tsp cayenne pepper 
  • 1 garlic powder
  • 1 tsp dry mustard 
  • 1 tsp cumin
  • 1 tsp dried oregano
  • 1 tsp dried parsley
  • 2 lb (900g) of chicken drumsticks
  • 1 cup (240 g) water

Instructions:

Combine all the spices and herbs and mix and set aside. Sprinkle half of the rub on the drumsticks. Add 1 cup (240 ml) water in the Instant Pot and place the trivet inside. Put the drumsticks on the trivet. 

Turn on the Instant Pot by pressing “Pressure Cooker/Manual” button and set the timer for 20 minutes on HIGH pressure. Close the lid tightly and move the steam release handle to “Sealing.” Preheat the oven to Broil. 

When the timer ends, you will hear a beeping sound. Allow the Instant Pot to cool down naturally until the float valve drops down. Press “Cancel” and open the lid. Remove the drumsticks and coat them with the herbal rub evenly.

Place the drumsticks on a roasting pan in a single layer. Broil the drumsticks for 2 minutes per side or until the skin is browned. Be careful not to burn them.

Serve immediately.

Filed Under: Uncategorized

Jackie’s Daily Rituals for Health, Sanity, and Business

January 8, 2019 by Jackie Ritz 2 Comments

Over on Instagram and Facebook I started a series on my daily rituals and tools that I use to stay on task. For those of you who don’t know me that well, let me introduce myself to you so that you can see why I am a huge advocate of rituals and habits.

My life mission has always been to help other people gain access to the tools they need to live a healthy, natural, toxic-free life. This passion is what led me to start The Paleo Mama blog which helps millions of people each month through this website and social media.

As I was starting to change over my family’s life to a more unconventional way of living, I struggled with trying to maintain my sanity and find balance in it all. I had to dig and find the answers for what products were safe and, eventually, it all started to become a way of life for me.

It’s not always this easy for everyone. We don’t know how to begin this journey of living more natural so we try to change our whole way of living at once and what happens? We get so overwhelmed that we end up throwing in the towel and quitting.

Because I had this struggle in my own life, I know many of you have the same struggles. That is why I went on to write my first book, “Everyday Natural: Living a Pure and Simple Life Isn’t As Complicated As You Think.” I wanted to give my readers some simple swaps that they can make as they are moving towards natural living.

My mission of helping others gain tools led me to an essential oil company that had a similar mission I believed in. I created tools for families to make some healthy swaps around their homes using essential oils and over 10,000 families on my essential oil wellness team have made brought plant based medicine into their home. Hundreds of these families wanted to create an income doing something that they love and have joined forces with me and we collaborate, create, and teach essential oil wellness to thousands of people each month.

Because of my insatiable hunger for plant based medicine, I went onto learn more about herbs and essential oils and went to Herbalism school so that I could really learn more about these plants which were so many were finding healing in.

If you take a look around my website, you will see that everything I do and share is so that others can find the freedom, that I and thousands others, have found with natural living.

In fact, I have a huge love for getting my hands dirty with natural ingredients like coconut oil, shea butter, baking soda, almond oil, and essential oils. I love creating recipes that others can use to bring homemade beauty into their home. This is why I just released my brand new book, “The Home Apothecary: Home Crafted Recipes Using Herbs & Essential Oils“.

All this to say, I have a lot on my plate but I live a happy, joyful life that is free from toxic ingredients and toxic people. I’ve learned to say no to things that don’t bring me joy, health, and happiness.

I have several streams of income that I managed and I manage them pretty darn well.

How do I do it all? With rituals. Habits. Routines.

You guys — this has always been a struggle for me. I am a super, go-lucky, nothing bothers me, hate routines, and wants to change things up all the time. I had to dig deep and find some discipline (there was a little bit down there) to keep with these habits and rituals. These are what carry me and make me be my best self.

These habits create and spark ideas so I want to share them with you for the next 14 days.

Use this page and come back daily to find the updated resources, links and tools that you need to create your own daily rituals for success.

Jackie’s Daily Rituals

More explanations about each of these rituals and how I use these products is on my Instagram page.

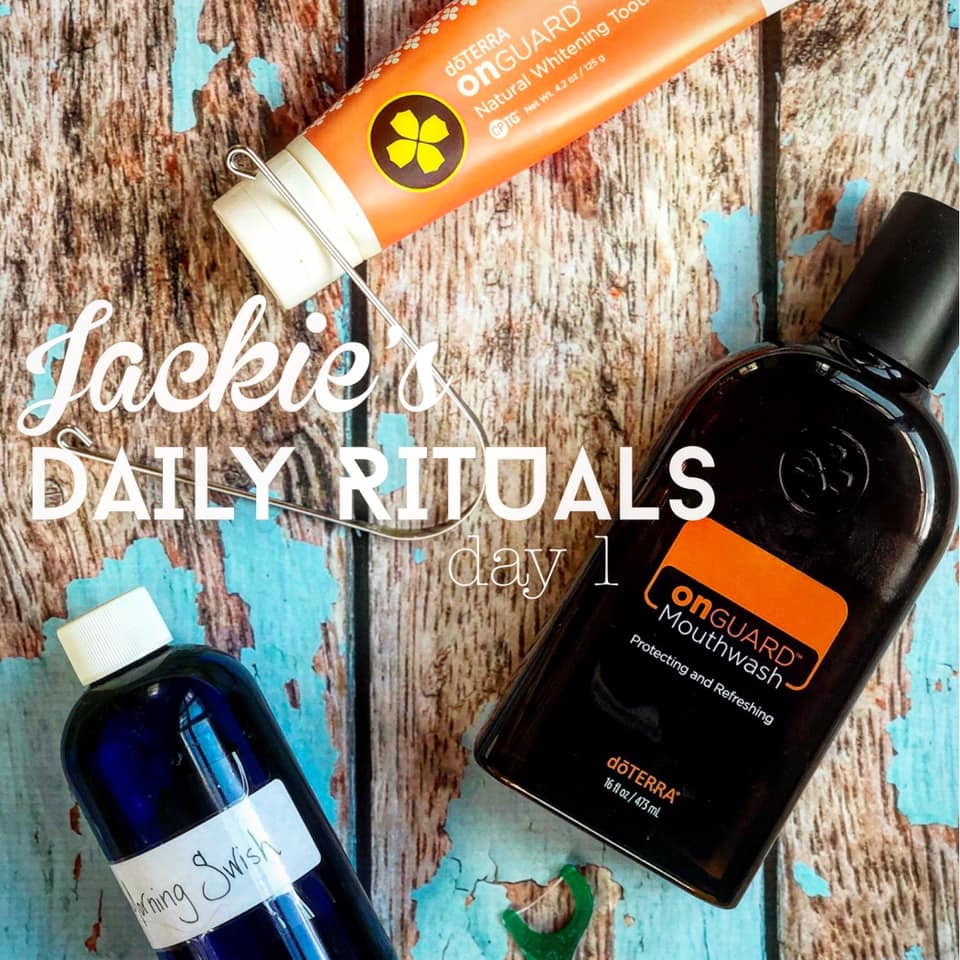
Day 1: Healthy Teeth Rituals

  • Tongue Scraper
  • OnGuard Toothpaste
  • OnGuard Mouthwash
  • Morning Swish recipe is in The Home Apothecary. You can go here to learn more about Oil Pulling.

For the next 14 days I am sharing some of the routines I do every, single day to keep me on my a-game as a mom, wife, entrepreneur, and natural woman.
.
So make sure you come over here to my page often, and check out the related blog post (link in profile) where I’m linking up all the tools for you! .
So let’s get started with day 1.
.
I wake up without an alarm clock between 5-5:30am. I’ve found that I MUST have 1.5-2 hours in quiet reflection and alone time to be a good human for that day. .
Upon immediately waking I:
✔️ Scrape my tongue
✔️ Brush my teeth –
✔️ Floss-
✔️ Rinse with OnGuard natural mouthwash-
✔️ Do my Morning Swish (oil pull) for 10-15 min while I do my next morning ritual.
.
So let’s break each of these down and explain what a few of them are. .
Tongue scraping is a Vedic practice that removes bacteria, food, toxins, fungi and dead cells from the surface of the tongue. Brushing your tongue will loosen the funk, but it doesn’t actually remove it. So I do a 10-count tongue scrape and you wouldn’t believe the stuff that comes off!
.
Don’t skip flossing! Just do it while you are making your morning coffee or filling up your diffusers (oops that’s part of another ritual I’ll be sharing this week).

And for those who don’t know what oil pulling is, it’s where you swish coconut oil around in your mouth for 5-15 min. This, also is a Vedic practice that helps to remove toxins and nourishes your teeth and gums. I put essential oils in mine! You can read all about which oils are great by clicking the link in my profile.


It’s easy to wake up, roll out of bed and skip doing these healthy oral rituals, but I have found that our oral health is a reflection of how we feel physiologically and psychologically. It really sets you up to show up as your best self.

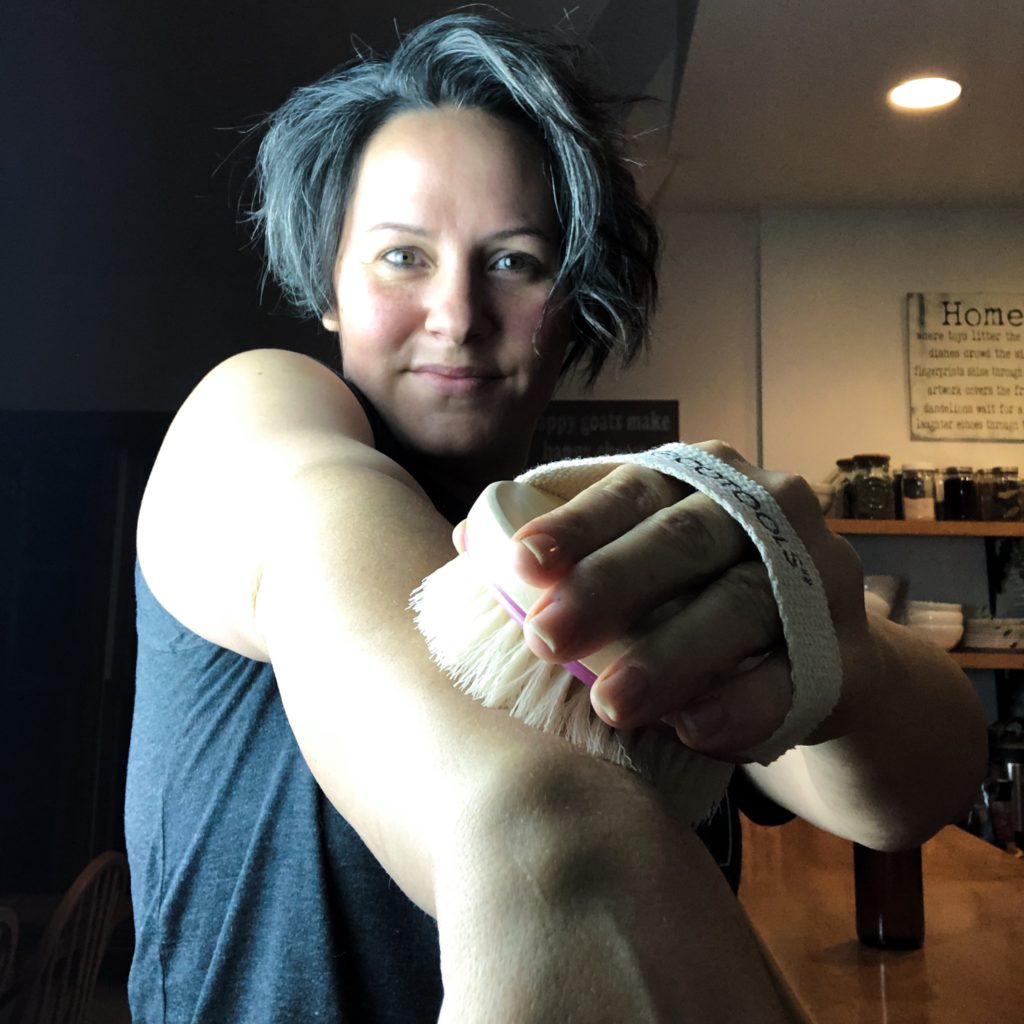
Day 2: Morning Dry Brushing Ritual

  • My favorite dry brush
  • Slim & Sassy essential oil blend
  • Empty spray container – these are the best spray bottles I have ever used! I use them for our kitchen cleaner and bathroom spray cleaners too.

You brush your teeth, maybe your tongue, and your hair. Why not brush your skin!

Let’s talk about my day 2 ritual…I dry brush my skin right after waking and before showing.

BENEFITS OF DRY BRUSHING:
✔️ Exfoliation
✔️ Stimulate lymph flow & drainage
✔️ Brush off pores of dirt & oil-
✔️ Reduce cellulite (possibly)
✔️ Energize my body first thing in the morning
.
HOW TO DRY BRUSH:
✔️ First I spray my whole body down with a spray bottle with a homemade mix of Slim & Sassy Essential Oil and some water. This metabolic blend is energizing and stimulating (great for using first thing in the morning).-
✔️ Start at feet and brush the tops and bottoms. I usually brush each part of my body about 8-12 times (moving pretty quickly)
✔️ For lymph flow, always brush towards your heart; the center of your body.
✔️ Move up the legs and thighs.
✔️ Brush your palms and up your arms.
✔️ Brush your armpits and down the top of your chest (avoiding your breasts…ouch!).
✔️ Brush your stomach, moving clockwise to support digestion.
.
Once you try this practice, I’m confident you’re going to love it as much as I do! The dry brush is very soothing and feels divine!

Day 3: Fill up My Body and Diffusers with Water

  • Favorite diffuser for small space
  • Favorite diffuser for large space
  • Essential oil shelf
  • Favorite water bottle
  • Favorite essential oils 

I used to wake up, roll out of bed, and plop down on the couch. I’d lay there while I caught up on social media, read the news, and consumed consumed consumed.

I was introduced to this concept of “create before consume” a year ago and it helped to completely change my mindset on how I want my mindset to be for the day.

I don’t want people influencing me, my joy, my outlook, or my day. So, I started this ritual of “create before consume” and have to tell you, it’s transformed my life, my business, and my marriage.

Instead of picking up my computer or phone first thing in the morning, I pick up my Bible, my journal or whatever book I am reading.

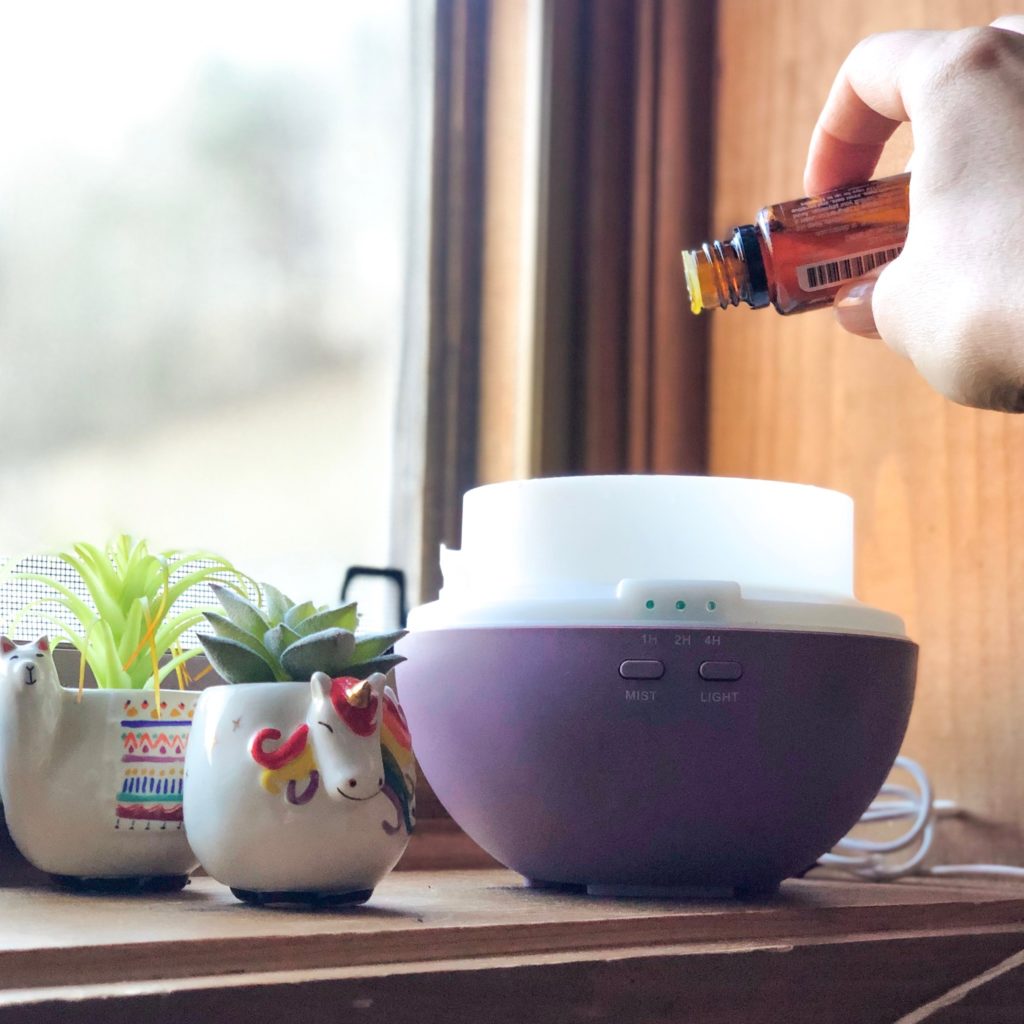
And one of things that has become a prompt for this behavior is the action of filling up my body with water and my diffusers with water. I’m very dehydrated (as we all are) when I wake up so I immediately drink a good 10-15oz of water, take my probiotic, and then move on to filling up the house diffusers.

Favorite Essential Oils to Diffuse:

  • On Guard “immune boosting blend”
  • Citrus Bliss “invigorating blend”
  • Eucalyptus
  • Serenity at bedtime
  • Douglas Fir and Lime
  • Peppermint and Tangerine

I may not turn all the diffusers on, but I do fill them up so that I can turn them on throughout the day when I need them. My diffuser that I use at bedtime, is filled up at this time so that when I’m tired and just want to go to bed, it’s ready to go and all I have to do is turn it on.

Diffusing essential oils is one of the best rituals you can get into. Aromatherapy is extremely beneficial for many things: improving your health, concentration, and mood.

I firmly believe in having readily available prompts throughout your house that encourage you to be consistent in these rituals. So I have an essential oil shelf near each diffusers that holds a few oils for me to choose from. This way, I’m not running all over the house looking for the essential oil I want to diffuse.

I have these prompts and reminders all over the house with each of my rituals. These reminders are set out at exactly where I need them so that I they remind me and I can grab and use them.

My water bottle is waiting for me on the kitchen counter and is already filled up with water. There are some essential oils I love putting in my water and those are right next to the sink as a reminder. My dry brush is out on display on my bathroom sink.

You don’t water just one plant at a time do you? Think of your diffusers as a plant that needs watering so that it can effectively work to improve the air in your home.

Day 4: Healthy Morning Coffee

  • How to Make a Bulletproof Coffee
  • MCT Oil
  • Butter-Flavored Coconut Oil (I use this because I’m 100% dairy-free right now. If you aren’t, just use healthy butter)
  • Favorite Protein Powder to Add
  • Collagen Peptides
  • Favorite Coffee (I use decaf

After I dry brush, after I fill up my diffusers (and myself) with water, and after I take care of my mouth, I head over to the kitchen and make my morning brew.

But y’all…it ain’t just a regular coffee. My brew is loaded with protein and healthy fats to get me going, to improve my creating and thought processes, and to satiate my hunger for several of the morning hours.

Here’s how to make a delicious morning brew that is:
✔️healthy
✔️loaded with healthy fats
✔️has protein in it which is essential in the morning 
✔️supports intermittent fasting
✔️quick and easy to make
✔️excellent for those who hate eating before they work out

HOW TO MAKE IT:
✔️brew a cup of high quality coffee (I use decaf)
✔️add to a blender: 1TB of coconut oil (I love butter flavored…remember I’m 100% dairy free right now) or 1 TB of MCT oil, 1 scoop of collagen peptides OR 1 scoop of Bone Broth Vanilla Protein powder
✔️ 1 ts of cinnamon or 1 drop of cinnamon oil
✔️if you use the bone broth protein powder you won’t need any sweetener. It’s sweetened with stevia and monk fruit. If you used the peptides, then you might need a sweetener of choice.
✔️Blend till frothy and enjoy while you move into #jackiesdailyrituals #5 (which I’ll post tomorrow)!

If you aren’t dairy free you can add a small bit of ghee or butter as well!

Day 5: Jackie’s MORNING Quiet Time Routine

  • List of my favorite books
  • My favorite coloring Bible
  • My favorite highlighters
  • My favorite pens (they’re erasable!)
  • This year I’m using the Best Self Journal
  • I use a Bullet Journal for note-taking, doodling, and jotting down quotes from whatever book I’m reading, church or conferences
  • I use this meal planner

I used to wake up to the noise of the kids and immediately got out of bed to start serving my family. I skipped everything I mentioned in the previous rituals, and got right to my mommy duties.

I never realized how this small habit made me grumpy and agitated all throughout the day.

A few years ago I started going to bed a little earlier so that I could attempt to wake up before my kids. Currently, I wake up almost 2 hours before them so that I can take care of me.

By the time they get up, mommy is filled up spiritually, physically, and emotionally. I am ready to see my kids and serve them.

This MUST be done in the morning before you start your day.

My Quiet Time Routine

  • Do all the previous rituals of #jackiesdailyrituals
  • Put on some quiet music
  • Empty your bladder so it doesn’t disturb you
  • Settle in a comfortable place with your morning coffee or tea
  • Remember “create before consume.” So, don’t look at your social media, emails, or TV
  • Grab your planner (if their is a space) or journal and write down 3 things you are grateful for
  • Next, I read my Bible. I’m currently doing the year-plan with the Bible Project.
  • Next I meditate and pray for a few minutes.
  • Then I grab whatever book I’m reading (here’s a list of books I’ve read and loved) and spend 10-15 minutes reading a chapter or two.
  • Now it’s time to plan my day. I grab my journal and write down anything I need to get done. I highlight appointments and phone calls so I remember to do them and set my phone alarm to remind me of them.
  • I make a list of any notes, ideas or tasks that I need to get done.
  • Then I identify and highlight my top 3 targets that will make today a win for me. I highlight them if they are on my larger list.
  • I plan what we are having dinner.
  • I put everything away, clean up my space, and start making breakfast for everyone! I feel amazing 🙂

Day 6: Sunday Batch Cooking and Meal Prep

When I started meal planning and batch cooking on Sundays, my life became easier. When you have 4 people who eat 3 meals a day at home, it can become a little cray cray…especially if there isn’t a plan. 

Sunday is the day I go through our freezer, fridge and pantry and plan dinners for the week. Since Frank and I work from home and live in a rural town with no delivery options for lunch, we make a large dinner and save the leftovers for lunches during the week.

The last thing I want to do, when I get working and in my creative space, is make lunch. So it’s nice to just have something to warm up. 

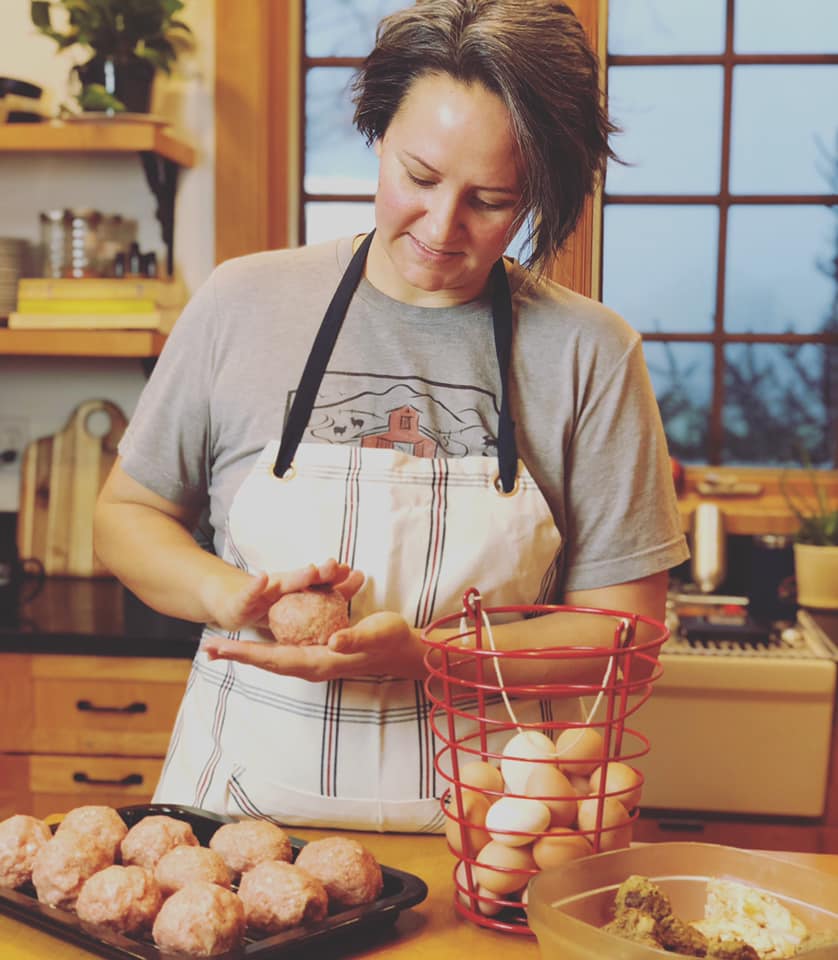
I, also, batch cook a bunch of meat on Sunday: Scotch Eggs, meatballs, smoked fish (to throw on salads), etc. Pretty sure Scotch Eggs are the kids favorite breakfast! Throw a smoothie or banana with it and done! We make about 10-12 Scotch Eggs once a week. 

HOW TO MAKE SCOTCH EGGS

✔️Boil 10 eggs (I actually boil about 20 eggs but only use 10 for this recipe. 
✔️Peel them
✔️Take 2lbs of ground sausage and divide it into 10 balls 
✔️Flatten the ball of sausage and wrap the sausage around the boiled eggs, making sure there aren’t any cracks
✔️Toss in the oven at 400 degrees for about 15 minutes 

Meal planning and batch cooking will make your life a whole lot easier! I love and use Real Plans because it has only real, whole food recipes. Happy planning!

Day 7: Movement and Exercise (5x/week)

It is so easy to talk yourself out of things — especially exercise. Trust me, I did it for years. I can remember all the things that my mind used to tell myself….all the excuses:

  • “Jackie, you live too far from a gym.”
  • Jackie, you get enough exercise just holding down a farm.”
  • “Jackie, it’s too cold outside.”
  • “People drive crazy on your road. You can’t run on that.”
  • “You can start a new workout routine tomorrow.”
  • “Oh well, they don’t have child care.”
  • “I’m too tired and didn’t sleep well.”
  • “I just don’t have the time. I’m a full time parent who works from home.”

I could keep going. These excuses dominated my life and my mindset and it wasn’t until I fully committed to myself that I saw a change in my life.

So, I stopped saying these excuses and just started going to the gym. Yes, it’s a 15 minute drive. Yes, I hate going some days. Yes, it’s freezing outside. But I feel so much better!

Instead of listening to music during my workout, I listen to a podcast. I get a good 30-45 minutes of self-care + personal development done in that time and I have come to really enjoy it.

So, ladies, stop making all the excuses and just get your butt to a gym or go outside and take a walk. Put a motivating podcast in your ears and move your body.

Don’t do it as a way to punish your body or to “lose weight”. Do it because your body needs some movement to function optimally!

Day 8: Natural Skin Care Routine

Products, Recipes, & Resources I use:

  • Verage Plant-Based Skin Care Collection
  • Yarrow POM Essential oil
  • Derma Roller
  • Bentonite Clay
  • Think Dirty App
  • Dry Brushing
  • Homemade Facial Scrub

I’m excited to share with you today what my skincare routine looks like. It’s probably one of the top 10 questions I get from my readers. So I’m gonna wrap it all up and put it here in one juicy post!

DAILY ROUTINE:
✔️workout and sweat! It opens pores and releases toxins. I don’t wash my face before this.
✔️ Oil cleansing method: so I wash my face with almond oil\castor oil mix. Google it! I lather the oil all over my face and use a HOT washcloth to remove it. I do this at night too to remove makeup.
✔️ Quick Spray with Verage plant based toner.
✔️ Squirt of Verage serum in my palms + a few drops of whatever essential oil is calling me (usually it’s yarrow, Frankincense or neroli).
✔️ Drink tons of water. I drink nearly a gallon a day. 

EVERY OTHER DAY to ONCE A WEEK:
✔️ Derma roll to reduce my rosacea and to boost collagen production
✔️ Exfoliate with a homemade scrub 
✔️ Clay mask to suck out impurities and toxins.

That’s it! I’ve learned simple is so much better with your skin.

Day 9: Layer on the Oils

Putting on my essential oils, is just as important as putting on my clothes. And I don’t just put oils on me, I apply them on my children as well.

I created a morning ritual of applying my oils that I use for:

  • emotional support
  • physical support
  • perfume

I apply them in that order (I don’t know why exactly other than I figured to tap into the deepest part of my body first).

For emotional support, I apply Balance essential oil to my chest and neck area. If it’s a “work-day” I like to layer Passion essential oil on top of that as it helps to inspire creative thoughts and focused work.

For physical support, I usually apply Frankincense and, sometimes, Deep Blue. I, quickly, add a drop to my palms and rub it on the bottom of each foot. Then I grab my bottle of Fennel or DigestZen and I rub some of it over my belly area. I do this daily, regardless of how I feel “digestively”. My body is going to be working all day to digest my food, so I make sure to keep it healthy and loved.

Lastly, I use essential oils that smell good and keep me smelling good. My favorite is HD Clear. I use this as a deodorant and apply it to my armpits. Then I select Whisper or my Egyptian Goddess blend and apply it to my wrists and back of neck.

By the time I’m done layering on the oils, I am ready for my day!

Day 10: Keto Green Smoothie

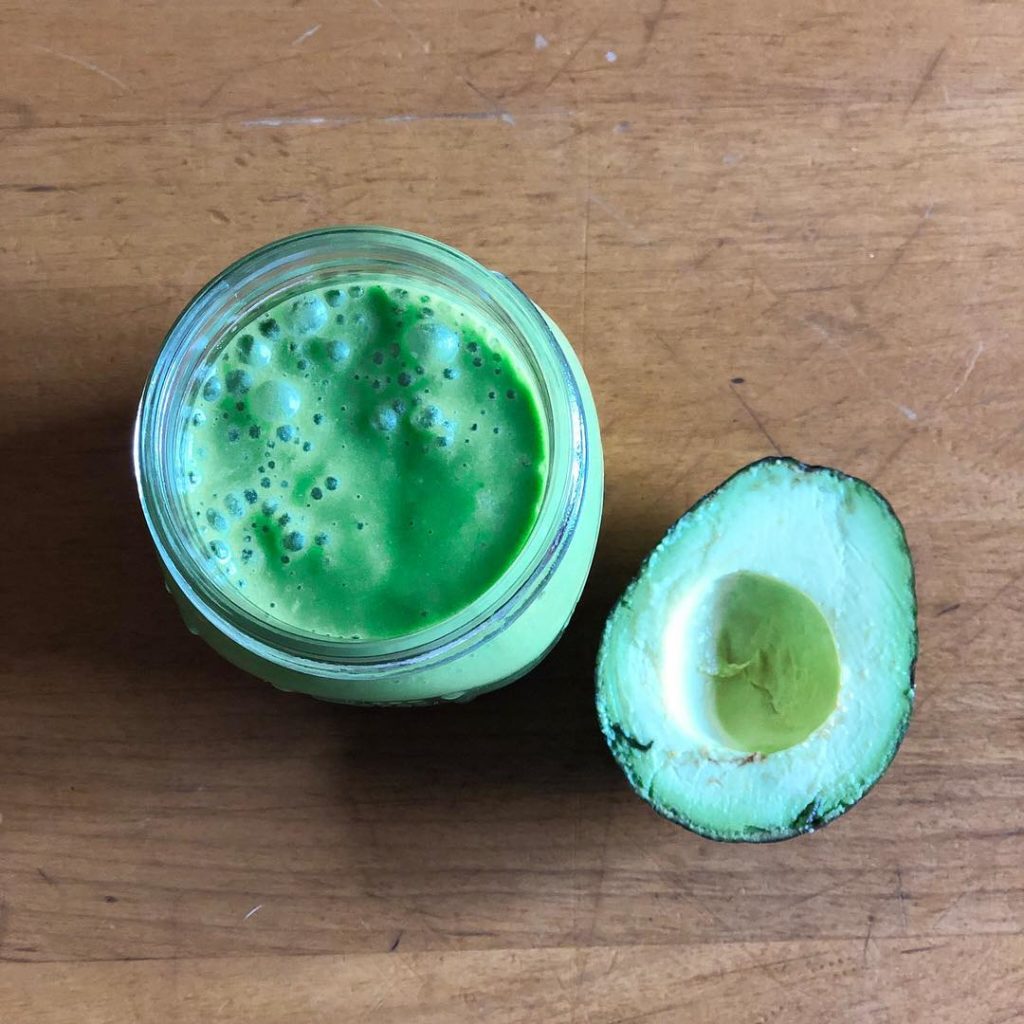
I’ve been enjoying this Keto Green Smoothie almost daily! I’ll be putting it up on the blog soon, but I didn’t want you to have to wait to enjoy it.

I’ve been low carb and keto for almost 3 months now and I feel fantastic! It’s been hard to continue my green smoothie because most smoothie recipes are loaded with sugar. After many fails, I’ve finally found a delicious smoothie that is low carb and keto-friendly! Enjoy!

KETO GREEN SMOOTHIE
✔️1/2 avocado (throw the other half in the freezer for next time
✔️ 1.5 cups of unsweetened almond or coconut milk
✔️ generous handful of spinach or kale
✔️ 1 ts of vanilla extract 
✔️ 1 TB of MCT oil 
✔️ 1 ts of fresh ginger
✔️ 1 scoop of collagen peptides
✔️ Keto sweetener of choice (I add about 8 drops of stevia)
✔️ 1/2 ts of matcha powder 
✔️ 5-10 ice cubes 


Blend everything together (except ice). Once blended, add the ice cubes and blend again.

Day 11: Detox Bath

During the winter, I take A LOT of baths. During the summer — not so much. I, absolutely, love soaking in a tub of hot water (I even have a playlist for bath time).

One way to upgrade your bath time is by taking a detox bath. It’s super easy and sounds way fancier than what it really is.

Basically you toss in some epsom salt and essential oils into your bathwater and you soak in it’s magnesium richness for about 20 minutes.

You can even give your kids a detox bath. I have instructions on that here.

But for adults, here’s the basic recipe I follow:

  • Start filling up your tub with hot water (as hot as you can tolerate).
  • Add 2 cups of epsom salt to a glass jar.
  • Add 10 drops of an essential oil to the salt. I like to rotate through what oils I use. I have them sitting next to my tub so I have easy access to them: lavender, douglas fir, cedar wood, tangerine, etc.
  • Pour the salt and oil mixture into the tub and stir to dissolve.
  • Soak for at least 20 minutes to allow your pores to release toxins and absorb the magnesium from the epsom salt.

Filed Under: Uncategorized

8 Zero Waste Solutions for 2019

January 7, 2019 by Jackie Ritz Leave a Comment

Waste is a B-I-G subject. In 2013, Americans generated 254 million tons of trash, and only 34 percent of that was recycled or composted. To bring this figure home, that means that the average American produces 4.4 pounds of trash per day! 

Since, like my own family, many of you reading this are very concerned with living naturally, and with eliminating many of the dangerous chemicals and compounds found in our food sources, most of us probably are actively recycling our containers and throw away items. Many of you are no doubt also composting much of your food waste. These are excellent steps, ones we wish everyone in the nation would take. But unfortunately simply reducing our waste production is not enough—we need to be finding ways to eliminate it completely.

Enter the zero-waste movement, which is putting a focus on reducing waste production as much as possible. That means, among other things, no plastic, no wrappers, no Styrofoam, and no garbage. Many who have seriously tackled this problem have been able to seriously reduce their trash. Some even track their landfill trash to a single mason jar…goodonya (that was my 6 months in Australia coming out)!

Thankfully, in our neck of the woods, most restaurants don’t even offer plastic straws anymore and have resorted to making paying customers drink their beverage without a straw (gasp!) or have paper straws. Straws are a huge problem. 500 million straws get thrown into the landfill each day in America. Yes, you read that right…I saw day. 

Why Is Reducing Waste So Important

Today’s waste is taken directly from our overflowing garbage cans to our nation’s overflowing landfills. Landfills stink, they leak ooze, hurt animals and people, and destroy large areas of our natural landscape. There are three important dangers to these landfills:

  1. A lot of the different materials that end up in landfills contain toxins that are eventually released and seep into the soil and groundwater. These toxins are major hazards to the environment and can last for several years. These toxins include arsenic, acids, lead, and mercury.
  2. Landfills form leachate—a liquid formed when waste breaks down and waters flow through it. Chemicals found in leachate include: methane, carbon dioxide, organic acids, alcohols, and aldehydes.
  3. Landfills are the third largest contributor to methane emissions. Landfill gas is 28 times more potent than carbon dioxide, and contributes to smog, and worsening health problems like asthma.

How to Get Started

So I want to give you some easy steps that you can use to begin reducing your own trash to get much closer to a zero-waste lifestyle. Each of these steps is a simple thing to do, and merely requires changing some long-held habits of how we handle our trash. You may be doing some of these already, or you may be ready to tackle this problems as one of this year’s resolutions.

1. Start a compost bin

Composting is the natural breakdown of organic matter to produce a crumbly nutrient-rich soil. As much as 25 percent of everything Americans throw out is compostable. Some of the ingredients you can compost are:

  1. Fresh grass clippings
  2. Flowers
  3. Nettles
  4. Vegetable and fruit peels
  5. Vegetable crop residue such as picked over plants
  6. Weeds
  7. Manure from animals
  8. Tea leave (not the tea bags)

Starting a backyard compost is easy. There are many suggested methods online that are practical, easy, and inexpensive. Start your research here. 

I have 2 of these compost bins; one near our garden and kitchen and one near our barn and chicken coop. We save all of our food waste for our pigs or chickens and, also, have a countertop bucket that we can throw all our food waste in and then deliver to our eager farm animals. 

2. Use reusable bags, not plastic

You can use your reusable bags for much more than just carrying your groceries. Use them for all your purchases, asking the checkout clerk to pack your purchases in your own reusable bag. Train yourself to keep two or three reusable bags in your car trunk, so you are always prepared. You can find 35 uses for these bags here.

3. Eliminate junk mail

Junk mail is a national problem! Nobody wants it, but everybody seems to get tons of it. The key to stopping the unwanted mail that comes to your home is getting your name off the mailing lists. Many businesses will gladly take your name off their lists if you just follow through and ask them to do it. You can also register on the National Do Not Mail List, by filling out the form found here. Follow these tips for ditching the junk mail you receive.

4. Phase out single-use products

It may seem old school to you, but your paper towels can be replaced with dish towels and rags, your tissues with washable handkerchiefs. Here are some of the single use products you should eliminate from your purchases: 

  1. Single-serve coffee pods – use this instead.
  2. Paper coffee cups – get a nice travel cup. 
  3. Boxes of tea bags – buy whole herbs and use a stainless steel tea bag. 
  4. Disposable utensils 
  5. Plastic bags
  6. Produce bags
  7. Feminine monthly products – try some cloth pads or DivaCup.

For more ideas for swapping out your single use products here.

5. Make your own DIY cleaning products

If you have followed my Paleo Mama page, you’ve seen many ideas for DIY products I’ve made or recommended before. See my recipes for floor cleaners and laundry detergent online. You can find many more suggestions and recipes for making your own DIY products in my book, The Home Apothecary: Home Crafted Recipes Using Herbs & Essential Oils. 

6. Make your own DIY Beauty products

I’ve been making my own home and beauty recipes for years now. It took me awhile to accumulate everything I needed, so let me share my beginner’s kit for making DIY recipes with you. One of my favorite products to use during these cold months of winter is my DIY Facial Serum. It uses anti-aging essential oils like lavender, frankincense, geranium, and myrrh, along with Almond oil or Jojoba oil. Follow the recipe here, and begin using it before bed each night or snag a copy of The Home Apothecary, which has tons of DIY beauty recipes. 

7. Stop using bottled water

There are more reasons than just the waste they create for making a choice to quit using bottled water. Here are some of the concerns they bring: 

  1. America uses more than 17 million barrels of oil each year to make bottles. That’s enough to fuel 1.3 million cars for a year.
  2. The energy we waste using bottle water could power 190,000 homes.
  3. The average American uses 167 disposable bottles a year, but only recycles 38.
  4. The recommended eight glasses of water a day, using tap water, would only cost about $.49 per year, but that same amount of bottled waters costs $1,400.
  5. Antimony, found in PET plastic bottles, can cause dizziness and depression in small doses; in large doses it can cause nausea, vomiting, and death.

Believe it or not, there is a 280,000 percent markup for bottled water! There are dozens of filter options available for you to use to filter your own water. These include Britta pitchers, soma, filter attachments for your sink, and charcoal sticks. 

Our home has a water purification system and each member of our family has a designated water bottle. This reduces have so many cups all over the house and helps each of us drink more water! When we travel we bring our Travel Berkey with us and use it in the hotel rooms or campgrounds. 

8. Stop buying plastic food storage containers. 

Plastic containers don’t last long anyways and leech chemicals into your food. I upgraded to glass food storage containers 5 years ago and still have the same containers. You can heat your food up in them, put them on the bottom level of the dishwasher and feel safe eating of them. 

Get Started

Saving the planet isn’t just for hippies anymore. In the past twenty years, major US cities have set goals to be trash-free. It is going to take people to make this movement successful. It is people who influence waste-producing companies to make major changes toward producing less waste. Some major companies are leading the way. Ikea plans to approach a zero waste by 2020, and Nestle has announced that all 23 of its US factories achieved zero waste in 2015.

But the easiest way for you to be a part of reducing the enormous waste problem in America is to begin at home. I’ve give you some simple steps you can take. Begin doing your own research into this problem and its solutions, and commit to taking at least one major step toward change each month of this year.

Just as we cannot blame others for destroying the environment, so we cannot look to others to protect the environment. Responsibility for both begins at home.

Paul Griss, The Daily Planet

Sources:

  1. https://www.bustle.com/articles/156442-what-is-the-zero-waste-movement-heres-how-its-participants-are-attempting-to-reduce-waste-as-much
  2. https://www.goingzerowaste.com/
  3. https://www.hcr-llc.com/blog/the-3-most-common-landfill-problems-solutions
  4. https://www.goingzerowaste.com/blog/10stepstoreducewaste

Filed Under: Uncategorized Tagged With: natural living, pollution, zero waste

« Previous Page
Next Page »

Footer

Our Blog

The Paleo Mama blog provides simple answers for healthier families through research, tutorials, recipes, and simple remedies for daily needs!

  • Health
  • Essential Oils
  • Recipes
  • Remedies
  • Natural Living
  • Meal Plans

Stick around!

You’ll get instant access to a library of natural remedies and real, paleo food, including our ebooks and free guides we send out.

  • Home
  • Disclosure/Disclaimer
  • Privacy Policy
  • Advertise
  • Contact Me

Copyright © 2025 · Wellness Pro on Genesis Framework · WordPress · Log in