• Skip to primary navigation
  • Skip to content
  • Skip to primary sidebar
  • Skip to footer

The Paleo Mama

Homegrown and Handmade

  • About
  • Blog
    • Podcast
  • Meal Plans
  • Essential Oils
  • Our Farm
    • Great Pyrenees Puppies
    • Goats
      • Goats for Sale
      • Goat Sales Policy
      • Nigerian Dwarf Bucks
        • Ranchocabra Lunar Eclipse

Jackie Ritz

A Day in the Life of “Homeschooling”: From Sheep to Sweater

November 18, 2013 by Jackie Ritz 3 Comments

My favorite thing about having my kids at home with me is the opportunity to teach them valuable lessons from everyday life. I feel it is so important for them to understand the process of hard work…learning that an egg just doesn’t come from the grocery store…or that a sweater isn’t just as easy as grabbing from Walmart. No, I believe in teaching them the process behind things so that they can fully appreciate what they have.

Lesson from the Land: From Sheep to Sweater – grab your kids and do this with them!

Today’s random lesson came when I saw this picture of a Valais Blacknose Sheep from Switzerland. I called my daughter over to come look at how adorable they are.

sheep

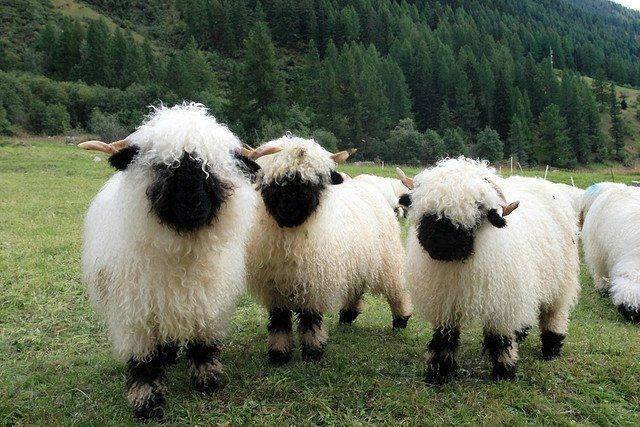
This started the conversation of their wool and how we use their wool to make many, many kinds of clothes. I grabbed my son’s wool sweater and put my new wool socks on and proceeded to tell them the process from sheep to sweater.

Thank God for You Tube! First we talked about sheep and the many uses for them. They have delicious milk, they provide meat, but most of all, people have been using their fur for many, many years. I told them how the farmer let’s their wool grow all year long, but when winter is over, in the spring, he SHEARS them.

“Does it hurt?” asked my daughter.

“Not at all! The farmer has special scissors or clippers that make the job easy. ” Then we watched this video of a farmer shearing his sheep.

They watched it intently for the whole 8 minutes. We watched how carefully he held the sheep and how good the sheep was.

Then we talked about what happens after the sheep is sheared. All the wool is now spun into yarn. Today, it’s easier to do this cause man has machines. But, back in the day, it was a careful process that was all done by hand.

We watched this video of a lady spinning wool into yarn by hand.

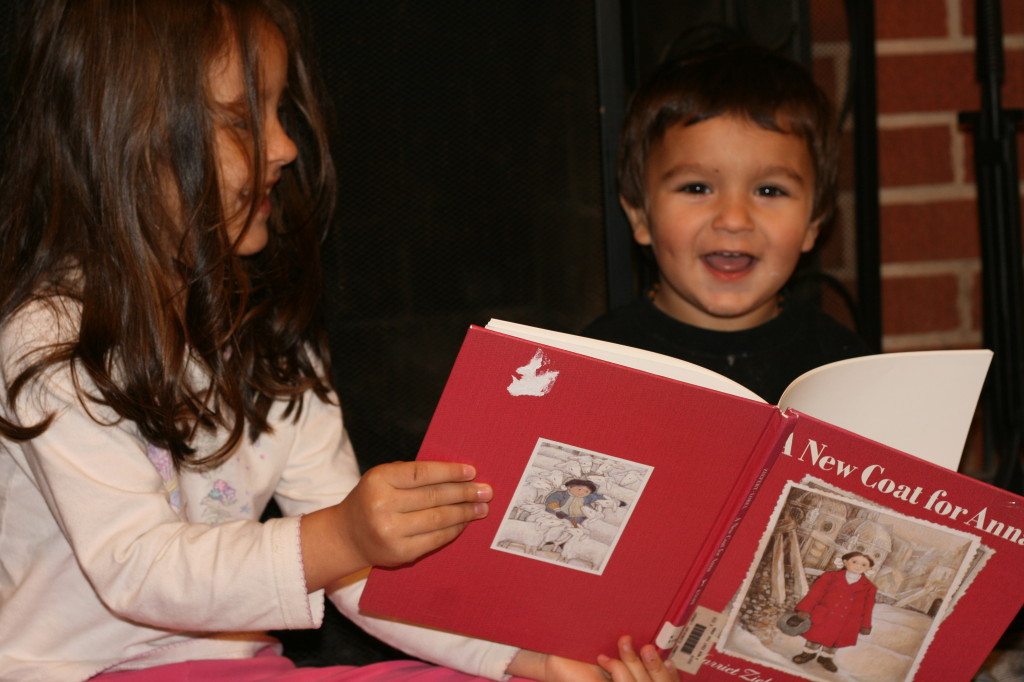
We finished off our lesson reading a beautiful book called, “A New Coat for Anna.” I was happy to have this book in our collection and we all snuggled together and read the story. It is about a little girl who needs a new coat. Her mother sets out to find a good farmer with sheep and purchases the wool. She then takes the wool to a lady to spin. Then she takes it to a lady to weave it. And finally she takes the cloth to a tailor to make a special red coat for Anna. The whole process takes a little under a year! It made me realize how much we have forgotten about this whole process of waiting for things to come into season.

If you don’t have the book, you can CLICK HERE to watch a book reading on You Tube.

IMG_8044

It was a wonderful lesson that just randomly happened when we saw a cute little sheep! These opportunities are always available to us…we just need to have a watchful eye for when they pop up!


Filed Under: Homeschooling Tagged With: charlotte mason, farm lesson, homeschooling, how to shear a sheep, paleo, primal, sheep, unschooling

Paleo Weekly Meal Plan on a Budget #4

November 17, 2013 by Jackie Ritz 5 Comments

mealplan4

I’m going to try to get better about sharing what our Paleo weekly meal plan is for the week. This is free…people pay big bucks for this stuff, but since I love y’all, and I want the best for you, I want you to succeed at eating Paleo, here is a free version. Probably not as pretty, but it is CHEAP. We eat Paleo on a budget…well, kinda. Our budget is $200 a week for a family of 4. This includes ingredients I need for homemade cleaners, detergents, dog food, and office supplies. It doesn’t include our farm supplies though!

If you don’t like this week, feel free to check out the other weekly meal plans I have shared. CLICK HERE. I,also, want to add that we are pretty boring when it comes to food. I don’t make a lot of fancy things…hey, I keep it real. I, also, don’t spend hours in the kitchen. I need quick things to make that are budget-friendly. So, here ya go!

The Paleo Mama Meal Plan On a Budget #4

Monday

  • Breakfast: Local eggs, bacon, and side of fruit. (reserve the bacon grease for Thurs dinner)
  • Lunch: Deli Meat Rollups, sliced cucumbers, and olives.
  • Dinner: Whole Roasted Chicken with Roasted Winter Vegetables (save the bones/organs to make stock for soup on Wednesday. CLICK HERE to see how to make stock following my simple method). Save the leftover chicken for the soup on Wednesday, as well.

Tuesday:

  • Breakfast: Pumpkin Pie in a Cup Smoothie with egg yolks (I throw raw egg yolks in the smoothies for protein. The eggs are from a local pastured farm so I don’t worry about it)
  • Lunch: Nitrate Free Hotdogs, avocado slices, and sliced carrots.
  • Dinner: Ground Beef Stroganoff over “Zoodles” (I use this to make zucchini noodles) and side of fruit. Grab a little of the stock you should be making for soup to go in the stroganoff.

Wednesday:

  • Breakfast: DIY Omelets – Omelet Bar. Kids get to pick what they want in their eggs. Easy peasy!
  • Lunch: Leftover Beef Stroganoff
  • Dinner: Smoky Roasted Butternut Soup with homemade Almond Bread. Top the soup with leftover chicken or boiled eggs for added protein. 

Thursday:

  • Breakfast: Scrambled eggs and sausage with a side of fruit or avocado slices.
  • Lunch: Leftover Soup
  • Dinner: Hard Cider Braised Brats with  Sauerkraut (or you can make your own.)

Friday:

  • Breakfast: Quickie Monkey Smoothies 
  • Lunch:Leftover Brats
  • Dinner: Salmon Patties with Creamy Cucumbers

Saturday: 

  • Breakfast: Bacon and Tomato Quiche and side of fruit/or smoothies
  • Lunch: We eat out.
  • Dinner: Leftovers from the week

Sunday:

  • Brunch: Mexican Breakfast 
  • Dinner: Apple Cider Pork with Rosemary and sautéed apples (to make sautéed apples: peel apples and cut into chunks. Saute in butter, ghee, or coconut oil till soft. Throw walnuts in the pan and toast lightly with the apples. Top with cinnamon!)

>>>CLICK HERE to print the shopping list!<<<


I hope you all have a wonderful week…filled with health and love! 


-Jackie


Filed Under: Weekly Meal Plan Tagged With: budget meal plan, gluten free meal plan, paleo meal plan, primal

Butternut and Sweet Potato Puree

November 15, 2013 by Jackie Ritz Leave a Comment

Squash-Sweet Potato Puree 2-1

Today I’m excited forJennifer of Sweet Plantains to share her Butternut and Sweet Potato Puree recipe with us.  Jennifer shared her Chocolate Pecan Pie Energy Bars with us a few months ago and it has been a HIT. Please head over to Sweet Plantains and check out Jennifer’s amazing recipes and don’t forget to follow Sweet Plantains on Facebook! Please welcome Jennifer! 
I just love butternut squash – of all the squashes…it’s my favorite. When Fall rolls around, I’m always the most excited to break open a lovely butternut squash and let that sweet scent fill the air around me. Mmm…

One of the first dishes I made this season was this Butternut and Sweet Potato Puree. A complete experiment, it was the perfect accompaniment to my beef stew one weekend. Now it’s made a weekly appearance at our table!

At first, I called this a mashed potato substitute, but I had to stop myself. Sure, it’s got an amazing thick texture reminiscent to that old standby. And it’s perfect to serve with almost any main course. But this delicious Fall side dish has a personality all it’s own…how could I do it such a disservice, I ask you?

This recipe makes such a nice big batch, that it’s just the thing to serve for the holidays – and unlike mashed potatoes, it’s perfect to make ahead! Just pull it all together the day before, and it’s just as wonderful the next day. How awesome is that?

Butternut-Sweet Potato Puree

INGREDIENTS:

2 lb Sweet Potato, peeled and cut into 1″ chunks
3 lb Butternut Squash, peeled, de-seeded and cut into 1″ chunks
1 t. dried, ground Lemongrass
1/2 t. ground Cumin
3 T. Butter or Ghee
Salt and Pepper

INSTRUCTIONS:

1. Combine the sweet potatoes and squash in a large pot and cover with water. Bring to a boil, and let simmer until both the potatoes and squash are easily pierced with a fork. Drain. Wipe down the pot with a cloth or paper towel to remove any remaining pieces.

2. Working in batches, if necessary, puree the potatoes and squash in a food processor until quite smooth. Pour the puree into the pot.

3. Add the lemongrass, cumin, and butter/or ghee to the puree and stir vigorously with a wooden spoon or whisk until the butter is melted. Season to taste with salt and pepper, and serve.

Enjoy!

Jennifer is a stay-at-home, homeschooling mom of four. She is an avid cook, health enthusiast, and lover of all things homemade! At Sweet Plantains she shares original recipes, homeschooling tips, parenting thoughts, and anything else that strikes her fancy. In her spare time she enjoys experimenting in the kitchen, reading nutrition books, and being barefoot outdoors with her little ones!

  • Follow Sweet Plantains Blog!
  • Follow Sweet Plantains on Facebook !
  • Follow Sweet Plantains on Twitter!
  • Follow Sweet Plantains on Pinterest! 

Filed Under: My Recipes Tagged With: butternut puree, gluten-free, paleo, primal, sweet potato puree, thanksgiving paleo recipes

Paleo Pinterest Party 11/14/13

November 14, 2013 by Jackie Ritz 6 Comments

pinterest party

Hey everyone! Have you heard of Pinterest parties? It’s when a bunch of girls (or guys…maybe?!) get together and bring a few dishes from a recipe they found on Pinterest. Hey, you might as well put all that pinning to good use!

They sound so fun so I thought I would create a virtual version of a Pinterest party for my Paleo/Primal followers and bloggers! It will help us connect and share fabulous recipes that we have tried!

Are you following me on Pinterest? If not, click here!

Get ready for a Paleo Pinning Party!!! My Paleo Pinning Parties will take place EVERY THURSDAY so be sure to come back next week for some more pinning fun!

BONUS* All recipes submitted will be pinned onto my Pinterest page and the TOP 5 recipes with the most re-pins will be featured the following week on my blog!!

Filed Under: Pinterest Party Tagged With: blog carnival, gluten-free, paleo blog carnival, paleo pinterest party, primal

How to Dye Your Hair with Henna

November 11, 2013 by Jackie Ritz 55 Comments

Henna is the safest way to color your hair. Henna is a plant that grows in hot, dry climates. It’s leaves are harvest, dehydrated, and then made into powder. When Henna is mixed with an acid medium, henna will stain your nails, skin, or hair into a reddish-brown color. This makes it a safe, non-toxic way to dye your hair. Henna has been used for thousands of years to keep hair healthy and to color white or gray hair. There is only ONE color of Henna, however, there are different ranges of that color depending on the climate and soil of that plant and I’m happy to show you how to dye your hair with henna! 

There are so many amazing benefits of using Henna…

hennameme

What Kind of Henna Should I Avoid?

You may have seen various types of commercially produced “boxed” Henna treatments that specifies for “blond hair”, “black hair” or strawberry-blonde hair”. I’ve learned over the years of doing Henna on my hair that these are very poor quality of Henna. They are produced by adding synthetic dyes, metallic salts, and other plant dyes to a poor quality of Henna. You want to steer very clear of anything that is labeled for a specific hair color. Look for Henna that is 100% Henna. The best quality you can get is Henna that is labeled “body-art Henna.” It has the highest dye content of Henna.

What will Henna Look Like On My Hair? 

See all my white/gray hair?

Because the red-orange dye molecule is binding to the keratin that surrounds the pigmented hair core, the resulting color is different for every strand of hair, and for every person. The henna stain is translucent, and blends with your own color. Hennaed hair looks like you grew it yourself! The color you get on your hair will vary depending on your hair color you have now and the chemicals you already have on your hair. Many ask if it is safe to apply Henna on color-treated hair and the answer is YES! But it’s only safe to use high quality, body-art quality Henna.

My Hair: Henna IS permanent if you use 100% Henna. See the pic below. Kinda embarrassing that I waited so long to color my roots, but you can see my white roots coming out and you can see the red Henna “highlights”. It had been 3 months since my last Henna treatment and the color was still going strong (other than my new roots). I do want to add, I use a natural shampoo and conditioner. It is wild-crafted, raw and vegan and I love it on my hair!

_MG_7395

If you have course hair, Henna will be amazing for it! It won’t dye your hair completely red, but it will give it red highlights, loosen the curl, and make it silky!

How to Apply Henna to Your Hair 

You can purchase your high-quality henna from here. 

You need to use a acid medium to apply henna. Lemon juice does this very well. When mixed together it releases the dye and bind to the keratin in your hair. This makes Henna permanent.

Step One:  MIX IT! Mix enough henna with lemon juice to make it like the consistency of mashed potatoes (see photo below). If lemon juice is too harsh on your skin, use something less acidic like grapefruit or orange juice. You could use vinegar or wine, but your hair will be a little stinky for awhile. Don’t use boiling water or your Henna will fade and be an ugly orange.

  • Short Hair (use 100g or 1 cup)
  • Collar Length Hair (use 200g or 2 cups)
  • Shoulder Length Hair (use 300g or 3 cups)
  • Waist Length Hair (use 500g or 5 cups)

If you have thick hair, add an extra 1/2 cup to a cup of Henna powder. 

_MG_7376

Step Two: REST IT. You need to let your Henna paste rest for several hours. I usually mix the Henna in the morning and apply to my hair at night. Letting it rest allows the slow dye release and will give you the BEST results. Cover your Henna with a plastic wrap and let it stew.

Step Three: MIX IT AGAIN. It’s been several hours and you are ready to apply. Mix some more lemon juice with the paste mixture until it is the consistency of yogurt.

_MG_7398

Step Four: APPLY IT. WEAR GLOVES. Henna is permanent and it will stain everything it comes in contact with. This is the messy step. I have a few suggestions to make it easier. Get in your bathtub and fill it up with water. Apply the Henna while standing in your tub. Or, you can go outside and apply. Bring a mirror.

  • Do not be stingy. Apply generously and thick for a deep, rich color.
  • Comb your hair and divide it into sections.
  • You can put the Henna in a piping back, squeeze bottle, or just use your fingers and apply. I find the latter to be the easiest.
  • Start at the back and work the Henna down to the scalp. Apply it thick! Then bring down the next section and Henna it. Make sure every bit of hair is THICKLY coated…like cake frosting. Don’t be afraid to use plenty of Henna and don’t be afraid to get messy.

hennasteps

Step Five: RELAX. When all your hair is covered with Henna, wipe your skin clean of any Henna, and wrap everything up in a plastic wrap. This keeps the Henna warm and moist and allows the hair to take in the dye. I then wrap a large DARK towel (remember Henna will stain anything it touches) around my head. This is when I go to bed. Yes, I sleep with the Henna on my head all night. This is not necessary but I have found that it covers my gray hair the best when I leave it on for, at least, 6 hours. The recommendation is 2-4 hours, but if you know that your hair is resistant to dye or has gray, then you may want to leave it on a little longer. I lay a dark towel over my pillow and sleep. I actually sleep really well with Henna on my head and it is also known that Henna can soothe headaches. So, just relax and enjoy the full benefit that Henna can give you.

wrapped head

Step Six: RINSE IT. Time to rinse out the Henna. I have shorter hair so this step isn’t too difficult. I take a nice long shower and rinse it out completely. I follow it with a wash and condition. When my hair was much longer, I used to fill up the bathtub and lay down in the water. This helped get the Henna out of my hair.

A few things…

  • Henna may seem really bright at first. Do not panic…it will darken over the next few days if you used the acidic mix. It will take about 3 days to settle into the true color.
  • Once again, DO NOT be stingy with the mix. More is always better with Henna.
  • You can use this on beards too if you would like!
  • Some people can’t stand the smell of Henna. I, personally, love it. It’s earthy and sultry. If you can’t stand the smell, you can add 1 TB of powdered ginger, clove, or cinnamon to your Henna mix.

Where to Buy Henna: 

  1. Order high quality henna from HERE.
  2. Check a local Indian store to buy it SUPER cheap!!! Just make sure it’s 100% Henna!

The day after I slept in Henna.


https://www.hennaforhair.com/techniques/deb/

https://www.hennaforhair.com/freebooks/hennaforhair.pdf

Filed Under: Living Sustainably, My Recipes, Natural Living Tagged With: gluten-free, henna hair dye, how to color your hair with henna, natural hair dye, non toxic hair dye, paleo, primal

What Does 125 Gallons of Donated Breast Milk Look Like?

November 6, 2013 by Jackie Ritz 30 Comments

donated breastmilk

A friend asked me yesterday what my most popular, or most viewed post was. I shared with her THIS POST. It was written about a little under 2 years ago during a very challenging time. I re-read it and was in tears. Every emotion came back to me and I remembered every terrible detail of that period in my life.

I’ve shared with you all that I lost my younger sister 2 years ago to suicide. My son was a newborn at the time, well, he was 2 months old, and I was breastfeeding him. He actually was so easy to breastfeed compared to my daughter. I had horrible issues with my daughter, including her completely taking a chunk of my nipple off. And, yes, stubborn me, I nursed right through it all. I was super-mama. I could nurse with a missing nipple…even though I, secretly, despised every whimper or cry my daughter made to nurse when she was hungry.

My son was a completely different story. I was so happy that we had such a good nursing relationship from the start. I guess this is how it usually is with your second child. However, the day my sister died, my supply immediately tanked. I talk about my experience more in depth in THIS POST. But, I remember sitting on the curb outside my sister’s house 15 minutes after we discovered that she had taken her own life. My son was hungry and I had to feed him. I had to give life in the midst of death….and I couldn’t. I couldn’t.

I will never judge another mom who I see give formula to their baby. I was so ashamed. I felt so guilty. I felt so inadequate as a mother. I drove myself crazy trying to get some milk out of my deflated breasts. I pumped while I was grieving. I took herbal supplements while eating care-meals that were delivered to us. I wore an Supplemental Nursing System in the middle of my sister’s funeral. I tried and I tried and I tried…and I failed. My body was telling me I needed the rest. My body was telling me to focus on myself…on my grief…on my loss. But I could not just let it go. Here I am trying to care for my 2 year old and my newborn baby …but my body was not able to keep up with the high demand that I was giving it.

Embarrassed by what I had to do…I shamefully, purchased baby formula in secret. I put that formula in my Medela bottles so people would think that it was pumped breastmilk. I even wore a nursing cover while feeding my son out of a bottle UNDER THE BLANKET. I was so ashamed.

My healing…

This is what 125 gallons of donated breastmilk looks like…

frankie1

frankie2

Two years later my son is a brilliant, strong, and healthy little boy. I made it. I got through the toughest season of my life. For a short while, I thought he was my curse. How could something so tragic happen when I had a newborn? I was so mad at God for giving me this “burden”. I loved my son so much, but, why? How? How could I celebrate this new life given to me while grieving the death of my sister? We think miracles are flying angels, or healings, or someone someone walking out of a wheelchair. But, I’ve come to realize they aren’t always like that.

Miracles come in the form of plastic baggies and styrofoam coolers and little notes saying that 10 ounces is all I could pump. They come in the form of a stranger handing you a cooler of pumped breast milk and giving you a hug. They come in the form of friends pumping while nursing their babies then giving you their milk. They come in the form a UPS man handing you a regular package, but inside you know that there is 2 months worth of milk for your baby that you weren’t able to produce.

Two years later I have a new appreciation for the community of mothers. They pump and they nurse and they drive 50 miles to give you something that you so desperately need. They don’t ask questions and they don’t ask for anything in return and when you give them flowers to say thank you, they say that they didn’t think twice about it.

My son is thriving today, 2 years later, because of those mothers. You are the reason I got through this. You are the reason I have hope in mankind again. You give birth to your own babies and then you nurse them and pump for mine. Who does that?

This is what 125 gallons of breastmilk looks like…

frankie3

frankie4

This is because of you. Thank you for donating. Thank you to all the mothers who have ever donated to ANYONE. You are amazing. You are the angels that walk this earth. Thank you.


Filed Under: breastfeeding, milk sharing, Paleo Baby Tagged With: donated breast milk, formula feeding, gluten-free, grief, healing, loss, milksharing, paleo, primal, sisters

« Previous Page
Next Page »

Primary Sidebar

  • Facebook
  • Instagram
  • Pinterest
  • RSS
  • YouTube

Hi, I'm Jackie Ritz and welcome to The Paleo Mama! I'm a published author, certified herbalist, and voracious researcher of natural medicine and nutrition. I'm glad you're here and I hope you stick around for awhile!

Recent Posts

  • When God Says Pause: Why I Took a 5-Year Break from My Online Business
  • How to Quit Facebook but Keep Your Business Profile
  • Leaving the City for the Country
  • Natural Way to Heart Health

MEAL PLANS

Biblically clean meal plans that are for those love to cook real food

Read More

Footer

Our Blog

The Paleo Mama blog provides simple answers for healthier families through research, tutorials, recipes, and simple remedies for daily needs!

  • Health
  • Essential Oils
  • Recipes
  • Remedies
  • Natural Living
  • Meal Plans

Stick around!

You’ll get instant access to a library of natural remedies and real, paleo food, including our ebooks and free guides we send out.

  • Home
  • Disclosure/Disclaimer
  • Privacy Policy
  • Advertise
  • Contact Me

Copyright © 2025 · Wellness Pro on Genesis Framework · WordPress · Log in