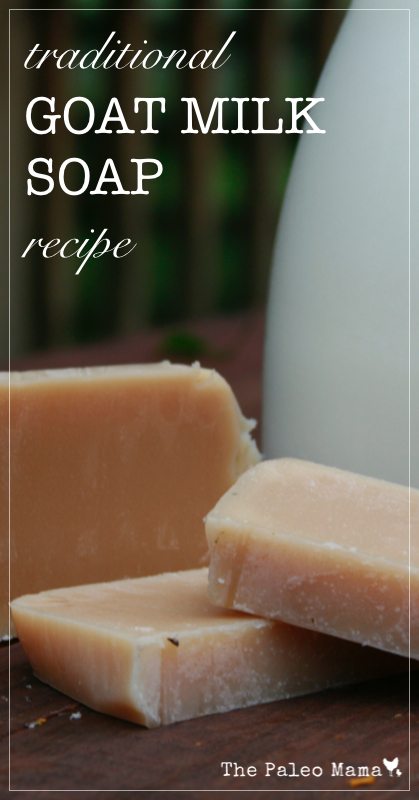
• Skip to primary navigation
  • Skip to content
  • Skip to primary sidebar
  • Skip to footer

The Paleo Mama

Homegrown and Handmade

  • About
  • Blog
    • Podcast
  • Meal Plans
  • Essential Oils
  • Our Farm
    • Great Pyrenees Puppies
    • Goats
      • Goats for Sale
      • Goat Sales Policy
      • Nigerian Dwarf Bucks
        • Ranchocabra Lunar Eclipse

Jackie Ritz

Traditional Goat Milk Soap Recipe

October 22, 2014 by Jackie Ritz 21 Comments

Goat Milk Soap Recipe .001

Why Goat’s Milk

Goat’s milk is packed with vitamins, minerals natural fats, and protein. It carries a pH of around 6.4 which is very similar to a normal skin pH of 5.6, which makes it great for skin tolerance. You can find vitamins A, B2, B6, B12, and Niacin in goat’s milk and many who cannot tolerate dairy, find that they have no problems with goat’s milk.

Those who have very sensitive skin, find that paying over $5 for a bar of goat’s milk soap is worth it! I’ve had several people come up to me and tell me that my soap was the one of the only bars of soap that they could use without breaking out or having a skin reaction.

Anyone Can Make Soap

Soap is NOT hard to make. What is hard to make is all that fancy soap…which I don’t understand anyways. It’s just you, naked in the shower or bath, rubbing a bar of soap on your body. Why do you need swirls and fun shapes? If you enjoy doing that, then by all means, go for it! But I make soap for my family and most the time the kids end up making holes in the bar and pretending like Spiderman can surf on it.

This is a very basic, traditional recipe that I created. I use lard and I use lye. This is NOT a vegan recipe. I also use the traditional method of cold-process. This process uses a short prep time and a long cure time. It’s the easiest, in my opinion, because you are mostly waiting on the soap to cure and harden. This is the way our ancestors prepared soap and it’s the way I prefer to make my soap. Since I use raw goat’s milk, I prefer to keep the milk unheated to prevent destroying any vitamins and minerals.

Why Lard and Lye

Lard was traditionally used in making soap and has a very long history of in soap-making.  I get my lard from a local farm for a really good price, but you can order pastured lard from here. Lard is the hardening fat in this soap – it’s what makes the bar hard so that it doesn’t turn into a big pile of glob while you are taking a shower.

I, also, like lard because of the aging time. When you make a cold-process soap, you are going to need to let your soap age (or cure) for 3-6 weeks. If you do not use a hardening fat, like lard, then it’s going to take your soap much longer to cure. I find that 3-4 weeks is perfect for this recipe.

Now lye is necessary for the alkali, when combined with the goats milk, loosens and attracts dirt, allowing it to be washed away. After 24 hours, the lye is not even present and by the time the 3-4 weeks is up, there is no trace of lye in the soap.

Supplies Needed:

For anything that touches the lye, you will need separate supplies and those supplies should never be used on anything else. Also, this is going to make an UNSCENTED bar. I have tried using essential oils and it requires way TOO MUCH. Alternatively, if you would like, you can add a few drops of essential oil to your bar of soap when you are washing in the shower.

  • Immersion blender
  • Glass bowls for mixing
  • Rubber spatulas
  • Digital Kitchen Scale
  • Tall stainless-steel pot for melting oils
  • 2 Thermometers
  • Safety Equipment – rubber gloves, long sleeve shirt, and goggles
  • Knife to cut the soap
  • Soap Molds or Old Loaf Pans – I prefer the rustic cut of the soap and prefer to use loaf pans.
  • Parchment paper

Ingredients Needed:

You can change your fats and oils if you would like. This is just the recipe that I created and enjoy the most. I have made several other recipes and I really prefer mine as it is very moisturizing, lathers very well, and includes sustainable fats.

  • 2 ounces of Beeswax
  • 18 ounces of Coconut oil
  • 5 ounces of Castor Oil
  • 26 ounces of pastured Lard
  • 6 ounces of Olive oil
  • 8.40 ounces (or 238.39 grams) of 100% pure Lye
  • 18.9 ounces of Frozen Goats Milk (raw or pasteurized) – easiest way to freeze goats milk for soap-making, is to pour the measured out goats milk into a gallon ziplock bag. Then freeze the bag flat.

Step-By-Step Instructions:

  1. Collect all your supplies and block off your kitchen. I usually do this when my kids are down for a nap because of the lye.
  2. Put parchment paper in your loaf pans to get them ready.
  3. Measure out all the fats and oils (everything but the lye and milk) and put in your tall stainless-steel pot.
  4. Put your stove on LOW and slowly melt the oils and the fats. Put a thermometer in and make sure it never goes above 100 degrees. Once melted, remove from stove.
  5. Take your bag of frozen goats milk and smash it up into smaller pieces. Add it to a large glass bowl.
  6. Slowly sprinkle your lye over the frozen milk and mix with a spatula at the same time. MAKE SURE you are wearing your safety gear!
  7. Mix until the frozen milk is melted. Check the temperature of the mixture with a thermometer and do not let it go over 110 degrees. If it does, no worries, just cool it down by placing the bowl in a larger bowl filled with ice water.
  8. Now check on your oils and make sure they are melted and the temp is not over 100 degrees. If it is, then cool it down by placing it in the bowl of ice water.
  9. You want your oil mixture and your lye mixture to be within 10 degrees of each other.
  10. Now slowly pour your lye mixture into your oil mixture. As you are pouring, put your immersion blender on LOW and start to mix.
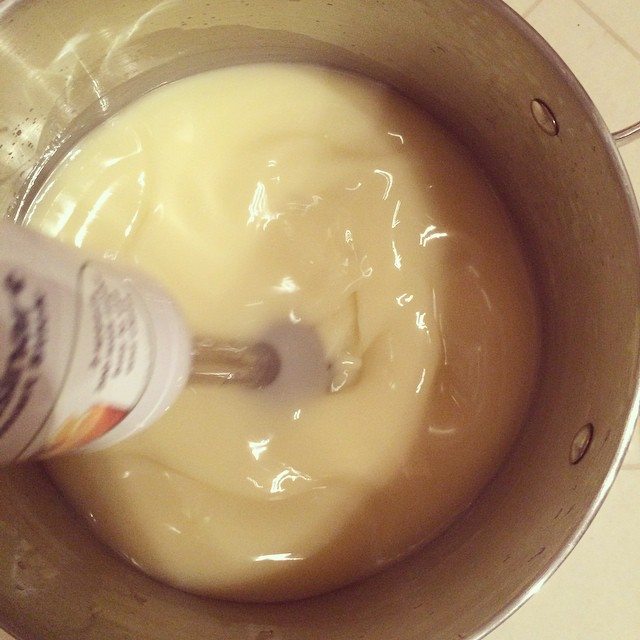
  11. When all the lye mixture is added, turn your immersion blender on HIGH and mix until you reach “trace”. Trace is when you can take a spoon or spatula and you can draw a line in your mixture. It usually takes me 2 minutes to reach trace with this recipe…sometimes less.
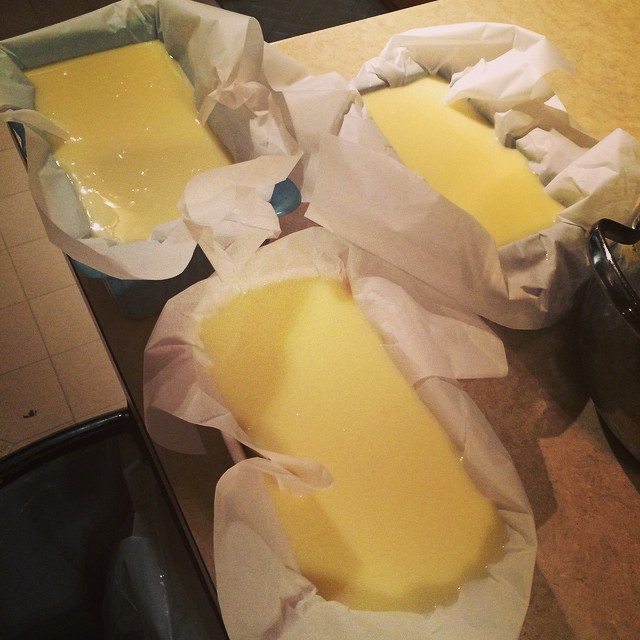
  12. Once you reach trace, you are going to need to move very fast. Immediately, pour your mixture into your 2 loaf pans or your soap molds. Use your rubber spatula to clean the bowl and smooth out the top of the loaf pan.
  13. Put the pans in a dark spot out of reach of kids. Leave it alone for 24 hours. After around 24 hours, the lye is inactive and you can touch the soap.
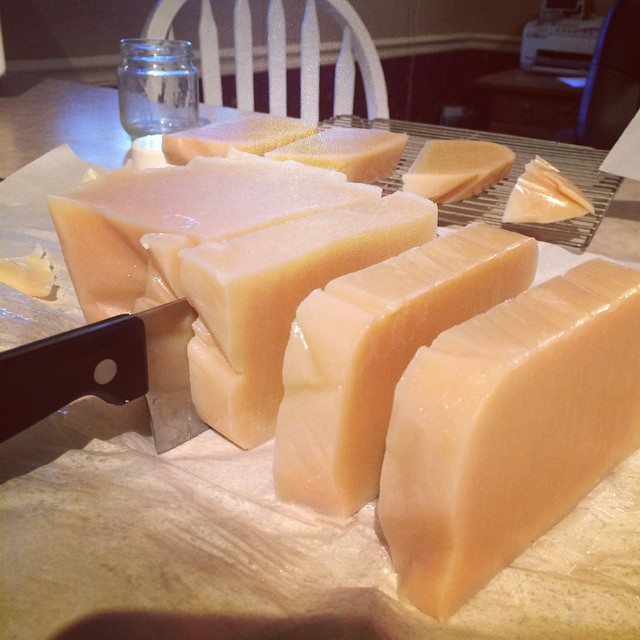
  14. After 24 hours, remove your soap from the loaf pans and cut into individual bars.
  15. Place the bars in a dark area and let them cure for 3-4 weeks! I know, it’s torture to wait, but it’s sooooo worth it!
  16. After 3-4 weeks the bars should be ready to go!

 See Picture Tutorial Below…..

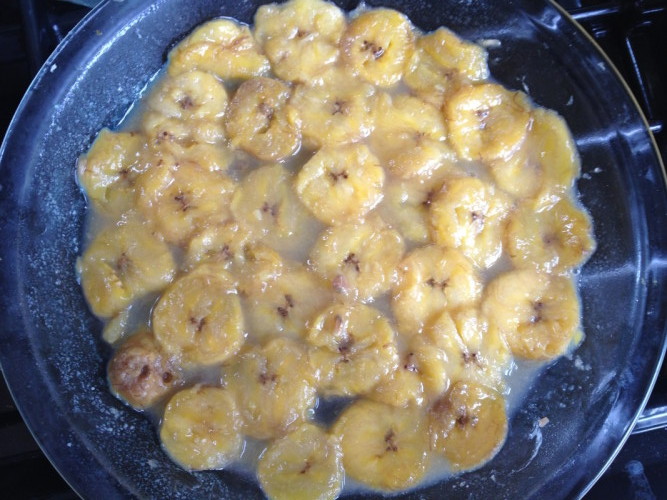
Working on reaching trace. 

16081_10152632866727013_915759999358523822_n

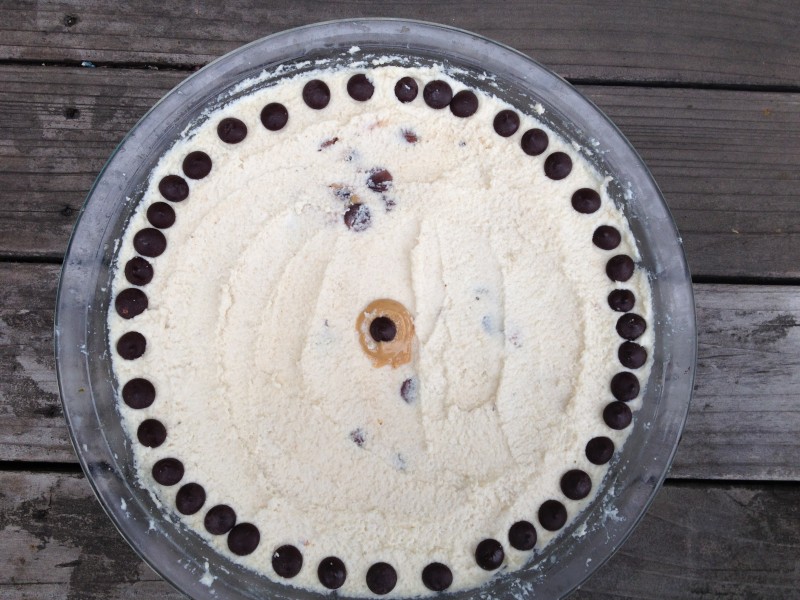
After you reach trace, pour into your loaf pans and allow to sit for 24 hours. 

soap1

After 24 hours, cut into individual-sized soap bars and cure for 3-4 weeks. 

soap 2

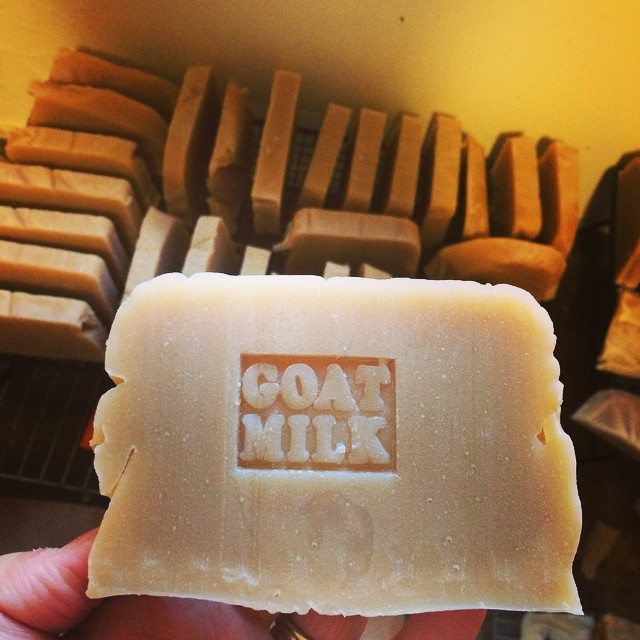
Waiting 3-4 weeks for the soap to harden! It’s worth the wait! 

10703599_10152663692747013_4306114713772124454_n


I hope you enjoy this recipe as much as my family does! 

Traditional Goat Milk Soap Recipe .001

Filed Under: Budget, DIY Beauty Recipes, DIY Home Recipes, goats, Homesteading, Living Sustainably, My Recipes, Natural Living

Plantain Crust Cashew Cream Pie (Paleo & Gluten-Free)

October 15, 2014 by Jackie Ritz Leave a Comment

Cashew Cream Pie

Paleo pie lovers are often crust challenged. You can roll out a grain free crust, but that’s a lot of work. Or you can mix nut flour and dates. But when that gets boring, I’ve got another option…a plantain and gelatin crust. It’s made of nothing but fruit and gut-healing gelatin and used in this recipe, it makes a delicious foundation to a paleo friendly, cashew cream pie.

 Not only does this add a health factor to your dessert but the plantain crust adds natural sweetness and holds up as a great crust. This no bake pie is super easy to make, it just takes a little patience and planning ahead because the crust has to set in the fridge like jello and the cashews need to be soaked (which coincidentally makes them easier to digest…bonus!).

This pie is perfect to bring to a party where it will please the gluten-free and paleo crowds alike. And if a nut allergy is a problem, fill the crust with cooked apples, figs, coconut cream, pumpkin or your favorite no-bake pie filling.

I garnished my pie with a ring of chocolate chips and a dollop of cashew butter in the middle, but you garnish with berries or banana slices.

Don’t like plantains? Experiment with adding jello to fruit like sliced pears or apples. I love to experiment in my kitchen lab (that’s how I came up with this recipe) so have some fun and try some experiments of your own.

Ingredients

  • One large plantain or two small, ripe, yellow plantains, sliced
  • 1 teaspoon of grass fed gelatin
  • 1 cup of cashews, soaked
  • Juice of one lemon
  • 1/2 cup of water divided into 1/4 cup portions
  • 1/2 teaspoon of vanilla
  • 2 tablespoons of maple syrup or raw honey (can also use 2 to 3 soaked dates)
  • 1/2 can of coconut cream (you can turn regular coconut milk into coconut cream by refrigerating overnight, scooping out the solid stuff and discarding the liquid).
  • 1/4 teaspoon of sea salt
  • optional: chocolate chips to decorate
  • optional: 1/2 teaspoon of cashew butter for garnish

How to Make the Crust:

  1. To make the crust slice the ripe plantains into rounds.
  2. Saute them in fat of choice until they darken in color, soften and caramelize. When you taste one it should be sweet and soft.
  3. Pour 1/4 cup of water in a shallow bowl and sprinkle gelatin on top and let it sit for 5 minutes. This is called “blooming” the gelatin and will soften it so it dissolves easier in hot water. Boil the other 1/4 cup of water and pour over the cold water and gelatin. Mix until the gelatin dissolves.
  4. If it doesn’t dissolve, you can pour the gelatin mixture into the pan with the plantains and heat the pan until the gelatin dissolves.
  5. Transfer the plantains and water to a pie tin. This is going to be your super healthy and sweet crust.
  6. Put in the fridge for 3 to 4 hours for the crust to set.

IMG_4524

How to Make the Filling:

  1. Submerge the cashews in water and leave it to soak while the crust is setting, or you can soak them overnight if you prefer.
  2. Drain the water from the cashews and throw the soaked cashews into the food processor and process until smooth.
  3. Add in coconut cream, lemon juice, sweetener, salt and vanilla. You can also used soaked dates instead of honey or maple syrup.
  4. Process until all the ingredients are well combined.
  5. Pour the cashew mixture into the set pie crust and return to the fridge for an hour.
  6. You can decorate the pie with a dollop of cashew (or other nut butter) in the center and a ring of chocolate chips around the perimeter of the pie. You can even mix some chocolate chips into the cashew cream filling, by hand, before putting it into the pie crust.
  7. Enjoy this unique no bake pie with a sturdy crust that can be served to just about anyone.

IMG_4527


Plantain Crust Cashew Cream Pie


gravatarAngela Privin stumbled on the Paleo diet while trying to cure her symptoms from irritable bowel syndrome (IBS). After a year on a strict Paleo diet she was completely healed and her food allergies were reversed. She’ll always be grateful to her health challenges for making her learn to cook years ago. These days she’s Paleo because she loves the creative challenge of cooking delicious grain-free, real food. She spends much of her spare time experimenting in herPaleo Kitchen Lab and eating the experiments. You can check out her recipes here. 

Filed Under: My Recipes, Paleo Education

5 Reasons Why I Put My Child in Public School…and Regretted It.

October 14, 2014 by Jackie Ritz 38 Comments

If you’re expecting some extreme circumstance that led to my decision to pull my little farm girl from public school and homeschool, then you are going to be unhappy. Sometimes decisions are made, not on impulse or out of anger, but because we simply decided to listen to something that all mothers possess…our mommy gut.

My mommy gut has been screaming at me for years to homeschool my children but when the time came in August to enroll her in public school, I found myself, reluctantly, at the open house and shaking hands with her extremely nice and lovable Kindergarten teacher.

This post isn’t about bashing the public school system. I loved my daughter’s Kindergarten teachers and so did my daughter. This post is about some things that we might all have in common. I love teachers and I think they do an amazing job at nurturing our children the best that they can. However, I’m better at nurturing my children then they are…because I’m their mommy.

Today is my daughter’s last day in public school. Here’s a short list of things that helped us come to this decision.

5 Reasons Why I Put My Child in Public School…and Regretted It:

1) I Was Too Busy

I’m always too busy. Too busy for this and too busy for that and no time for anything extra. And let’s face it, homeschool is EXTRA. I made excuses how I couldn’t do it and there was no free time in my schedule. Granted, I was VERY busy at the beginning of the year but my daughter should have come first.

2) I Couldn’t Do It: 

The responsibility of educating my child was going to be in my hands??? No way jose’! I doubted myself, my abilities to be able to give her ALL she needs and I took no responsibility. I didn’t want it. It’s much easier to pass this off to a actual, real “teacher” instead of owning up to it myself.

3) It’s “Just” Kindergarten: 

She’s gonna go play half the day and make friends. There’s no real learning in Kindergarten…right? I can brush this year off and start to really focus on what we want to do in first grade.

4) I’ll Have No “Me” Time

Sometimes this girl drives me crazy and I think we would be better if we had a little space. She goes to school and then comes home to me and that time away will be just what we need. Mommy needs time to herself and time away makes me appreciate them so much more.

5) She Needs Friends

Little Farm Girl is one of the most lovable, sociable girls I have ever met. She has the personality of her father…a social butterfly that thrives on being around people. I can’t take this from her and keep her home. I need to allow her to have her time with her friends.

SHUT UP Jackie!

Seriously, I’m killing myself with all these negative talks I have going on in my brain. I go back-and-forth and I’m, constantly, overcoming my own personal doubts. But one thing I have learned about myself over the last few years is: 1) never let doubt make a decision. 2) Never say never. 3) If your heart is speaking it, JUST DO IT.

You see I feel so relieved to have overcome those 5 reasons! I, literally, BROKE each one and overcame the doubt that I would not be able to do this.

I made a plan and I am going to make this work! 

5 Reasons Why I CAN Homeschool:

1) I Am Busy, but Never Too Busy

My kids come first. Their education is very important to me. I am so blessed to be able to work from home. I’m even more blessed that my income is retiring my husband very soon! So, yes, I am busy right now, but I have time for my little Farm Girl. Time is something that is coming and going so fast. I am, literally, watching my children grow up before my own eyes. THIS is the perfect opportunity to savor their lives and learn together. I am so excited about this opportunity to homeschool them! And you know what? When I add my kids education to my plate, I take something off that is not fulfilling me. Easy peasy!

New Homeschooling Mom Suggestion: Get over yourself and hire someone to clean your house OR download this awesome app that helps you keep up with daily cleaning tasks!

2) I TOTALLY Can Do This! 

I am smart. I am productive. I am creative. I can teach my children about life and the world around them. I have the resources at my fingertips!

We appreciate a literature-based approach to education. In fact, the more I was learning and researching about Common Core Standards (which are the standards that are the foundation to most public schools), the more I was worried about what they were learning. I wanted my child to be an individual. In my opinion, Common Core is the widget approach to education. With the right processes and production standards, they can manufacture students the same way they manufacture products. Like any successful industry, efficiency and consistent outcomes are the name of the game. Apply that model to education, and Common Core makes sense to them.

The problem is, my child is not a widget, and education is not designed to produce economic automatons.

Great video on Common Core:

So, we ordered Sonlight curriculum. I needed something to really help me get moving this first year. Something that was SPELLED out for me. I needed organization and a schedule and something just TO TELL ME WHAT TO DO! I love the Charlotte Mason approach and I plan on implementing that into our education, as well. But this first year, as I get my feet wet, we will be using the Sonlight curriculum.

3) It’s More than JUST Kindergarten

It’s a foundation. It’s showing her the world around her. It’s experiencing things together. It’s about learning together. Her teacher last week told us that she had already “passed” Kindergarten in her first month of being in school. Well, what the heck is she gonna do the rest of the year? Now, I can meet her where she is at. If she moves on to first grade reading by Christmas, then so be it. If we have to repeat math next year, then so be it!

I GET TO TEACH MY DAUGHTER TO READ and that is an amazing thing! The ability to read is something she will use every, single day for the rest of her life and I get to teach that to her!

4) It’s NOT About Me

Who cares if I have no “me” time. I had kids and they are more important than me. Plus, I can make time for myself when I need it (hello YMCA…I’m hear to “work out” for 2 hours)…hehe, just kidding (not really).

Why does my “me” time need to be alone. My “me” time will turn into WE time and we can discover the world together. We can get haircuts and pedicures together DURING SCHOOL HOURS (gasp!) and we can go to the nearby waterfalls and sit and read. There’s so much to do and I’m not worried about myself anymore. I’m worried about her.

5) She Will Have So Many Friends

She already has her first homeschool art function today at a nearby art museum! I’m picking her up at lunchtime and we are going right there! She didn’t even want to go to her last day of public school today because she is so ready to get out of the classroom.

I signed up for local homeschool association. OMG there is so much stuff to do. Probably more than I’ll be able to do with my kids. Also, she will have some enrichment classes at a local Montessori school! I was so happy to be able to give her this! I love Montessori and there is a local school that has a Kindergarten curriculum.

I CAN TOTALLY DO THIS…and you know what, YOU CAN TOO!

5 Reasons I Put My Child in Public School and Regretted It

Filed Under: About Me, Homeschooling

Why I Chose to Use doTERRA Essential Oils

September 10, 2014 by Jackie Ritz 26 Comments

I’ve been using doTERRA essential oils for 2 years now (updated 8/28/15)! I have been through almost every single essential oil brand and company but when I started using doTERRA, I started noticing a huge difference…in fact, one of doTERRA’s blends, Elevation, is what started my journey into doTERRA and changed my life! . 

Before I go into why I love doTERRA essential oils and address some of the common misconceptions about essential oils, I wanted to say one thing:I think it’s amazing that so many families are using herbs and essential oils. I love seeing testimonials from people who have used an oil and seen a drastic improvement. Regardless of the brand, I think it’s so great that people are turning to essential oils and natural healing and away from over-the-counter, synthetic drugs!

Why I Love doTERRA

1. I Like the Purity

doTERRA wanted to create a purity level that goes above and beyond organic. So they created an internal standard called Certified Pure Therapeutic Grade that is verified by 3rd party testing laboratories. They test their oils 7 different ways to make sure that they are pure and safe for therapeutic use. Even though doTERRA essential oils are not “certified organic“(read why in next paragraph), you can be assured that they are a step above organic.

Organic certification varies from country to country and state to state. doTERRA essential oils are sourced all over the world, so that is why organic certification is not possible. One of the ways they ensure their oils are free of pesticide, herbicide, extenders and solvents is through the GC/MS analysis process, which is one of the 7 ways they test the purity of their oils.

Have you heard different? There is many misconceptions and lies across the internet. Much of the untruth about the purity of doTERRA essential oils stems from a website that was anonymously published by one of doTERRA’s competitor. The website accused doTERRA’s peppermint of having a synthetic ingredient called “ethyl vanillin” in it. It was purposely set up to be anonymous and it was soon obvious who was behind the scandal of the fake test results. Thankfully, the truth of this website came out (doesn’t it always!) and the website has since been taken down.

Dr. Pappas, a world-reknown chemist, that does the third-party testing for doTERRA, along with other essential oil companies, published his testing results of doTERRA peppermint essential oil and stated:

As you can see from the report in which we looked at everything down to 0.01%, there is no finding of ethyl vanillin in the oil, despite what was claimed on certain other websites. So I guess it comes down to a matter of trust and who one chooses to believe on this issue.  Before making that decision on who to believe however,  it would at least be prudent for one to become educated about many aspects of the report which claims to have found ethyl vanillin. – source

2. I Like that they Do Third-Party Testing

Many people come to me with the concern that doTERRA uses third-party testing facilities. My first question is, “Why the heck is this a concern?” A company that uses an IN-HOUSE lab would be something that would concern me. I would be concerned about them being biased. So, I love that they use third-party testing of their essential oils!

3. I Like that they Source their Oils All Over the World

This was really important to me. I don’t buy my wine from Idaho when I can get it from France. Some things are MUCH BETTER to get outside of the United States. This is when you want to forget your “American-made” pride and realize that some herbs do not grow good in the United States…some do..but not all. So, doTERRA carefully selects and sources their essential oils from where it grows at it’s prime! Here’s a great video by Emily Wright, one of doTERRA founders, talking about where they source their essential oils and a world-map below on where their oils are sourced.

doterra origins

4. I like that they are Driven by Charity

“The doTERRA Healing Hands Foundation is dōTERRA International’s registered 501(c)(3) non-profit organization committed to improving lives through partnering with organizations that offer hope to millions around the world. Healing Hands seeks to bring healing and hope to the world, for lives free of disease and poverty, and to ultimately empower impoverished communities with the tools needed to become self-reliant. dōTERRA International, LLC provides for all overhead and administrative costs of the dōTERRA Healing Hands Foundation, ensuring that 100 percent of all donations go directly to those receiving aid.”

You have the option of donating to the Healing Hands foundation every time you order! I love that they work so much in communities of need. This is important to me in a business, and especially a business that I represent.

5. I like that they Educate

The education and ongoing support that you get with doTERRA is incredible. I have learned so much about essential oils, the safety of them, and the proper way to use them. My team and upline have educational team calls that you can join in and participate in. There is so many online tools that you can use if you would like to make a business out of doTERRA. I’m in a hundred Facebook groups that share and educate on using essential oils. There is so much support and that is what I love about the company.

When I was using store-bought essential oils, I had ZERO support. I had no one to go to and talk to about how to use the oils.

6. I like How Clean they Smell

The smell test is a good indicator of purity. I read one blog article on how doTERRA essential oils smell good because they are not “first distillation“. This prompted me to research more into this and what I found out was GREAT! Essential oils SHOULD smell good. This quote from the chemist, Dr. Pappas, speaks volumes on how Peppermint essential oil is distilled and how the information you read on the internet is not always accurate:

The plant is distilled for basically 2 hours and its done, no more oil is coming out so they shut the still down. Its absolutely ridiculous to think that the distiller, after watching his oil come over, seeing that his oil level is not growing, shuts the still down and then later thinks to himself “gee, I bet if I fire this still back up (wasting thousands in feul and labor) we can get some more oil out of that spent mint leaf we distilled yesterday.” Where do people come up with this stuff!!?? Now the MINT OIL can, and often is (thank God), taken for some further redistilling and/or fractional vacuum redistilling that can take place to further improve the quality of the oil by removing nauseating components of the whole oil (just tiny amounts of very bad smelling components get removed in this process). But NOBODY distills the mint biomass a second or third time. This is generally true, not just for mint, but for essential oil distillations in general.  When I tried to explain it to the person posting this rubbish she basically did not believe me because her “research” of talking to retailers of essential oils apparently was of higher credibility. If people would just use some common sense they could look at this kind of misinformation and come to the conclusion that none of it makes sense. From an energy standpoint, why would anyone plan to shut down their distilling process just to start it up again later? The amount of energy required to get massive amounts of water boiling and enough steam generating to liberate the oil from large vats of biomass is quite astonishing and costly. Why not just keep distilling and just start collecting the oil produced at the tail end of the distillation in a separate container, if you want to collect what you think might be a different quality at the end of the run than at the beginning (by the way this is done with Ylang Ylang oil which is why there are the different grades of extra, I, II, III and complete). But aside from ylang ylang most all essential oil distillations are collected in one combined lot. And the only time I have ever seen a distiller shut down his process and restart it later was because of mechanical problems, running out of fuel, or just getting too physically tired to continue (in the case of sandalwood for example the distillation can go on for more than 24 hours and oil is still in the wood). I hope that this post will finally do some damage to this myth that has been circulated for decades now and we can finally put it to bed. – source

So, there ya have it. There is not 1st, 2nd, or 3rd distillations. The only that does undergo more than one distillation is Ylang Ylang, like Dr. Pappas describes above in the quote.

7. I Like that they Shoot for Quality, Not Quantity 

I hear so many people talk about how ______ company has more variety of oils. I know this can be disappointing when your company that you love does not have a specific essential oil that you may be looking for. The reason for this is because doTERRA will not compromise their quality for their quantity. This is why many oils have come and gone and why doTERRA is always looking for a more sustainable and reliable source that is high in quality. I love that. I would rather have a limited quantity of AMAZING oils than a large quantity of low-quality oils.

8. I LOVE the Business Model

The compensation plan of doTERRA is incredible! It’s extremely generous and I am so happy to say that it is our top income source. In fact, my husband doesn’t even need to work at this point. In less than 8 months I achieved the rank of Diamond in doTERRA. I did NOT expect to achieve diamond that quickly, nor did I set out to do that. But once I started sharing with how essential oils were changing my life, people started jumping on board and my team grew enormously!

This YouTube video is great at describing what doTERRA’s compensation plan is and how it is very different than our main competitor. If you are interested in joining doTERRA for growing a business, please read my blog post on how you can start working with this company!

Essential Oils are for EVERYONE!

Regardless of what company you love or choose, I am just so overjoyed to see you reaching for oils instead of over-the-counter medication that is filled with side-effects and God knows what else.

However, if you would like to start your journey into using doTERRA essential oils, I want you to know that I would love to help you! My team is so supportive and you will be able to join our exclusive team groups and learn so much about essential oils. CLICK HERE to take a look at my current monthly specials and to get started in using essential oils!

Any rude comments or comments including links promoting a certain brand will be deleted. The purpose of this post was to share why I love doTERRA for my family and to provide some links and research for those who are trying decide if doTERRA is right for them. 

Why I Chose doTERRA Essential Oils for My Family

Filed Under: essential oils, Living Sustainably, Natural Living

My Natural Miscarriage

September 3, 2014 by Jackie Ritz 55 Comments


Misty sunrise over the field

DISCLAIMER: This story is about miscarriage and what my body went through. Read at your own discretion. 

Some of you knew that I was carrying our 3rd child. But what some of you probably do not know is that I miscarried our 3rd child in late June. I haven’t talked about it much. It just happened and I tried to move on.

Now I’m ready to talk about it and I want to share my story for a few reasons.

One, it’s part of my healing process…I am ready to open up about it and I know this will be very therapeutic to me.

Two, I want to share what a natural miscarriage is like in the comfort of your own home.

Three, this life I carried is worth talking about…even if I only carried him/her for 13 weeks.

Four, more women need to talk about miscarriage. It’s very taboo, yet it happens to to many.

The Story

I was at 13 weeks and things felt like they were going great. I had my energy back. I wasn’t sleeping all the time. I was able to catch up on work that I had put behind me. And I was finally back to my normal pre-pregnancy self! I celebrated getting over the hump of the first trimester with my husband and the relief that every woman seems to feel when they move past that 12 week hump.

Then one afternoon I had some spotting. It wasn’t a lot and it wasn’t enough to worry me. I knew spotting during pregnancy was normal. I had carried 2 other babies full term. But it kept happening. Not a lot of blood, just a little.

I finally told my husband as we were doing the evening chores. He showed concern…which then made feel feel more concerned. He told me I should call my midwife and just talk it over with her. It was a Friday night.

My midwife told me that spotting was completely normal but if I had any concern that I could have it looked at. It was Friday night so the only thing I could do was go to the ER or wait to come in to her office on Monday morning.

My husband and I decided that we didn’t want to wait till Monday so we went into the ER…with both our kids in tow because we couldn’t find anyone to watch them.

They took me back and told my husband that he wouldn’t be able to be with me because he had our 2 kids with him. I was super pissed about this but was strong and said it would be alright. Up until this point I didn’t have any cramping, but then I started to feel a dull pain in my lower back. That was when it finally hit me that a miscarriage was probably inevitable. With both my children, I had back labor, so I recognized this pain.

I was rolled into the ultrasound technician’s room and she placed the cold doppler on my small pregnant bump. For about 5 minutes she pushed buttons, took measurements, but DIDN’T SAY A  THING TO ME. I was irritated and asked her if everything was alright. She said she had to go grab a doctor. My heart sank.

A doctor came back in with her, they both looked at the screen, and then they both walked out. I layed there on the hospital bed wanting it all to be over.I wanted them to tell me the baby was gone and be done with it. Why was this whole process taking so long?

The ultrasound technician came back in and STILL did not look or talk to me. I said, “Excuse me, ma’am, could you please tell me what’s going on?” She FINALLY looked at me and said, “I’m not supposed to say anything.” Then I simply said, “Is the baby gone?” And she nodded her head yes.

I laid on that hospital bed in a daze. It seemed like 10 minutes before anyone came and got me and rolled me back to my room. I actually felt very emotionless. I felt numb. I felt betrayed, once again, by my body.

The ER doctor came in to give me my results…which he didn’t know I already had. I think she was expecting me to break down and cry and hold my hand and was surprised when I said, “Can I please go home now?” She wanted to talk about a DNC and I said no. I wanted my body to release the baby naturally.

I went home that Friday night with my husband and my 2 kids and another broken heart. I had a miscarriage before but it was early on. I was nearly in my second trimester this time. So, I tried to move on with my weekend and just let my body do it’s job.

Saturday came. Nothing. Sunday came…nothing. Monday came…nothing. The waiting was torture.

Then Tuesday night I was outside helping with the farm chores in our pasture and I felt a sharp pain in my lower abdomen and then felt something slip out of me. I looked up at my husband and told him that it was beginning. The cramping was intense and I could barely stand up straight and walk inside to sit on the toilet. Once I got inside and sat down on the toilet I saw our baby.

I could see our babies eyes forming. I saw the feet and the toes. I saw five tiny fingers and from my best judgement our baby was a little boy. I sat on the toilet and I finally cried. I held our baby and couldn’t stop staring at him. The contractions I was having were very painful and it felt good to cry through them while holding my baby. He was worth it.

I set him down on the counter and tried to get up so I could go get my husband. He came in and I showed him our baby. We both held each other and kissed our baby goodbye. I asked my husband to bury him under my favorite maple tree, and so he did.

My husband came back in and was with me EVERY second. I felt a gush of water flow down my legs and knew that was the water breaking. I sat down on the toilet for what seemed like an hour after this. The contractions and pain were so hard and the next 24 hours were very much like birth. I bled a lot and had huge clots that I passed. I thought I had passed the placenta with the water that broke but I was wrong. I’m not sure what I was birthing, but I was grateful my husband was holding my hand through it all.

My back was on fire and at some point it slowed down and my husband helped clean me up and put me in bed. He applied my essential oils to my body. A soothing blend on my back pain, white fir and lavender on my abdomen and clary sage over my abdomen as well. Thankfully, I slept pretty good that night but the next morning was another day of intense contractions and lots of bleeding. The contractions and the cramping went on for 2 days. The bleeding slowed down after about 24 hours. I still was passing clots and I was unsure how long this was going to last. It was Tuesday when this started and on Thursday I felt things slowing down.

Then a huge contraction came. I got up and told my husband I feel like pushing. He directed me to the toilet and I sat down and pushed. The placenta (which was the size of my hand) shot out of me and I felt so relieved. I told my husband I just delivered the placenta and he went in to make sure that was what it was. He showed it to me and I cried as I looked at it…the organ that nourished my baby for 13 weeks was now out of my body. He asked if I wanted to keep it and I told him to bury it with our baby.

From the moment the placenta came out, my body felt 100 times better. The emotional torture of the whole process was worth it.  I got to hold my baby, say goodbye and bury him.

It’s been over 2 months since I said goodbye to my 4th, and final, baby. We tried for a third and I am 100% positive that I cannot go through this again. I was so grateful that I let my body naturally miscarry and that I didn’t opt for a DNC. I was so grateful that I was at home…even though it was not the home birth I was hoping for.

Sometimes in tragedy we find our life’s purpose…

And I have. My purpose and vision is for other women going through tragedy’s, such as mine, to find refuge and security from the storm. My purpose is to cry with them, love on them, encourage them…never show judgment…always love, always grace.

My heart goes out to all of you who have been down this road before. I pray that mercy washes over you and you find peace.


Jackie xoxo

Filed Under: About Me, Natural Living, Thoughts

You Make Beautiful Things Out of Us

August 25, 2014 by Jackie Ritz 2 Comments


Beautiful Things

Hopeless.

Depressed.

Filled with guilt.

Bad mother.

Bad sister.

Incapable.

Alone.

Ugly.

Fat.

Me.

All this pain. I wonder if I’ll ever find my way. I wonder if my life could really change at all.

These were just a few things that described my life. The guilt that I carried was heavy. Guilt for letting my sister go to her apartment alone. Guilt for not wanting to get off the couch to play with my kids. Guilt for being so selfish with my grief. Guilt for not wanting to let myself feel loved by my husband.

Guilt. It weighed me down and it tore me apart and it crushed me. Crushed. Bruised.

Fat. Ugly. Typical mother who let herself go. Nothing special. Nothing beautiful. Nothing worth caring about.

ME

Incapable. Weak. Unqualified. “Jackie, you can’t do anything right. You weren’t even there for her. You let her go. This is your fault.”

You’re not worth it. You’re not worth anything.

Could all that is lost ever be found? Could a garden come up from this ground at all? 

Change. Joy. Life. I starved for it. I was so dry and hungry and desperate and I wanted it so bad.

I was so empty. So dusty.

All around, hope is springing up from this old ground. Out of chaos life is being found in You.

Who is this person? Did I just smile? Did I just laugh? Am I kissing my husband again with passion? Do I really have passion? What is going on?

I’m changing.

I’m evolving.

I’m….becoming.

Happy.

I’m happy. I’m becoming happy.

Beautiful….I’m beautiful.

You make beautiful things out of the dust. You make beautiful things out of us. 

I’m not hopeless. I’m promising.

I’m not depressed anymore. I’m happy.

I’m NOT guilty.

I may not be perfect, but I am exactly what my children need. I am a great mother.

I loved my sister and she loved me and we will see each other again one day. I was the best sister to her.

I’m able. I am able to be and do what I so passionately love to do. I am able.

I am beautiful.

You make me new. You are making me new. 

You make beautiful things out of the dust. You take a dusty woman like me and you make it beautiful.

My life has changed so much. I am so incredibly happy and blessed and grateful that I have been made beautiful. I am so grateful that I tattooed it on my body….

10390933_10152601798012013_882215162376416392_n


Filed Under: About Me

« Previous Page
Next Page »

Primary Sidebar

  • Facebook
  • Instagram
  • Pinterest
  • RSS
  • YouTube

Hi, I'm Jackie Ritz and welcome to The Paleo Mama! I'm a published author, certified herbalist, and voracious researcher of natural medicine and nutrition. I'm glad you're here and I hope you stick around for awhile!

Recent Posts

  • When God Says Pause: Why I Took a 5-Year Break from My Online Business
  • How to Quit Facebook but Keep Your Business Profile
  • Leaving the City for the Country
  • Natural Way to Heart Health

MEAL PLANS

Biblically clean meal plans that are for those love to cook real food

Read More

Footer

Our Blog

The Paleo Mama blog provides simple answers for healthier families through research, tutorials, recipes, and simple remedies for daily needs!

  • Health
  • Essential Oils
  • Recipes
  • Remedies
  • Natural Living
  • Meal Plans

Stick around!

You’ll get instant access to a library of natural remedies and real, paleo food, including our ebooks and free guides we send out.

  • Home
  • Disclosure/Disclaimer
  • Privacy Policy
  • Advertise
  • Contact Me

Copyright © 2025 · Wellness Pro on Genesis Framework · WordPress · Log in