Do you ache to quit Facebook but you aren’t sure how to keep your business pages and groups thriving if you leave? I’ve got a 10-step plan for you follow so that you can regain your freedom!
Last year decided that it was time for me to break-up with Facebook for good. I’ve been battling issues with social media for a LOOOOONNNNGGGG time now. I would go on a Facebook fast, and then shortly later, I would find myself consumed with it once again.
Just so you know. I have an all-or-nothing personality. I am either obsessed with someone and devote all my time and energy to it, or I hate something and don’t want anything to do with it. Those who speak Enneagram language…I’m a 7. So, maybe that all makes sense to you…
Either way, Facebook consumes me. I scroll, tap, join groups, post, comment, and get lost in it’s web. There is no balance for me and when I finally admitted this to myself, I was able to see the joy and time Facebook was sucking out of me.
But….what about my Paleo Mama Facebook page that I’ve built? What about my groups that I admin? What about keeping in touch with people? What about this and that???
I’m going to share with you my plan that I executed back in December to get rid of Facebook, but still use it SOLELY for business. Where there’s a will, there’s a way, and by-golly I am going to find it!
Step One for Getting Rid of Facebook (but keeping your business pages/groups)
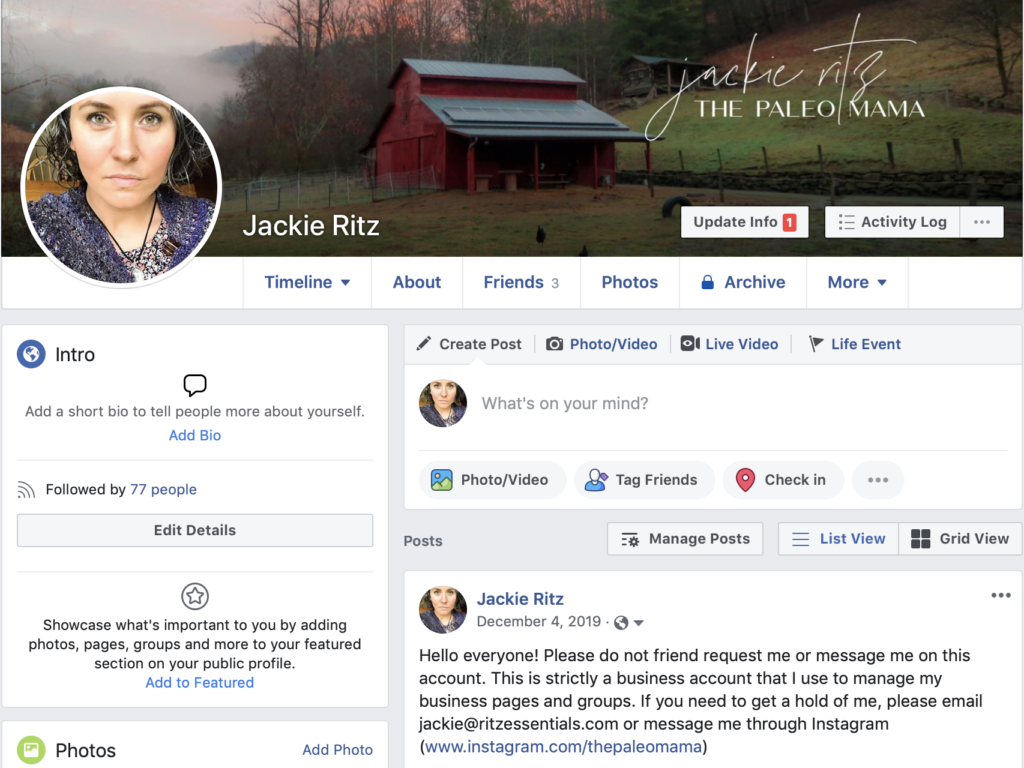
Create another profile. Yes, you are going to re-join Facebook with a new email address and start completely over. It’s up to you if you want any friends on this profile. Once again, I’m an all-or-nothing type of girl so when I quit Facebook for fun, I quit it for good.
As you are setting up your new profile, you might want to make ONE POST, similar to the one I did in the image below.

Step Two: Friend request your old account
You will want to send your old Facebook account a friend request from your new account and then log into your old account and accept. You need to make sure both these accounts are friends so that you can follow through with some of the next steps.
Step Three (optional): Make an announcement when you are deleting
How do you want to keep in touch with friends on Facebook? On your old account, make sure you make an announcement if you want to stay in touch with certain people.
Honestly, I didn’t do this because I was so eager to get off Facebook, that I forgot to trade phone numbers with some people.
Step Four: Add New Facebook Profile as Admin on All Business Pages and Groups
You will need to be logged in to your old account to do this. And you need to make sure both your accounts are friends, so don’t skip step two. Make sure you designate your new Facebook profile as the admin on EVERYTHING. Double-check a million times because once you cancel your old account, you will not be able to get back into it!
Step Five: Log into Old Account and Save Important Photos
Here’s the thing. You can do this one-by-one, or you can wait for the pop-up during activation that says that Facebook will send you an email with all the data and pictures. I did that and, honestly, I didn’t really use Facebook to save photos. But if you do, you got your work cut out for you…remember, it’ll be worth it!
Step Six: Instagram Integration
Remember Instagram is owned by Facebook and is connected with your Facebook profile through your OLD account. Make sure you log out of Instagram and then log back in using your new Facebook account. Just make sure Instagram all works well before moving onto the next step.
Step Seven: Are you ready? DELETE Facebook!!!! OMG
Yes, you’ve reached the scariest part. You are going to go into your old Facebook account “settings” — “general” — “manage account” and click on “Deactivate your account”. It’s okay…you’ve got this and you are gonna feel like you are leaving something huge behind, but I promise you, you aren’t. If you have reached this point, you have already convinced yourself of the reasons why you need to leave Facebook behind. It’s time to pull the plug and finish it! Watch how much time it frees up for you!
Step Eight: Download All Data
During the deletion process, Facebook will ask you if you would like to keep all data and photos. It takes up to 24 hours to receive them. I suggest making sure you have already downloaded the important photos that you want to keep.
Step Nine: Ignore Facebooks Pleas for You to Stay
Facebook begs for you to stay! They will give you a few options of just ghosting it for awhile. They will make it sound super scary and you will miss out on everything! Keep on with your mission, sister, and keep the processing moving! You will have 30 days to change your mind. After 30 days your page will be deleted forever. Hallelujah!
Step Ten: Enjoy the Freedom
In the past 3 months since I’ve deleted my Facebook account, I’ve taken up a few hobbies, started my YouTube channel back up again, connected more with people in real-life (I don’t have the false sense of community anymore that Facebook gave me), and spend way more time with my kids. My screentime has dropped dramatically! I use Facebook for business only and I run it…not it running me.
Conclusion…
I hope this helps you take the big step of deleting Facebook if that is something that you want to do. If you do decide to do this, and you found my article helpful, I’d love to know! Would you comment below and tell me that you joined the club?!
