Henna is the safest way to color your hair. Henna is a plant that grows in hot, dry climates. It’s leaves are harvest, dehydrated, and then made into powder. When Henna is mixed with an acid medium, henna will stain your nails, skin, or hair into a reddish-brown color. This makes it a safe, non-toxic way to dye your hair. Henna has been used for thousands of years to keep hair healthy and to color white or gray hair. There is only ONE color of Henna, however, there are different ranges of that color depending on the climate and soil of that plant and I’m happy to show you how to dye your hair with henna!
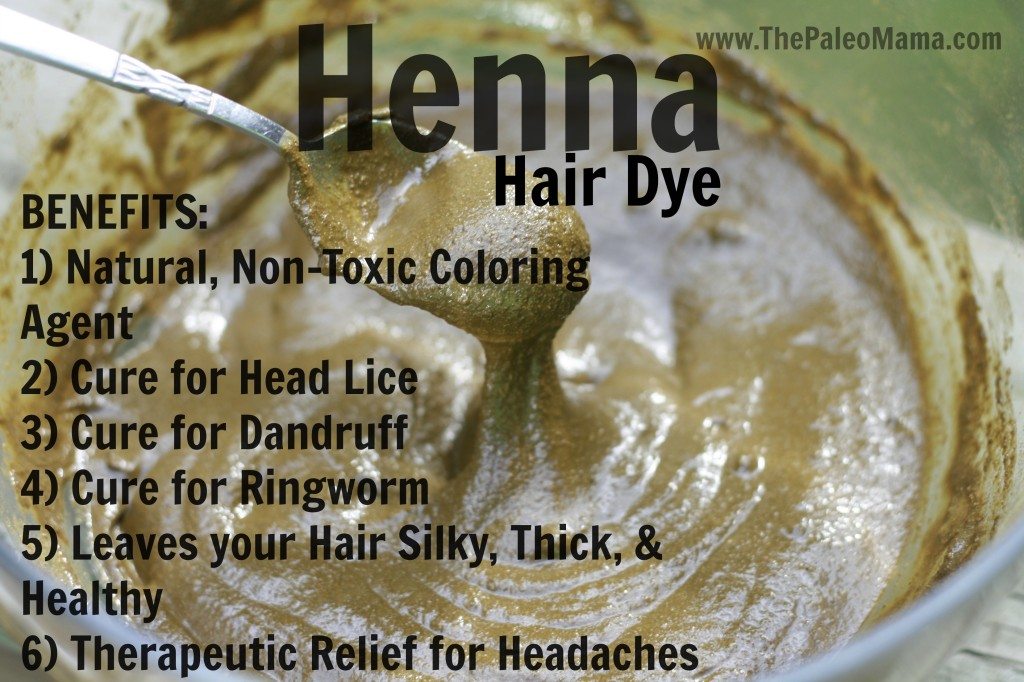
There are so many amazing benefits of using Henna…
What Kind of Henna Should I Avoid?
You may have seen various types of commercially produced “boxed” Henna treatments that specifies for “blond hair”, “black hair” or strawberry-blonde hair”. I’ve learned over the years of doing Henna on my hair that these are very poor quality of Henna. They are produced by adding synthetic dyes, metallic salts, and other plant dyes to a poor quality of Henna. You want to steer very clear of anything that is labeled for a specific hair color. Look for Henna that is 100% Henna. The best quality you can get is Henna that is labeled “body-art Henna.” It has the highest dye content of Henna.
What will Henna Look Like On My Hair?
Because the red-orange dye molecule is binding to the keratin that surrounds the pigmented hair core, the resulting color is different for every strand of hair, and for every person. The henna stain is translucent, and blends with your own color. Hennaed hair looks like you grew it yourself! The color you get on your hair will vary depending on your hair color you have now and the chemicals you already have on your hair. Many ask if it is safe to apply Henna on color-treated hair and the answer is YES! But it’s only safe to use high quality, body-art quality Henna.
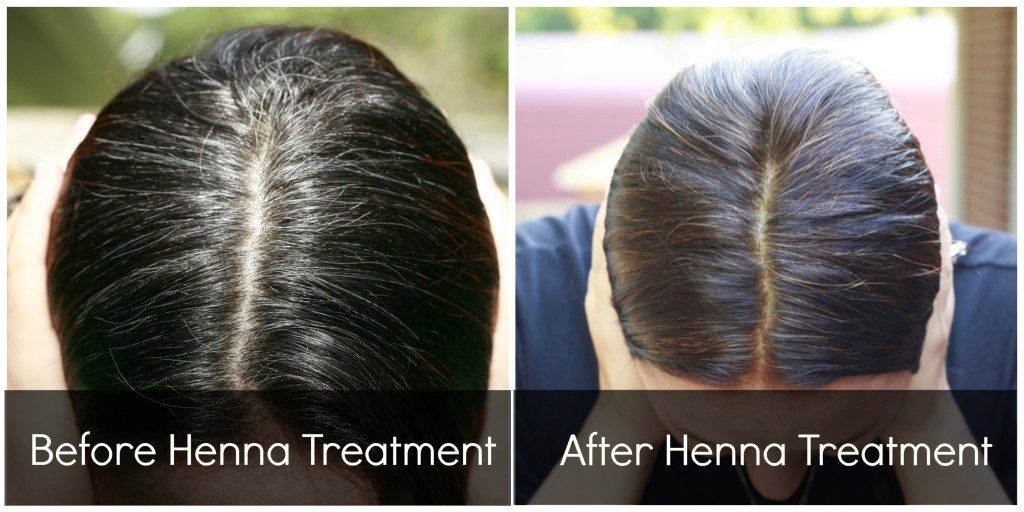
My Hair: Henna IS permanent if you use 100% Henna. See the pic below. Kinda embarrassing that I waited so long to color my roots, but you can see my white roots coming out and you can see the red Henna “highlights”. It had been 3 months since my last Henna treatment and the color was still going strong (other than my new roots). I do want to add, I use a natural shampoo and conditioner. It is wild-crafted, raw and vegan and I love it on my hair!

If you have course hair, Henna will be amazing for it! It won’t dye your hair completely red, but it will give it red highlights, loosen the curl, and make it silky!
How to Apply Henna to Your Hair
You can purchase your high-quality henna from here.
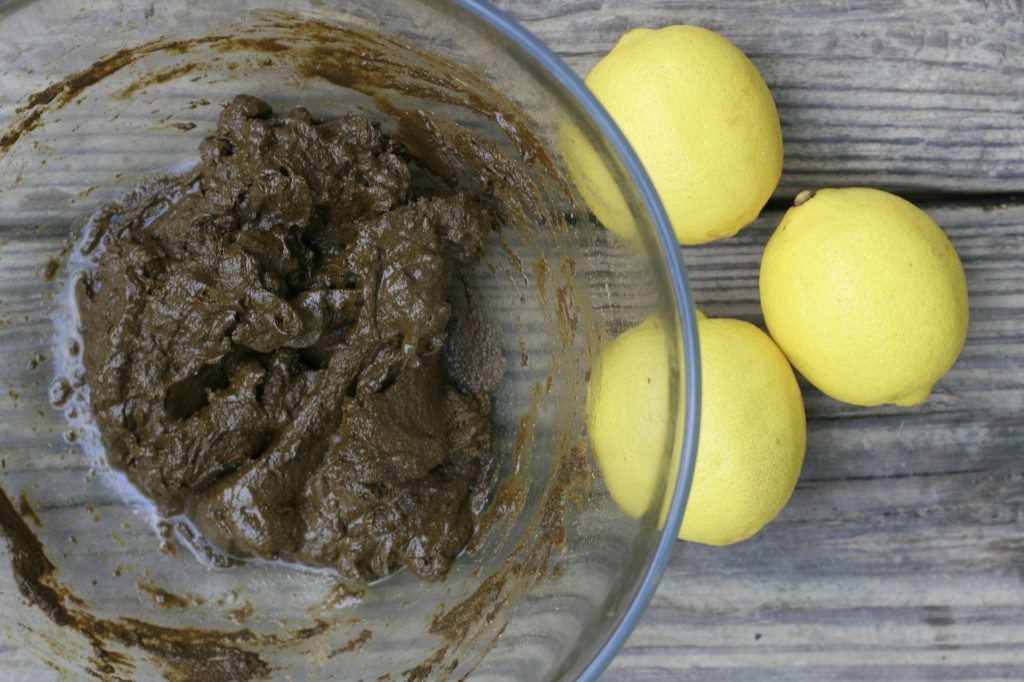
You need to use a acid medium to apply henna. Lemon juice does this very well. When mixed together it releases the dye and bind to the keratin in your hair. This makes Henna permanent.
Step One: MIX IT! Mix enough henna with lemon juice to make it like the consistency of mashed potatoes (see photo below). If lemon juice is too harsh on your skin, use something less acidic like grapefruit or orange juice. You could use vinegar or wine, but your hair will be a little stinky for awhile. Don’t use boiling water or your Henna will fade and be an ugly orange.
- Short Hair (use 100g or 1 cup)
- Collar Length Hair (use 200g or 2 cups)
- Shoulder Length Hair (use 300g or 3 cups)
- Waist Length Hair (use 500g or 5 cups)
If you have thick hair, add an extra 1/2 cup to a cup of Henna powder.
Step Two: REST IT. You need to let your Henna paste rest for several hours. I usually mix the Henna in the morning and apply to my hair at night. Letting it rest allows the slow dye release and will give you the BEST results. Cover your Henna with a plastic wrap and let it stew.
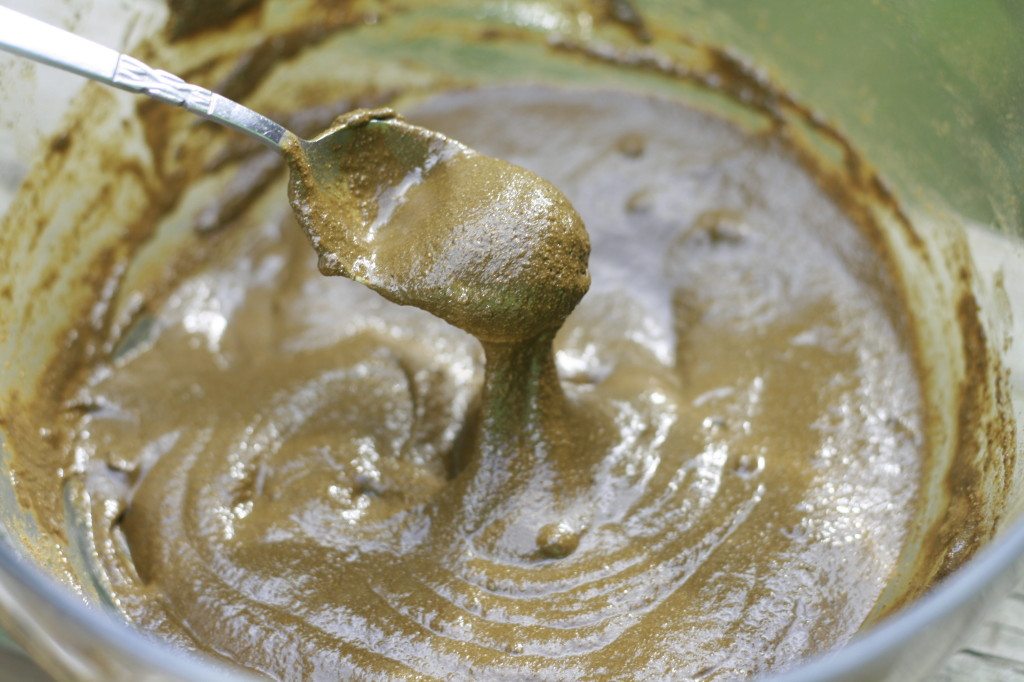
Step Three: MIX IT AGAIN. It’s been several hours and you are ready to apply. Mix some more lemon juice with the paste mixture until it is the consistency of yogurt.
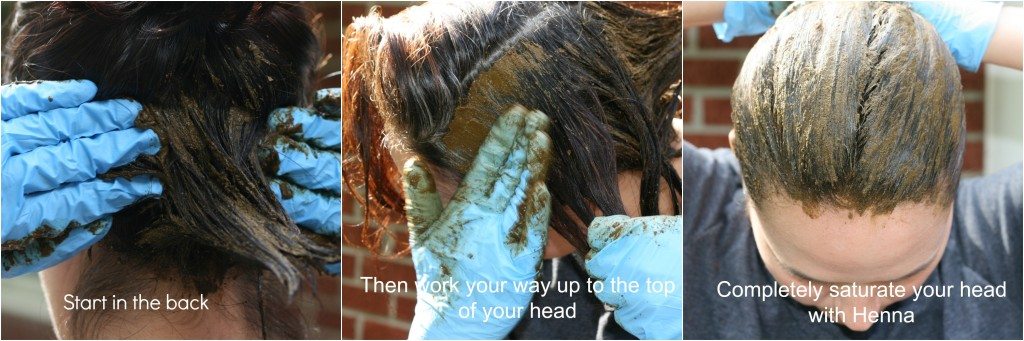
Step Four: APPLY IT. WEAR GLOVES. Henna is permanent and it will stain everything it comes in contact with. This is the messy step. I have a few suggestions to make it easier. Get in your bathtub and fill it up with water. Apply the Henna while standing in your tub. Or, you can go outside and apply. Bring a mirror.
- Do not be stingy. Apply generously and thick for a deep, rich color.
- Comb your hair and divide it into sections.
- You can put the Henna in a piping back, squeeze bottle, or just use your fingers and apply. I find the latter to be the easiest.
- Start at the back and work the Henna down to the scalp. Apply it thick! Then bring down the next section and Henna it. Make sure every bit of hair is THICKLY coated…like cake frosting. Don’t be afraid to use plenty of Henna and don’t be afraid to get messy.
Step Five: RELAX. When all your hair is covered with Henna, wipe your skin clean of any Henna, and wrap everything up in a plastic wrap. This keeps the Henna warm and moist and allows the hair to take in the dye. I then wrap a large DARK towel (remember Henna will stain anything it touches) around my head. This is when I go to bed. Yes, I sleep with the Henna on my head all night. This is not necessary but I have found that it covers my gray hair the best when I leave it on for, at least, 6 hours. The recommendation is 2-4 hours, but if you know that your hair is resistant to dye or has gray, then you may want to leave it on a little longer. I lay a dark towel over my pillow and sleep. I actually sleep really well with Henna on my head and it is also known that Henna can soothe headaches. So, just relax and enjoy the full benefit that Henna can give you.

Step Six: RINSE IT. Time to rinse out the Henna. I have shorter hair so this step isn’t too difficult. I take a nice long shower and rinse it out completely. I follow it with a wash and condition. When my hair was much longer, I used to fill up the bathtub and lay down in the water. This helped get the Henna out of my hair.
A few things…
- Henna may seem really bright at first. Do not panic…it will darken over the next few days if you used the acidic mix. It will take about 3 days to settle into the true color.
- Once again, DO NOT be stingy with the mix. More is always better with Henna.
- You can use this on beards too if you would like!
- Some people can’t stand the smell of Henna. I, personally, love it. It’s earthy and sultry. If you can’t stand the smell, you can add 1 TB of powdered ginger, clove, or cinnamon to your Henna mix.
Where to Buy Henna:
- Order high quality henna from HERE.
- Check a local Indian store to buy it SUPER cheap!!! Just make sure it’s 100% Henna!

https://www.hennaforhair.com/techniques/deb/
https://www.hennaforhair.com/freebooks/hennaforhair.pdf