• Skip to primary navigation
  • Skip to content
  • Skip to primary sidebar
  • Skip to footer

The Paleo Mama

Homegrown and Handmade

  • About
  • Blog
    • Podcast
  • Meal Plans
  • Essential Oils
  • Our Farm
    • Great Pyrenees Puppies
    • Goats
      • Goats for Sale
      • Goat Sales Policy
      • Nigerian Dwarf Bucks
        • Ranchocabra Lunar Eclipse

Natural Living

Our Homeschool Routine

October 7, 2015 by Jackie Ritz 17 Comments

It’s been over a year since I’ve been homeschooling. I am, by far, not an expert at this yet, but I’ve had so many of you ask me about what our homeschool routine and curriculum that we use are, so here it all is! 

I had always planned on homeschooling my little ones. My mother homeschooled me in my early years, and it is some of the most memorable times of my life. I remember doing so much with my older brother and younger sister during my homeschooled years and I had always hoped to do give the same memories to my children. 

There was a month where I had a moment of freak out. I didn’t think I would be able to do this and felt so much self-doubt. I actually ended up putting my daughter in public school during this panic and regretted it so much. She wasn’t even in public school a month before we pulled her out. It just wasn’t a good fit for our laid back, farm life. 

Our Style of Homeschooling: 

There are many different approaches to homeschooling, but here are the top 5: 

  1. Traditional – this is probably the that most of us grew up with. You have separate textbooks and workbooks for each subject and usually the workbooks contain multiple choice answers and fill-in-the blanks. 
  2. Classical – this style of education teaches children according to the Trivium (3 stages): the Grammar Stage, the Dialectic stage, and the Rhetoric Stage. 
  3. Unschooling  – also called “Child-Led Learning” this follows the interest and pace of the child and has no set curriculum. 
  4. Unit Studies – Unit studies take a theme or topic and incorporate all the school subjects (language arts, history, science, music, art, etc.) into that topic.
  5. Charlotte Mason – this style of education uses rich literature, also called “living books”, rather than textbooks. This approach uses a generous curriculum, rich in nature, art, music, and narration, that “spreads the feasts” throughout the week, leaving lots of room to digest what the child is learning. 

Want to find out which type of homeschooler you are? TAKE THIS QUIZ! It’s fun and you might want to see what fits your family’s personality before you go spending money on an expensive curriculum. 

Our family is Charlotte Mason through-and-through! We have a deep love and appreciation for good books, art, and leaving lots of room for thought and processing. We don’t like to rush ideas, thoughts, or check things off the list. We appreciate good books, known as living books. These are books that come alive! I’m sure you all can think of a childhood book you love. Most likely it is a “living book”! Oh and, we really do not like textbooks. We would rather learn from nature, or from stories, than a textbook. So, this philosophy fits us perfectly! 

Our Curriculum & Routine: 

We have a first grader and a 4 year old who participates in our school day. Our 4 year old takes part in the morning basket (I’ll explain later) and the literature reading we do. Other than that, he mostly plays outdoors or does artwork during our formal hour of school. 

It’s important to remember that we believe that learning takes place all throughout the day, not just during “formal school hours”. With our first grader, it takes us about an hour in the morning to finish the daily studies, and the rest is done throughout the day whenever learning opportunities spring up. 

A few things today that prompted learning:

  • Retrieving the hen’s eggs and counting them
  • Learning from a local farm about proper horsemanship and respect of animals
  • We watched a documentary on the most dangerous animals and an Australian crocodile was one of them. We got out the air-dry clay (best stuff in the world!) and made alligators.
  • We spelled out new words from our reading on our refrigerator during dinner prep. 
  • We put up a new vinyl wall decal with 73 different stickers. Little farm girl did it all herself, counting and making sure she staying in order.
  • We listened to Bach in the car and talked about how he used to teach piano

We use some of the Simply Charlotte Mason materials, along with using a lot of the recommendations on Ambleside Online. So make sure you check out those two amazing websites! Ambleside Online links to MANY online books, so you could homeschool for pretty much free! I prefer books I can hold in my hand, and find lots of the recommended reading books at thrift stores and used on Amazon for a good price. 

Our Morning Basket:

This is a basket of books I keep on the dining room table and do with the kids during breakfast or “morning tea” (morning snack). It includes our poem book, our Bible, a stack of famous art from an artist (we are doing Constable right now), and a few CD’s. We read a poem everyday, talk about our Bible lesson for the week (this week it’s the ladder that reached heaven), play a folksong or hymn, and just take advantage of the early morning opportunity to learn (while the kids are sitting still eating!). 

If you want to see exactly what is in our morning basket, feel free to take a peak at my weekly schedule HERE. This is where I keep track of what we are doing and making sure we are getting through our materials. 

We don’t do all of these every, single day. We kind of rotate through different books, finding our own pace, and making sure the kids are understanding what we are reading. I go at their pace.

What exactly is in our morning basket? 

  • A Child’s Book of Verses
  • The Child’s Story Bible 
  • Bach Music Study
  • Shakespeare for Young Readers
  • Jeremy: The Honest Bunny (our current literature book) 

Everyday Work: 

After we finish breakfast we head to our homeschooling room and do the “formal” stuff. These are the materials that I make sure we do everyday. And just a note, we don’t spend more than 10-15 minutes on each of these subjects. Less is more!  The everyday subjects include reading/phonics, copywork (handwriting practice), math and history. I’ve pieced together materials that work for us and these include: 

Math Curriculum: Math-U-See – we LOVE this math curriculum and the simplicity of it. We have tried 2 other curriculums that didn’t work for us and fell in love with Math-U-See. 

Copywork: this is handwriting activity is essential to the early years. We use various poems or folksongs that we are learning and write a few lines from them. We do this everyday. I believe that less is more in this and I make sure that my first grader is taking her time and writing neat. Right now we are writing the lines from a folksong we are loving called, “The Bold Grenadier“. Here’s a short part of it: 

“As I was a-walking one morning in May 
I spied a young couple a-making of hay. 
Oh, one was a fair maid, and her beauty shone clear, 
And the other was a soldier, a bold grenadier.”
 
Phonics: We love the phonics curriculum from Easy Peasy. Easy Peasy is a free, online curriculum and uses much of the Charlotte Mason method. We have almost completed the phonic lessons from “Getting Ready 2“, which will complete our phonics. 
 
Reading: My first grader is reading through the Pathway Readers. I HIGHLY recommend this series, but make sure you start at the first book. These readers are so delightful and help so much with sight words…plus they are the cutest stories ever! When we come upon a new word, we talk about it, build it with her letters, and move on. 

History: You can take a peak at our schedule HERE and see all the great books we are reading for history. Paddle to the Sea is the main one we are reading; making sure to track Paddle’s journey on our map as he journeys from the Great Lakes to the St. Lawrence River, and finally the Atlantic Ocean. It’s full of geography, nature, drama, and adventure that all children (even us adults) love reading! 

Literature: We make sure to read various fairy tales and great literature books everyday. We don’t read all these every, single day. We pick one book a day for mandatory reading and then the kids usually beg for more. Our 4 year old enjoys sitting in and listening to most of these. Right now we are reading a wide variety, including Aesop’s Fables for Children (the kids ADORE these) , Jeremy, The Honest Bunny, Blue Fairies, and a few others. You can see them all HERE on our schedule. We follow the reading lists on Ambleside Online for most of these. 

Weekly Work: 

This is the part I love about the Charlotte Mason approach. You spread out a lot of the work throughout the week, making sure that the child is retaining it all. We do most of this stuff once a week. We do art everyday, but I’m putting it in this section because it’s encouraged to do at least once a week. 

Picture Study: Each term (3 terms in a year) we focus on a new artist. Right now we are studying the masterpieces of Constable. I use a picture-study portfolio from HERE and we pick a new picture to study each week. WE talk about it and then hang it up on our classroom wall. 

11144944_10153303083257013_5670139855513589938_o

Nature Study: Though encouraged to do at least once a week, this is a daily thing we do. We live on a farm and the kids enjoy so much time outdoors. We use the Handbook of Nature Study and try to study things in season. We will rotate the various animals and things of nature in this book for the next five years! This book is a beautiful investment! 

Geography: We usually cover geography in our history reading of Paddle to the Sea, however, our first grader LOVES maps and learning about location. We are taking “Visits to Africa” using THIS BOOK and diving into the culture of Africa. We are enjoying reading about what they eat in Africa and the various countries using this Hungry Plant book. 

Some days are better than others when you are homeschooling, but overall, we are so in love with being able to share our day with our children. I, personally, am enjoying the fact that I am going through school again! I love all the books my children are reading, and I love the special moments and conversations that develop because of our time together! 

Our Homeschool Routine and Curriculum

Filed Under: family, Homeschooling, Natural Living

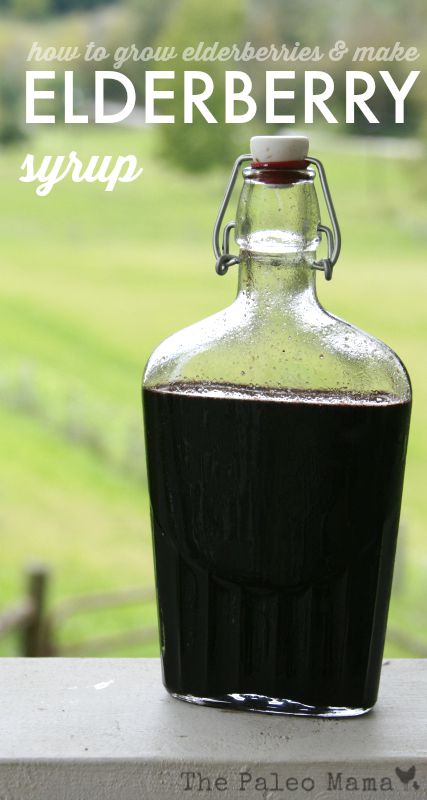
How to Grow Elderberries and make Elderberry Syrup

September 28, 2015 by Jackie Ritz 5 Comments

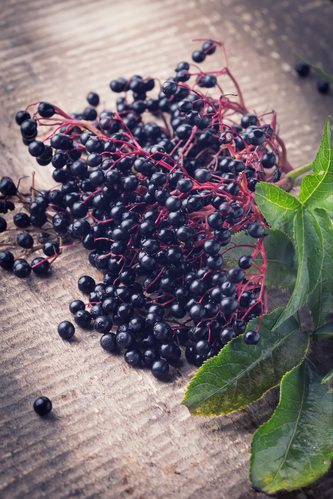
Elderberries are one of the most sustainable crops, and is being farmed by many farmers who are interested in nutritious, home-grown and organic farming. It is packed with Vitamins A, B, and C, iron, potassium, and powerful antioxidants. The plants are a hardy perennial, and are naturally disease resistant. Surprisingly, only 10 percent of the elderberries consumed in the United States are actually grown here. Making a elderberry syrup recipe is a great way to get all the nutrition from these delicious bushes into our body! 

Our farm wants to be a part of the group that wants to change that statistic. We are so happy to have some elderberry bushes on our farm already, and we plan to add more. I’ve already made my own homemade Elderberry Syrup and hope to have many more elderberries to harvest next Fall.

In this blog post I want to cover some of the basics in elderberry growing and harvesting and then using the berries to make an elderberry syrup. We will take a look at:

  1. Elderberry varieties to consider growing
  2. Planting new elderberry bushes
  3. Taking care of your elderberry bushes
  4. Harvesting your elderberries
  5. Nutritious, healthy ways to use your elderberry harvest
  6. Elderberry Syrup Recipe

1. Elderberry varieties to consider growing

There are several varieties of the American elderberry that are especially good fruit producers. Here are some of the best selections to try in your yard or farmland.

  • Adams—This American variety grows 8 to 10 feet tall. The large, juicy, dark purple fruits ripen in August and are great for making pies. The strong branches hold the berries upright. Plant a pollinator variety such as ‘Johns’ for maximum fruiting. This variety is often sold as “Adams No. 1” or “Adams No. 2.” There is little difference between these two selections.
  • Black Beauty—This striking European variety features purple foliage and lemon-scented pink flowers. It grows 6 to 8 feet tall and wide and can be grown in perennial borders or as a foundation plant.
  • Black Lace—This eye-catching European selection looks like a Japanese maple with its dark purple, deeply cut foliage. Like “Black Beauty,” this variety also grows 6 to 8 feet tall and wide, producing pink flowers and dark purple fruits.
  • Johns’—This early-producing American variety produces an abundance of berries that are especially good for making jelly. Growing 12 feet tall and wide, this variety is a good pollinator for “Adams.”
  • Nova—This American variety can be self-fruitful, but does best with another American elderberry growing nearby. Large, sweet fruit are produced on compact, 6-foot shrubs.
  • Variegated—This European variety has attractive green and white leaves and grows 6 to 8 feet tall and wide. The plant is less vigorous and productive than other elderberry varieties, but the foliage is attractive all season long.
  • York—This American variety produces the largest berries of all the elderberry selections. It matures in late August and only grows 6 feet tall and wide. It pollinates “Nova” well.­1

2. Planting new elderberry bushes

While your elderberry berries will grow on your bush the first year they are planted, you will want to be aware that the berries will do better the second year and each year after. The bushes will grow best in well-drained loamy soil. If your soil is sandy, you will need to add organic matter to prepare your soil. Before you plant, be sure to check your soil pH. Your local County Extension Office can supply you with the information you need for doing this.

All elderberries require cross-pollination with other varieties. Either plant two different varieties in their own spots close to each other in your garden, or plant two varieties in one hold. Since Nova and York are the two cultivars that grow the biggest crops, you may want to begin with these two, cross-pollinating them as you plant.

Here are some excellent planting tips:

  • Pick a location with full sun
  • Add manure or compost to your soil before planting
  • Plant your elderberry bushes 6-8 feet apart in rows 10 feet apart.
  • Water the plants thoroughly
  • Don’t apply any fertilizer during the first year.
  • Elderberries are shallow rooted: Keep them well watered the first season.

3. Taking care of your elderberry bushes

After the first year, your elderberry bushes will grow best if you fertilize annually using compost. Because they have shallow roots, mulch around the plants to control weeds that compete for water and nutrients.

Your bushes will grow suckers freely, sending up new branches each season. In the second and third years, these new branches will produce side branches that fruit heavily. In late winter, prune out branches that are more than 3 years old, leaving equal numbers of one- two- and three-year-old branches. Prune out dead or diseases branches as well.

There aren’t many significant pests or diseases affecting elderberries. However you will want to watch for cane borers and Japanese beetles. Be aware that birds love elderberries, and will compete with you to eat them before you can harvest the berries. To avoid the birds getting your harvest, cover the shrubs with netting once they begin to berry. If you are also raising chickens, your chickens can be one of your best defenses against both weeds and insects. You can also handpick the beetles, or use a natural, organic control such as AzaMax. (Here) 

4. Harvesting your elderberries

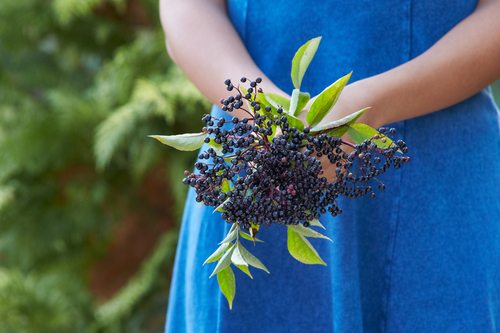
In most climates, there will be a 5-15 day period in mid-August through mid-September when the berries are ripening. Be sure to pick them before the birds do! Let them ripen on the shrub to a dark purple color. Prune off the entire cluster when ripe, and strip the berries into a bowl. You will need to keep the harvest refrigerated and process the berries as soon as possible. You can get 12-15 pounds of berries from one mature 3-4 year old shrub.

5. Nutritious, healthy ways to use your elderberry harvest

As I mentioned at the start of this post, elderberries are packed with vitamins, minerals, and antioxidants. One of the best-known benefits of the black elderberries is its power to boost the immune system, because of it strong, antiviral properties. The medicinal parts of the elderberry bush include the roots, bark, young shoots, leaves, flowers, and berries. Yup—the entire plant! 

The flowers are effective at reducing phlegm and encouraging sweating. They are also good for strengthening the upper respiratory track. The flowers help to soften the skin and are often added to lotions and creams. You can also make a flower poultice with them too! (Here) 

Elderberries can also be used in cooking, and there are many good, nutritious elderberry food recipes that you can research for yourself.

Elderberry Syrup Recipe

If you cannot grow your own elderberry bushes, then you can still reap the benefits of this plant by purchasing dried elderberries from HERE.

I want to really encourage you to find a local honey farmer and get the MOST local raw honey you can find. It’s not necessary to have local honey, but it is essential to have RAW honey that has not been pasteurized (to destroy it’s many health benefits). I am lucky enough to have our own honeybees, so we used the honey that we harvested in July from our backyard! 

INGREDIENTS:

  • 2 cups of filtered water 
  • 2/3 cup of dried elderberries or 1.5 cup of fresh
  • 1 cup of your most local raw honey you can find
  • 1 teaspoon of whole clove 
  • 1 stick of cinnamon
  • 1 knob of fresh ginger, peeled 

DIRECTIONS: 

  1. Bring the water, elderberries, and spices to a boil. Reduce to simmer on low for 30-45 minutes with a lid on. 
  2. During the simmering, use a potato masher and frequently mash the elderberries while simmering.
  3. Remove the saucepan from the heat.
  4. Pour the honey in a separate glass jar.
  5. Filter the hot syrup through a sieve or cheesecloth into the honey. You might need to grab a funnel. You will want to make sure you squeeze all the liquid out from the elderberries. This is why I like using a cheesecloth and twisting to make sure it’s completely drained out . 
  6. Stir the honey until it is dissolved. Make sure you use the hot syrup to dissolve the honey. 
  7. Date and label the bottle and then place in the refrigerator. The honey acts as a natural preservative so you syrup should be good for several months in the fridge. 

NOTES: 

  • Adults can take 1 tablespoon daily and children (over 1 years old) can take 1/2ts-1 ts daily. 
  • If feeling under the weather, adults can take 1 teaspoon every 2-4 hours and children can take 1/2 teaspoon, every 2-4 hours. 
  • Remember honey can cause botulism in infants! 
  • Cost/Savings: It cost me $2.17 if purchasing dried elderberries to make this recipe and only $$0.97 if using your own homegrown elderberries!
  • This recipe makes over 3 cups of elderberry syrup! You won’t beat that price anywhere! 

You will never regret your decision to try raising and harvesting elderberries. Elderberries are even better nutritionally than blueberries. They are wonderful for pies, jams, jellies, and homemade medicinal remedies. The flowers are delightful breaded and made into fritters. Join us at bringing these wonderfully versatile berries back as homegrown American treasures and enjoy the delicious and nourishing Elderberry Syrup Recipe! 

Elderberry Syrup Recipe

Sources

  1. https://www.garden.org/ediblelandscaping/?page=july_elderberry
  2. https://normsfarms.com/aboutus/our-story/
  3. https://www.gardeningknowhow.com/edible/fruits/elderberry/planting-elderberry.htm
  4. https://www.starkbros.com/growing-guide/how-to-grow/berry-plants/elderberry-plants/planting
  5. https://www.healing-from-home-remedies.com/elderberry-benefits.html

Filed Under: beekeeping, DIY Home Recipes, Homesteading, Living Sustainably, Natural Living

20 Fall Diffuser Blends

September 21, 2015 by Jackie Ritz 1 Comment

Fall Diffuser Blends

Summer is screeching to a stop here in the mountains of Western North Carolina. The leaves are beginning to evolve into the the most beautiful colors and I find myself reaching for my sweater each morning as I head outside to do the farm chores. 

For a homesteader, Fall brings a period of urgency to prepare for the winter ahead. It, also, brings a relief that most the garden work is done and the period of harvest is nearly over. 

I love the smell of autumn and pumpkin pie and the sweet smell of homemade applesauce. It’s deeply nourishing to me and warms my soul. 

It, also, reminds me of my childhood and oatmeal spice cookies and gingerbread men who get their head bitten off. 

As, Autumn sweeps into our lives, I want to share with you all a few blends I love making with essential oils to diffuse around the house. 

Diffusing essential oils is a safe, non-toxic and therapeutic way to:

1) make your house smell good, and

2) boost your immune system during the months our bodies need it.  

I wish you the best autumn season, filled with lots of joy and memories spent with those you love! And I want to thank my amazing essential oil team who helped me put this round-up post together! 

Fall Diffuser Blends

You can purchase all your essential oils that you need and diffuser here.

Cozy Home Blend

  • 3 drops of Wild Orange
  • 2 drops of Cassia
  • 2 drops of Cedarwood 

Pumpkin Pie Diffuser Blend

Pumpkin Pie diffuser blend

  • 3 drops of Cardamon 
  • 2 drops of Cinnamon Bark or Cassia
  • 1 drop of Wild Orange 
  • 1 drop of Clove 

Trick or Treat Blend 

  • 2 drops of Wild Orange 
  • 2 drops of Frankincense
  • 2 drops of Cassia 

Crispy Autumn Blend 

  • 3 drops of Wild Orange 
  • 3 drops of Patchouli 
  • 1 drop of Clove 

Spiced Apple Cider Blend 

Spiced Apple Cider diffuser blend

  • 3 drops of Wild Orange 
  • 2 drops of Cinnamon or Cassia
  • 2 drops of Ginger 

Cozy Holiday Blend 

  • 2 drops of Wild Orange 
  • 2 drops of Cassia 
  • 2 drops of White Fir 

Thanksgiving Joy Blend 

Thanksgiving Joy Diffuser blend

  • 3 drops of Cypress
  • 2 drops of Sandalwood 
  • 2 drops of White Fir

Cool Nights Blend

  • 3 drops of Cedarwood 
  • 2 drops of Bergamot 
  • 2 drops of Wild Orange 

You can purchase all your essential oils that you need and diffuser here.

Warm Spice Blend 

  • 2 drops of Cardamon 
  • 2 drops of Cinnamon or Cassia 
  • 2 drops of Clove 

Spiced Chai Blend

  • 3 drops of Cardamon 
  • 2 drops of Cassia
  • 2 drops of Clove 
  • 1 drop of Ginger

A Walk Through the Forest Blend 

  • 2 drops of Lime
  • 2 drops of Lemon
  • 1 drop of Wild Orange 
  • 1 drop of Bergamot 
  • 1 drop of White Fir

Oatmeal Cookie Blend 

  • 2 drops of Cedarwood 
  • 2 drops of Cassia 
  • 2 drops of Wild Orange 

Apple Pie Blend 

  • 2 drops of Clove 
  • 2 drops of Cinnamon 
  • 2 drops of Ginger 

Give Thanks Blend 

  • 2 drops of Ginger 
  • 2 drops of Coriander 
  • 2 drops of Cinnamon 
  • 1 drop of Clove 

Cuddle by the Fire Blend 

  • 3 drops of Cinnamon 
  • 2 drops of Clove 
  • 2 drops of White Fir 

You can purchase all your essential oils that you need and diffuser here.

Orange Pomander Blend

  • 3 drops of Wild Orange 
  • 2 drops of Clove 
  • 2 drops of Rosemary 

Fall Leaves Blend 

  • 5 drops of Wild Orange 
  • 1 drop of Patchouli 
  • 1 drop of Ginger 

Log Cabin Blend 

  • 2 drops of Cassia 
  • 2 drops of Cedarwood 
  • 2 drops of Wild Orange 

Fall Romance Blend 

  • 3 drops of Sandalwood 
  • 2 drops of Patchouli 
  • 2 drops of Rose (or Geranium) 

Holiday Joy Diffuser Blend 

  • 3 drops of Frankincense 
  • 2 drops of Wild Orange 
  • 2 drops of Peppermint 

Sweet Baby Jesus Blend 

  • 4 drops of Frankincense 
  • 4 drops of Myrrh 

You can purchase all your essential oils that you need and diffuser here.

Fall Diffuser Blends


Filed Under: DIY Home Recipes, essential oils, Homesteading, Living Sustainably, Natural Living

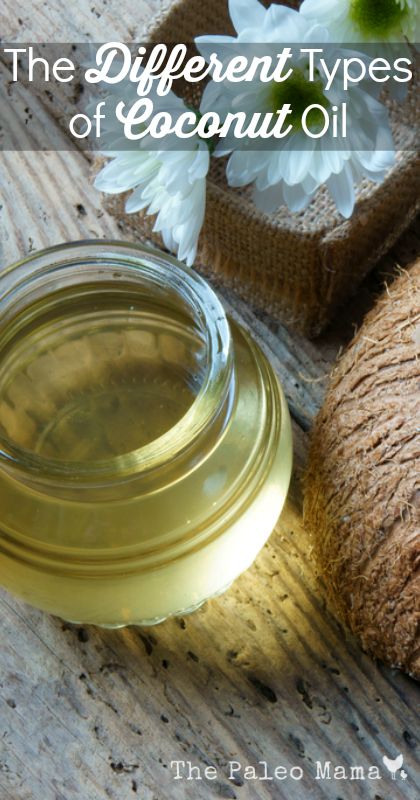
The Different Types of Coconut Oil

August 20, 2015 by Jackie Ritz 2 Comments


It’s no secret that coconut oil has been used for centuries in many different ways. There are so many different types of coconut oil, but most of them are 100 percent natural oil, and full of antioxidants and saturated fats—the good ones—that contain medium chain fatty acids (MDFAs) that provide so many good things:

  • MDFAs burn fast and are used as energy
  • MDFAs help to avoid weight gain
  • MDFAs will not raise cholesterol
  • MDFA have no risk of heart attack, strokes, or heart disease
  • MFDAs help to boost the metabolism

At one time it was very popular in the United States. But a strong propaganda campaign in the late 1970s promoted the use of corn oil and soy oil, and spread the message that because coconut oil was high in saturated fat it should be considered harmful for the human body. Fortunately today we understand the good benefits of the saturated fat content of coconut oil, and it is slowly being accepted as the powerfully healthy oil it is.

Coconut oil is used extensively in tropical countries like India, Sri Lanka, Thailand, Jamaica, New Guinea, Samoa, and the Philippines. These countries use it for:

  • Treatment for illnesses
  • Healing for injuries
  • Moisturizer for hair
  • Massage oil for babies
  • Even as a drink to boost the immune system

In this blog post I want to remind you of how healthy coconut oil is for you and your family. There are so many benefits to it, and so many ways to use it. We will take a closer look at some of these benefits and uses.

The Types of Coconut Oil

What kind of coconut oil is best to buy? How do I choose a coconut oil? These are the questions we all have when we begin to add this nutrient to our lives. Today there are many choices when it come to buying coconut oil. Let’s briefly review some of these choices.

There are two basic categories of coconut oil: those that are mass produced and need to be refined, and those that start with fresh coconut and are much less refined. All coconut oil is refined because oil doesn’t grow on a tree…coconuts do.

Virgin Coconut Oil

This is the least refined oil. It is coconut oil produced without starting with dried coconut (called “copra”) that has been removed from the shell and is inedible and needs more refining to produce coconut oil. The types of Virgin Coconut Oils include:

  • Extra-virgin coconut oil—There are no commonly understood or accepted definitions for “extra” virgin coconut oil, as there are in the olive oil industry. It is simply a marketing term and nothing else. 
  • Virgin coconut oil produced using a “wet-milling” process whereby the oil is extracted from fresh coconut meat without drying the meat first. This is the best kind of coconut oil for you!
  • Virgin coconut oil produced by pressing the oil out of dried coconut. This is the most common type of coconut oil found online and in stores today.

Refined Coconut Oil

Copra-based refined coconut oils are called “RBD coconut oils” (refined, bleached, deodorized). The RBD refining process does nothing to alter the fatty acid profile of coconut oil, so all the medium chain fatty acids are kept intact. There are several types of refined coconut oils available:

  • Expeller-pressed coconut oils
  • Hydrogenated coconut oil
  • Liquid coconut oil

As you examine your choices for coconut oil in the market today, your choice will largely be determined by how you intend to use the oil, and your budget. If you want the highest quality virgin coconut oil possible, this chart summarizes what is currently available in the market and rated on a scale of 1 to 10.

types-coconut-oil-rating

The Benefits of Coconut Oil

There really are so many healthful benefits to coconut oil. Because most of us very interested in filling our menus with as much real food and natural and organic products as possible, we have probably begun using coconut oil in our daily menus. It is solid like butter at room temperature, and it doesn’t break down or become rancid like many other oils. It even smells good to most people. 

But there are many other uses as well. Let’s look closer at some of them.

  1. As a cooking oil—It can be used for nearly any cooking use, including stove-top cooking and sauteéing, for stir frying, baking grain-free cookies, muffins, cakes, etc., and even for adding to your smoothies or using it to make home-made, sauces, and desserts.
  2. In coffee or tea—I’d been hearing rumors about people putting butter in their coffee. Supposedly, this is called a Bulletproof Coffee. Why on earth would someone want to put butter in their coffee??? I took the plunge! And I must say, IT IS UN-friggin-BELIEVABLE! It came out frothy, smooth, and filling! I love my coffee in the morning, in fact, it’s one thing I have always said I will never give up. I’ve given up enough in my life…my coffee is staying! 
  3. As part of a daily cleansing and beauty regimen—It can be used making toothpaste or used in oil pulling. It’s a wonderful foundation for my all-purpose healing salve, I add it to the nightly detox bath my kids take, it is great to use in your shampoo or as shave lotion, and it can be used in home-made deodorant.
  4. As nature’s perfect massage oil for babies and infants—Mothers around the world have been using coconut oil to massage their babies for centuries. It prevents so many irritating skin problems in babies, and keeps them soft and smooth as butter. 
  5. To help in weight loss—The medium-chain fatty acids in coconut oil help to get rid of excessive weight. It is easy to digest, and it help your thyroid and endocrine systems operate in good health. It increases the metabolic rate by removing stress on the pancreas, and lets you burn more energy and lose the weight. Many people trying to lose weight made and drink a “weight loss supplement” daily containing coconut oil, raw apple cider vinegar, and honey.

 There are so many additional benefits to coconut oil that I highly recommend you doing your own additional research to discover ways you can incorporate it into your family’s lifestyle. You won’t regret it!

Where to buy coconut oil?

I purchase all my coconut oil through Tropical Traditions. For cooking, I prefer the Gold Label coconut oil, however if you do not like the taste of coconut, then I recommend you get the expeller pressed. For making soap and salves, I like to get the 100% pure coconut oil. 

Different Types of Coconut Oil

Resources

1. https://wellnessmama.com/2072/benefits-of-coconut-oil/

2. https://www.organicfacts.net/health-benefits/oils/health-benefits-of-coconut-oil.html

3. https://coconutoil.com/what-type-of-coconut-oil-is-best-how-to-choose-a-coconut-oil/

Filed Under: DIY, DIY Beauty Recipes, DIY Home Recipes, essential oils, Natural Living, Starting Paleo

Household Chores for Kids Under Seven

July 20, 2015 by Jackie Ritz Leave a Comment

Household Chores

No parent chooses to raise a kid to be a TV-and-video-game-addicted-couch-potato, but unfortunately that’s exactly what can happen unless we learn how to motivate our kids to better pursuits. And one of the best ways to begin to inspire kids to do more than sit in front of the tube is to teach them how to work with their natural, intrinsic drive to be productive, creative contributors to the household. Kids want to feel like they are part of something bigger than themselves, so don’t let them drag their feet about doing household chores. Dan Pink, author of Drive: What Motivates Us tells us why household chores are good for kids: “Chores show kids that families are built on mutual obligations and that family members need to help each other.”

Kids are not born with the work ethic. Character traits of tolerance, perseverance and self-discipline are learned—and must be taught by us parents. It’s up to us to teach our kids the difference between wanting and getting, and how to postpone gratification in order to accomplish and succeed later as an adult.

I have found that both my six-and-a-half year old and my four year old love to help me with chores when I can help them see that they are enjoyable and entertaining. My six year old has been helping me with my essential oil tasks since I began. She also has already become Little Miss Farmer, and gathers eggs, picks flowers, finds new vegetables growing on our new farm, takes care of the chickens, gets Sunflower seeds ready for roasting, and helps me cook and bake. Barefoot Boy loves to search for our free range chicken eggs, help pick berries (yes, he eats most of them!), and take care of the goats.

None of those things are consistent, everyday chores for them yet, but they have already learned to be productive family members. In this blog I want to help us all take these sometimes chores a step further, and give you some ideas for household chores for kids under seven, that my kids, and yours, can do every day.

I want to look at four important considerations when planning and assigning chores to our kids.

  1. Tips and Pitfalls to keep in mind about kids and chores.
  2. Age-appropriate chores for children birth through age seven or so.
  3. Ways to consistently check up on your children’s faithfulness to their chores.
  4. How to appropriately reward your children for their help with the family chores.

1. Tips and Pitfalls to keep in mind about kids and chores.

Sometimes there is a fine line between motivating our children to do their chores and overwhelming them with demands and responsibilities that de-motivate them. Here are a few pitfalls to avoid.

  • Don’t insist on perfection—No one is perfect. It’s better to have a relaxed approach to how well our kids do their chores.
  • Don’t delay—Your kids are probably more capable than you think. Kids can do a lot of chores at an early stage. Remember that they learn best by doing.
  • Don’t be stingy with praise—Get that praise going right away! Don’t wait until the chores is done. Praise and encourage your children as they do their chores.
  • Don’t be inconsistent—If your children aren’t expected to regularly follow through with their chores, they may start putting them off in the hopes someone else will do them for them.

And here are a few tips that will make it easier to get started.

  • Be specific with instructions—Be explicit. If you want your son to clean his room, tell him exactly what to do: “Put your clothes in the closet, your books on the shelf, dishes in the kitchen, and toys in the toy box.”
  • Ease into chores for children—First show them how to do the chore step by step. Next, let your child help you do it. Then have your child do the chore as you supervise. Once she’s mastered it, let her do it alone.
  • Go easy with reminders and deadlines—Don’t micromanage your kids. Use the when/then technique. For example, say: “When the pets are fed, then you can have your dinner.”
  • Kids want to help—Take advantage of their natural desire and encourage their excitement about doing chores.
  • Kids have a short attention span—If your child seems to be struggling consistently with doing a certain chore, it may be too involved for him, or he may not be able to do it as well as he wants to.

2. Age-appropriate chores for children birth through age seven or so.

Our children are capable of doing so many more things than we even realize at times that it would be hard to give you an exhaustive list of everything your children can do at a specific age. You can do your own research to find many kinds of chores that might be appropriate for your children. But I would like to suggest several chores for each of three age groupings.

Chores for children ages 2 to 3

  • Put toys away
  • Fill pet’s food dish
  • Put clothes in hamper
  • Wipe up spills
  • Pile books and magazines

Chores for children 4 to 5

  • Brush hair and teeth
  • Make their own beds
  • Empty wastebaskets
  • Pull weeds, if you have a garden
  • Clear table
  • Water flowers
  • Set the table
  • Take out the garbage

Chores for children 6 to 7

  • Sort laundry
  • Sweep floors
  • Weed and rake eaves
  • Help make and pack lunch
  • Keep bedroom tidy
  • Care for pets
  • Help put away groceries

3. Ways to consistently check up on your children’s faithfulness to their chores.

Teaching kids about chores, money, and work is definitely a lifelong process. One of the most successful ways to inspire your children’s faithfulness to their chores may be through the use of a chore chart. This can be used not only to provide motivation, but also to help teach your children financial responsibility.

Since children are much more excited about cute pictures than simple words, use a chore chart that is visually stimulating to your children. You can do your own research and find many, many ideas for chore charts online. (You can find several different printable charts here.) 

A few that we have used and love are: 

  • Melissa & Doug Magnetic Chart – great for kids under 4
  • Accountable Kids System – we adore this system for our nearly 4 year old and 6 year old. 

You will want to place your chore chart in a visible location, and make sure to review your children’s accomplishments every day. Love, praise, and acknowledgment are your secret weapons to keep them diligent to their chores.

4. How to appropriately reward your children for their help with the family chores.

When you begin assigning chores to your children be sure that you and your spouse have discussed what kinds of rewards or incentives you will be using with them. Maybe you think chores are just part of belonging to the family. As part of the family you expect them to chip in, help out, and do things around the house

You may want to set up some kind of a reward system. It can be a powerful tool to motivate them. The rewards can be earned privileges, playdates, maybe a movie with a friend, or whatever else you choose to be appropriate. Some parents will choose to reward their kids for their chores with money, thereby teaching important lessons about earning.

Our family was able to pay off our debts and become financially stable through the help of Dave Ramsey’s Financial Peace University. You can read our story here.  I would highly recommend his Financial Peace Junior materials, which are designed to help you teach your children about money. It doesn’t just give you the tools to teach your kids to win with money—it shows you how. You can find it here. 

Since our children learn the most by watching us, be sure that you are modeling a positive work attitude yourself. Show pride in your accomplishments and share your insights with your kids. Let them see that your career is not just work, it’s an opportunity to grow and to achieve financial stability. Teaching your children to be independent and to have life skills will allow them to feel empowered, and helps to develop healthy self-esteem. Give your children every opportunity to become ready for whatever life brings to them. It starts with simple household chores.

Household Chores for Kids Under Seven

Source

  1. https://www.parents.com/kids/development/social/motivate-kids-to-do-chores/
  2. https://www.today.com/parents/what-chores-what-age-guide-parents-2D80555366
  3. https://www.webmd.com/parenting/features/chores-for-children
  4. https://childparenting.about.com/od/familyhome/a/choreschild.htm
  5. https://www.freeprintablebehaviorcharts.com/chore_list.htm
  6. https://www.parents.com/kids/development/social/motivate-kids-to-do-chores/
  7. https://www.livingwellspendingless.com/2014/09/19/great-chores-kids/


Filed Under: family, Homeschooling, Natural Living

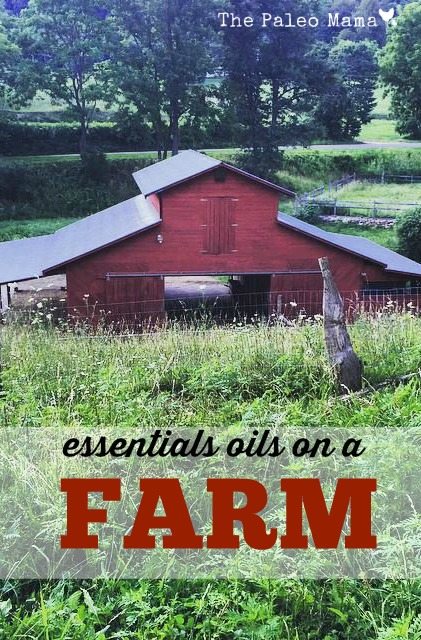
Essential Oils On a Farm

July 11, 2015 by Jackie Ritz 5 Comments

One of the statements I can remember my mother saying whenever she counseled with someone about a problem in a marriage relationship was: “You have to always remember that you bought the farm!” So what does that mean? It means that in relationships, just as in farming there are cute, cuddly animals and bountiful harvests; there are also weeds, predators after your chickens, fleas and ticks on your barnyard animals (and sometimes your kids), and lots of manure to deal with. However, I’m coming to realize that essential oils can be used for so many things and so in this post I’m going to share with you how to use essential oils on a farm. 

I know that truth a lot better today after just a few short years of homesteading, than I knew it in my head before I experienced it…homesteading is NOT easy, nor is it glorious. I want this post to help us find ways that we can deal with some of the more negative factors in homesteading through the use of essential oils.

Yes, that’s right, you can use essential oils on your livestock and in the care and management of your farm. But you don’t just start using essential oils indiscriminately wherever and however you choose. Just as you want only to better the health of your family members with your essential oils, so too that’s your goal with your animal family, and it takes a bit of forethought and knowledge to get it right.

If you are interested in my trusted brand and how to get started using essential oils, then CLICK HERE! 

I want to concentrate in this post on using essential oils on animals. There are many other uses for essential oils in farming, but we’ll start with our animal family in this blog. Let’s consider briefly the use of oils with:

  • Flies, Fleas and Ticks
  • Cats and Dogs
  • Chickens
  • Goats
  • Dairy cattle
  • Pigs

Flies, fleas and Ticks

OK, I know we are not choosing to raise flies, fleas and ticks, but every barnyard animal will have to do battle with these pests. Flies are a major health concern all across the globe. The common housefly is a serious threat to people and animals alike because of the many infectious diseases they carry. Fleas and ticks like blood of any flavor—human, animal, or poultry.

Researchers in India did studies testing essential oil usage for dealing with flies. They discovered that peppermint oil successfully repelled larvae and egg laying, with ginger oil, cinnamon oil, and gooseberry oil also giving respectable assistance. (Source) You can find a Homemade Fly Spray Recipe using essential oils here. 

Finding a nontoxic insect repellent to use on your barnyard animals is not easy. Chemicals like prallethrin and piperonyl butoxide are often used in livestock sprays, as well as the proven toxic chemical, deet. These chemicals accumulate in the liver and put our animals at risk. However, researchers seeking organic and naturally healthier ways to get rid of insects and have developed nontoxic sprays using essential oils. You can find four of these natural livestock spray recipes here. 

Cats and Dogs

cats

There is a wealth of helpful research available online to help you find nontoxic, natural solutions for the health problems experienced by your household pets. It is important to remember that the essential oils blends and aromatherapy that humans can enjoy and handle might not produce the same reaction in our pets. Some oils can be quite dangerous. If used correctly, however, essential oils contain a host of biologically active and powerful compounds and are an indispensable part of integrative medical care. (Source)  You will need to research carefully to learn how to successfully use essential oils on your pets. 

There are cautions and principles for safe use you will need to be aware of. Do your research before trying anything. One veterinary who uses aromatherapy in the treatment of his animal patients has recommended the following essential oils that are safe for use. You need to see his recommendations for use and to know what they are used for here.  The oils he considers safe for use are:

  • Lavender
  • Cardamom
  • Fennel
  • Helichrysum
  • Frankincense
  • Spearmint

Once you are familiar with the essential oils safe for your pets, you can begin to develop essential oil remedies. You can find several suggestions for sprays, shampoo, flea collars, ear problems, paw pad care, skin irritations, doggie smell deodorizer, and calming mists here.  

Chickens

chic

To be successful using essential oils on chickens you must first understand that chickens breathe differently than mammals. They do not have a diaphragm, and use the rib cage and breast bone to move the air in and out of the body. Their lung rely on air sacs to distributed oxygen to their bodies. As a result, chickens breathe in higher concentrations of oxygen and whatever else in is the air. (Source) 

A buildup of fumes from chicken droppings, spilled water and cleaning products irritates their breathing system and leads to illness. So using a coop cleaner made with natural products will clean the coop without irritating the chicken’s respiratory system.

Lemon essential oil and other citrus fruits have natural cleaning and disinfecting capabilities. You can easily make a homemade coop cleaner that is easy on your nose and easy on the chicken’s respiratory tract. Use the recipe you will here for cleaning out the old shavings and coop bedding, and to spray down the coop. 

You can also make a salve ointment with essential oils for chicken care. You will find one recipe using lavender and frankincense essential oils here.  Coconut oil is also a great carrier oil to use for homemade chicken ointment.

Heavily diluted oregano essential oil is used by many chicken owners for many uses. Using essential oils for chicken care is a wonderful natural approach. Just make sure you do your own research so you are comfortable with the choice that is right for you to use.

You can also find a recipe for Natural Garlic Juice Spray  here. 

We like to add a few cloves of garlic to our chickens waterer. The garlic infuses the water and provides a good immune support every time they take a drink of water. 

Goats

One essential oil that has proven success in improving health issues in goats is lavender oil. It has traditionally been used for everything from respiratory problems, to skin health, and even as a natural aid during labor. Emotional issues in goats can also be alleviated with the help of lavender oil. (Source) 

j


If a goat is being kept in a stall due to illness, you can put drops of oil around the stall to help eliminate some of the animal’s stress. Some goat farmers will also add a few drops to a vaporizer or diffuser to alleviate respiratory issues. Lavender oil can be very hard on the liver and kidneys of animals, so avoid internal use. You can research all aspects of raising goats here. 

Dairy cattle

Essential oils with dairy cattle is now being considered as a way to improve or alter rumen fermentation (the cow’s first stomach) in order to reduce methane gas production. If you are interested in learning more about using essential oils with dairy cattle, one resource lists the essentials oil that may be helpful along with their properties, and possible uses. (Here)

Essential oils can benefit cattle during summer months with heat stress and pesky insects. Flies, fleas, and lice irritate cattle. Strongly scented essential oils like rosemary, cedar, lavender, and eucalyptus naturally repel pests and lessen the stress on the herd. Cinnamon oil, known as a “hot oil,” and along with garlic oil, clove oil, and oregano oil can help to reduce fermented protein in the rumen. Garlic oil can help to relieve digestive upset and the production of methane gases. You can find specific instructions for their use here. 

Pigs

One non-conventional use of essential oils with pigs is in animal feed. Some time ago Porcine Epidemic Diarrhea Virus (PEDv) was spreading rapidly throughout pig farms and causing a drastic impact on pork supply and prices at the meat counter. To combat this epidemic, many pig farmers began using a pig-feed ingredient that contained essential oils, oregano, and chili powder along with other all-natural organic ingredients. There has been a big boost in immunity to PEDv as a result. Essential oils are known for their aromatic effect, and the combination of essential oils, oregano, and chili powder have made pig barns at feeding time smell like and Italian pizzeria. (Source) 

It’s so encouraging to Frank and I as newbies in the business of raising farm animals to find that more and more farms are putting essential oils into practice. A number of companies are even selling plant extracts as feed additives, but very few big companies are willing to readily offer that information. Essential oils are truly a secret weapon, an unsung hero being used successfully, but not quite openly. Our farm plans to continue openly trying to find more and more uses for these powerhouse essential oils in our farmyard.

If you are interested in my trusted brand and how to get started using essential oils, then CLICK HERE! 

Essential Oils Around Your Farm

Sources

  1. https://www.theprairiehomestead.com/2014/07/essential-oils-livestock.html
  2. https://www.hobbyfarms.com/crafts-and-nature/4-diy-bug-repellents-for-you-and-your-animals.aspx
  3. https://www.optimumchoices.com/animals_essential_oils.htm


Filed Under: DIY Home Recipes, Dogs, essential oils, Homesteading, Living Sustainably, Natural Living

« Previous Page
Next Page »

Primary Sidebar

  • Facebook
  • Instagram
  • Pinterest
  • RSS
  • YouTube

Hi, I'm Jackie Ritz and welcome to The Paleo Mama! I'm a published author, certified herbalist, and voracious researcher of natural medicine and nutrition. I'm glad you're here and I hope you stick around for awhile!

Recent Posts

  • When God Says Pause: Why I Took a 5-Year Break from My Online Business
  • How to Quit Facebook but Keep Your Business Profile
  • Leaving the City for the Country
  • Natural Way to Heart Health

MEAL PLANS

Biblically clean meal plans that are for those love to cook real food

Read More

Footer

Our Blog

The Paleo Mama blog provides simple answers for healthier families through research, tutorials, recipes, and simple remedies for daily needs!

  • Health
  • Essential Oils
  • Recipes
  • Remedies
  • Natural Living
  • Meal Plans

Stick around!

You’ll get instant access to a library of natural remedies and real, paleo food, including our ebooks and free guides we send out.

  • Home
  • Disclosure/Disclaimer
  • Privacy Policy
  • Advertise
  • Contact Me

Copyright © 2025 · Wellness Pro on Genesis Framework · WordPress · Log in