• Skip to primary navigation
  • Skip to content
  • Skip to primary sidebar
  • Skip to footer

The Paleo Mama

Homegrown and Handmade

  • About
  • Blog
    • Podcast
  • Meal Plans
  • Essential Oils
  • Our Farm
    • Great Pyrenees Puppies
    • Goats
      • Goats for Sale
      • Goat Sales Policy
      • Nigerian Dwarf Bucks
        • Ranchocabra Lunar Eclipse

Natural Living

Jackie’s Money-saving Paleo tricks

June 21, 2012 by Jackie Ritz 6 Comments

I’ve been doing Paleo for awhile now. It’s become a part of us, who we are. We are also very frugal people. We like to save and hoard our money instead of shopping for things we really don’t need. In fact, I hate shopping. However, I love grocery shopping and planning our meals. I love making it strategic to see how I can save, but also to see how much I can woo my family with the taste of delicious Paleo food.

So many are people are hesitant to give Paleo a try because they think it’s going to cost a lot of money. Which, honestly, doesn’t make sense to me because, eating Paleo, you are eating REAL FOOD. You’re not buying the crap in between, in the aisles of the supermarket…you’re just buying food. So, once you take all that processed crap away, you are left with a lot of extra money. So, no more “meals in a bag”, no more blown up air…I mean bread, no more pasta, and no more gluten-laden snacks. Trust me, it looks like you are missing a lot, but you really aren’t.

Anyways, I’ve put together a little list of how I save money eating Paleo!

1) I buy the whole chickens. I cook it in my crockpot and then I use the bones to make stock. We usually just eat 1 whole chicken a week. This is for my family of 2 adults and 2 kids. Then I make stock. I either make a soup that week or I freeze it (flat in a gallon ziploc bag). Read my post, “Good Broth Resurrects the Dead”: https://thepaleomama.com/2012/02/18/good-broth-resurrects-the-dead/

Chicken stock simmering away in my crockpot!

2) I buy my beef in bulk. I buy 1/4th of a grassfed cow at a time. For 1/4th of a cow we get: 64lbs of ground meat, 8 rib eye, 9 TBone(some look like they may have NY strip attached), 3 Liver, 7 Sirloin, 4 roasts, and 7 cube steak. The cost was $4.50lb. This saves us a ton of money! https://thepaleomama.com/2012/02/15/my-first-cave-mama-kill/

Meat of a whole cow

3) I shop local and in season. I get lots of produce at the Farmer’s Market. I, also, keep the Publix and Kroger weekly ads and I plan my meals around what is on sale. I also use www.southernsavers.com to see what is on sale and if there are any online coupons I can print for things like coconut milk, cleaning supplies, toilet paper, paper towels, and some food items. I usually have 3-5 coupons for each weekly grocery trip. Nothing like I used to have when I was extreme couponing! However, we were eating crap food.

4) I pick my own produce. This is a great way to save money and also to spend some good time outdoors. A great website to find local farms that you can pick at is www.pickyourown.org.

5) I shop on Amazon A LOT! My UPS driver knows me now and he is, literally, at my door 3-5 times a week. When you buy through there Subscribe & Save option, you really save some good money.

6) I shop at Sam’s Club to get things like nuts, Lara Bars, frozen fruit for smoothies, almond milk, olive oil, and spices.

7) I don’t buy much organic. I save my money that I would spend on overpriced organic produce that has traveled halfway around the world and I buy local meat and produce instead.

8) I prepare things myself. I make my own mayo, salad dressings,  and stocks. I also make our own Paleo treats, like popsicles, cookies (on occasion), pancakes, and muffins.

9) I grow things myself. Last year I had a full garden with lots of vegetables and spices. It really does save a ton of money!

10) I shop at the local Asian market for things like coconut milk, tapioca, some seed oils, sweet potato noodles, fish sauce, etc.

11) I save money in other areas of our life so that I have money to splurge on food. I make my own cleaners, laundry soap, and skin care soaps.

I hope these ideas help you get started and show you that eating healthy doesn’t have to be so complicated and expensive.

Filed Under: Living Sustainably, Natural Living, Shopping Local, Starting Paleo

Henna Hair Dye

April 1, 2012 by Jackie Ritz 13 Comments

Update: 4/4/12

Last night I applied the other package of Henna that I have. I read a lot about Henna these past few days and believe I was more uneducated the last time I applied it. I’ve learned alot from this free booklet that I found online: https://www.hennaforhair.com/freebooks/hennaforhair.pdf . I did several things different this time. First, I mixed the Henna with lemon juice, not boiling water. I read that you need to use something acidic to release the dye. Instead of letting it sit overnight, I placed the bowl of mixed Henna outside for a few hours. When it started to rain I placed it inside next to a window to cure. The booklet says to let it cure overnight or if you are in a hurry to put it outside for a few hours.

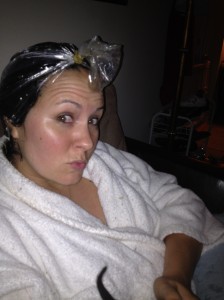
After about 5 hours of curing and after the kids were in bed I took the bowl of Henna and added a little more lemon juice to it to get it to the consistency of mashed potatoes. I also added about a teaspoon of cloves to it to give it a nice smell. The first time I applied Henna a few days ago I mentioned how messy it was. Well this time it was so much easier. I filled up my bathtub about ankle deep with water. I got all my supplies ready and put it near the bathtub. I got in the bathtub and applied the Henna in there. It made it much easier cause I wasn’t flinging Henna all over the bathroom. I had a washcloth ready to wipe off any Henna that fell on my shoulders or on the bathtub sides. I used a mirror while I was standing in there and applied all the Henna from back to front. Dividing it up in sections made this MUCH easier. Next I took my gloves off and grabbed saran wrap and wrapped my head up really well.

I cleaned up the small mess I made, which was easy since it was all in the bathtub. All-in-all, this took me about 20 minutes. Then I layed a dark towel over my pillow and hung out with my hubby till we fell asleep. I also wrapped a towel around the saran wrap to help keep the heat in more. Heat helps release the dye onto your hair.

When I woke up I got in the shower and rinsed the Henna out. This takes a few minutes, so enjoy the hot shower and let it completely rinse out. I washed my hair with baking soda and conditioned with apple cider vinegar (No Poo Method) and got out and styled my hair.

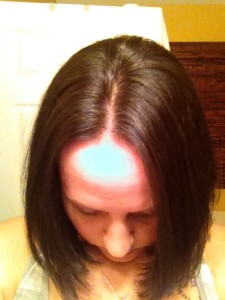
I went out in the sunlight to see what a difference it was. I figured if it was too red I would apply the Indigo, however, I am very happy with the color. My hair is so dark that I really didn’t expect it to lighten it up very much. But, I was surprised how auburn it now looks, especially in the sunlight!

I read that Henna is permanent in the hair but fades over time. I am hoping I can go about 2 months till the next time I need to use Henna again, but I will let you all know!

I also want to recommend EVERYONE do Henna, even if you don’t need color. They have a neutral Henna that has no color, just the conditioning properties. It is so nourishing to your hair. My hair feels so soft and I love the smell. I read some people hate the smell, but I think it smells so earthy and sexy. I really like the clove smell too that I added to it.

Update: 4/2/11

I really don’t think I left the Henna on long enough when I applied it. I left it on for about 10 minutes and then I applied the Step 2 to my hair. I’ve learned that the Step 2 was Indigo, another natural dye. This tones down the Henna and makes it darker and not so red. I left the Indigo on for about an hour. My white hair was covered and it turned it a nice golden blond color. I don’t believe it did anything to the rest of my hair. I really wasn’t expecting it to because my hair is very dark. I think I’m going to use my other box and do just the Henna application (which is the Step 1) and not use the Indigo. I would like more of a red in my hair.

I felt like Cleopatra last night! I had henna all over my head and I was reminded how the last Pharaoh of Egypt, the beautiful and exquisite Cleopatra, was known for her use of henna. For thousands of years women have used henna, which comes from a plant, to dye and condition their hair, skin, and nails. Henna is completely natural and chemical free, unlike commercial dyes that strip the hair with harsh chemicals like ammonia and hydrogen peroxide so that it is then able to absorb the color.

I never knew you could use henna on your hair. I’ve had henna done to my body before. The most recent time being when I was pregnant with my little 8 month old son. My friends at my baby shower had a blast decorating my full belly!

9 months pregnant

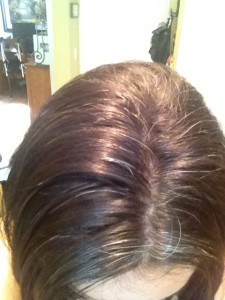
I never knew you could do henna on your hair. I was researching some natural and chemical-free ways to dye your hair. Since I have been doing the “no-poo” (no shampoo) method on my hair the past week, I was wondering how I would dye my hair now since I was avoiding chemicals. I looked it up and saw that women the past thousands of years had put henna on their hair. My hair was needing some color. The only reason I dye my hair is because I have premature WHITE hair…not gray…stark white.

My white roots

I found a henna brand on Amazon and ordered it. I couldn’t wait for it to get here. As soon as it arrived I started my experiment. It was a pretty long process but, I do believe, worth the end result.

The directions that came in the package were pretty clear. What I liked about this brand was that it is not a compound henna pack, which you do want to avoid. It’s not 100% true henna. I thought for my first time I would do something like this since it had directions and was pretty easy. Next time I might actually go into an Indian store and get the henna powder that I have to mix myself. I was also thinking about ordering the henna bricks from Lush. I love Lush! Have you seen their products?! They are so clean and delicious!

The process of putting the henna in your hair is messy. The directions did not warn me about this. Next time I will either do it outside or put newspaper all over my bathroom. I didn’t stain anything because my husband was quickly picking up my mess! Gotta love a clean freak hubby! This box came with a 2 step process because it is targeted towards those needing gray coverage. I let the mixtures of both powders that came with the box cure for 3 hours. The step 1 mixture was the henna that I put on my hair for a total of 10 minutes. I rinsed that out and put the step 2 mixture on, which is the conditioner. I added a raw egg to the mixture for extra conditioning. You can also add a teaspoon of ginger, nutmeg or sage for smell if you want. The smell of the henna didn’t bother me. It smells natural, like earth. My hair still has a faint smell of henna…and it’s the next morning. I plan on not washing my hair for 3 days so the henna can set and start to darken a little bit more.

watching my Roku while waiting for henna

Henna could be considered “semi-permanent” because it lasts for 4-8 weeks depending on how often you wash your hair. I figured since I won’t be using shampoo on my hair and am using baking soda and apple cider vinegar, then it might last a little longer.

So, I love the outcome! Not only does my hair feel amazing, look shiny, and covered my gray pretty, darn well, but I didn’t even have to use harsh chemicals at all! I also have not used shampoo in over a week and my hair feels so clean and looks very healthy. I am thoroughly enjoying experimenting with more natural skin care and hair techniques. It’s nice to feel more self-sustainable!

No more white!

Filed Under: DIY, Living Sustainably, Natural Living Tagged With: chemical, hair dye, henna, light mountain, no poo, no shampoo, white hair

Homemade Body Wash and Toothpaste

March 30, 2012 by Jackie Ritz 10 Comments

I’ve been buying Kirk’s castile soap for my family. It’s very safe, hypoallergenic, and has like 5 ingredients in it. I love that it’s coconut based too! The only thing though, is that we have been going through almost a bar every week. I am used to body wash…liquid soap. I’m not digging the bar soap. So, I found a recipe online on how to turn a bar soap into body wash! Score! I love Dr. Bronner’s liquid castile soap, but it’s kind of expensive. I keep it on hand to clean the kids with, and to mop the floor with. A little goes a long way with Dr. Bronner’s, but I had 2 bars of Kirk’s soap so I thought I would see how a homemade recipe would turn out. I modified this recipe I found online and here is what I did.

First I grated the bar of soap.

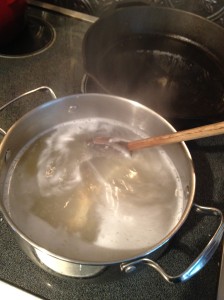
Then I put 6 cups of water in a pot and turned it on. Once it was almost boiling, I added in the grated soap (about 2 cups). I stirred it until it was melted and set it aside to cool for about an hour.

At this point I added in a few TB of coconut oil and about 15 drops of Lavender essential oil. It made a quart-sized mason jar and a pint-sized jar!

I used some of this the other day when showering. It’s nice and works well.  If you’ve ever used Dr. Bronner’s liquid castile soap, then you know that natural liquid body wash has a more “watery” consistency. I am on the look-out for those foaming hand soap dispensers because I would really like to use this soap I made for washing hands too. It should foam up nicely with one of those foaming dispensers!

Homemade Toothpaste

On to homemade toothpaste! Ok so this was a big step for me. To make something I lather on my body is one thing, but to make something that I actually put inside my mouth is another. Then I realized how silly this logic is. I’m trying to live more sustainably, so I need to trust myself more and trust that God gave us all we needed when He made us and the earth. I’m really trying to live more sustainably for many reasons. One, I want to be ready in the even of a Zombie Apocalypse. Two, I want to never run out of things and have to run to the store. And three, I want to show my kids to be dependent on themselves and not the grocery store. So, I found a recipe on Pinterest that uses: 5 Tbs baking soda -4 Tbs coconut oil -About 10 drops of essential oil -Container (Make sure it has a lid. Baking soda will absorb smells if left to open air.) -*You can also add a bit of stevia or other natural sweetener if you’re used to a sweeter toothpaste. I added some stevia and it did make it more palatable. It is definitely different tasting. I didn’t have any peppermint essential oil so I used my lavender essential oil. Gross! It smells good but the taste is hard to take. However, I am going to use it for myself. I know my husband will never use it. He couldn’t even use the Tom’s toothpaste without gagging. I really do like how clean it makes my teeth feel. It doesn’t bubble up and lather like commercial toothpaste does, but those do that because of all the toxic chemicals in it.

I’m really happy with all my homemade, natural products! I’m ordering a few “peri” bottles from Amazon to store them in. I have a bunch of glass mason jars in the shower right now and we all know how dangerous that can be.

All-in-all, I’m excited about my all my new products I’m making. I’m on my first week of doing the “No Poo” hair method, which is using no shampoo to wash with, however, that is a whole new post in itself. I am documenting it and after a month or so I will update you all!

Filed Under: About Me, DIY, Living Sustainably, Natural Living Tagged With: body wash, castile soap, dr. bronner's, homemade body soap, homemade toothpaste, no poo, toothpaste

Cavemama’s Facial Skin Care Regime

March 27, 2012 by Jackie Ritz 5 Comments

I’ve tried to get back to a more natural way when it comes to skin care. I, especially, am very cautious what I put on my children’s skin. Commercial skin care products, even the very expensive ones, have so many chemicals in them that are so harmful for your skin. Your skin is what protects you from outside invaders, but when you are applying products that have chemicals in them, the invaders are getting a free ride inside your body.

For awhile now I have been doing the Oil Cleansing Method for my facial skin care, and I must say, I will NEVER go back to buying any other form of skin care products. For starters, this method is washing your face with oil. Yes…oil. Seems absurd, I know, throwing oil on your already oily face. But, oil cleanses oil. Oil moisturizes. Oil softens. Oil cleanses. Oil is natural, made by the earth. Oil has ONE ingredient…oil. There are several kinds of oil that you can use. I use a mixture of Olive Oil and Castor oil. Castor oil is an amazing cleansing agent (look at my son! He was cleaned out of me with the use of castor oil! lol!). I do a 60% Castor oil, 40% Olive Oil mix. I put it in an old bottle and shake it up before I use it.

I splash some water on my face and put a quarter-size amount of the oil mixture on my hand. Then I rub the oil all over my face. I rub it into my pores in a circular motion. Then I get a washcloth and put it under HOT water. I lay the washcloth over my face and let the steam open my pores. You’re supposed to keep it on for about a minute or so, but I am usually in such a hurry to get myself ready that it only stays on my face for a couple seconds. Then I take the washcloth and rub the oil into my skin. I do circular motions again and rub the oil off. I do this until all the oil is rubbed into my pores as much as possible and my face is no longer oily. I pat dry with a towel and I’m done! My face is soft, never needs anything more! I do this every night and in the mornings I just splash water on my face.

Commercial cleansers strip oil away from our face, leaving it dry and tight. We need our facial oil! It was put there for a reason. When I used a 4 step facial program, my face would get so oily in the mid afternoon. I used to carry around those things you can dab the oil off your face with. My oil glands went into overdrive producing so much oil because the cleansers were stripping it away. Now, I have balance to my skin. And my skin looks good! I get compliments on it quite often!

Up close and personal picture of my face. No makeup on. Meet Snuggles, our rescue kitty!

Filed Under: Natural Living Tagged With: castor oil, natural skin care, Oil cleansing method, olive oil, skin care

« Previous Page

Primary Sidebar

  • Facebook
  • Instagram
  • Pinterest
  • RSS
  • YouTube

Hi, I'm Jackie Ritz and welcome to The Paleo Mama! I'm a published author, certified herbalist, and voracious researcher of natural medicine and nutrition. I'm glad you're here and I hope you stick around for awhile!

Recent Posts

  • When God Says Pause: Why I Took a 5-Year Break from My Online Business
  • How to Quit Facebook but Keep Your Business Profile
  • Leaving the City for the Country
  • Natural Way to Heart Health

MEAL PLANS

Biblically clean meal plans that are for those love to cook real food

Read More

Footer

Our Blog

The Paleo Mama blog provides simple answers for healthier families through research, tutorials, recipes, and simple remedies for daily needs!

  • Health
  • Essential Oils
  • Recipes
  • Remedies
  • Natural Living
  • Meal Plans

Stick around!

You’ll get instant access to a library of natural remedies and real, paleo food, including our ebooks and free guides we send out.

  • Home
  • Disclosure/Disclaimer
  • Privacy Policy
  • Advertise
  • Contact Me

Copyright © 2025 · Wellness Pro on Genesis Framework · WordPress · Log in