• Skip to primary navigation
  • Skip to content
  • Skip to primary sidebar
  • Skip to footer

The Paleo Mama

Homegrown and Handmade

  • About
  • Blog
    • Podcast
  • Meal Plans
  • Essential Oils
  • Our Farm
    • Great Pyrenees Puppies
    • Goats
      • Goats for Sale
      • Goat Sales Policy
      • Nigerian Dwarf Bucks
        • Ranchocabra Lunar Eclipse

Natural Living

DIY Cooling Cucumber Mask

December 3, 2013 by Jackie Ritz 13 Comments

I started my natural living experience nearly 5 years ago! I remember how daunting it was to get rid of all the chemicals in my house and how overwhelming it was learning about toxins in my skin care products. I was so happy to follow so many wonderful bloggers who generously shared their home remedies and recipes. After 5 years, I still feel like an amateur when it comes to creating DIY beauty products for myself or my blog! I love the learning experience, but when someone like Jenni from Jenni Raincloud comes along and offers to do a guest post for a DIY Cooling Cucumber Mask…I am thrilled to allow it! So, please welcome Jenni!  – Jackie 

Hi everyone!  I’m Jenni, from Jenni Raincloud Homebody Extraordinaire!  I am an aesthetician and have been in the skin care industry for over a decade!  After taking a break from my career to start a family I started realizing how my favorite skin care products were full of false promises and CHEMICALS!  I started to search for alternatives to my favorite lines and came up with very few choices of skin care companies that were charging an arm and a leg for organic, pure products.  So, I decided to take control and make my own!  I immediately fell in love with the wonders of nature in skin care.  My blog is all about my adventures in do it yourself skin care!  Thanks for having me and I hope you enjoy today’s post!
2013-11-12 15.47.58 HDR-1
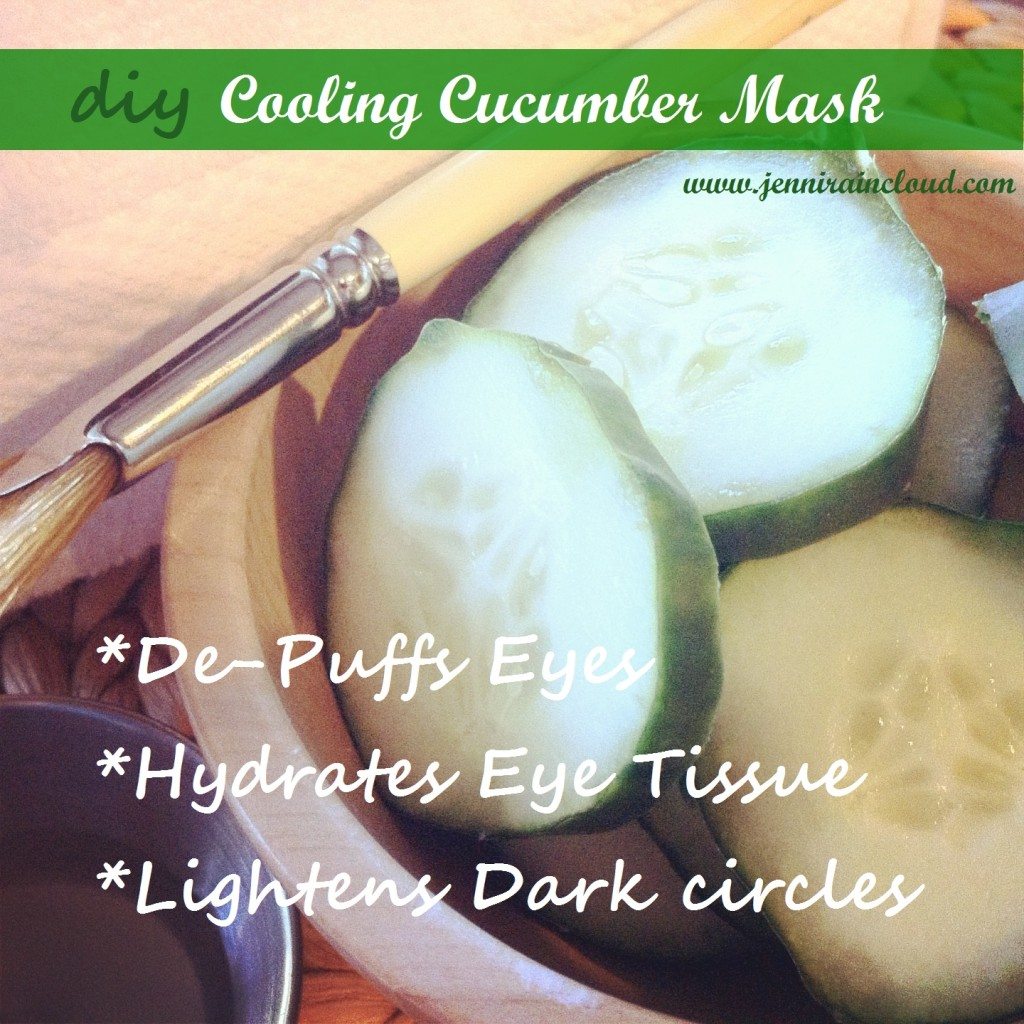
Anyone have issues with dark circles, crows feet, and puffy bags under your eyes?  My hand is up.  Let’s just get real for a second-Sometimes drinking 10 tons of water a day just doesn’t happen.  Sometimes you just don’t get a full night’s sleep-baby is screaming, 5 year old had a bad dream, husband snores, dog is trying to get underneath you, bladder is shot (thanks Sofie and Heidi for that) weird noises outside, cell phone mysteriously vibrates-you get the picture, the older you get the less you sleep through stuff, but that’s a whole other post, huh?!  More often then not, stress is a daily annoyance-that breeds and multiplies itself while reeking havoc on our bodies.  These annoying issues all contribute to worn out, tired eyes.  So, let’s fix it.  Let’s take 10 minutes to do something for ourselves?  It’s easy and relaxing-You in?

2013-11-12 15.37.13 HDR
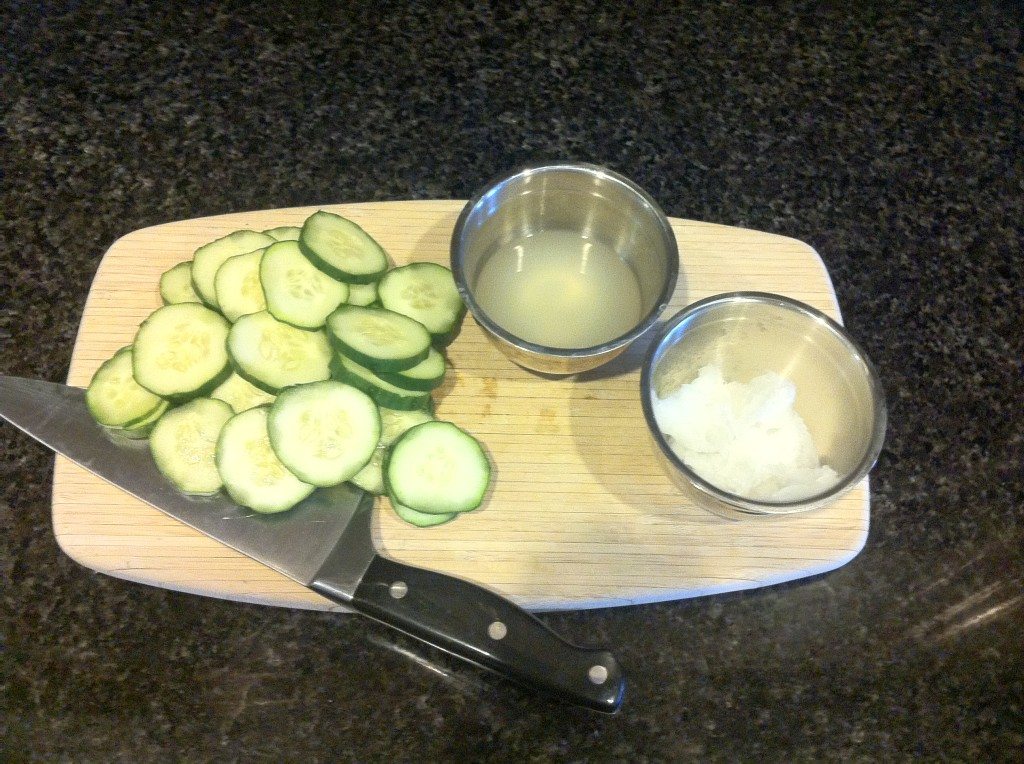
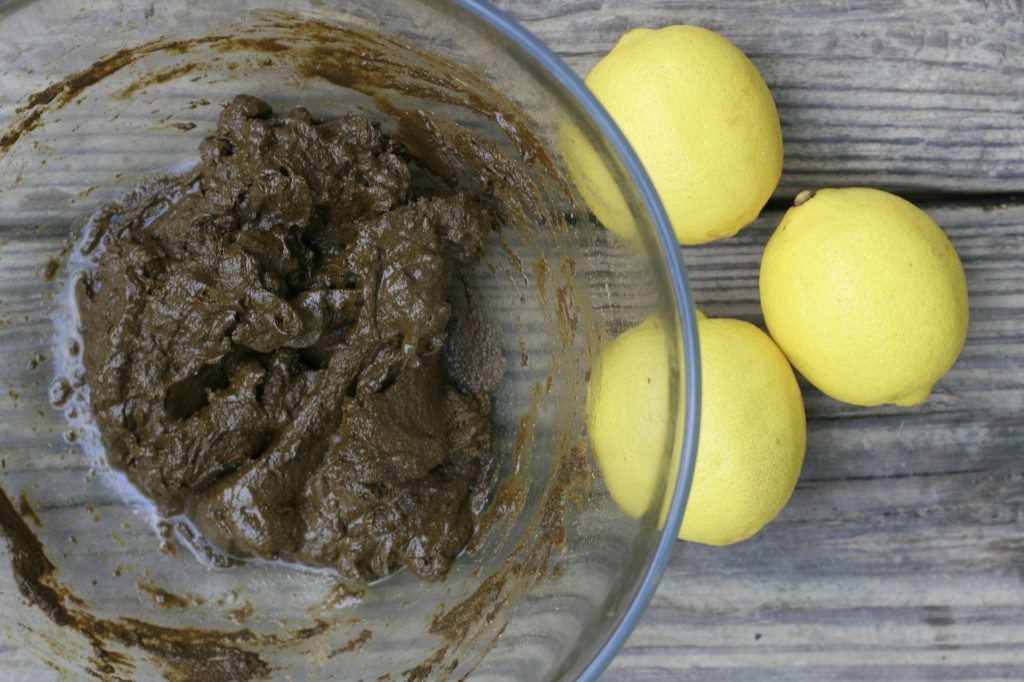
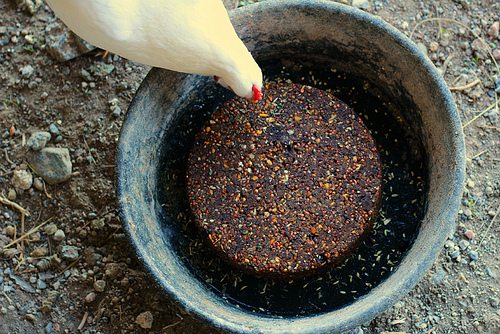
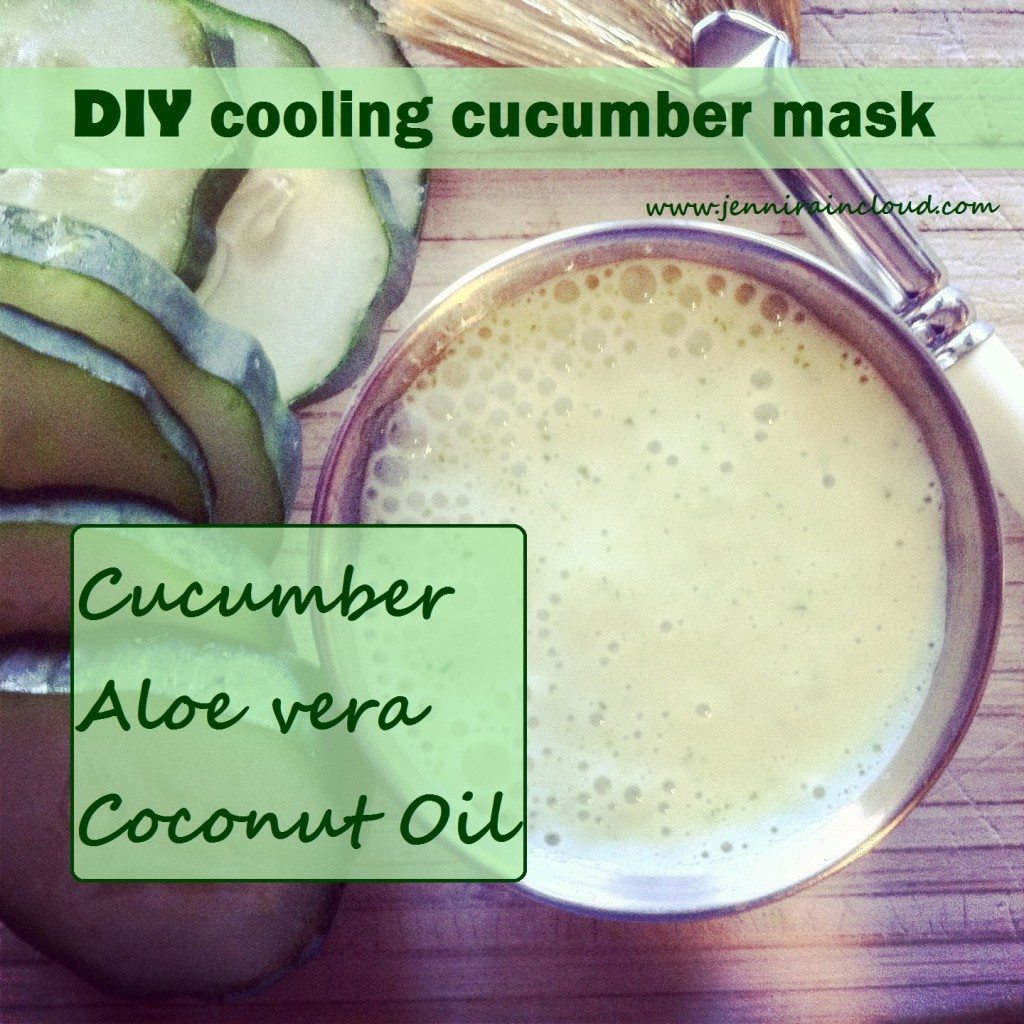
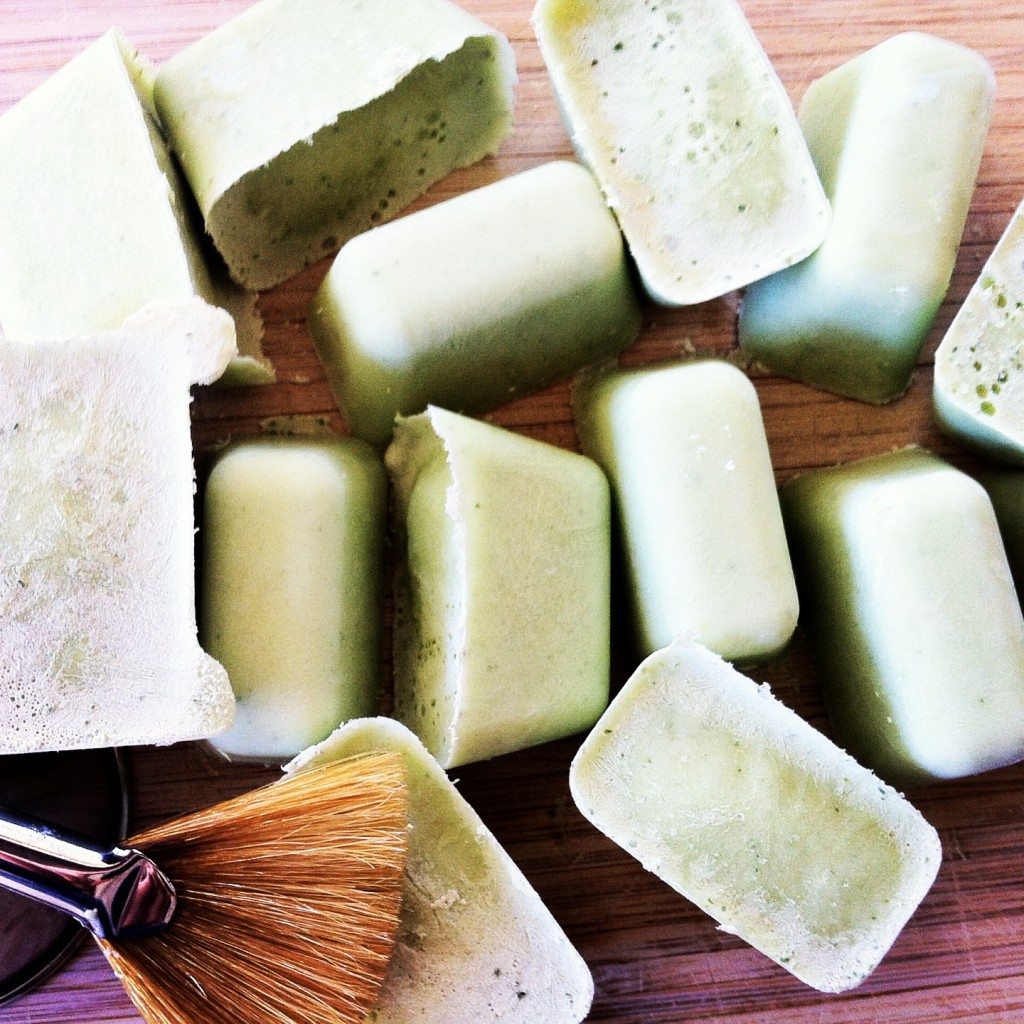
I always love to use food on my face.  Seriously-nature is full of remedies.  This is an easy way to relax those tired eyes with out adding chemicals to your body or breaking the bank!  All you need is a cucumber, coconut oil and aloe vera gel!  If you really want to get fancy, Carrot Seed Oil is my go to essential oil for the eyes.  It regenerates and renews-I talk more about it in my DIY Anti Wrinkle Eye Stick post. Now, I like to not waste.  So, I use a whole cucumber, 2 TBSP of coconut oil and 1/4 cup of aloe vera gel.  I put it in an ice cube tray and freeze (hence the cooling part).  This will give you many applications without wasting your cucumber and will also save time and effort in the long run!

2013-11-13 12.10.03 HDR-2

 Cooling Cucumber Mask

  • 1 large cucumber
  • 2 TBSP Unrefined Coconut Oil
  • 1/4 cup Aloe Vera Gel
  • 8 drops of Carrot Seed Essential Oil (optional)

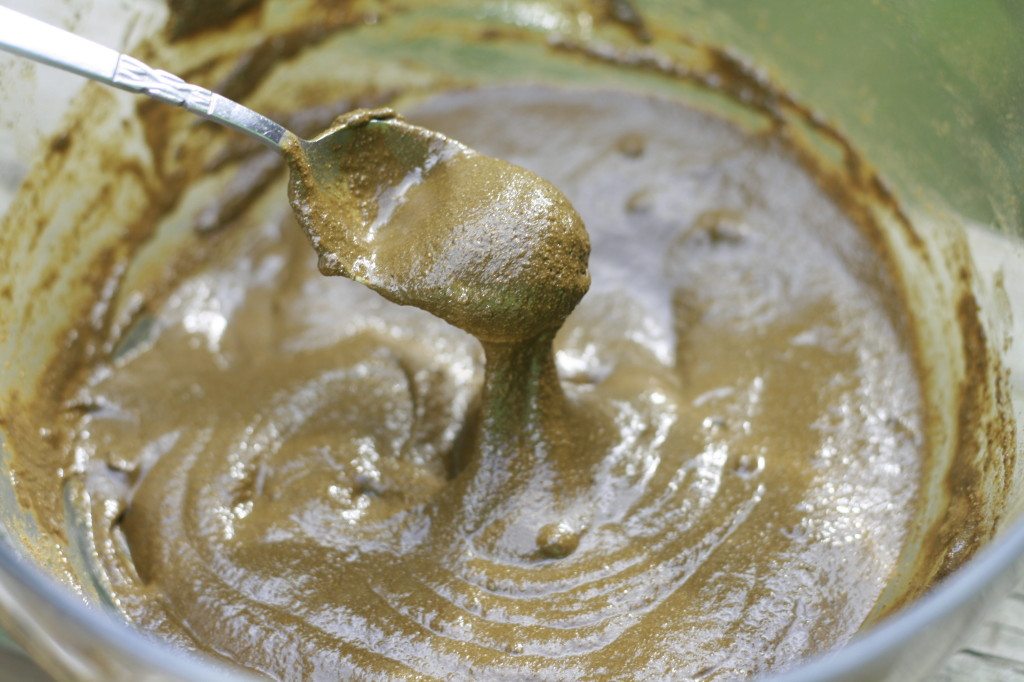
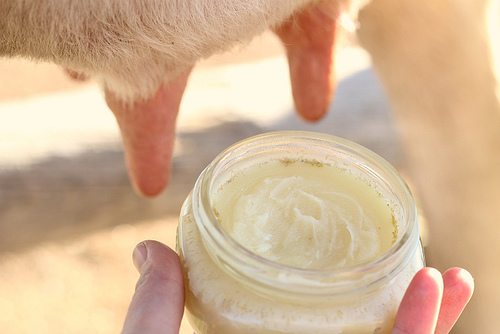
Blend all ingredients together until all ingredients form a smooth cream.  Transfer to ice cube tray and freeze.  You might hold a bit back and pop it in the fridge so you can use your mask now!

Apply all around the eyes.  Leave on for 10-15 minutes.  It feels HEAVENLY!  So refreshing-you can just feel the puffiness disappearing!  If you are using the Carrot Seed oil be very careful-if it gets in your eyes it will burn.  If the oil gets in your eyes, rinse out your eye with cool water immediately.

2013-11-12 15.42.47 HDR-1

So there you have it!  A fast and easy remedy for those pesky tired, puffy eyes!

Cucumbers rock!

2011-08-14 09.37.27-1

Jennifer lives in Edmond Oklahoma with her husband and 2 daughters. She has been in the skin care world for over a decade. She believes beautiful skin comes from the inside out. In order to achieve youthful skin a healthy lifestyle must be in place. If you can’t eat it, don’t put it on your skin are her words to live by! She sells her skin care products on Etsy, runs her “at home spa” for close clients and blogs full time. She is happiest staying home with her family and cooking up healthy skin care products in the kitchen! You can follow Jenni Raincloud on Facebook, Pinterest and Twitter!

Filed Under: essential oils, Guest Posts, My Recipes, Natural Living Tagged With: cooling cucumber mask, DIY beauty, DIY Cucumber mask, paleo, primal, toxic free

How I’m Healing My Cavities Naturally

November 26, 2013 by Jackie Ritz 221 Comments

Six months ago I walked into a routine cleaning at the dentist and walked out with a hefty quote for dental work to be done on SIX cavities they found in my teeth. It seems pregnancy does this to a lot of women. 

I started reading and researching natural ways to heal your teeth. I read the book, Cure Tooth Decay: Remineralize Cavities & Repair Your Teeth Naturally With Good Food  and my mind was blown. I can remineralize my teeth without having thousands of dollars of dental work done? I can heal my cavities with proper diet? I’m in! This post is about a holistic protocol I used to remineralize my teeth. However, to fully understand how to heal your cavities, we must take a look at what is the root cause of tooth decay.

Root of Tooth Decay = Lack of Nutrition

A prominent dentist, Dr. Weston A. Price,  and author of Nutrition and Physical Degeneration, set out in 1915 to discover the cure for tooth decay. He studied groups of people from different parts of the world. His field studies took place in many indigenous areas (where modern toothbrushes and floss are nonexistent) and the discoveries he found in these countries are astounding. His conclusion:

“All groups having a liberal supply of minerals particularly phosphorus, and a liberal supply of fat-soluble activators, had 100 per cent immunity to dental caries.”

Dr. Price determined that tooth decay was a result of a lack of nutrients in the modern diet and modern diet does not even meet the MINIMUM standards for proper nutrient intake (1).

The Two Major Suspects of Tooth Decay: 

1. Lack of Adequate Fat-Soluble Vitamins in the Diet– Fat-soluble vitamins: A, D, E, and K are found in fat and let’s face it, with the low-fat lifestyles that most of us believe in, we are deprived in these vitamins. Dr. Price discovered that all the indigenous groups he studied had the highest immunity to tooth decay. Why? Because they, liberally, ate foods that are high in fat. Their diets consisted of organs and meat from land animals, fish, and shellfish…all containing generous amounts of fat-soluble vitamins.

2. Lack of Activator X in the Diet – Dr. Price discovered that Activator X, a hormone similar to vitamin D, is the missing nutrient in modern diets. Activator X is found in the grassfed dairy of animals that are grazing on rapidly growing green grass (grass grown from May through September). Butter that has a deep yellow or orange color, has more Activator X in it is produced from grassfed milk that is from cows that are grazing on rapidly growing grass.

Other Notable Suspects: 

  1. Lack of Proper Minerals in the Diet – Calcium and Phosporus are vital in tooth remineralization and their levels in the blood need to be balanced (2).
  2. Hormones are Out of Balance – When our endocrine glands are out of balance, we are more susceptible to tooth decay. Common influencers of hormone issues are prescription drugs, birth control pills, and other toxic/or stress factors.
  3. Too Much Phytic Acid from Grains in the Diet – Prior to the cultivation of grains, corn, and rice, human fossil records show that tooth decay was virtually unheard of (1). Phytic acid is significantly shown in grains, nuts, corn, rice, beans, legumes and seeds.

The Missing Link in Our Diet:

The absence of fat-soluble vitamins is THE PRIMARY cause of tooth decay. You need Activator X and liberal amounts of vitamin A and D to properly reverse tooth decay. The simplest and most effective way to add fat-soluble vitamins to your diet is by adding in extra-virgin cod liver oil and extra-virgin butter oil (1).

Extra-Virgin Cod Liver Oil (EVCLO) – Extra-virgin cod liver oil  real Norwegian cod liver oil that is fresh, raw & handcrafted from wild livers using a very rare ancient extraction technique which uses nature to separate the oil from its liver. EVCLO has a pale/golden color and a very mild, fishy taste (unlike fermented cod liver oil.

Extra-Virgin Cod Liver Oil is fresh and a rich source of vitamins A, D and Omega fats. Cod liver oil tops the food chain with the highest levels of Vitamin D AND Vitamin A. Following closely behind for Vitamin A is liver; and for Vitamin D is high vitamin butter oil.

Extra-Virgin Butter Oil (EVBO) – Extra-virgin butter oil is is one of the most stable, flavorful nutritional oils produced today – although it has an old world traditional feel and taste. It comes from grassfed cows that are grazing on rich pasture grass. It takes 26 days of grazing on rich pastures for the milk to test out at its peak and only then is the milk considered ‘high vitamin’ for use in Extra-Virgin Butter Oil. 

Unlike many brands of Ghee and clarified butter that use high heat to extract the oil from the milk solids, destroying the lower fatty acid chains, EVBO is processed minimally to preserve all of the nutrients, freshness, aroma and color. Many lactose-intolerant people find no difficulty digesting EVBO.

EVBO is a natural source of vitamin A, E, K2 (MK-4), Butyric Acid, Wultzen Factor and Conjugated Linoleic Acid (CLA). It is extremely potent it its levels of Activator X and Vitamin K2. Foods that are also high in Activator X are the innards of crab and lobster, skate liver oil, bone marrow, and animal glands. Yea…those foods aren’t on my menu, so I choose to supplement with extra-virgin butter oil. Butter is one of the top 10 foods with the highest amounts of K2. There are no solid sources that know the ratio of butter to extra-virgin butter oil when it comes to figuring out the K2 content, but most believe that it’s a 1:8 -1:10 ratio. This would make high vitamin butter oil top the list with Natto, goose liver paste, and hard cheeses like Gouda (3).

Since that day at the dentist when I was told I had 6 cavities, I have been diligent in pursuing the complete healing of my cavities. I cancelled my appointment to have my teeth all drilled and filled, and I began my journey into curing tooth decay with proper nutrition. And my journey has been successful!

Why Did I Have Cavities?

  1. My diet was missing the fat-soluble vitamins found in extra-virgin cod liver oil and extra-virgin butter oil. I have since started taking this powerful duo, as well as the rest of my family for added nutrition.
  2. I had been dairy-free for over a year and did not focus on my intake of calcium and phosphorus. Since discovering my tooth decay, I have since added back raw milk from grassfed cows and goats into my diet as well as many homemade cheeses.
  3. I, most likely, had been consuming high amounts of phytic acid in nuts and seeds. Since learning of my cavities, I have minimized my intake of nuts and seeds, and have become diligent about properly soaking them to help neutralize phytic acid. 

 What Have I Been Doing to Heal My Tooth Decay? 

  • I take extra-virgin cod liver oil daily.  I take 1 teaspoon a day. The kids prefer their’s with a dash of raw honey mixed in.
  • I take 1 teaspoon of high-vitamin butter oil daily.
  • I take Skate Liver oil daily.
  • I drink 3-4 cups a day of raw goats (or cow) milk per day.
  • I drink 1 cup a day of homemade bone stock and use collagen (tasteless and odorless) to cook with and add to beverages.
  • I eat liver once a week. If this grosses you out, you can take desiccated liver tablets.
  • I use liberal amounts of grassfed butter and ghee in my foods and recipes. As mentioned in the post, this is NOT a substitute for extra-virgin butter oil. 
  • I oil pull with coconut oil. Not sure what oil pulling is? CLICK here to learn more.  
  • I avoid any toothpaste with glycerin, as it counteracts remineralization. I make my own toothpaste using bentonite clay or I buy this one. 
  • I, normally, don’t eat any many grains or foods high in phytic acid. I make sure my nut butters come from a trustworthy source and are soaked. If you are not willing to give up your grains, look into supplementing with Vitamin C to help neutralize phytic acid.

Where to get the best fermented cod liver oil and high vitamin butter oil: 

Perfect Supplements carries the most trusted brands of extra-virgin cod liver oil and extra-virgin  butter oil on the market. They are a One Stop Shop for products and resources for optimal oral health and more! They, also, carry skate liver oil, grassfed beef gelatin, ghee, desiccated liver capsules, and the coconut oil I use in my remineralization protocol. Cure Tooth Decay was the book that changed my life and showed me I could take healing my cavities into my own hands!

Sources:

  • (1) Nagel, Ramiel. Cure Tooth Decay
  • (2) Page, M. Abrams, L. Your Body is the Your Best Doctor.
  •  (3) https://www.westonaprice.org/fat-soluble-activators/x-factor-is-vitamin-k2#interactions

Filed Under: Natural Living Tagged With: featured, fermented cod liver oil, healing your cavities, high vitamin butter oil, how to heal tooth decay, paleo, radiant life, weston a. price

Soothing Elixir for Cold and Flu Season

November 25, 2013 by Jackie Ritz 36 Comments

The moment I feel myself getting the sniffles, I grab a few lemons, some ginger, some green tea, cinnamon, and some local, raw honey and I make myself this Soothing Elixir for cold and flu season.  It’s so deeply nourishing and easy to make and helps to boost immunity. 

You can make it in the crockpot and let it simmer all day, ladle a hot glass when you want, or you can make it on the stovetop. Either way works great and there are many “add-ins” you can put it in to add more nutrition.

Soothing Elixir for Cold and Flu Season

Ingredients: 

  • 2 lemons, sliced in circles
  • 8 echinacea tea bags (I use this tea)
  • 3 cinnamon sticks (I use these sticks)
  • 2 inch piece of ginger, sliced thin
  • 1/4-1/2 cup of raw apple cider vinegar (I use this one)
  • 6 cups of water
  • Raw Honey
  • OPTIONAL: turmeric, coconut oil, or gelatin.

_MG_8112

Instructions: 

  1. Pour the water in a pot and bring to a boil.
  2. Add the lemons, ginger, tea bags, and cinnamon sticks. Cover and let steep for 20-30 minutes.
  3. Pour the apple cider vinegar into a pitcher or a large half gallon mason jar .
  4. Dump the tea into the mason jar. You can keep the lemons and ginger in, but remove the tea bags.
  5. When ready to drink, warm up, and add in a teaspoon or two of raw honey.
  6. OPTIONAL Add-ins: tumeric, coconut oil, and gelatin.

Soothing Elixir for Colds and Flus
2017-10-25 14:54:55
Serves 8
Write a review
Save Recipe
Print
Prep Time
5 min
Cook Time
20 min
Total Time
25 min
Prep Time
5 min
Cook Time
20 min
Total Time
25 min
Ingredients
  1. 2 lemons, sliced in circles
  2. 8 Echinacea tea bags
  3. 3 cinnamon sticks
  4. 2 inch piece of ginger, sliced thin
  5. 1/4-1/2 cup of raw apple cider vinegar
  6. 6 cups of water
  7. Raw Honey
  8. OPTIONAL: turmeric, coconut oil, or gelatin.
Instructions
  1. Pour the water in a pot and bring to a boil.
  2. Add the lemons, ginger, tea bags, and cinnamon sticks. Cover and let steep for 20-30 minutes.
  3. Pour the apple cider vinegar into a pitcher or a large half gallon mason jar .
  4. Dump the tea into the mason jar. You can keep the lemons and ginger in, but remove the tea bags.
  5. When ready to drink, warm up, and add in a teaspoon or two of raw honey.
  6. OPTIONAL Add-ins: tumeric, coconut oil, and gelatin.
By The Paleo Mama
The Paleo Mama https://thepaleomama.com/

Filed Under: essential oils, My Recipes, Natural Living Tagged With: cold elixir, gluten-free, grain-free, green tea, lemon tea, paleo, primal, soothing tonic, tea for sickness, turmeric tea

How to Dye Your Hair with Henna

November 11, 2013 by Jackie Ritz 55 Comments

Henna is the safest way to color your hair. Henna is a plant that grows in hot, dry climates. It’s leaves are harvest, dehydrated, and then made into powder. When Henna is mixed with an acid medium, henna will stain your nails, skin, or hair into a reddish-brown color. This makes it a safe, non-toxic way to dye your hair. Henna has been used for thousands of years to keep hair healthy and to color white or gray hair. There is only ONE color of Henna, however, there are different ranges of that color depending on the climate and soil of that plant and I’m happy to show you how to dye your hair with henna! 

There are so many amazing benefits of using Henna…

hennameme

What Kind of Henna Should I Avoid?

You may have seen various types of commercially produced “boxed” Henna treatments that specifies for “blond hair”, “black hair” or strawberry-blonde hair”. I’ve learned over the years of doing Henna on my hair that these are very poor quality of Henna. They are produced by adding synthetic dyes, metallic salts, and other plant dyes to a poor quality of Henna. You want to steer very clear of anything that is labeled for a specific hair color. Look for Henna that is 100% Henna. The best quality you can get is Henna that is labeled “body-art Henna.” It has the highest dye content of Henna.

What will Henna Look Like On My Hair? 

See all my white/gray hair?

Because the red-orange dye molecule is binding to the keratin that surrounds the pigmented hair core, the resulting color is different for every strand of hair, and for every person. The henna stain is translucent, and blends with your own color. Hennaed hair looks like you grew it yourself! The color you get on your hair will vary depending on your hair color you have now and the chemicals you already have on your hair. Many ask if it is safe to apply Henna on color-treated hair and the answer is YES! But it’s only safe to use high quality, body-art quality Henna.

My Hair: Henna IS permanent if you use 100% Henna. See the pic below. Kinda embarrassing that I waited so long to color my roots, but you can see my white roots coming out and you can see the red Henna “highlights”. It had been 3 months since my last Henna treatment and the color was still going strong (other than my new roots). I do want to add, I use a natural shampoo and conditioner. It is wild-crafted, raw and vegan and I love it on my hair!

_MG_7395

If you have course hair, Henna will be amazing for it! It won’t dye your hair completely red, but it will give it red highlights, loosen the curl, and make it silky!

How to Apply Henna to Your Hair 

You can purchase your high-quality henna from here. 

You need to use a acid medium to apply henna. Lemon juice does this very well. When mixed together it releases the dye and bind to the keratin in your hair. This makes Henna permanent.

Step One:  MIX IT! Mix enough henna with lemon juice to make it like the consistency of mashed potatoes (see photo below). If lemon juice is too harsh on your skin, use something less acidic like grapefruit or orange juice. You could use vinegar or wine, but your hair will be a little stinky for awhile. Don’t use boiling water or your Henna will fade and be an ugly orange.

  • Short Hair (use 100g or 1 cup)
  • Collar Length Hair (use 200g or 2 cups)
  • Shoulder Length Hair (use 300g or 3 cups)
  • Waist Length Hair (use 500g or 5 cups)

If you have thick hair, add an extra 1/2 cup to a cup of Henna powder. 

_MG_7376

Step Two: REST IT. You need to let your Henna paste rest for several hours. I usually mix the Henna in the morning and apply to my hair at night. Letting it rest allows the slow dye release and will give you the BEST results. Cover your Henna with a plastic wrap and let it stew.

Step Three: MIX IT AGAIN. It’s been several hours and you are ready to apply. Mix some more lemon juice with the paste mixture until it is the consistency of yogurt.

_MG_7398

Step Four: APPLY IT. WEAR GLOVES. Henna is permanent and it will stain everything it comes in contact with. This is the messy step. I have a few suggestions to make it easier. Get in your bathtub and fill it up with water. Apply the Henna while standing in your tub. Or, you can go outside and apply. Bring a mirror.

  • Do not be stingy. Apply generously and thick for a deep, rich color.
  • Comb your hair and divide it into sections.
  • You can put the Henna in a piping back, squeeze bottle, or just use your fingers and apply. I find the latter to be the easiest.
  • Start at the back and work the Henna down to the scalp. Apply it thick! Then bring down the next section and Henna it. Make sure every bit of hair is THICKLY coated…like cake frosting. Don’t be afraid to use plenty of Henna and don’t be afraid to get messy.

hennasteps

Step Five: RELAX. When all your hair is covered with Henna, wipe your skin clean of any Henna, and wrap everything up in a plastic wrap. This keeps the Henna warm and moist and allows the hair to take in the dye. I then wrap a large DARK towel (remember Henna will stain anything it touches) around my head. This is when I go to bed. Yes, I sleep with the Henna on my head all night. This is not necessary but I have found that it covers my gray hair the best when I leave it on for, at least, 6 hours. The recommendation is 2-4 hours, but if you know that your hair is resistant to dye or has gray, then you may want to leave it on a little longer. I lay a dark towel over my pillow and sleep. I actually sleep really well with Henna on my head and it is also known that Henna can soothe headaches. So, just relax and enjoy the full benefit that Henna can give you.

wrapped head

Step Six: RINSE IT. Time to rinse out the Henna. I have shorter hair so this step isn’t too difficult. I take a nice long shower and rinse it out completely. I follow it with a wash and condition. When my hair was much longer, I used to fill up the bathtub and lay down in the water. This helped get the Henna out of my hair.

A few things…

  • Henna may seem really bright at first. Do not panic…it will darken over the next few days if you used the acidic mix. It will take about 3 days to settle into the true color.
  • Once again, DO NOT be stingy with the mix. More is always better with Henna.
  • You can use this on beards too if you would like!
  • Some people can’t stand the smell of Henna. I, personally, love it. It’s earthy and sultry. If you can’t stand the smell, you can add 1 TB of powdered ginger, clove, or cinnamon to your Henna mix.

Where to Buy Henna: 

  1. Order high quality henna from HERE.
  2. Check a local Indian store to buy it SUPER cheap!!! Just make sure it’s 100% Henna!

The day after I slept in Henna.


https://www.hennaforhair.com/techniques/deb/

https://www.hennaforhair.com/freebooks/hennaforhair.pdf

Filed Under: Living Sustainably, My Recipes, Natural Living Tagged With: gluten-free, henna hair dye, how to color your hair with henna, natural hair dye, non toxic hair dye, paleo, primal

Friday Book Love: Natural Homestead 40+ Recipes for Natural Critters & Crops

October 25, 2013 by Jackie Ritz Leave a Comment

I have been drooling over this digital book coming out and it is finally here! The Prairie Homestead has put together a incredible resource of over 40 recipes for homemade chicken feed and treats, natural pesticides, herbal supplements, non-toxic barn cleaners, herbal salves, DIY fly sprays, and TONS MORE!

As soon as I downloaded this book I printed the WHOLE thing out. I’ve been so confused as to what to use on my chickens, what to feed my goats, how to care for my barn, and what is safe to use in my garden. I want to have a natural homestead but there is NOT ONE book on all this. Now there is!

10414215654_1a58b6c66d

This book is perfect if you are:

  • Tired of feeding commercial feed to your chickens that contain GMOs, antibiotics, and processed by-products like feather meal
  • Struggling to create a natural environment for your cooped-up flock
  • Battling pests on your homestead because you refuse to purchase chemical pesticides that contain toxic
  • Feeling discouraged because chemical dewormers are no longer working
  • Wishing you had some home remedies on hand for when your critters get cuts or scrapes
  • Giving yourself a headache when you try to disinfect your coop or barn with bleach
  • Want to utilize essential oil in your homestead

 Why a Natural Homestead is Important:

I personally have felt terrible because I’ve been so focused on creating a natural environment in my house that I have neglected to create a natural environment in my homestead. My chickens and goats shouldn’t have to eat crappy commercial feed while my family and I are eating locally grown organic food. That’s just not right!

Did you know that:

  • Parasite resistance is a very real problem as many chemical deworming products are simply no longer effective due to overuse???
  • Not only do some bagged chicken feeds contain bizarre ingredients and even added antibiotics to the feed???
  • That the popular herbicide that everyone has sitting in their garage has been linked to tumors in animals, DNA damage, cancer, endocrine disruption, and physiological disorders in crops???

What I Loved Learning from this Book:

  • I learned how to put a natural supply cabinet together with stuff I can find at the feed store.
  • I learned how awesome diatomaceious earth is.
  • I learned that that pumpkin seeds, garlic, baking soda, vinegar, and kelp are more than just old wives’ tales but they are very beneficial to a natural homestead.

10414204154_94c2497a8d

  • I learned that essential oils (I use these) are extremely important to a homestead and can be used countless ways around your farm or house and even directly on your animals.

10414378683_92ccc41003

  • I learned how to mix up grain-free, corn-free, and soy-free feeds for my flock!
  • I, also, learned how to battle bugs without using toxic chemicals on my garden.

See how much I loved this book…I printed it out and have highlighted and tabbed it all up!

_MG_7675

Wanna see a free preview? Click here! 

 click here to purchase!!!!


Some Chicken Recipes You Will Love:

FOUR different chicken feed recipes including a grain-free option, and a corn-free and soy-free feed for both layers and broilers

10414236735_020046e13e

Deworming Cookies

10414188034_27b4e19b82

Bordom Buster Block

10414232806_c604ec3ec4

Some Recipes for Your Girls in Milk:

Udder Balm

10414216715_9c0a2e7af5

Teat Dip

10414217096_924e7ac161

Other Pest and Garden Recipes You Will Love:

Bug Be-Gone Garden Spray

10414383463_e0439014ec

Fly Spray

10414232325_6bd2886e32


Get these and so many more when you order this digital book TODAY! 

Still not convinced you NEED this book? The Prairie Homestead gave me permission to share a recipe with you! Think of this recipe as a giant granola bar for your chickens. This block is a wonderful way to alleviate boredom in your flock!

Boredom Buster Block

10414232806_c604ec3ec4

INGREDIENTS:

  • 2 cups scratch grains
  • 1 cup oats
  • 1 cup cornmeal
  • 3/4 cup wheat germ
  • 1/2 cup raisins or cranberries
  • 1/2 cup crushed egg shells or oyster shells
  • 4 eggs + shells, crushed
  • 3/4 cup blackstrap molasses
  • 1/2 cup melted coconut oil, tallow, or lard

INSTRUCTIONS:

  1. Mix dry ingredients together in a bowl.
  2. Mix the eggs, molasses, and coconut oil in a separate bowl.
  3. Add the wet ingredients to the dry and mix well.
  4. Pour your mixture into greased pans
  5. Bake for thirty to forty-five minutes at 400 degrees. You may need to bake slightly longer if you are using a deeper pan. The block is ready when the edges have become dark and the middle is firm.
  6. Allow to completely cool. Serve it to your chickens.

NOTES:

  • I was able to fit this entire recipe in one eight-inch round pan. But you could also divide it between two pans to help it bake more quickly, or use 2 nine-by-five inch loaf pans.
  • This is not meant to be a substitute to your flock’s regular ration
  • Feel free to play around with the ingredients to see what your birds like best.

 click here to purchase!!!! 


Filed Under: Book Love, Homesteading, Natural Living Tagged With: book, chickens, cows, goats, holistic livestock care, homesteading, natural chicken feed, natural homesteading, natural teat dip, natural udder balm, urban farming

5 Ways to Start Homesteading (No Matter Where You Live)

October 2, 2013 by Jackie Ritz 3 Comments

Today I’m excited to share this guest post from Colleen of Five Little Homesteaders!  I love her blog for it’s encouragement of self-reliance, DIY posts, and great homesteading ideas! Please head over to check out her amazing blog and don’t forget to follow Five LIttle Homesteaders on Facebook!  Please welcome, Colleen! -Jackie @ The Paleo Mama! 

Greetings! I’m so excited to be guest posting over on The Paleo Mama today. My family and I are currently living the homesteading lifestyle in Phoenix, Arizona. I blog about our trials and successes on my blog Five Little Homesteaders. I love reading about Jackie’s homesteading adventures and I especially loved her recent post on goat-milking.

We don’t have goats on our little homestead but we do have chickens – six of them. And you might be surprised to hear that when I say little homestead, I mean LITTLE. We currently live on a .15 acre lot near downtown Phoenix.

You see, we’re urban homesteaders and we make the most of the little bit of land that we have – gardening and raising our small flock of chickens. I’m here today to assure you that you CAN homestead. You may think your lot is too small and that you don’t have enough time, but after reading this post, I hope you’ll feel like there is something you can do to get yourself a little closer to the land, no matter how small that piece of land is.

5 Ways to Start Homesteading (No Matter Where You Live):

1.  Build a raised bed.

paleomama5

Building a raised bed garden in your back (or front) yard doesn’t have to be expensive or time consuming.  My husband has built us all manor of raised beds but one of my favorites is incredibly easy and cheap, costing just $30!  Raised beds are great for the beginning gardener because they allow you to control the soil quality more easily and don’t require any tilling or special knowledge.

2.  Get a good scratch-cooking cookbook.

Cooking from scratch is a habit that many homesteaders embrace.  Start with getting a good cookbook and quality ingredients. (I realize many/most of you who read this blog follow the Paleo diet and probably already cook most of your own food from scratch, so there you go!  You’re on your way to being a homesteader!)

3.  Start a compost pile.

Rather than throwing out your food waste or grass clippings, toss them into a pile in your backyard (preferably in a compost bin) and start a compost pile.  It is pretty simple to do and you can use the compost to enrich your garden each season.

4.  Learn to preserve your surplus. 

Once you start your garden, you’ll find that you quickly begin getting more of certain crops than you know what to do with.  This is the perfect time to learn to preserve.  It can be as simple as freezing produce properly or as complicated as learning to pressure can.  Start simple and ask for help.  I learned to water bath can by having my mom over one morning and she walked me through it.  Now I’ve got it down and actually really enjoy doing it!

5.  Get chickens!

Not every city allows them but more and more cities are opening up to the idea. Check local ordinances and if you are allowed, get a couple of chickens. Eggs that you raise in your backyard cannot be beat.  In Phoenix we are allowed to have up to 20(!) chickens.  We currently have 6, but I’m hoping to raise that to 10 this spring.  Start small and don’t be intimidated.  At the end of the day, my chickens are easier to care for than our family dog.

In the past several years my family and I have become increasingly more self-sufficient – living off our land more and more.  It has been incredibly rewarding for us and educational for our children.  I think you’ll agree, if you give it a try!

You can continue to follow homesteading endeavors on my Facebook page and my blog! 

Headshot - CAnderson


Colleen is a special education teacher turned stay-at-home mom to three little ones – ages 4, 2, and 1. Her days are filled with laughing and tears, joys and frustrations, toddlers and babies.  The basics of gardening were gifted to her by her mother and father starting at a very young age.  Through their homesteading adventures, she hopes to lead her family down the path of leading a more sustainable, intentional, and full life.


Shared on The Prairie Homestead

Filed Under: Living Sustainably, Natural Living Tagged With: canning, chickens, compost, gluten-free, homesteading, paleo, primal, urban homesteading

« Previous Page
Next Page »

Primary Sidebar

  • Facebook
  • Instagram
  • Pinterest
  • RSS
  • YouTube

Hi, I'm Jackie Ritz and welcome to The Paleo Mama! I'm a published author, certified herbalist, and voracious researcher of natural medicine and nutrition. I'm glad you're here and I hope you stick around for awhile!

Recent Posts

  • When God Says Pause: Why I Took a 5-Year Break from My Online Business
  • How to Quit Facebook but Keep Your Business Profile
  • Leaving the City for the Country
  • Natural Way to Heart Health

MEAL PLANS

Biblically clean meal plans that are for those love to cook real food

Read More

Footer

Our Blog

The Paleo Mama blog provides simple answers for healthier families through research, tutorials, recipes, and simple remedies for daily needs!

  • Health
  • Essential Oils
  • Recipes
  • Remedies
  • Natural Living
  • Meal Plans

Stick around!

You’ll get instant access to a library of natural remedies and real, paleo food, including our ebooks and free guides we send out.

  • Home
  • Disclosure/Disclaimer
  • Privacy Policy
  • Advertise
  • Contact Me

Copyright © 2025 · Wellness Pro on Genesis Framework · WordPress · Log in