• Skip to primary navigation
  • Skip to content
  • Skip to primary sidebar
  • Skip to footer

The Paleo Mama

Homegrown and Handmade

  • About
  • Blog
    • Podcast
  • Meal Plans
  • Essential Oils
  • Our Farm
    • Great Pyrenees Puppies
    • Goats
      • Goats for Sale
      • Goat Sales Policy
      • Nigerian Dwarf Bucks
        • Ranchocabra Lunar Eclipse

My Recipes

Two-Minute Paleo Mug Brownie

January 18, 2013 by Jackie Ritz 40 Comments


I found this recipe online today and it looked sooooooo good. I wanted it soooo bad so I thought I would attempt to make a Paleo-version. The first I tried to make it, it tasted good but it was kinda oily and runny. This may have been because I didn’t use white flour…I used almond flour which has natural oils and doesn’t soak up liquid like white flour. I don’t know. Whatever the case may be, I tried again. This time, I used an egg, which the author was trying to avoid, but it came out great and hit the choco-G-spot.

Also, since I am learning how to take food pictures with my new camera, I used some of the author’s staging ideas for this recipe!

Two-Minute Mug Brownie

1/4 cup Almond Flour

1/8-1/4 cup Coconut Sugar

2 TB unsweetened cocoa powder

Pinch of salt

2 TB of beaten egg

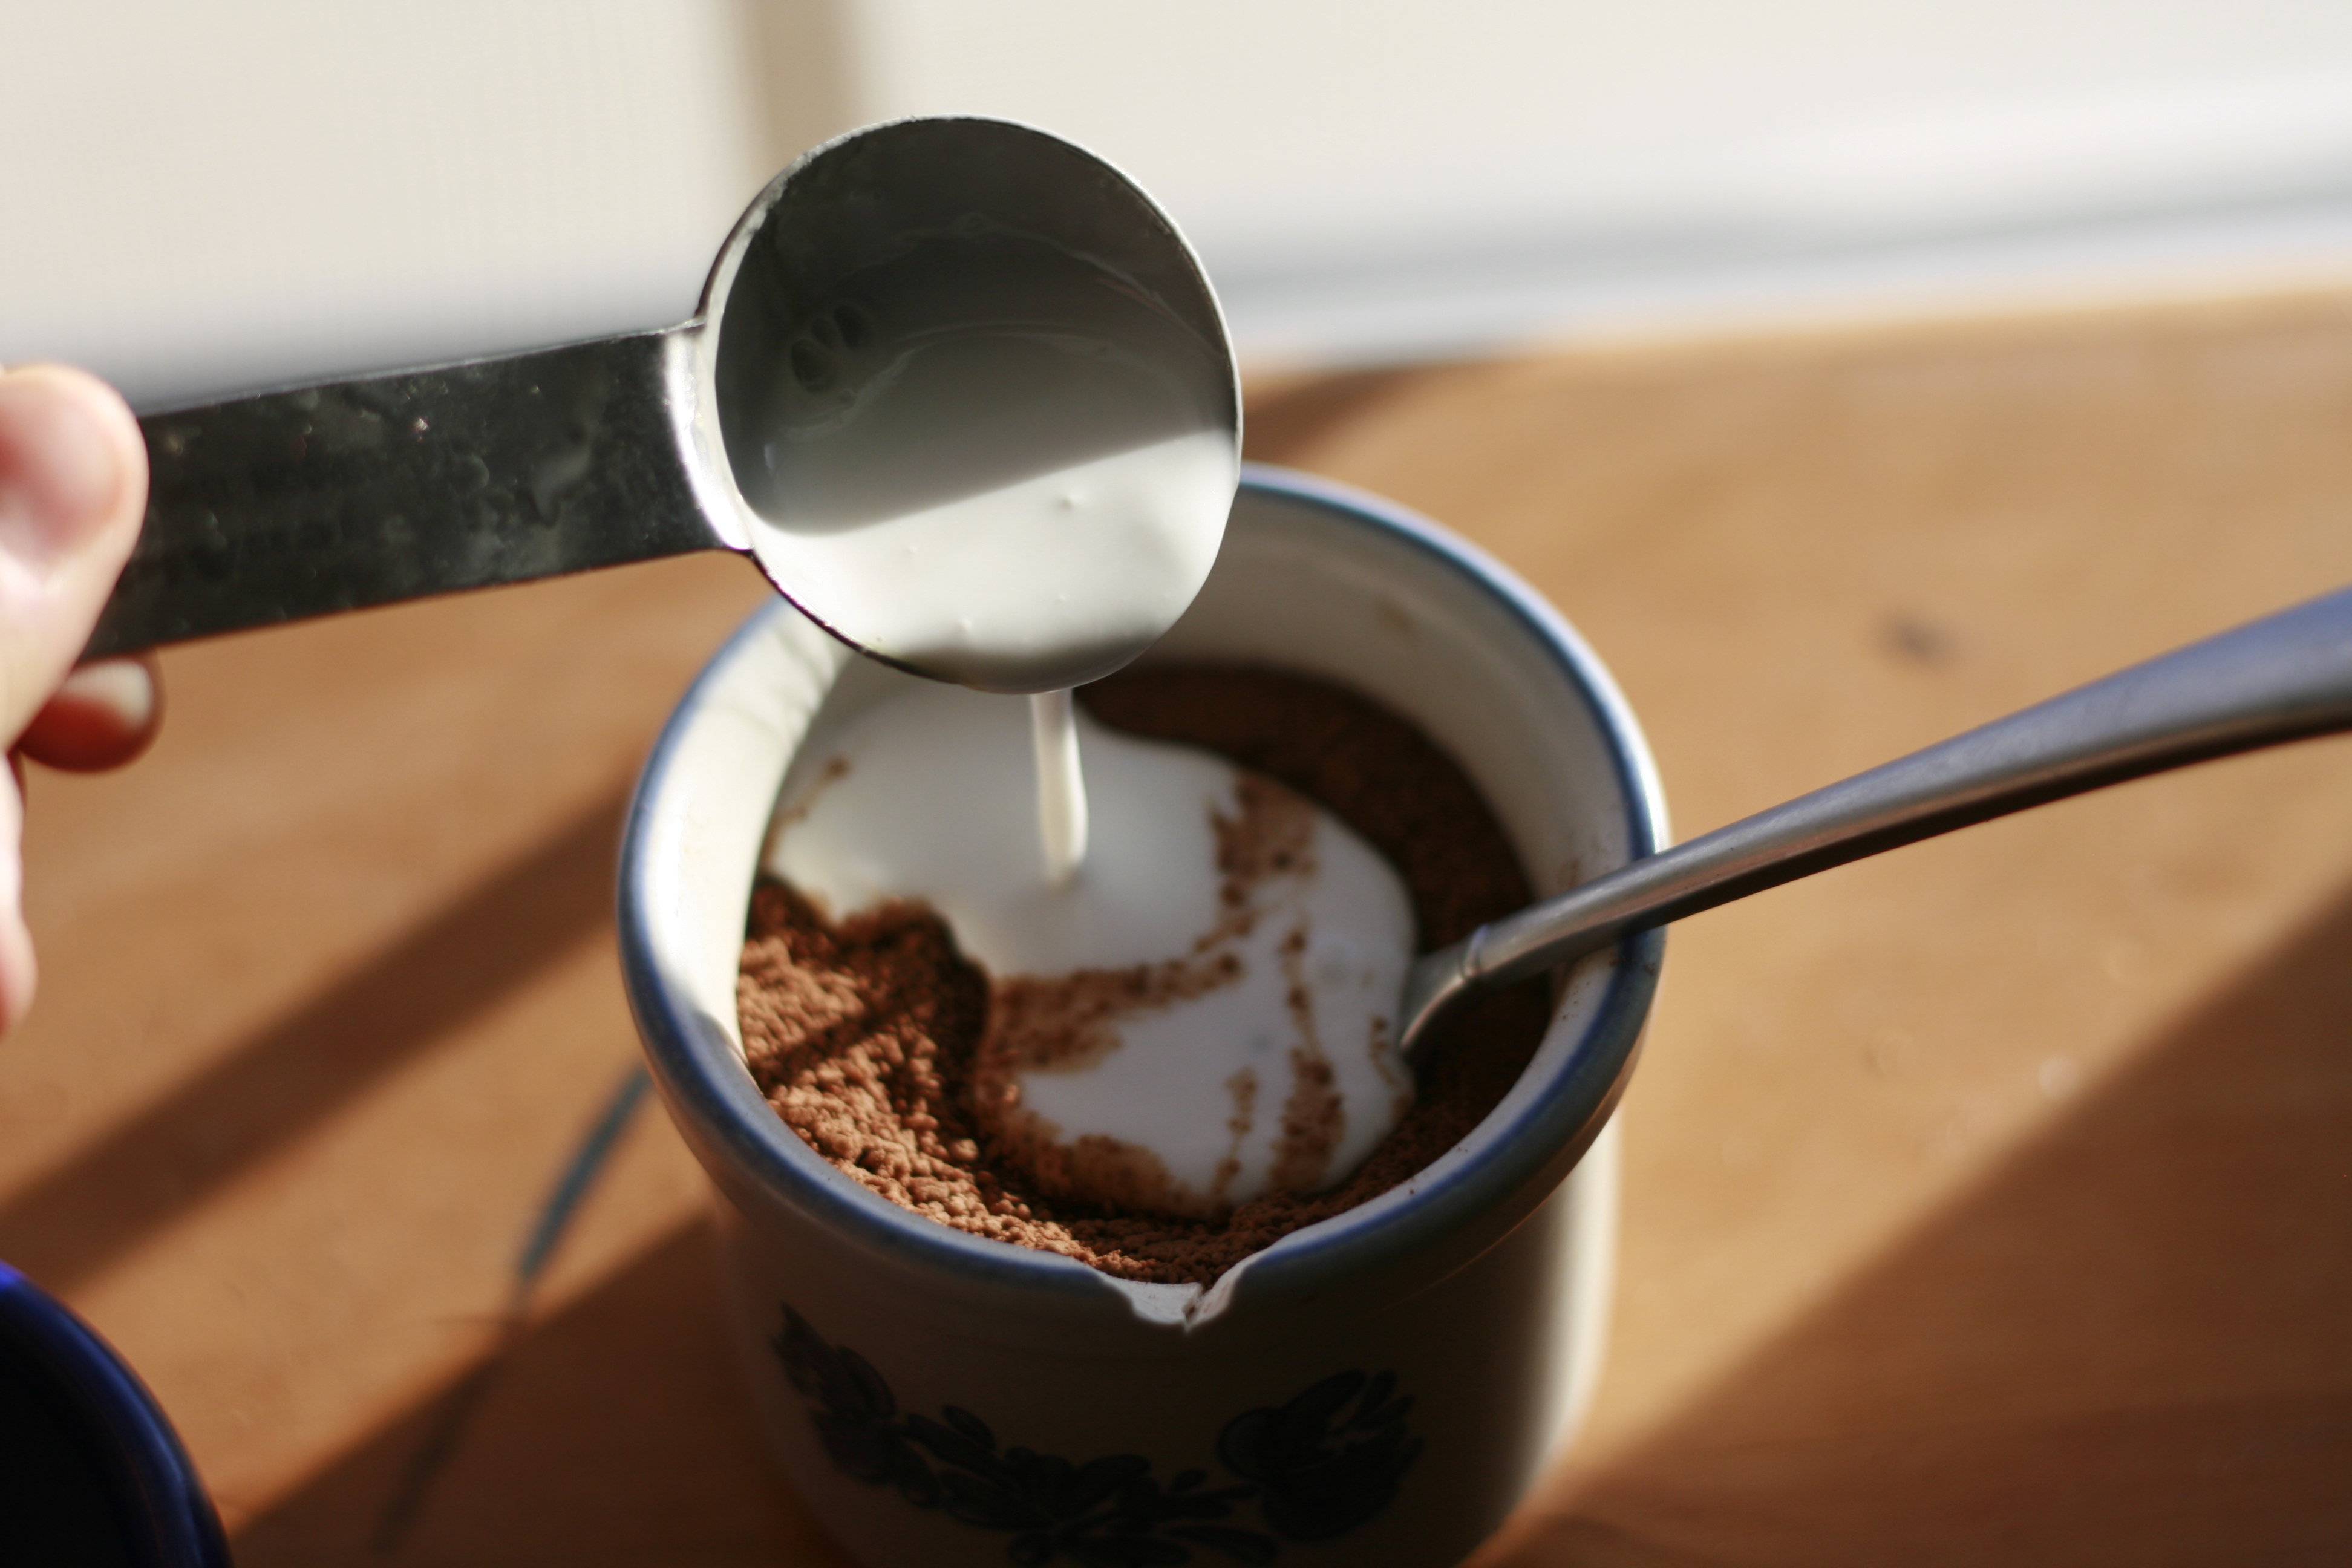
2 TB of coconut milk, coffee, or water

Directions:

Stir together your almond flour, coconut sugar, cocoa and a pinch of salt in a ramekin.

_MG_2643

Stir in the egg and milk or coffee.

_MG_2716

Stir it all together until you have a thick, chocolatey paste.

_MG_2687

Microwave it for a minute. If you have a really powerful microwave you may want to check after 30 seconds. It’s done when it is puffed up and springy to the touch…but you still want it a little gooey – like a good brownie should be!

_MG_2735

This makes one ramekin. You can eat it all yourself or you can share it! I was nice and shared it….this time!

***Don’t have coconut sugar???

Use 2 TB of honey or maple syrup and ONLY 1 TB of milk/coffee!!! ***


_MG_2706

Filed Under: My Recipes, Uncategorized Tagged With: 2 minute brownie, dairy free, gluten-free, sugar free brownie

What the Heck is Kombucha?

January 17, 2013 by Jackie Ritz 76 Comments

Over on my Facebook page, I am always talking about Kombucha. I am a Kombucha addict. I love it. I love the taste, the smell, and the squishy SCOBY’s that I use to make the drink. It is my drink of choice.

_MG_2374

I get so many messages and comments from people who have never heard of it. Well, here is my little bit of knowledge on the health benefits of Kombucha.

Kombucha is an ancient elixir that has a history of starting in China and, somehow, made it’s way over here to America. It is a sort of “tea” that is infused by fermentation with beneficial bacteria, probiotics, and yeast and is great for your gut and overall health. It is made from either using black or green tea, and some herbal teas, some sugar (which the yeast feeds on), and lots of patience.

The SCOBY (“symbiotic colony of bacteria and yeast”) looks like a flat mushroom but solid and squishy. This SCOBY is actually alive and feeds on the white sugar that is in the tea. Wait, WHITE SUGAR?!?! Yes, plain old white sugar. It may be the only thing I buy white sugar for, but my SCOBY’s thrive on it. After fermentation, which usually takes around 7-10 days, the SCOBY is then taken out of the tea and the tea is then bottled and refrigerated and ready to drink! Or, you may choose to do a second fermentation which is just for a few more days. The purpose of the second fermentation is to create more “fizz” (Kombucha is naturally carbonated because of the fermentation) and, also, a time to add any kind of fruit flavorings that you may want to the tea. My flavoring of choice is Pom juice. I add a few ounces to every 16 ounce jar and it gives it a delicious taste.

_MG_2376

Taste. What does it taste like? I get this question all the time and it’s really hard to describe the taste. To me it taste like something between a hard cider and champagne. But, no, Kombucha is not alcoholic.

Why do I drink it? Well, first of all, I’m cheap. I am a self-proclaimed cheapo and the cost of probiotics is just ridiculous. The cost to make a gallon of Kombucha is around $1! The cost to buy a 16 ounce bottle of Kombucha from a health food store is $4!!! The cost to buy a bottle of probiotics is $40! Hmmm, tough decision but I’ll stick with my cheap Kombucha!


How I make it:

Step One: Boil 2 quarts of water and add 3 family-size tea bags and 1 cup of white sugar. You can use organic sugar and organic tea if you would like, but it is not necessary.

Step Two: Once the tea is cooled (not hot, you could kill your SCOBY) add it to a gallon glass jar. Must be glass. Then add 2 more quarts of filtered water and 1 cup of starter liquid (which should have come with your new SCOBY).

Step Three: Cover the jar with a coffee filter or cloth and set aside to ferment for 7-10 days. Taste it every other day or so and you will learn about the process of how the SCOBY alters the taste.

Step Four: Take the SCOBY and the new baby that may have formed on the top of the liquid and put them aside.

Step Five: This is personal preference now, as I mentioned above. Either bottle it up and put the Kombucha in the fridge or do a second fermentation. I don’t do a second fermentation. I just bottle it up, add a few ounces of Pom juice to the bottles and put them in the fridge. Make sure you keep 1 cup of the Kombucha to put in the next batch. This is your starter liquid which will get the next batch going.

Step Six: Repeat steps 1-5 and drink up!

Where can I get Kombucha?

You can either buy Kombucha at health food stores, or you can easily make it yourself at home!

Click here to get Kombucha cultures to make at home.

***I’ve been told that you should start slow with drinking Kombucha because it is a natural detoxer. I started drinking a cup a day and then gradually increased it. I, now, drink about 32 ounces a day and enjoy every sip of it!***

Filed Under: About Me, My Recipes Tagged With: fermentation, health drink, Kombucha, probiotics, SCOBY

Spanish Burgers with Caramelized Onion & Chile Relish and Roasted Red Pepper Sauce

January 15, 2013 by Jackie Ritz 6 Comments

Whew, it is a mouthful, but so is this incredible, juicy, decadent burger. This is the burger to impress. Wanna shock the socks off your non-Paleo, skeptical friends? Make this immediately!!!

DSCN6259

Roasted Red Pepper Sauce
1/2 cup of thickened coconut milk (the thick part of an unshaken can of coconut milk) or homemade mayo
12 oz. jar of roasted red peppers or roast 3 red peppers beforehand
1 ts. salt
1/2 ts. pepper

DSCN6239

Scoop the thickened coconut milk or the homemade mayo into a blender. Add drained roasted red peppers, salt, and pepper. Process till smooth. Set aside in refrigerator for 30 min. to a few days so flavors can deepen.

Caramelized Onion Chile Relish
2 TB of olive oil
2 large sweet onions, finely diced
16oz of roasted/seeded green chiles
1/2 cup of coconut sugar>

salt and pepper to taste

DSCN6246

Eat 2 TB of olive oil in a pan over low/medium heat. Add the diced onions, salt and pepper. Add green chiles and coconut sugar. Slowly cook for around 15-20 minutes until the onions are soft and are a deep, caramelized color. Set aside.

Burgers
1 1/2lbs of ground beef
1/2lb of chorizo
1 TB of homemade taco seasoning
1 medium onion, finely diced
Portobello caps (optional for “bun”)
optional toppings: tomato, lettuce, ketchup, mustard, homemade mayo, avocado or guacamole, fried egg, pickles and cheese (if you do dairy)

Add all the ingredients to a big bowl. Get in there with your hands and mix everything up. Form into 5-6 patties. We  like to set the raw patties in the fridge to harden up for about 30 minutes before throwing on the grill. Place the burgers on a hot grill and cook to your desired doneness. However, since you are using chorizo, I recommend you cooking them to medium-well (8 minutes per side). If you are grilling the Portobello caps, throw them on and cook about 3-5 minutes per side.

Assemble
Top the burger with caramelized onion relish, roasted red pepper sauce, and another toppings you would like! Put between Portobello caps or 2 big lettuce leaves! ENJOY and feel free to lick the plate!

DSCN6255

Other recipes you might like:

Ground Beef Stroganoff

Asian Lettuce Wraps

Chile Pork Tacos


Filed Under: My Recipes Tagged With: burgers, dairy free, gluten free burger, paleo, paleo ground meat recipe, roasted red pepper, spanish burgers

Gluten/Sugar/Dairy Free Pie Crust

January 12, 2013 by Jackie Ritz 3 Comments

Thanksgiving morning my mother and I realized we forgot to put a dessert on our menu! We decided to make a my mom’s Pumpkin Pie but we had never had a Paleo pie crust. So, we put our two brains together and made a pretty darn good pie crust! Even my “not-so-Paleo” family members raved about how tasty it was and we have made it a few times since!

The recipe we came up with is too good not to share. I made it again this morning and paired it with Elana’s Pantry Apple Tart. I am in Paleo heaven!

Paleo Pie Crust

1 cup of almond flour 
¾ c. shredded coconut 
2 TBS. coconut oil
1 egg
Pinch of salt
½ c. chopped walnuts

***preheat oven to 350 and grease a pie pan

1) Process almond flour, coconut, and walnuts in a food processor by pulsing until everything becomes crumb-size. Add egg to the food processor and process until mixed in. Then drizzle the coconut oil and process on low until the mixture forms a nice, smooth ball.

DSCN6120

DSCN6121

2)Press dough into large size pie pan or 8×8 glass dish. It will press in easier if you use either saran wrap or tinfoil over the mixture and press down on the foil to press evenly around the pan.

DSCN6122

3)Bake the crust at 350 degrees for 10-15 minutes until the crust is golden brown. Remove from oven. Cool five minutes, then add the pie filling or cheese cake mixture and bake according to directions.

DSCN6138

DSCN6139

***If you decide to make the Apple Tart: the directions say not to cook the crust first but to cook the apples and the crust all together. So, you don’t need to pre-cook the crust for this recipe***

Filed Under: My Recipes Tagged With: apple tart, dairy free pie crust, gluten free pie crust, paleo, paleo pie crust, sugar free

25 of My Favorite Main Dish Paleo Meals

November 15, 2012 by Jackie Ritz 15 Comments

I thought I would put together a list of the recipes that my family loves! These are tried-and-true! We eat these pretty much on a rotation or using whatever meat we have stocked in the freezer!

1) Balsamic Mustard Chicken – This tops my list because this chicken is unbelievable. We serve it over spinach and drizzle the juice over roasted veggies. You have to try this!!!

2) Chicken Nuggets – my kids love this…ok, so do us adults 🙂

3) Thyme Roast Chicken – I am always looking for whole chicken recipes because I buy whole chicken in bulk when it goes on sale. This chicken is so delicious!

4) Lime Roast Chicken – another whole chicken recipe that my family loves. The juices are so good you can drink them!

5) Asian Chicken Lettuce Wraps – this is a recipe that I made Paleo. We love it!

Asian Lettuce Wraps

6) Damn Fine Chicken – OMG, this chicken is so good. We make it with virgin red palm oil.

7) Spicy Caramelized Peach & Leek Stuffed Bacon Wrapped Chicken – whew, yes it’s a long title but it is out of this world! The sauce is delicious!

8) Meat & Spinach Muffins – We love these! They are a great protein to have on hand when you are in a hurry.

Meat & Spinach Muffin on the right

9) Ground Beef Stroganoff – tired of burgers? Give Beef Stroganoff  a try!

10 ) Stuffed Poblano Peppers – these are sooooooo delicious! Not spicy, and our kids eat it!

11) Firecracker Tuna Salad – another amazing recipe from The Clothes Make the Girl!

12) Almond Bread – I know this isn’t a main dish…but this is our go-to bread recipe. It’s the consistancy of cornbread and a great side to any soup or stew! I just had to share it because it’s that time of the year where there’s nothing better than a warm piece of bread and a hot bowl of soup!

13) Creamy Chicken Tomato Crockpot Soup – this is so easy and simple and yet so tasty! I always have lots of bone stock that I make from our whole chicken bones. This soup tops my list!

14) Chicken Noodless Soup – just in time for the chilly months! This soup will warm you to the bones!

15) Paleo Butternut Squash Lasagna – this is soooooooooooooo freakin good! I make it quite often. You won’t even miss the lasagna noodles! Trust me, my Italian husband gobbles this down!

16) Sausage Stuffed Apples – sausage and apple just go perfect together!

17) Apple & Bacon Stuffed Pork Chops – finger licken good! You won’t be disappointed with this. I’ve even make it with chicken breast and it’s just as good!

18) Spinach Stuffed Braciole – mine never comes out pretty, but it tastes amazing! My mom introduced me to this recipe! So good!

19) Pepper Crusted Steak – delicious! We had it over spinach and loved it!

20) Zucchini & Sweet Potato Frittata – we have this for breakfast, for dinner…who cares! It’s so good and I love sweet potato!

21) Scotch Eggs – the Scottish got it right when they created these little boogers! Another great breakfast or quick snack if you are on the go a lot!

22) Bacon Egg Cups – so cute and easy! Great when you are in a rush and need to get ready while the oven cooks for you!

23) Mexican Hash – my husband loves this hash! I use it with ground beef sometimes instead of chorizo and it’s delicious!

24) Buffalo Chicken Chopped Salad – ever get that chicken wing craving? This salad will satisfy it!

25) Lemon Garlic Crockpot Chicken – another favorite whole chicken recipe! But this one you can throw in the crockpot and be done with it!

Filed Under: My Recipes Tagged With: beef, chicken, crockpot, paleo

Mama Jo’s Italian Meat Stuffing

November 2, 2012 by Jackie Ritz 5 Comments

I grew up on Mama Jo’s stuffing! Mama Jo was just that…a second Mama to me growing up. She had that amazing Italian laugh that filled your heart with joy!

Mama Jo was the one responsible for cooking for all the major functions at my church growing up. Whenever I smelled food, Mama Jo was the one who was sweating behind the burner and cooking for the hundreds. Nothing she ever made was gross. I loved watching her move around in the kitchen; a dance that only a true cook had mastered.

My love for cooking, undoubtedly, came from watching Mama Jo.

Every Thanksgiving I knew that Mama Jo was going to bring over her unbelievable meat stuffing. I must have been Paleo-at-heart as a child because I never did like bread stuffing. My daddy loved putting cranberry sauce on top of this meat stuffing. This cranberry recipe looks delish and so does this one.

Mama Jo gave me permission to share her recipe. I hope you love it just as much as I do! It makes a big pot of stuffing, so plenty to share with a big group.

Mama Jo’s Italian Meat Stuffing (Primal)

3 1/2 lbs of ground beef

3/4lbs of ground sausage

1 bunch of celery hearts (chopped fine)

2 medium onions (chopped fine)

2 cups of parmesan cheese

1 cup of pine nuts

1/2 cup of parsley

salt and pepper

1/2 cup of butter

3 splashes of my secret ingredient Red Boat Fish Sauce OR 2 ts of garlic salt

Instructions:

Brown the ground beef and the sausage in a large pot (my dutch oven was perfect for this). When brown, remove the meat and drain.

Melt 1/2 cup of butter in the same pot. Saute the celery, onions, and garlic until soft and translucent.

Add the meat mixture and all the other ingredients. Please don’t skimp on the pine nuts! These are what make this recipe so awesome!

This is where you add the secret ingredient. This was the only thing I had to find a substitute for. The real recipe called for Accent which isn’t necessarily Paleo, so I had to research this a bit. Accent is a flavor enhancer, so I thought, YES! My Red Boat Fish Sauce is my favorite enhancer.

I add it to every meat dish I make and it doesn’t make it taste fishy. It gives the meat flavor more depth! I added about 3 quick splashes to this recipe. If you don’t have fish sauce, or the thought just grosses you out (although you really should give it a try!) you could just add a few teaspoons of garlic salt for added flavor.

Mix everything together very well and then bake until heated through.

Enjoy and Happy Thanksgiving y’all!

Enjoying the stuffing with avocado!

Other recipes you might like:

Ground Beef Stroganoff

Asian Lettuce Wraps

Spanish Burgers

Chile Pork Tacos


Filed Under: My Recipes Tagged With: breadless stuffing, italian meat stuffing, recipe, red boat fish sauce, thanksgiving

« Previous Page
Next Page »

Primary Sidebar

  • Facebook
  • Instagram
  • Pinterest
  • RSS
  • YouTube

Hi, I'm Jackie Ritz and welcome to The Paleo Mama! I'm a published author, certified herbalist, and voracious researcher of natural medicine and nutrition. I'm glad you're here and I hope you stick around for awhile!

Recent Posts

  • When God Says Pause: Why I Took a 5-Year Break from My Online Business
  • How to Quit Facebook but Keep Your Business Profile
  • Leaving the City for the Country
  • Natural Way to Heart Health

MEAL PLANS

Biblically clean meal plans that are for those love to cook real food

Read More

Footer

Our Blog

The Paleo Mama blog provides simple answers for healthier families through research, tutorials, recipes, and simple remedies for daily needs!

  • Health
  • Essential Oils
  • Recipes
  • Remedies
  • Natural Living
  • Meal Plans

Stick around!

You’ll get instant access to a library of natural remedies and real, paleo food, including our ebooks and free guides we send out.

  • Home
  • Disclosure/Disclaimer
  • Privacy Policy
  • Advertise
  • Contact Me

Copyright © 2025 · Wellness Pro on Genesis Framework · WordPress · Log in