• Skip to primary navigation
  • Skip to content
  • Skip to primary sidebar
  • Skip to footer

The Paleo Mama

Homegrown and Handmade

  • About
  • Blog
    • Podcast
  • Meal Plans
  • Essential Oils
  • Our Farm
    • Great Pyrenees Puppies
    • Goats
      • Goats for Sale
      • Goat Sales Policy
      • Nigerian Dwarf Bucks
        • Ranchocabra Lunar Eclipse

My Recipes

DIY Remineralizing Toothpaste

December 16, 2013 by Jackie Ritz 196 Comments

Six months ago I went to the dentist and found out that I had six cavities. I could not believe it. It didn’t make sense because I eat a very clean, Paleo diet. I pinpointed some of the things that caused my cavities in this post that I wrote, “How I’m Healing My Cavities Without Dentistry.” This post has received a lot of attention and I’ve received many emails and messages about various things that I’m doing to heal my cavities. Well, good news…I went for a 6 month check-up at this dentist a few days ago to see how my cavities looked and to see if the remineralizing process was working…AND…I HAVE ZERO CAVITIES!!! I healed my teeth naturally with proper diet and nutrition and I did not have to pay a hefty dentist bill to have my teeth drilled and filled!

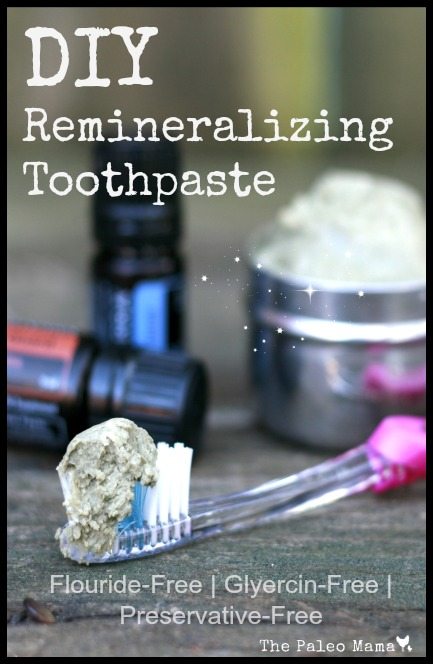
I mention in that post that I use a homemade toothpaste and because I have received so many emails about what that recipe is, I thought I would share my DIY Remineralizing Toothpaste recipe. I was having a hard time finding a toothpaste that did not have certain ingredients in them. When you are trying to remineralizing your teeth, you need to make sure you are not using a toothpaste with glycerin or xylitol in it. Glycerin coats your teeth and counteracts the remineralization process and this article explains why we don’t use xylitol. Our family avoids toothpaste with fluoride and preservatives, as well.

This recipe is great for remineralizing your teeth if you are following the Cure Tooth Decay protocol and have some cavities you are trying to reverse but it’s, also, a wonderful recipe to use just to maintain optimal oral health for your day-to-day life.

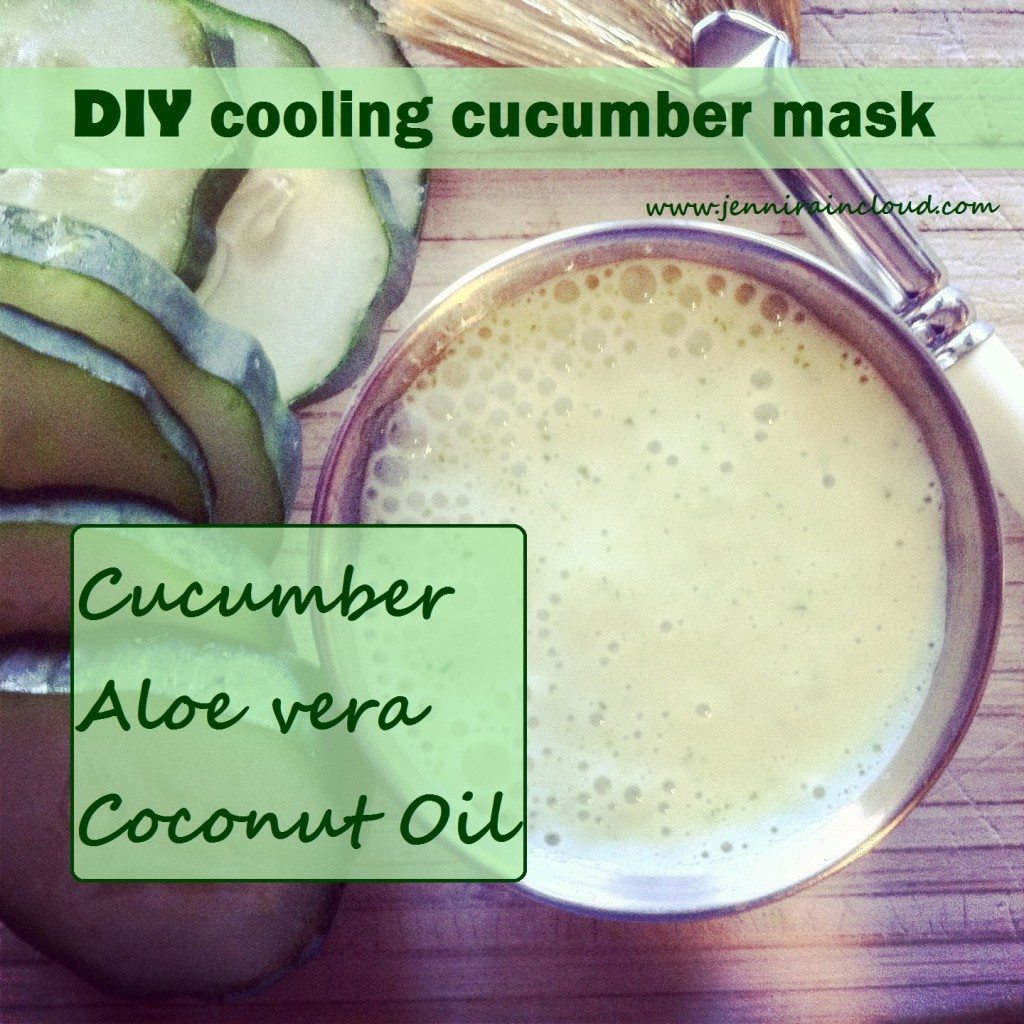
DIY Remineralizing Toothpaste:

INGREDIENTS: 

  • 1/3 cup of Bentonite Clay (where to buy)- this comes from pure sources of undisturbed deposits in the ground. What is special about bentonite clay is that it draws toxins out of the body.
  • 1/4 cup of boiling water
  • 1 Tablespoon of coconut Oil (where to buy) – coconut oil is amazing for oral health. It is highly effective with getting rid of viruses and bacteria in the mouth
  • 1/4 teaspoon of Real Salt (where to buy) – real salt is unrefined and full of natural minerals.
  • 1/2 teaspoon of REAL stevia  (where to buy)- this is the dry herb that is green and unprocessed in it’s natural form.
  • 15 Drops of Protective blend Essential oil (where to buy) 
  • 10 Drops of Peppermint Essential oil (where to buy) 

DIRECTIONS:

  • Step One: Put your bentonite clay in a bowl. Heat the water on the stove and then stir in the coconut oil till it is melted.
  • Step Two: With a hand mixer, mix on medium speed the bentonite clay and the water/oil mixture till blended through.
  • Step Three: Add the salt, stevia, and essential oils and continue to blend until it is completely blended.
  • Step Four: Keep in a covered jar!
  • *The mixture will harden a little bit as it sits because of the coconut oil. This makes it easier to add a bit to your toothbrush when you brush.

For more information on healing your cavities naturally, read this post and check out Cure Tooth Decay!

Want a kid-friendly version of this recipe? Check out my DIY Remineralizing Tooth Powder for KIDS! 


DIY Toothpaste

Filed Under: essential oils, My Recipes, Natural Living Tagged With: bentonite clay recipes, DIY remineralizing toothpaste, essential oils, gluten-free, heal cavities naturally, homemade toothpaste, paleo, primal, real salt

Bacon Pancakes

December 12, 2013 by Jackie Ritz Leave a Comment

bacon pancakes 3

We often eat bacon. We often eat pancakes. So, I thought, “Hmm, how can I put these two delicious things together?” And this is what I came up with. Bacon in between the pancakes!!! And let me tell you, it’s like a bacon-y BOOM when you bite into them! I hope you love these Bacon Pancakes as much as I do.

Bacon Pancakes 

INGREDIENTS:

  • Your favorite pancake batter (this is our favorite)
  • Bacon
  • Butter or Ghee
  • Maple Syrup

DIRECTIONS:

1. Cook the bacon on a cast iron pan or griddle (could not live without my griddle!).

baconpancakes1

2. Remove the bacon and cut the strips in half. Scoop off some of the bacon fat and reserve it to make one of these 20 recipes using bacon fat. Repeat: DO NOT throw the bacon fat away. It’s good stuff! Leave a little bacon fat on the pan or griddle to coat the pancake batter. You could leave it all on if you want!

3. Pour a little pancake batter onto the pan or griddle. Push a piece of bacon into the batter. Cover the bacon with more pancake batter.

bacon pancakes 2

4. Flip when the bottom is lightly browned. Then cook the other side.

5. THAT’S IT! This is the easiest recipes every! Top with butter/or ghee and maple syrup!

Filed Under: My Recipes Tagged With: bacon fat, bacon grease, bacon pancakes, breakfast recipes, gluten free pancakes, paleo, primal

DIY Cooling Cucumber Mask

December 3, 2013 by Jackie Ritz 13 Comments

I started my natural living experience nearly 5 years ago! I remember how daunting it was to get rid of all the chemicals in my house and how overwhelming it was learning about toxins in my skin care products. I was so happy to follow so many wonderful bloggers who generously shared their home remedies and recipes. After 5 years, I still feel like an amateur when it comes to creating DIY beauty products for myself or my blog! I love the learning experience, but when someone like Jenni from Jenni Raincloud comes along and offers to do a guest post for a DIY Cooling Cucumber Mask…I am thrilled to allow it! So, please welcome Jenni!  – Jackie 

Hi everyone!  I’m Jenni, from Jenni Raincloud Homebody Extraordinaire!  I am an aesthetician and have been in the skin care industry for over a decade!  After taking a break from my career to start a family I started realizing how my favorite skin care products were full of false promises and CHEMICALS!  I started to search for alternatives to my favorite lines and came up with very few choices of skin care companies that were charging an arm and a leg for organic, pure products.  So, I decided to take control and make my own!  I immediately fell in love with the wonders of nature in skin care.  My blog is all about my adventures in do it yourself skin care!  Thanks for having me and I hope you enjoy today’s post!
2013-11-12 15.47.58 HDR-1
Anyone have issues with dark circles, crows feet, and puffy bags under your eyes?  My hand is up.  Let’s just get real for a second-Sometimes drinking 10 tons of water a day just doesn’t happen.  Sometimes you just don’t get a full night’s sleep-baby is screaming, 5 year old had a bad dream, husband snores, dog is trying to get underneath you, bladder is shot (thanks Sofie and Heidi for that) weird noises outside, cell phone mysteriously vibrates-you get the picture, the older you get the less you sleep through stuff, but that’s a whole other post, huh?!  More often then not, stress is a daily annoyance-that breeds and multiplies itself while reeking havoc on our bodies.  These annoying issues all contribute to worn out, tired eyes.  So, let’s fix it.  Let’s take 10 minutes to do something for ourselves?  It’s easy and relaxing-You in?

2013-11-12 15.37.13 HDR
I always love to use food on my face.  Seriously-nature is full of remedies.  This is an easy way to relax those tired eyes with out adding chemicals to your body or breaking the bank!  All you need is a cucumber, coconut oil and aloe vera gel!  If you really want to get fancy, Carrot Seed Oil is my go to essential oil for the eyes.  It regenerates and renews-I talk more about it in my DIY Anti Wrinkle Eye Stick post. Now, I like to not waste.  So, I use a whole cucumber, 2 TBSP of coconut oil and 1/4 cup of aloe vera gel.  I put it in an ice cube tray and freeze (hence the cooling part).  This will give you many applications without wasting your cucumber and will also save time and effort in the long run!

2013-11-13 12.10.03 HDR-2

 Cooling Cucumber Mask

  • 1 large cucumber
  • 2 TBSP Unrefined Coconut Oil
  • 1/4 cup Aloe Vera Gel
  • 8 drops of Carrot Seed Essential Oil (optional)

Blend all ingredients together until all ingredients form a smooth cream.  Transfer to ice cube tray and freeze.  You might hold a bit back and pop it in the fridge so you can use your mask now!

Apply all around the eyes.  Leave on for 10-15 minutes.  It feels HEAVENLY!  So refreshing-you can just feel the puffiness disappearing!  If you are using the Carrot Seed oil be very careful-if it gets in your eyes it will burn.  If the oil gets in your eyes, rinse out your eye with cool water immediately.

2013-11-12 15.42.47 HDR-1

So there you have it!  A fast and easy remedy for those pesky tired, puffy eyes!

Cucumbers rock!

2011-08-14 09.37.27-1

Jennifer lives in Edmond Oklahoma with her husband and 2 daughters. She has been in the skin care world for over a decade. She believes beautiful skin comes from the inside out. In order to achieve youthful skin a healthy lifestyle must be in place. If you can’t eat it, don’t put it on your skin are her words to live by! She sells her skin care products on Etsy, runs her “at home spa” for close clients and blogs full time. She is happiest staying home with her family and cooking up healthy skin care products in the kitchen! You can follow Jenni Raincloud on Facebook, Pinterest and Twitter!

Filed Under: essential oils, Guest Posts, My Recipes, Natural Living Tagged With: cooling cucumber mask, DIY beauty, DIY Cucumber mask, paleo, primal, toxic free

Sushi at Home: Tuna Kobachi

December 2, 2013 by Jackie Ritz 3 Comments

Tuna Kobachi is my favorite dish to get at a Sushi restaurant. Unfortunately, it’s really hard to find and many Sushi chefs don’t know how to make it. If you like Sashimi, you are going to love this dish! It usually comes as an appetizer on a bed of sliced cucumbers or avocados. I love avocados with it cause it just compliments the flavor.

For the tuna, you want to look for wild-caught tuna. I buy mine at Fresh Market and it comes labeled, “Sashimi Tuna” or “Sushi-Grade“. Just make sure it’s wild-caught and you should be good to go!

The Asian spice that goes with this, I found at a local Asian store. It’s called shichimi togarashi and the ingredients include red chili pepper, orange peel, sesame seeds, Japanese pepper, ginger and seaweed. If you don’t have a Asian store near you, you can order it for pretty cheap on Amazon (click here to see it).

You are going to love this dish! For more awesome Paleo-friendly recipes, checkout these Spicy Tuna Rolls by Yuppie Farm Girl and these Salmon Salad Handrolls by Primally Inspired!

Tuna Kobachi

Ingredients: 

  • 3 Tuna Steaks (wild-caught from a local source)
  • 2 TB of Sesame Oil (if you like spicy, you can do a blend of regular sesame oil and HOT Sesame Oil)
  • 1 teaspoon of Togarashi spice 
  • Sprinkle of Sesame Seeds (Black or Natural) – I do a little of both.
  • One bunch of green onions, cut to the white part.
  • Coconut Aminos (Paleo soy sauce) to dip.
  • Squeeze of lemon juice
  • OPTIONAL: Fish Roe/Caviar

**I find most these ingredients for cheap at a local Asian store**

Directions: 

  1. With a really sharp knife, cut the tuna into small chunks. Toss in a bowl.
  2. Add the green tips of the onions, sesame oil, togarashi spice, and sesame seeds.
  3. Taste and adjust seasonings. If you like it spicy, add more togarashi spice.
  4. Squeeze a little lemon juice over the Tuna.
  5. Enjoy sliced cucumbers or avocados on the side and dip in coconut aminos!

TunaKobachi2

Tunakobachi3


Filed Under: My Recipes Tagged With: gluten-free, japanese paleo, paleo, paleo sushi, primal, sushi recipes, tuna kobachi

Soothing Elixir for Cold and Flu Season

November 25, 2013 by Jackie Ritz 36 Comments

The moment I feel myself getting the sniffles, I grab a few lemons, some ginger, some green tea, cinnamon, and some local, raw honey and I make myself this Soothing Elixir for cold and flu season.  It’s so deeply nourishing and easy to make and helps to boost immunity. 

You can make it in the crockpot and let it simmer all day, ladle a hot glass when you want, or you can make it on the stovetop. Either way works great and there are many “add-ins” you can put it in to add more nutrition.

Soothing Elixir for Cold and Flu Season

Ingredients: 

  • 2 lemons, sliced in circles
  • 8 echinacea tea bags (I use this tea)
  • 3 cinnamon sticks (I use these sticks)
  • 2 inch piece of ginger, sliced thin
  • 1/4-1/2 cup of raw apple cider vinegar (I use this one)
  • 6 cups of water
  • Raw Honey
  • OPTIONAL: turmeric, coconut oil, or gelatin.

_MG_8112

Instructions: 

  1. Pour the water in a pot and bring to a boil.
  2. Add the lemons, ginger, tea bags, and cinnamon sticks. Cover and let steep for 20-30 minutes.
  3. Pour the apple cider vinegar into a pitcher or a large half gallon mason jar .
  4. Dump the tea into the mason jar. You can keep the lemons and ginger in, but remove the tea bags.
  5. When ready to drink, warm up, and add in a teaspoon or two of raw honey.
  6. OPTIONAL Add-ins: tumeric, coconut oil, and gelatin.

Soothing Elixir for Colds and Flus
2017-10-25 14:54:55
Serves 8
Write a review
Save Recipe
Print
Prep Time
5 min
Cook Time
20 min
Total Time
25 min
Prep Time
5 min
Cook Time
20 min
Total Time
25 min
Ingredients
  1. 2 lemons, sliced in circles
  2. 8 Echinacea tea bags
  3. 3 cinnamon sticks
  4. 2 inch piece of ginger, sliced thin
  5. 1/4-1/2 cup of raw apple cider vinegar
  6. 6 cups of water
  7. Raw Honey
  8. OPTIONAL: turmeric, coconut oil, or gelatin.
Instructions
  1. Pour the water in a pot and bring to a boil.
  2. Add the lemons, ginger, tea bags, and cinnamon sticks. Cover and let steep for 20-30 minutes.
  3. Pour the apple cider vinegar into a pitcher or a large half gallon mason jar .
  4. Dump the tea into the mason jar. You can keep the lemons and ginger in, but remove the tea bags.
  5. When ready to drink, warm up, and add in a teaspoon or two of raw honey.
  6. OPTIONAL Add-ins: tumeric, coconut oil, and gelatin.
By The Paleo Mama
The Paleo Mama https://thepaleomama.com/

Filed Under: essential oils, My Recipes, Natural Living Tagged With: cold elixir, gluten-free, grain-free, green tea, lemon tea, paleo, primal, soothing tonic, tea for sickness, turmeric tea

Slow Cooked Pears with Lemon and Thyme

November 22, 2013 by Jackie Ritz Leave a Comment

I’m honored to have Julie from Real Fit Mama over here on my blog today sharing a simple, yet decadent recipe.  Julie loves sharing her passion for fitness, health and well-being and I’m so grateful to have her sharing a beautiful recipe with us. Julie authors an amazing book, Real Fit at Any Age, A Fitness Guide to Optimal Health from 1 to 100. Please give Julie a warm-welcome and be sure to follow her Facebook page to keep up with all she is doing! 

Slow Cooked Pears with Lemon and Thyme

pears

Simple to make, the soft warm pears will melt in your mouth.  A perfect desert for any night, they are naturally sweet and full of flavor without any concentrated sweetener.  The thyme adds just a hint of complexity, and boosts the immune enhancing quality of this dish.  Cinnamon is warming and promotes circulation.  It also helps to relieve cold from the outer layer of the body.  Pears themselves nourish the lungs and moisten the body, enhancing skin quality and large intestine function.  To dress them up, simply serve along side vanilla ice cream or top with homemade whipped cream.

All of this in a delicious dessert? Sign me up! Plus, with the slow cooker, they are so easy to make it’s just ridiculous.  Like all good desserts (in my humble opinion), these pears make an awesome breakfast too.  Slow-cooked pears with some warm homemade pumpkin bread, anyone? Or how about with a big side of bacon? Yes yes yes, please for me!

Added bonus: These pears are an adaptation of a traditional Korean cold remedy.  Cooking them fills the house with a rich soothing aroma that stokes your appetite.  With no concentrated sweeteners, they are naturally flavorful and full of health benefits.  Ready to dive in to Autumn? Here we go…

 Ingredients for Slow Cooked Pears:

  • 6 pears, medium ripe and firm
  • 1 TBS butter
  • 2 sprigs of fresh thyme
  • 2 TBS raisins
  • 1/8 tsp cinnamon
  • ¼ tsp vanilla extract
  • ½ lemon

ingredients

How to prepare:  

  1. Wash and peel pears.  Then quarter them and remove the cores.
  2. Place in a slow cooker.
  3. Mix juice of ½ lemon with vanilla extract and cinnamon.
  4. Pour over pears.
  5. Sprinkle in raisins.
  6. Add butter.
  7. Place thyme sprigs on top.
  8. Cook on low for 3 ½ or 4 hours.
  9. Serve warm.  Drizzle with juice at bottom of the slow cooker.

pearsincooker

Enjoy!

cookedpears

realfitmama

Julie de Lagarde, Real Fit Mama

Conceived in the belly of my integrative wellness practice, Real Fit Mama was born in early April 2013 as the next generation in my wellness family. I recently started writing and blogging, ready to share what I’ve learned through decades of living and nearly a decade of clinical acupuncture practice. Real Fit Mama has opened doors to allow me a more personal and intimate connection with a broad base of people, based on my experiences as a mom, Real Food eater, athlete, and acupuncturist.  My mission is to inspire and empower people to find connection, joy, and optimal wellbeing.


Follow Julie on Social Media! 

  • Blog
  • Facebook 
  • Pinterest


Twitter

Filed Under: Guest Posts, My Recipes Tagged With: crockpot pears, desserts, gluten-free, grain-free, healthy desserts, paleo, pears lemon, primal, slow cooked pears, thyme

« Previous Page
Next Page »

Primary Sidebar

  • Facebook
  • Instagram
  • Pinterest
  • RSS
  • YouTube

Hi, I'm Jackie Ritz and welcome to The Paleo Mama! I'm a published author, certified herbalist, and voracious researcher of natural medicine and nutrition. I'm glad you're here and I hope you stick around for awhile!

Recent Posts

  • When God Says Pause: Why I Took a 5-Year Break from My Online Business
  • How to Quit Facebook but Keep Your Business Profile
  • Leaving the City for the Country
  • Natural Way to Heart Health

MEAL PLANS

Biblically clean meal plans that are for those love to cook real food

Read More

Footer

Our Blog

The Paleo Mama blog provides simple answers for healthier families through research, tutorials, recipes, and simple remedies for daily needs!

  • Health
  • Essential Oils
  • Recipes
  • Remedies
  • Natural Living
  • Meal Plans

Stick around!

You’ll get instant access to a library of natural remedies and real, paleo food, including our ebooks and free guides we send out.

  • Home
  • Disclosure/Disclaimer
  • Privacy Policy
  • Advertise
  • Contact Me

Copyright © 2025 · Wellness Pro on Genesis Framework · WordPress · Log in