• Skip to primary navigation
  • Skip to content
  • Skip to primary sidebar
  • Skip to footer

The Paleo Mama

Homegrown and Handmade

  • About
  • Blog
    • Podcast
  • Meal Plans
  • Essential Oils
  • Our Farm
    • Great Pyrenees Puppies
    • Goats
      • Goats for Sale
      • Goat Sales Policy
      • Nigerian Dwarf Bucks
        • Ranchocabra Lunar Eclipse

Living Sustainably

How to Homestead on a Rental Property

January 19, 2015 by Jackie Ritz 6 Comments

Homestead on a Rental Property

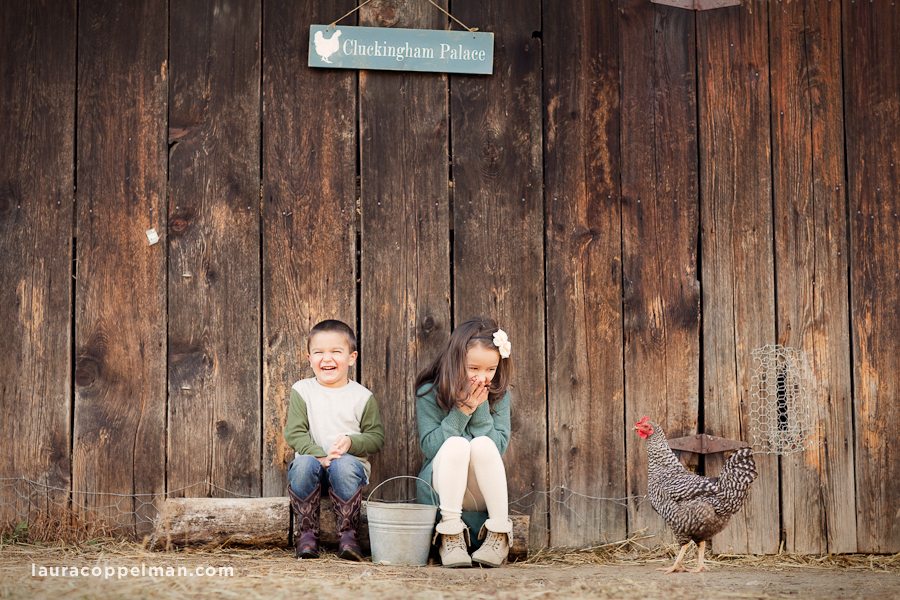
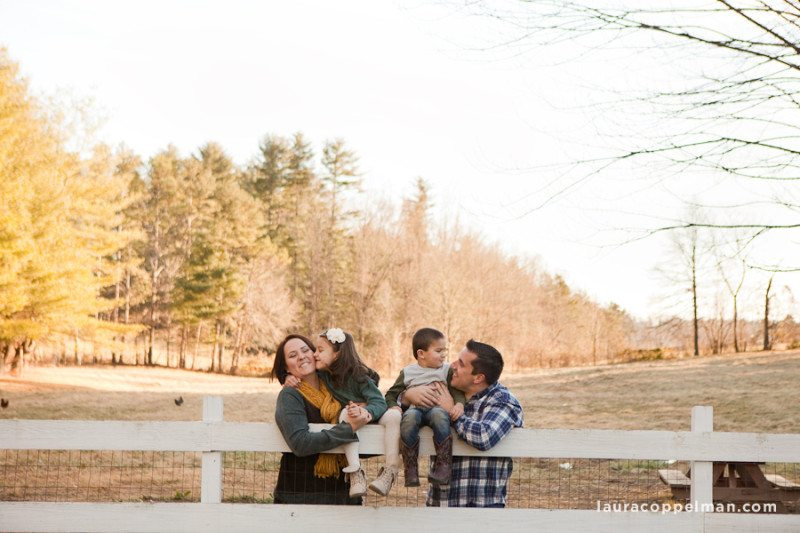
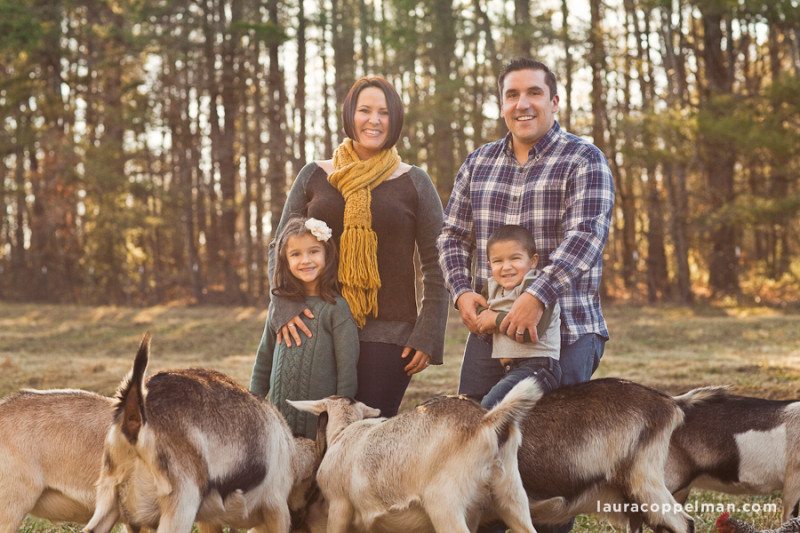
Laura Coppelman Photography took all these pictures for us! Aren’t they amazing?! 

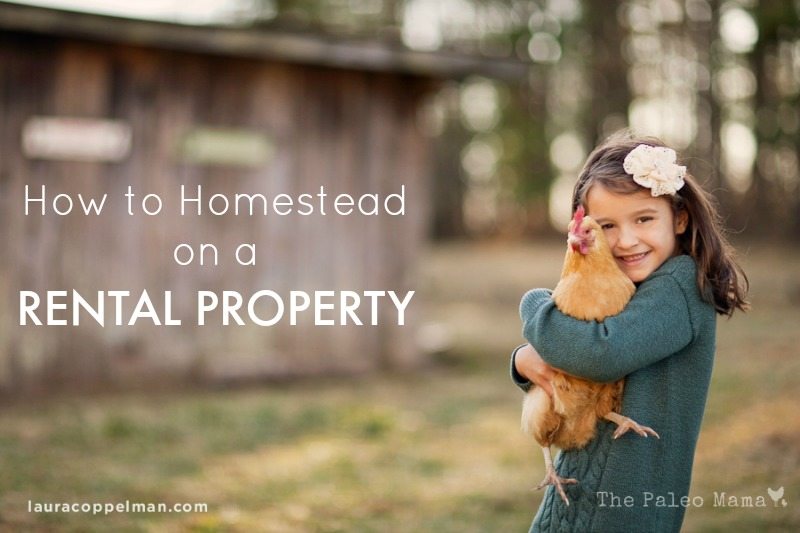
It’s been nearly 1.5 years since we ditched the city to start a farm! Many people don’t realize that we don’t actually own our home. We are renting and have been able to successfully tap into our farming dreams while we live here and save up to purchase our dream farm!

So far, we have had meat rabbits, meat chickens, egg layer chickens, and goats. In the next month we are getting Katahdin sheep! Oh, and we have a Great Pyrenees who is our “livestock guardian dog” and keeps on eye on all these animals for us.

Laura_Coppelman_141213-2

We live on 3 acres in our rental home. It has 2 acres that are fenced, a HUGE chicken coop, and a 3 stall barn! We just fenced a small paddock area that we are planning on keeping a future breeder buck for 5 Alpine does. We found this place on Craiglist and pay $1,250 a month for it!

So, my friends, as you can see, you can pursue your homesteading and farming dreams on a rental property! In fact, I highly, recommend it as I think it’s a great way to get your feet wet and get a better understanding on what actually goes into homesteading….cause, guess what, it ain’t aways that pretty! 

 How to Homestead on a Rental Property

Laura_Coppelman_-13

Search Craigslist, Zillow, and Trulia 

First step is finding a place that is going to let you do this. We spent hours upon hours searching these websites. We had a criteria that we searched and used keywords like “farm, barn, chicken coop, acres, etc“. We, also, made sure that we that we only searched homes that had over 1 acre. We wanted something with 5-10 acres but we settled on 3 acres. It’s enough to really get started! 

Laura_Coppelman_-4724

Check Local Animal Laws and Ordinances

Please, oh please, make sure you don’t move somewhere and hope to purchase livestock and then realize that you can’t have it in that area! Check, and then double check, that livestock, chickens, and goats are allowed at that address. Drive around the home and check out homes and neighbors. Do you see chickens? How about a pig? Even better! 

Call the Home Owner and Tell Them Your Ambitions

This is super important. We disclosed immediately that we were wanting to have a small farm on the property. In our case, this was no issue since our rental property was previously used as a small farm. In the Craigslist ad that we found for our rental property, there were pictures of the red barn, the chicken coop, and the fenced pasture. So, I figured, they were okay with us using it the same way. 

However, don’t assume from looking at the pictures, that farming is permitted. Make sure you ask about it! 

Laura_Coppelman_141213-3

Start with Just a Few New Animals

We have 3 acres so we haven’t been able to do everything that we want to do. However, we are BUSY so this rental home has been perfect and kept us from making some stupid decisions….um, yes I almost purchased a Jersey cow. I can’t believe I nearly cheated on my dairy goats! 

If you have more than 5 acres, then you, pretty much, have the land for any livestock, however, I recommend that you start slow. 

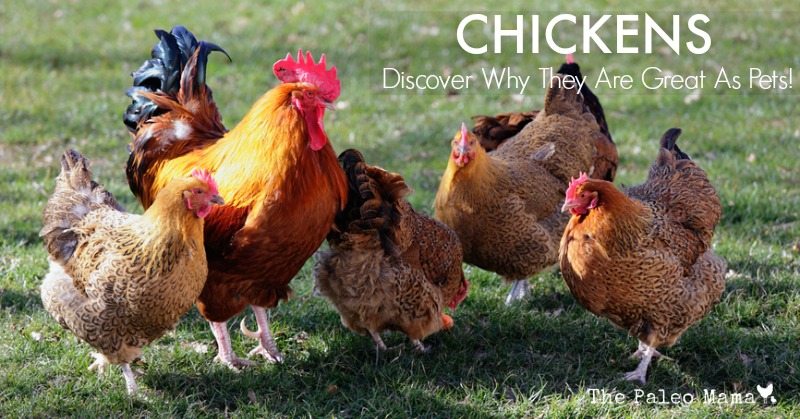
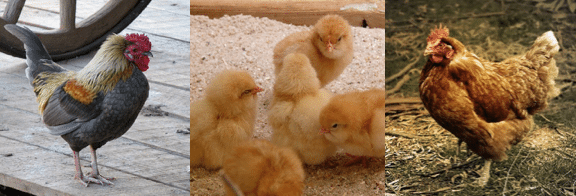
For us, that mean with chickens and goats. We purchased our first chickens from a hatchery. We, quickly, thought that 15 chickens weren’t enough so we added 10 more. Chickens are such good pets! This year, we will be incubating more! Chickens, are so entertaining and addicting! 

Next we got dairy goats (read my 1st experience milking them) and then start our journey into breeding meat rabbits. All of these animals take up smaller amounts of space and don’t tear up the property. As much as I LONG with all my heart for adding pigs — I just don’t know how our landlord would like that idea. They do tear up the grass and land, plus they require better fencing then what we have. Pigs are escape artists! 

 Make Temporary Improvements to the Homestead

Laura_Coppelman_-5

Consider making any fencing you do easily removable. Thankfully, our rental home already had a really good fence, but we put in a small paddock using chain link that we will remove when we move out. 

We use pallets for EVERYTHING! They are free from our local furniture store and you can do so much with them. 

Conclusion

See — you can homestead on a land that you don’t own!  You might enjoy it more than owning your own home and farm…it’s nice to, simply, pick up the phone and call the landlord when we have any issues! We aren’t spending money on home repairs or home improvements…we are saving that money and putting it towards the purchase of our dream farm! We, also, refuse to get into debt again after paying off more than $50,000 of debt in just under a year, so everything we do is with cash! 

We are so happy that made me this decision! I know you will be too! 


Filed Under: Homesteading, Living Sustainably, Natural Living

Chickens: Discover Why They Are Great As Pets!

January 9, 2015 by Jackie Ritz 3 Comments

Flock of poultry

by Jordan at Coops and Cages

Jordan Walker is an avid fan of healthy living and claims that he can get a bit overboard with the things that he eats, preferring these to be organic. He is a writer who loves sharing about animals and health at Coops And Cages and in blogs like this one. In this article, he will be telling you some of the benefits of raising chickens.

McDonald’s and Kentucky will probably won’t get tired of telling you how chickens are great every single day. And why not when these are great for sales? Kids love them, moms adore them, and dads like them spicy-hot with their beers- yes, chicken will always be considered an all-time favorite. Why? They are tasty and versatile. Have you ever seen a supermarket that does not sell chicken meat in their frozen goods section? Or a country that does not have their own delicacy with chicken as their main ingredient? How about you? Do you like chickens? Have you considered raising them on your own as your pets?

Top 7 Benefits of Raising Chickens

Screen Shot 2015-01-09 at 2.02.28 PM

Raising chickens can have varied benefits, some of which are listed below:


  1. Access to fresh meat. Yes, you can buy fresh meat at the frozen section when grocery shopping. But what if you live a bit far away from the city proper? Although you can store chicken meat in the fridge for quite some time, its quality could not compare to that of fresh meat. Having your own chickens at home means that you could just grab an adult one any time you feel like eating roasted or fried chicken. Plus since you are cooking it, you can choose the ingredients that are added into your dish, possibly lessening the risk of unhealthy extenders.
  2. Eggs within your reach. You know how experts would describe eggs? These are now dubbed superfoods because they offer a varied array of nutrients. In the past, eggs received a nasty reputation because of the controversy on its cholesterol content. However, recent studies show that this claim was unfounded and that it is okay to eat eggs on a daily basis. But have you noticed how free-range chicken eggs are more expensive? By growing your own chickens at home, you can have these pricey eggs for free.
  3. You could become healthier in the process. If you choose to grow chickens and raise these with the use of organic practices, you are given access to meat and eggs that have higher nutritional content. Aside from these, organic produce are considered safer for your body because of the reduced use of medicines such as antibiotics or growth hormones. For one, animals that are given antibiotic could develop antibiotic-resistant strains in the process. If you happen to get sick because of these strains, you won’t get well by using antibiotics as a cure.
  4. Free pest control service. Chickens like to eat vegetables, fruits, and well, fresh protein. Do you know why they like to peck on the ground when you haven’t given them any food? It’s actually a hobby with a delectable benefit for pet chickens. Pecking on the ground could give them yummy bugs or pests, great as protein sources. Who needs to spend extra money on pest control service if you can have chickens to do this for you, and on a daily basis at thattoo?
  5. They are great for your garden. If you can have organic meat and eggs when you raise chickens at home, guess what the other hobby that would meld well with it? Vegetable farming! Organic farming requires the use of organic fertilizer. Chicken poop should do the trick. Not so excited about tilling the soil. Put the chickens in a chicken tractor and place this on the soil where you plan to place your plants. Okay, they won’t be able to dig ten inches deep, but they will more than be able to prep it up which will make it easier for you to till it later.
  6. Provides you with entertainment. Not all chickens are the stereotyped “chicken” than runs away easily. They can have different typesof personalities, depending on breed. Now, if a puppy could entertain you with their silliness, although chickens aren’t aware of it, they could be considered funny most times too. And if you get the right breed, you could even get to hold them, acting as your real buddy when you are in need of a friendly company.
  7. Can be used to educate your children. It helps to tell your kids the importance of being responsible. But words are easily forgotten when these are not put into practice. When you have chickens at home, you can use these to teach your kids to actually learn how to be responsible. Make cleaning the coop, collecting the eggs, and feeding the chickens as their chores. If you have excess eggs, you may even be able to teach them a thing or two about putting up their own business. Why not teach them how to sell these in your neighborhood so that they are given actual experience on marketing and finance?

Other Things to Consider

Raising chickens sounds like a great deal after reading the benefits, right? But wait! Read this too before you decide. Although raising chickens will give you the benefits mentioned above, it may not be for you. First, you need to ask yourself these questions:

Screen Shot 2015-01-09 at 2.04.29 PM


  • Do you travel a lot? Chickens will need to be fed on a daily basis. If you aren’t home to take care of them, you should at least have someone else to babysit them while you’re gone.
  • Are you afraid of blood? Unless it’s a silkie chicken, it’s pointless raising chickens if you do not have the guts to butcher them for dinner. That’s why you’re raising them anyway- so that you can have chicken for dinner.
  • Is your wallet ready for it? For starters, you will need to spend money on a flock of chickens. But on top of this, you will also be spending on their housing needs.
  • Does your city allow it? You need to check if your city is okay with you raising chickens in your backyard since not all are amenable with this arrangement.

So are chickens right for you? If you answered positively on the questions asked above, then go ahead and start raising them.

Author: Jordan Walker

Jordan is the lead content curator for Coops And Cages as well as a couple of other pet related blogs. His passion for animals is only matched by his love for ‘attempting’ to play the guitar. If you would like to catch him, you can via Google+ or Twitter: @CoopsAndCages

Flock of poultry

Image Links: [1][2][3][4][5][6][7]


Filed Under: Homesteading, Living Sustainably

Wool Dryer Balls with Essential Oils

January 8, 2015 by Jackie Ritz 31 Comments

Wool Dryer Balls

Since I have made the switch to using wool dryer balls, instead of dryer sheets, my pocket-book is much happier, and so is my energy bill! I love my wool dryer balls with essential oils and I know you will making the switch too!

What Are Dryer Balls?

They are a 100% natural replacement for dryer sheets made from wool. You can purchase them already felted and ready to go, or you can make them yourself.

Why Use Wool Dryer Balls?

  • They can cut your drying time in half
  • They help reduce static
  • They save you money on your energy bill
  • They are chemical-free, unlike dryer sheets
  • They can be re-used over-and-over again
  • They increase the fluffiness of your clothes
  • They are safe to use with cloth diapers

Adding in Essential Oils

I love to lightly scent my clothes, so I add 3-4 drops of my favorite essential oils to each dryer ball. This usually lasts 2-4 loads before I have to add more! Here’s a few essential oil recommendations; it’s fun creating combinations that make your clothes smell so wonderful:

CLICK HERE to see where I get my essential oils at a discount

  • Lemongrass 
  • Lavender + Lemon
  • Wild Orange 
  • Peppermint + Wild Orange
  • Tangerine

Where to Buy Wool Dryer Balls:

I love Woolzies (click here to see them) in XL. I use all 4 in my laundry and right now they are 62% off on Amazon!!

Dryer Balls are Easy to Make:

ITEMS NEEDED: 

  • Recycled wool sweaters
  • Wool Yarn
  • Knee High Nylon

Step 1) Save the money and go buy a few wool sweaters from Goodwill. Then go to your nearby craft store and get a big roll of wool yarn.

Step 2) Cut the wool sweaters up in scrap pieces and ball them up in your hand. Then take the wool yarn and start wrapping it around the scrap wool until you have a large softball-size bundle of yarn. Some people make them the size of tennis balls but I say go BIG! I also think you need 4-8 of them to really notice a difference. So, make a bunch!

Step 3) Then when you’re done rolling them into balls, tie a knot, then throw the ball in a knee-high nylon, or in a sock. Tie off the end with a rubber band (a hair rubber band) and run them through a hot wash cycle and then a hot dry cycle. This makes the wool felt together.

Step 4) Then take them out and you’re done!

How to Use Your Dryer Balls:

  1. Add a few drops your favorite essential oils to each ball.
  2. Toss in the dryer with your wet clothes
  3. Re-use over and over and over again!!!!

Wool Dryer Balls from The Paleo Mama

Filed Under: DIY Home Recipes, essential oils, Living Sustainably, Natural Living

Whipped Magnesium Body Butter

January 2, 2015 by Jackie Ritz 89 Comments

We are always trying to get more magnesium into our bodies. Recently, I’ve started using more magnesium oil to spray on my skin, but I wanted to create a recipe that was a body butter but included magnesium oil.

Unlike many other body butter recipes out there, mixing a “water-based” substance, like magnesium oil, into a body butter recipe can be tricky. However, as an avid-soapmaker, I understand how to accurately emulsify a liquid, fat, and solid together and it’s super easy…just requires one extra step (trust me, it’s worth it!).

Whipped Magnesium Body Butter

Makes one luscious cup

INGREDIENTS: 

  • 1/4 + 1/8 Cup (3/8ths of a cup) of Coconut Oil (where to buy)
  • 1/4 + 1/8 Cup (3/8ths of a cup) Shea Butter (where to buy)
  • 1/4 Cup Magnesium Oil (where to buy)
  • 1/4 Cup Almond Oil (where to buy)
  • 20 Drops of Lavender (where to buy at a discount)
  • 20 Drops of Sandalwood, Cedarwood, or Vetiver Essential Oil (where to buy at a discount)

SUPPLIES NEEDED: 

  • Immersion blender
  • KitchenAid Mixer with a Whisk Attachment
  • Glass Jar to store it in.

DIRECTIONS: 

  1. Melt the coconut oil and shea butter together on LOW heat, then remove. Don’t let it get hotter than 110 degrees. If it does, stick it in the fridge to cool down.
  2. Mix in the almond oil and allow it to cool to a warm temperature.
  3. Here’s the extra step: you want your oil/butter mixture to be room temp. Take your immersion blender and turn it on low while slowly adding in your magnesium oil. You will need to mix until you see it completely emulsify together and there is no separation of water and fat. Takes about 1-2 minutes.
  4. Now, stick the mixture in the fridge for about 10 minutes or leave it on your counter for 20 minutes. You want it to begin to harden and become opaque.
  5. Scoop it into your mixer with the whisk attachment. Add your essential oils and whip it on medium speed until you see it become light and fluffy!
  6. Scoop it into your glass jar!
  7. Use at night before bed to help promote a restful sleep!

Note: One teaspoon of this body butter contains around 250mg of magnesium! Check out my Magnesium Deodorant recipe HERE.

Whipped Magnesium Body Butter The Paleo Mama

Filed Under: DIY Beauty Recipes, essential oils, Living Sustainably, Natural Living

A Beginner’s Kit to Making DIY Beauty Recipes

December 8, 2014 by Jackie Ritz 15 Comments

A-Beginners-Kit

I’ve been making my own home and beauty recipes for years now. It took me awhile to accumulate everything I needed to have on hand for making my own homemade products. So, I wanted to share with you all a beginner’s kit to making DIY recipes and everything that you need to get started.

I’ve sourced ingredients and supplies all over the place and have found that most of the items you can find on Amazon for cheap. I HIGHLY recommend you join Amazon Prime to get the free 2-day shipping. It costs about $75 for the year to do Amazon Prime, however, you quickly get that back!

So, if I had to narrow down to the most needed, this is what I would recommend you buy….

Beginner’s Basic Kit to Making DIY Beauty Recipes:

_MG_9480

1) Coconut Oil 

This tops the list and you will need it in many recipes! Whether you are making soap, toothpaste, all purpose salve, pain rubs, or sleepytime cream for this kids, coconut oil is a necessity. Now, you don’t need the high quality coconut oil that you cook with. I find that a great expeller-pressed works best! I buy mine from Tropical Traditions and wait for a sale combined with free shipping! Go sign up for their newsletter to get notified when there is a sale and a free shipping code! If you prefer to stick with Amazon, then I recommend this coconut oil. If you have a Sam’s or Costco near you, then you can find coconut oil at a great price!

2) Almond Oil

Having almond oil on hand to use as a carrier oil to making rollerball recipes with essential oils or a homemade anti-aging face serum is much needed! Almond oil has many benefits for the skin and hair and it makes a great makeup remover! CLICK HERE to buy.

3) Beeswax

I recommend you find a local beekeeper and talk to him about buying beeswax in bulk. I get mine for $5lb. However you can find beeswax on Amazon in easy-to-use pellets! Cutting a huge block of beeswax is very difficult so these pellets are easy to measure and use in your DIY recipes! CLICK HERE to buy.

4) Essential Oils 

Essential oils are the most important part of most DIY beauty recipes, so you should make sure you purchase the best brand. This is one item I DO NOT recommend you purchase off Amazon. Many essential oils from Amazon are tampered with and the quality is questionable. Since you are putting these DIY recipes on your body, I recommend you purchase therapeutic-grade essential oils. This is the brand I recommend and have used for over a year with confidence. You can purchase them directly from me through my referral link and I recommend you snag a wholesale starter kit. These kits have the most used oils for a discounted price! CLICK HERE to buy and check out the starter kits.

5) Metal Tins for Storage

I love using 2oz metal tins to make all purpose salve, and homemade deodorant. When you are using essential oils in a recipes, you cannot use plastic. These small metal tins are cheapest on Specialty Bottle but you can find them on Amazon too!

6) Dropper Bottles

If you use liquid stevia then SAVE your bottles! I use these dropper bottles to make hand sanitizer, face serum, and so many more things! You can find them in a 6-pack from Amazon for a great price! CLICK HERE to buy.

7) Dried Herbs

I find that Amazon has the cheapest price on bulk organic dried herbs. I buy a lot of calendula for soap and salve-making so I like THIS brand from Amazon. I, also, use other dried herbs like lavender, comfrey, and rosemary.

8) Glass Spray Bottles 

If you are making my hand sanitizer then you need a glass spray bottle. It fits perfectly into your purse and you can keep one on your countertop for disinfecting purposes. CLICK HERE to buy.

9) Olive Oil 

I try to stick with organic ingredients. This organic olive oil is the best deal I have been able to find. I believe you can find this at Costco too! Sometimes on Tropical Traditions I can find a better deal. I use olive oil to make my goat’s milk soap and homemade healing salve. CLICK HERE to buy organic olive oil.

10) Soap Molds

Silicone molds can be used to make soap or a lotion bars. So if you are ready to dive into soap-making then I love this mold from Amazon! CLICK HERE to buy. However, I prefer the rustic look of cutting your own soap, so I just use an old silicone loaf pan and cut the soap myself. CLICK HERE to buy.

11) Mason Jars of All Sizes

Mason jars are such an important part of making your own recipes and they are dirt cheap! You can find them at Walmart and places like Ace Hardware on sale!

12) Bentonite Clay

I use bentonite clay for making my own toothpaste and deodorant (posting recipe soon!). I also like to use it in a detox bath and to make my own facial mask! So many ways to use this gift from the earth. CLICK HERE to buy.

12) Cacao Butter

I use a lot of this stuff! It’s great to use to help recipes that have a coconut oil base hold. You can find this in my Spiced Chai Lip Balm recipe. CLICK HERE to buy.

That’s it!

Well, those are my top 13 necessities! I hope you enjoy creating your own DIY beauty recipes as much as I do! You can CLICK HERE to take a look at all my DIY recipes using essential oils and CLICK HERE to see 20 DIY Homemade Gifts that you can make for your friends and family!

Once again, I highly recommend you purchase a wholesale essential oil starter kit. You save the most money purchasing this way, AND you get a wholesale membership for purchasing any oils in the future at a huge discount!

A-Beginners-Kit-to-Making-DIY-Beauty-Recipes-

Filed Under: DIY Beauty Recipes, essential oils, Homesteading, Living Sustainably, Natural Living

Traditional Goat Milk Soap Recipe

October 22, 2014 by Jackie Ritz 21 Comments

Goat Milk Soap Recipe .001

Why Goat’s Milk

Goat’s milk is packed with vitamins, minerals natural fats, and protein. It carries a pH of around 6.4 which is very similar to a normal skin pH of 5.6, which makes it great for skin tolerance. You can find vitamins A, B2, B6, B12, and Niacin in goat’s milk and many who cannot tolerate dairy, find that they have no problems with goat’s milk.

Those who have very sensitive skin, find that paying over $5 for a bar of goat’s milk soap is worth it! I’ve had several people come up to me and tell me that my soap was the one of the only bars of soap that they could use without breaking out or having a skin reaction.

Anyone Can Make Soap

Soap is NOT hard to make. What is hard to make is all that fancy soap…which I don’t understand anyways. It’s just you, naked in the shower or bath, rubbing a bar of soap on your body. Why do you need swirls and fun shapes? If you enjoy doing that, then by all means, go for it! But I make soap for my family and most the time the kids end up making holes in the bar and pretending like Spiderman can surf on it.

This is a very basic, traditional recipe that I created. I use lard and I use lye. This is NOT a vegan recipe. I also use the traditional method of cold-process. This process uses a short prep time and a long cure time. It’s the easiest, in my opinion, because you are mostly waiting on the soap to cure and harden. This is the way our ancestors prepared soap and it’s the way I prefer to make my soap. Since I use raw goat’s milk, I prefer to keep the milk unheated to prevent destroying any vitamins and minerals.

Why Lard and Lye

Lard was traditionally used in making soap and has a very long history of in soap-making.  I get my lard from a local farm for a really good price, but you can order pastured lard from here. Lard is the hardening fat in this soap – it’s what makes the bar hard so that it doesn’t turn into a big pile of glob while you are taking a shower.

I, also, like lard because of the aging time. When you make a cold-process soap, you are going to need to let your soap age (or cure) for 3-6 weeks. If you do not use a hardening fat, like lard, then it’s going to take your soap much longer to cure. I find that 3-4 weeks is perfect for this recipe.

Now lye is necessary for the alkali, when combined with the goats milk, loosens and attracts dirt, allowing it to be washed away. After 24 hours, the lye is not even present and by the time the 3-4 weeks is up, there is no trace of lye in the soap.

Supplies Needed:

For anything that touches the lye, you will need separate supplies and those supplies should never be used on anything else. Also, this is going to make an UNSCENTED bar. I have tried using essential oils and it requires way TOO MUCH. Alternatively, if you would like, you can add a few drops of essential oil to your bar of soap when you are washing in the shower.

  • Immersion blender
  • Glass bowls for mixing
  • Rubber spatulas
  • Digital Kitchen Scale
  • Tall stainless-steel pot for melting oils
  • 2 Thermometers
  • Safety Equipment – rubber gloves, long sleeve shirt, and goggles
  • Knife to cut the soap
  • Soap Molds or Old Loaf Pans – I prefer the rustic cut of the soap and prefer to use loaf pans.
  • Parchment paper

Ingredients Needed:

You can change your fats and oils if you would like. This is just the recipe that I created and enjoy the most. I have made several other recipes and I really prefer mine as it is very moisturizing, lathers very well, and includes sustainable fats.

  • 2 ounces of Beeswax
  • 18 ounces of Coconut oil
  • 5 ounces of Castor Oil
  • 26 ounces of pastured Lard
  • 6 ounces of Olive oil
  • 8.40 ounces (or 238.39 grams) of 100% pure Lye
  • 18.9 ounces of Frozen Goats Milk (raw or pasteurized) – easiest way to freeze goats milk for soap-making, is to pour the measured out goats milk into a gallon ziplock bag. Then freeze the bag flat.

Step-By-Step Instructions:

  1. Collect all your supplies and block off your kitchen. I usually do this when my kids are down for a nap because of the lye.
  2. Put parchment paper in your loaf pans to get them ready.
  3. Measure out all the fats and oils (everything but the lye and milk) and put in your tall stainless-steel pot.
  4. Put your stove on LOW and slowly melt the oils and the fats. Put a thermometer in and make sure it never goes above 100 degrees. Once melted, remove from stove.
  5. Take your bag of frozen goats milk and smash it up into smaller pieces. Add it to a large glass bowl.
  6. Slowly sprinkle your lye over the frozen milk and mix with a spatula at the same time. MAKE SURE you are wearing your safety gear!
  7. Mix until the frozen milk is melted. Check the temperature of the mixture with a thermometer and do not let it go over 110 degrees. If it does, no worries, just cool it down by placing the bowl in a larger bowl filled with ice water.
  8. Now check on your oils and make sure they are melted and the temp is not over 100 degrees. If it is, then cool it down by placing it in the bowl of ice water.
  9. You want your oil mixture and your lye mixture to be within 10 degrees of each other.
  10. Now slowly pour your lye mixture into your oil mixture. As you are pouring, put your immersion blender on LOW and start to mix.
  11. When all the lye mixture is added, turn your immersion blender on HIGH and mix until you reach “trace”. Trace is when you can take a spoon or spatula and you can draw a line in your mixture. It usually takes me 2 minutes to reach trace with this recipe…sometimes less.
  12. Once you reach trace, you are going to need to move very fast. Immediately, pour your mixture into your 2 loaf pans or your soap molds. Use your rubber spatula to clean the bowl and smooth out the top of the loaf pan.
  13. Put the pans in a dark spot out of reach of kids. Leave it alone for 24 hours. After around 24 hours, the lye is inactive and you can touch the soap.
  14. After 24 hours, remove your soap from the loaf pans and cut into individual bars.
  15. Place the bars in a dark area and let them cure for 3-4 weeks! I know, it’s torture to wait, but it’s sooooo worth it!
  16. After 3-4 weeks the bars should be ready to go!

 See Picture Tutorial Below…..

Working on reaching trace. 

16081_10152632866727013_915759999358523822_n

After you reach trace, pour into your loaf pans and allow to sit for 24 hours. 

soap1

After 24 hours, cut into individual-sized soap bars and cure for 3-4 weeks. 

soap 2

Waiting 3-4 weeks for the soap to harden! It’s worth the wait! 

10703599_10152663692747013_4306114713772124454_n


I hope you enjoy this recipe as much as my family does! 

Traditional Goat Milk Soap Recipe .001

Filed Under: Budget, DIY Beauty Recipes, DIY Home Recipes, goats, Homesteading, Living Sustainably, My Recipes, Natural Living

« Previous Page
Next Page »

Primary Sidebar

  • Facebook
  • Instagram
  • Pinterest
  • RSS
  • YouTube

Hi, I'm Jackie Ritz and welcome to The Paleo Mama! I'm a published author, certified herbalist, and voracious researcher of natural medicine and nutrition. I'm glad you're here and I hope you stick around for awhile!

Recent Posts

  • When God Says Pause: Why I Took a 5-Year Break from My Online Business
  • How to Quit Facebook but Keep Your Business Profile
  • Leaving the City for the Country
  • Natural Way to Heart Health

MEAL PLANS

Biblically clean meal plans that are for those love to cook real food

Read More

Footer

Our Blog

The Paleo Mama blog provides simple answers for healthier families through research, tutorials, recipes, and simple remedies for daily needs!

  • Health
  • Essential Oils
  • Recipes
  • Remedies
  • Natural Living
  • Meal Plans

Stick around!

You’ll get instant access to a library of natural remedies and real, paleo food, including our ebooks and free guides we send out.

  • Home
  • Disclosure/Disclaimer
  • Privacy Policy
  • Advertise
  • Contact Me

Copyright © 2025 · Wellness Pro on Genesis Framework · WordPress · Log in