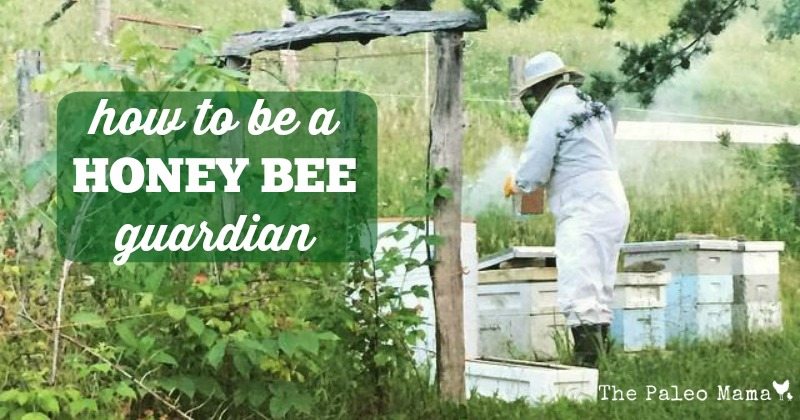
As you know by now, Frank and I and our two little budding farmers just moved into our dream farm! We are just beginning to get acquainted with all the things waiting for us—comfrey, potatoes, asparagus, black raspberries, blueberries, and tons of fresh herbs—just to mention a few. But one of the farm perks we are most excited about are our five established honeybee hives. We have already tasted the sweet honey, and we know many of the flowers and vegetables in the gardens are so succulent and good because our honey bees have been busy pollinating them all spring. We are so excited to jump into this world of beginner beekeeping and hope to learn more in the months and years ahead.
In this blog post I want to introduce you to the wonderful world of beekeeping. We are newbies at it, but our former owners have given us wonderful instructions for the care of honeybees, and we are doing our research to learn even more. Now you get to benefit from what we know, which I am sure will increase more and more as we begin the joyful task of being honey bee guardians. Let’s take a look at:
- Why are so many honey bee colonies disappearing?
- How do honey bees provide benefits to our farms and homes?
- What is life like in the bee colony?
- What makes a good beehive home?
- What do beekeepers need to have?
- What can you do to help protect America’s honeybees?
1. Why are so many honey bee colonies disappearing?
Honey bees have been domesticated by humans for thousands of years. A bee is the only creature besides us who manufactures food for humans. Every third bite of food that you eat has been pollinated by a bee. Natural diseases can cause populations of bees to die off, but most bee colonies were able to bounce back from adversity—until the winter/spring of 2006/2007. In that season, the die-off of domesticated bees was so bad bee researchers coined a new phrase: Colony Collapse Disorder. The normal loss of colonies was about 10 percent, but that year it was over 30 percent. Some beekeepers lost more than 80 percent of their bees.
Since then, in the US bees have been dying off at alarming rates, and beekeepers are continuing to report staggering annual losses. WHY? WHAT IS HAPPENING TO THE BEES?
A new class of systemic, neurotoxic pesticides—neonicotinoids–was introduced in the 1990s, and quickly became in use pervasively, being used to treat food crop seeds, as well as in lawn care and flea products. These products persist for years in the soil, and permeate the plants to which they are applied, causing pollen and nectar gluttation droplets, which are deadly toxins to bees. Thousands of beehives have been killed off by colony collapse, while government regulators in America steadfastly fail to take action and create a policy that will be meaningful for bees and beekeepers.
2. How do honey bees provide benefits to our farms and homes?
There are a lot of good reasons to have a few hives of honey bees around. For garden and orchard crops, honey bees provide the necessary pollination so there’s something to harvest at the end of the season. For a source of a natural sweetener—honey—there’s no rival, and if the other natural products of the hive—pollen or propolis—appeal to you, then a few hives are certainly useful. Plus, there’s the added benefit of having all the light you want from fragrant and clean-burning beeswax candles. Sweetness and light in the same package.
Remember that bees pollinate every third bite of food that you eat. Some of the specific plants and vegetables that require bee pollination include:
- Apples
- Almonds
- Watermelon
- Pumpkin
- Squash
- Cucumbers
- Avocados
- Mangos
- Blueberries
- Raspberries
- Blackberries
- Cranberries
Plants and food that benefit from bees include:
- Tomatoes
- Strawberries
- Peppers
- Eggplants
- Soybeans
- Lima beans (and other dry beans)
- Sunflower seeds
- Sesame seeds
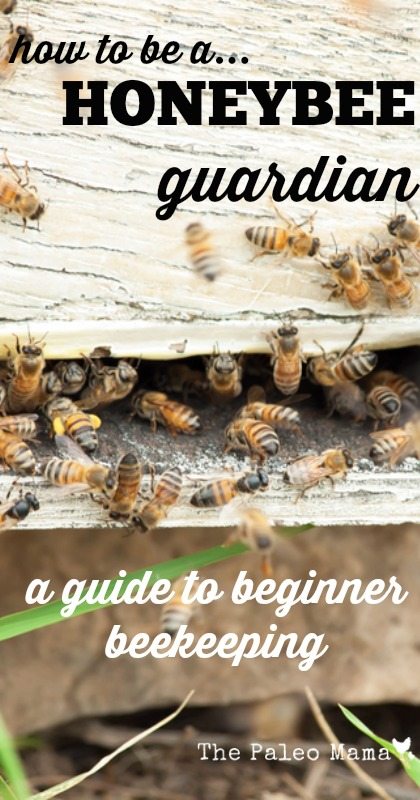
3. What is life like in the bee colony?
The Bee Colony
Whether hidden in a hollow tree or kept in a beekeeper’s wooden hive, every colony of honeybees functions in the same way. A bee colony is made up of three types of bees: workers, drones, and a queen.
Worker Bees
Most of the bees in a hive are workers, sterile females that can number in the tens of thousands. Young worker bees are called house bees. They build and maintain the hive, feed the young, make honey and wax, and tend to the queen. Older workers fly from the hive to gather nectar and pollen for food and for use in making honey and wax.
As a worker bee buzzes from flower to flower, she gathers nectar and stores it in a specialized stomach called a honey sac. She also picks up pollen in her fine hairs and combs it into pollen baskets in her back legs. Heavily laden, she finds the shortest path home, making a “bee line” for the hive.
Interesting enough, female worker bees are the only honey bee that can sting you.
Drones
There are hundreds of drones in a colony. They are males that develop from unfertilized eggs, and their only job is to mate with the queen. During the mating ritual, the queen flies high into the air, nearly 30 feet above the hive. Up to ten or more drones mate with the queen and then die. The queen returns with enough fertilization to lay eggs for years to come.
The Queen Bee
There is only one queen in a hive, and she can lay up to 2,000 eggs a day and may lay a million eggs in her lifetime. When a new queen is born, the old queen leaves the hive with about half of her workers to form a new colony.
When flowers are in bloom, bees work nonstop from sunrise to sunset, gathering pollen and nectar and pollinating flowers in the process. To be as busy as a bee is to be busy indeed.
4. What makes a good beehive home?
If you are thinking of starting beekeeping, the first thing you need to do is to decide where the bees are going to live. Where will the hives sit? If you live in tropical, or nearly so, locations, a bit of afternoon shade can be advantageous for both you and the bees. But if you are further north, no shade at all is the best place to be. Having the colony facing south or south east is ideal.
Getting started, like many new ventures, has a learning curve to be dealt with. The most important part of that curve is assuming responsibility for the well being of a living being under your care… not unlike family pets, chickens, cattle or other friendly or productive animals. A beehive may appear as only a box full of bugs, but a honey bee colony has a personality and lifestyle all its own, and as its keeper you must learn its ways and wiles so you do the best you can to protect it from the dangers of the bee world.
Plan on how your bees will sit where you want them to sit. Up off the ground is good, to keep the bottom off damp ground and to keep skunks, toads, ants and other nasties at bay. Too, a beehive that sits up 18 inches or so off the ground (the recommended height) is easier to work because you won’t be putting heavy boxes full of honey all the way down and having to lift them all the way back up when you’re done.
5. What do beekeepers need to have?
Here are some very general recommendations. A honey bee colony requires two deep brood boxes for the bees to live in, store some honey and pollen in, and raise their young. A deep brood box (also called a hive-body) is one that holds eight or ten frames of comb and are 9-5/8” tall (or so… exact standards in beekeeping equipment are a bit fuzzy). This can weigh as much as 90 pounds or so when full of bees, honey and pollen.
Your beehive also needs additional boxes, called honey-supers (super = above), that are stacked above the brood boxes for the bees to store honey in. These honey-supers can be the same size as a hive-body or, to confuse things, there are two sizes of smaller boxes—one is called a shallow honey-super because it is only 5 -11/16” tall. This will weigh about 30 pounds or so when full of honey. The other is a medium honey-super because it is 6-5/8” tall, and weighs about 50 or so pounds when full. Which box to use will depend to some degree on your ability to heft.
A bee hive needs a floor, called a bottom board, that has a large, screened area so debris falls completely out of the boxes rather than accumulate inside. The bee hive should also have an inner cover that sits directly on top of the top box (think of this like the ceiling in your house), and an outer cover that goes over the inner cover (much like the outside roof). Together, these two covers keep the internal environment somewhat controlled and the elements out.
You’ll need feeders... yes, you sometimes need to feed your bees. So what do bees eat? Sugar syrup… a mix of half sugar and half water, fed in a container that the bees can get to inside, or sometimes outside the hive. There are a variety of feeder styles available and each has advantages and disadvantages. Find them in the catalogs you get from the advertisers in the journals you read, on the web (see references at the end) or from local suppliers you find out about at club meetings. And don’t hesitate to ask other beekeepers what they use… and why they use what they do.
You will also need beekeeping attire—protective gear to wear when working bees. A good veil to keep bees out of your hair, and a light-colored, light weight protective suit to keep your clothes clean when in the hives is a good start. And beekeeping gloves. Having bees walk on your hands the first few times in a hive can be very distracting, so use beekeeping gloves until you are comfortable with this aspect of the craft.
Along with the attire you get, you must have a smoker. When you puff a little bit of smoke across the top of an open colony the bees inside retreat down to rapidly consume honey and they stay out of your way as you do your work. Any communication between them inside is disrupted because the smoke masks all the chemical signals going on and they can’t talk… the confusion goes on for several minutes while you work. Then, when it begins to clear, they stop eating honey and start again to the top, a bit more smoke gives you a few more minutes to work undisturbed. You have maybe 15 minutes though before all this smoke simply overloads the system and they quit eating and start checking out the problem. That’s when it’s time to move to the next colony.
6. What can you do to help protect America’s honeybees?
Gardeners who plant the right flowers and provide welcoming habitats can do their part in restoring the waning bee population. We can nurture bees that will travel, pollinating fruit, vegetable and flowers around us, helping commercial growers to regain bees. “Every single gardener can make a difference, even if you just plant one more container of flowers than you have previously, you can help!”, says the National Garden Bureau.
Small Steps
It doesn’t take much effort to help bees increase their population. Here’s how to make a difference:
- Plant flowers with open petals and upright stamens for easy access by our pollen-loving friends. Cosmos, zinnias and purple coneflowers are good examples.
- Choose flowers that are heavy pollen producers like salvia, penstemon and goldenrod. And pick colors that attract bees like blue salvia, yellow nasturtium, marigolds and sunflowers.
- Herbs, oregano, mints, sage, lemon balm, rosemary, lavenders, thyme, cilantro and basil in particular, provide food for bees as well as humans. So add them to your garden. It’s simple to keep a potted herb garden on your back porch, close to the kitchen for cooking. Bees will quickly discover it. Pots keep invasives like mint in bounds, and they can be brought indoors for the winter to use.
- Make sure your garden blooms from very early spring (crocus and early daffodils) to late fall asters to provide pollen as long as possible.
- Limit or eliminate pesticides, which kill bees, and use compost instead of synthetic fertilizers that leave behind toxic chemicals.
Sources:
- https://earthjustice.org/features/the-case-of-the-vanishing-honey-bee?gclid=CjwKEAjwtYSsBRCDx6rM1v_uqmsSJAAZgf2qKVGPIYrPW3Lu2j8kEgYBvqMMeGsDSE-W9c9w0OM0IhoCYXzw_wcB#
- https://www.panna.org/issues/publication/bee-change-tips-tools-protecting-honey-bees
- https://www.almanac.com/content/honeybees-garden-busy-can-bee
- https://homestead.org/KimFlottum/BeginningBeekeeping/Bees.htm?gclid=Cj0KEQjwkv-rBRDwoMLav-2l9KIBEiQAUTkDU6oTNtv5_aKKAFY9n0xWQsiKhNdyrI1CEp_twv9SzMIaAqOG8P8HAQ
- https://www.almanac.com/blog/gardening-blog/bee-buzz-blue-berries