• Skip to primary navigation
  • Skip to content
  • Skip to primary sidebar
  • Skip to footer

The Paleo Mama

Homegrown and Handmade

  • About
  • Blog
    • Podcast
  • Meal Plans
  • Essential Oils
  • Our Farm
    • Great Pyrenees Puppies
    • Goats
      • Goats for Sale
      • Goat Sales Policy
      • Nigerian Dwarf Bucks
        • Ranchocabra Lunar Eclipse

Living Sustainably

My Journey to Diamond in dōTERRA

November 18, 2015 by Jackie Ritz 15 Comments

cover

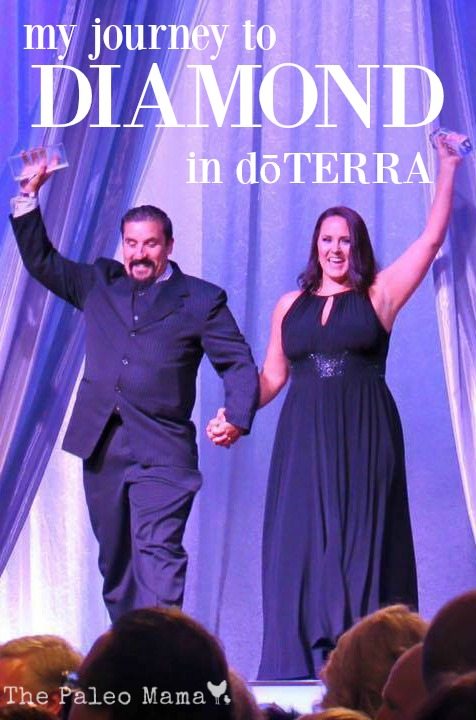
You all know how passionate I am about natural living, DIY recipes, and essential oils. I’ve been using essential oils for nearly 10 years, but it wasn’t till two years ago, that I found dōTERRA. I’ve pushed back writing this blog post for over a year now, because of various reasons and fears, but it’s about time I step out in boldness and share with you my journey to diamond in dōTERRA (I’m Blue Diamond). 

This month I saw a renewal fee in my monthly dōTERRA order and waves of emotions came over me. I sat there in my bed in the early morning, coffee in hand, rooster crowing outside, and tears flooded down my cheeks. The past two years of my life have been life-changing for me. 

Many of you know my story and how far I have come, but to keep my thoughts organized, I’ll be discussing these things: 

  • Why I chose dōTERRA
  • Why I was drawn to the business side of dōTERRA
  • The unbelievable compensation plan
  • The MLM challenge 
  • My financial freedom and becoming debt-free 
  • The opportunity of dōTERRA for ANYONE

Why I Chose dōTERRA

Sources of Oils MAP

Like I said before, I’ve been an avid user of herbs and essential oils for many, many years. However, it wasn’t until that dōTERRA showed up on my radar that I truly understood the dire need for using essential oils that are not only very pure, but oils that have an impact of how and where they are sourced. 

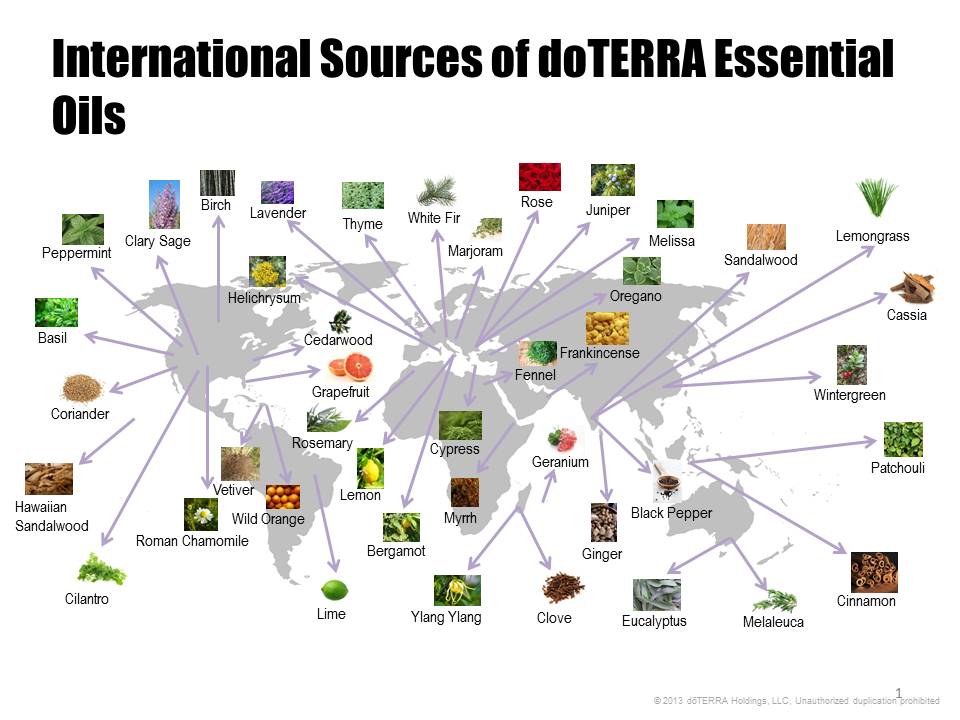
The “International Sources of dōTERRA Essential Oils” map shows you the many places that dōTERRA is sourcing their beloved essential oils. Where a plant is grown has a major impact on it’s constitution, which then determines the potency of the plant. Additionally, harvesting the right part of the plant at the right time is a major determiner in the quality of an essential oil (1). 

This short video on dōTERRA’s impact they are making around the world with their sourcing methods, speaks volumes. 

Next, I loved their testing methods. dōTERRA has an internal testing standard that they labeled as “Certified Pure Therapeutic Grade”. You see, my skeptical brain has never believed in labels so it took me awhile to understand what this standard really meant.

Be aware, my friends, that just because something is labeled “therapeutic“, does not mean it’s the best purity or quality. There are many essential oils on the market that deem themselves as being “therapeutic-grade“, yet there quality is poor. While many companies promote their own therapeutic grade standard, one should be aware that there is no universally accepted independent body that certifies essential oils as therapeutic grade. 

dōTERRA’s mission is to have the purest oils on the planet so they created their own internal standard. They want to be able to test all the oils they are getting from all over the world and make sure they were indeed pure. Why in the world would dōTERRA source their oils all over the world and not just do what most other companies do and grow them in one spot and slap on a “therapeutic-grade” label? It’s cheaper to grow them all in one place, but dōTERRA is true to their mission of having the purest and most potent essential oils on the planet. 

After learning all this and then seeing their testing protocol, I must say, I was impressed. Here’s the 8 ways they test their oils: 

  • Organoleptic testing
  • Microbial testing
  • Gas chromatography
  • Mass spectrometry
  • Fourier Transform Infrared spectroscopy (FTIR)
  • Chirality testing
  • Isotopic analysis
  • Heavy metal testing (2) 

And none of this amazing information with dōTERRA would have mattered to me if I didn’t actually see a difference in my life while using them.

I purchased the cheapest starter kit (big mistake) and started incorporating them into my family’s life. I actually felt comfortable using this brand on my small children, on my body, and in my home. I saw, smelled, and felt a drastic difference using dōTERRA, instead of all the other brands I had in my pantry. In fact, I still have those “other” brands and will let people smell the difference between the different brands.

Why I was drawn to the business side of dōTERRA

I didn’t purchase my dōTERRA starter kit because I wanted to share or sell the oils. In fact I told my friend I enrolled with to just “leave me alone“…in much nicer words though. 

But after feeling such a difference using dōTERRA, I couldn’t stop talking about them. I even swapped out some old blog links on recipe posts using essential oils and added a link to my little “landing page” I made. 

And the next morning…I had quite a few enrollments! I had no idea what I was doing, nor did I even care how much money I had just made, but people were buying starter kits through me and HOLY COW, I better figure the “business part” of dōTERRA out. 

So, here’s the low-down on why dōTERRA has the absolute best compensation plan in the world because I know some of you really want to know. 

dōTERRA is on the left of the diagram and the direct sales company standard is on the right. 

earning chart

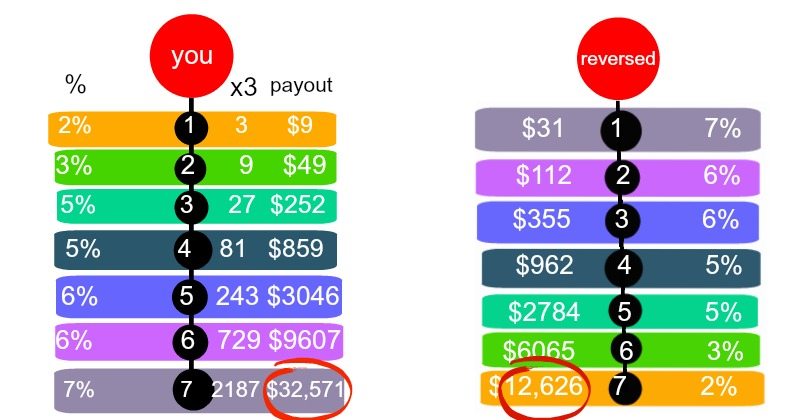
  • dōTERRA’s unilevel compensation plan is paid on seven levels (or more) of referrals. You can see the seven levels on the diagram I made. 
  • You receive a percentage of sales on each level.
  • The x3 is the average amount of people who are on that level and the average earnings you will make
  • The earnings grow the further down you grow
  • You earn the LEAST on the LEAST(people on a level) and the most where the most people will be on your levels. This is so true! The majority of my team is on my 4th-7th+ levels and I’m earning the most percentage of commission. 
  • Most companies reverse this percentage payout and pay you the MOST on the LEAST (people in your levels) and the LEAST on the most. Shame! 
  • This means, if reversed (like most direct-sales companies) that you would be making $20,000 less per month. 

Since most direct-sales companies pay you 7% on your first level and 2% on your 7th level, this does not encourage the desire to grow deep in your organization. You probably would want to keep everyone on your first level since you would be making the most on them. What kind of teamwork and growth does that encourage? None, in my opinion.

dōTERRA not only pays you through unilevel commission, but 5 other ways as well: fast start bonuses, power-of-3, retail, preferred membership, and leadership pools. Read more here for explanations and more details. I recommend anyone looking into creating an income with a direct sales company, to take a good look at their compensation plan and see it lines up with dōTERRAs. 

The MLM Challenge

The multi-level marketing companies of today are not the same of our parent’s generation. The ones that are legitimate are NOT a get-rich-quick scheme…it’s hard work! 

What I love about direct-sales and legitimate MLM’s is that you get to purchase a product from another person, often another mom like myself, rather than from a big store. It’s very similar to buying local and supporting your farmers…this time you are supporting your friends and family. 

I, personally, swore I would never be part of a MLM, but dōTERRA is so different and I love these oils and use them every, single day. I’m passionate about sharing them with the world around me. 

In just two years, I have been able to completely surpass my husband’s income, making well into six-figures, retire him and bring him home to be with me and the kids, and I’ve empowered many others to make better choices for their health and wellness. 

I would rather people tell me no, then to never share something that I believe in wholeheartedly. 

Financial Freedom and becoming debt-free 

My purpose in sharing about dōTERRA isn’t to get a yes, an enrollment, or hit a new rank. My primary goal in sharing about dōTERRA with others is to help them find natural solutions PERIOD. 

My purpose is to help others experience the abundance and financial-freedom that we experience everyday. We are living our dreams because we laid down a pipeline the past two years and stopped hauling all those heavy and frustrating corporate buckets. 

You are going to work hard in life…and if you have a dream, like we did, then you might as well work hard building your dream, instead of your bosses. 

When I started sharing dōTERRA (never selling) we were heavy in debt but working towards becoming debt-free following the Dave Ramsey method.  

In the early leadership ranks of silver and gold, I was able to help pay off a few thousand dollars a month to whatever debt, or bill, we were working on getting rid of. All my money from dōTERRA went to paying down debt. We were so adamant about getting the monkey of debt off our backs and determined to make it happen as soon as possible. 

We tore up bill-after-bill and when I hit the rank of diamond 8 months after I started sharing dōTERRA, we WERE DEBT FREE! 

At diamond, I started bring in an extra $15,000 a month and that was when my husband and I started talking about him coming home and working with me. We started dreaming again and then we started living our dreams! 

12196054_10153506193972013_3173822347912199833_n

You see — our dream was to live in the mountains and have a farm. We wanted to homeschool our kids and live a life of freedom. We wanted to travel the world and because of dōTERRA we have been to Jamaica for free and in January of 2016, we are headed to the Dominican Republic for free. 

My focus turned to leadership development within my dōTERRA team and training them to share from there hearts. I wanted this so bad for my team and for the people on my team who needed this financial freedom. 

Three months after hitting the rank of diamond, I was recognized for achieving the rank of blue diamond…one year after I purchased my wonderful starter kit and told my enroller to “leave me alone“. 

Then my dreams unfolded. We bought the house (errr…farm) of our dreams. My husband quit his busy corporate job. We worked less and were way happier! 

We put in about 20 hours each to our business these days and it’s wonderful. I have time to homeschool our kids, travel, and buy any farm animals that my heart desires. The best part? I give more and that is the most beautiful thing of all. 

The opportunity of dōTERRA for anyone

If you have a passion for serving others, and want to use your God-given talents and gifts, and believe that YOU ARE WORTH this, then you can do dōTERRA. 

You don’t have to be a doctor, an aromatherapist, or an expert sales person…the world has enough of those. The world needs people who are willing to put down their agenda and just sit down and listen. 

The world needs people who are leading with their heart and not their pocketbook. 

The world needs people who want to empower others to have the answers at their fingertips. 

Freedom comes when you decide to stop living someone else’s dream and decide to live your own dream. 

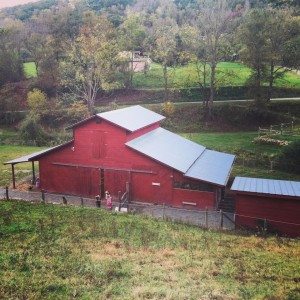
Do you dream of a rustic red barn, milking goats in the morning light, and making your own butter? I did…and I made it happen. 

Do you dream of staying home with your kids, your newborn? 

Or do you simply dream of living an abundant life where you can be a blessing to others? 

The world needs more people who are financially free. I make more money so I can give more money. I invest my money back into my children, my business, and into my future. 

I don’t want to end this post by saying, “sign up with me so I can change your life” because I can’t. The decision to change your situation is up to you and you don’t have to join dōTERRA to do that. However, dōTERRA is an incredible tool if you choose to be a part of it…and it’s not going anywhere. 

If you are interested in the opportunity of building a business with doTERRA, please email me at jackie@ritzessentials.com and I would LOVE to talk with you and help answer any questions you might have! 

Journey to Diamond

References:

  • https://www.doterra.com/en/ourProducts/sourcing/coImpact
  • https://www.doterra.com/en/ourProducts/sourcing/testing
  • https://www.joomag.com/magazine/mag/0599302001443815720?feature=archive
  • https://www.doterratools.com/documents/Compensation_Plan.pdf
  • https://www.doterratools.com/documents/2014_Opportunity_and_Earnings_Disclosure_Summary.pdf

Filed Under: About Me, DIY Beauty Recipes, DIY Home Recipes, essential oils, Living Sustainably

Homemade Gift Ideas for the Homesteader

November 14, 2015 by Jackie Ritz 1 Comment

Gift Ideas

The holiday season has already begun. Every year it arrives, and so often chaos, stress, and uneasiness about gift giving comes with it. But it doesn’t have to be that way for those  prepared with several homemade gift ideas for the homesteader in your life that loves the beauty of things “from scratch”. 

In this blog I want to get your season started right by sharing some of my favorite homemade gift ideas for those homesteaders-at-heart in your life. You can make these easily for your friends and family and give them healthy, original gifts that are so much better than last-minute store-bought items. I will follow up with a second blog on ideas for making homemade tasty food gifts for your loved ones.

Get your shopping list ready and prepare to impress your loved ones with these great gift ideas. I am including three groups of DIY homemade gifts:

  1. DIY Homemade Beauty Products
  2. DIY Health Supporting Products
  3. DIY Home Cleaning Products

For most of these recipes, you are going to need high-quality essential oils. 

essential oils and medical flowers herbsI LOVE LOVE LOVE dōTERRA and would love to help you get started using essential oils. dōTERRA is sold exclusively through independent distributors like me. Working from home, these advocates, like myself, introduce, educate about, and sell essential oils in their local markets through person-to-person contact and globally through websites (like this one!). If you want to take a peak at the starter kits which include most of the essential oils you will need for these recipes, CLICK HERE and let me know if you have any questions! 

DIY Homemade Beauty & Health Products

(Click here to get my DIY Beauty Recipes eBOOK for even more ideas!)

Sugar Scrub BarsSugar Scrub Bars

I love making my own sugar scrub. I, also, love making my life easier which is why I made these sugar scrub bars. All I have to do is grab a bar before getting in the bath or shower. No more opening up a mason jar and scooping out the scrub and letting water get into the scrub. Now I just take a bar and start lathering it over my body. It’s easy to hold and easy to make! (Find Recipe here) 

Lavender Body Butter

I have an obsession with making body butter. There’s something about putting together the simplest of ingredients and then whipping it up into this luxurious, natural, and nourishing lotion. This Lavender Body Butter does just that; it’s simple to make, only four ingredients and uses lavender essential oil. (Find Recipe here) 

Spiced Chai Lip Balm RecipeSpiced Chai Lip Balm www.thepaleomama.com

I love chai tea and the way the spices in a chai tea smell. I have been making my own lip balm for years now, usually I just put my Healing Salve on my lips, but I wanted something a little “fancier” so I created a delicious Spiced Chai Lip Balm recipe that I know you will enjoy. (Find recipe here) 

Whipped Sleepytime Rub

Winding down at night can be tough at times. I know my mind keeps going for minutes and sometimes hours after I lay my head down on my pillow. The same goes for our kids.

Our nightly routine has become essential at our house. I notice that the nights we go from dinner to bed is CRAZY. The kids are not ready to rush rush rush and then get in bed. So, I stopped expecting it from them and started taking our bedtime routine a little more seriously.

Whipped Sleepytime Rub www.thepaleomama.comNow we eat dinner at the table as family and then we slowly start getting ready for bed. The kids take a nice relaxing bath, sometimes a detox bath, with certain essential oils in it, and then we get all snuggled up in our pajamas and read books.

During our reading time I apply this Whipped Sleepytime Rub made with essential oils to my kids. They absolutely love this! The 3 main oils I choose to apply are Frankincense, Lavender, and Vetiver because these oils promote a nice, restful sleep. (Find recipe here)

DIY Health Supporting Products

Elderberry Syrup

Elderberries are packed with Vitamins A, B, and C, iron, potassium, and powerful antioxidants. Making an elderberry syrup recipe is a great way to get all the nutrition from these delicious bushes into our body! (Find recipe here) 

Comfrey Salve

Homemade Comfrey Salve

One of my favorite things about my new homestead is our very own comfrey patch. Of course, you don’t need to grow your own comfrey to make a nourishing salve with it. There are several places online that you can purchase dried, organic comfrey leaves to make this simple and homemade comfrey salve. 

Comfrey has been in use as a medicinal herb for more than 200 years. The allantoin content of comfrey aids in healing wounds, sores, burns, swollen tissue, and broken bones. It can be applied externally to bruises, sprains, arthritic bones of any inflamed tissue, and acts as an anti-inflammatory and pain reliever. (Find recipe here) 

All-Purpose Salve

My goal in creating this recipe is to minimize your medicine cabinet and prove to you that, once again, nature has given us the remedy. This all-purpose salve is good for so many things. The coconut oil and olive oil bring nourishment, while the beeswax is known to lock in moisture, foster cells, and protect skin from damaging environmental factors. For children, the BEST two essential oils to have on hand are melaleuca and lavender.

(Find recipe here) 

DIY Home Cleaning Products

Multi-Purpose Floor Cleaner

When it comes to cleaning your floors, you don’t need expensive products to do the job. Essential oils are great at cleaning up the dirt while leaving a refreshing, clean aroma in the air. Cleaning your floors with essential oils is completely safe, non-toxic, frugal, and easy!

The beauty of using essential oils on your floors, is that you don’t have to worry about using a specific oil on a specific service. Each essential oil will work on your floors. This recipe works if you have tile, hardwood, linoleum, ceramic, laminate, and vinyl. You can mix any of the oils I recommend above to make this recipe or use one single oil. (Find recipe here) 

DIY Laundry Detergent—$0.02 a Load

I’ve been making my own laundry detergent for years now. I was so scared at first to switch over to natural-homemade detergent because there was this mindset that store-bought is best…store-bought smells better…store-bought makes my clothes fresher. However, when we did our budget makeover, I decided to take homemade detergent into my own hands and come up with a DIY laundry detergent recipe that saves a TON of money. (Find recipe here)

Wool Dryer Balls with Essential Oils

 Wool Dryer Balls from The Paleo Mama
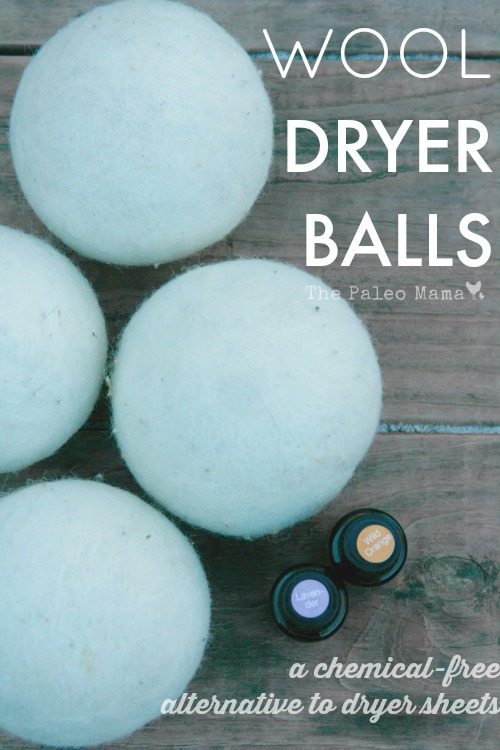
Since I have made the switch to using wool dryer balls, instead of dryer sheets, my pocket-book is much happier, and so is my energy bill! I love my wool dryer balls with essential oils and I know you will making the switch too! Here are some of the reasons why you should try these wool dryer balls:

  • They can cut your drying time in half
  • They help reduce static
  • They save you money on your energy bill
  • They are chemical-free, unlike dryer sheets
  • They can be re-used over-and-over again
  • They increase the fluffiness of your clothes
  • They are safe to use with cloth diapers

(Find recipe here)

All of these easy-to-make homemade products would make fantastic holiday gifts for your friends and loved ones. You will have fun making them, and your loved ones will appreciate the efforts you make to prepare gifts offering healthy, economical alternatives to the chemically laden products you can purchase at stores.

Gift Ideas for the Homesteader


Filed Under: Budget, Budget Shopping, DIY, DIY Beauty Recipes, DIY Home Recipes, essential oils, Homesteading, Living Sustainably

How to Make a Simple Chocolate Mousse

November 5, 2015 by Jackie Ritz Leave a Comment


Ever wondered what kind of blogs bloggers like to read? Well, I have a few that top my list and The Elliott Homestead is one of them. I love Shaye’s writing style, her posts are always encouraging, and the way she connects with her readers. Bonus — she’s a real life friend of mine and when she asked me if she could share a post on my blog on how to make a simple chocolate mousse, I — of course — said yes! Welcome Shaye! 

Hello fellow homesteaders! So glad to meet you… even if it is digitally. I’m always humbled by the community that exists around a common love for animals, farms, and good food. Which is obviously why you’re reading Jackie’s blog in the first place! It’s a beautiful place to hang out and be inspired. I’m humbled she’s invited me to share in a bit of that love. 

In the spirit of celebrating the farm and all the goodies it gives us, I wanted to share with you my super-simple chocolate mousse, make fresh with cream from the family cow and eggs from the chickens. It’s a sweet celebration and whips up in just a few minutes! 

I hope you enjoy it’s simplicity – from my farm to yours! 

Simple Chocolate Mousse Recipe 

Ingredients
  1. 8 oz. high quality dark or semi-sweet chocolate
  2. 4 Tbsp. butter
  3. 2 cups cold cream
  4. 3 egg whites
  5. Pinch sea salt
  6. Garnishes: Berries, powdered sugar, shaved chocolate, pistachios, maple syrup etc.
Instructions
  1. Melt chocolate and butter in double boiler. Meanwhile, whip the egg whites with a pinch of sea salt until stiff peaks form. Set aside. Whip the cream until fluffy and stiff.
  2. Gently fold in half of the chocolate mixture into whipped cream. Then gently fold in the other half of the chocolate. Lastly, gently fold in the whipped egg whites.
  3. When combined, refrigerate for 1 hour.
  4. Garnish with fresh berries, nuts, shaved chocolate, maple syrup, additional whipped cream etc.
      By Shaye Elliott

Filed Under: Homesteading, Living Sustainably, My Recipes

The Deep Litter Method for Your Winter Chicken Coop

October 17, 2015 by Jackie Ritz 7 Comments

If you’ve been following me online, you already know that during the last six months or so I’ve been decluttering our home and farm using the KonMari Method (HERE) for simplifying, organizing, and storing only those things that “spark joy” for us. It’s been a real eye-opening time, and we’ve gotten rid of tons of stuff! SO…this post on The Deep Litter Method for your winter chicken coop may at first sound like an oxymoron! But I assure you it isn’t—what it is is one of the easiest and healthiest ways to prepare your chicken coop for the cold winter months.

You see, my chickens are a real source of joy for us and make the perfect pet. We are raising heritage breeds, and thoroughly enjoying the ability to help protect these endangered breeds, as well as being thrilled with the dozens and dozens of eggs they give us, and the tasty chicken meals we are able to have from their gift of life to us when needed. Taking the best care of them at all times is our prime goal—especially during the cold months of our North Carolina winters.

The deep litter method allows your coop litter to build up over a period of time. As the chicken manure and bedding litter compost, it helps to heat the coop, keeping your chickens warmer. This is also called “The Old-Timers Method,” because it’s been used successfully by many chicken farmers for decades. And an added benefit (“joy” for us KonMari followers) is lots of beautiful compost for our spring gardens.

Let’s take a look at these things:

  • Preparing Your Coop for the winterizing Deep Litter Method
  • Managing the Deep Litter method in your coop through the winter months
  • Doing spring cleaning of your coop when winter ends
  • The Benefits of the Deep Litter Method

1. Preparing Your Coop for the Winterizing Deep Litter Method

You prepare your coop for the winter months by beginning with a deep cleaning. Pick a nice, sunny day and shovel out all the soiled straw and litter in the coop. This is also a great time to check the exterior of the coop for loose screws, hinges, shingles and to make any repairs necessary before winter.

Once your coop is cleaned thoroughly, put a fresh 6-inch layer of pine shavings down on the bare floor. This is the best bottom layer for the Deep Layer Method because they are small and will compost fairly quickly. Put a thin layer of straw over the shavings. Note: Do not use Diatomaceous Earth (DE) for this method. It will kill the good microbes and just is not beneficial to have in your composted soil.

Now you begin deep littering. Each morning turn over the pine shaving and straw, adding more straw as needed until you have a 12-inch layer. You are not removing anything, simply turning it over to expose new straw. You can also add leaves, grass clippings, and weeds during this initial preparation period. You may need to add a 12-inch board at the door of your coop to keep the litter inside for the winter.

Chicken manure is very high in nitrogen.  Mixing it with a source of carbon (either straw, shavings or dry leaves) will balance the mixture and hasten the rate of decomposition.  It is important that your composting material contain oxygen, so turning is crucial. Fortunately the hens will help you with that part, especially if you get in the habit of tossing some scratch or sunflower seeds into the coop for them before bedtime. They will learn to scratch through the litter to find the scratch when they wake up in the morning.  You can also turn the material with a rake. The turning and introduction of oxygen will reduce the chance of ammonia buildup.

After just a few weeks, the droppings, shavings and straw will start to decompose and you will end up with a fine dirt on the bottom.  As anyone who composts for their garden knows, when properly done, composting does NOT smell and does generate quite a bit of natural heat.  This is the same idea as you would do in a compost pile or bin, you’re just doing it inside your coop!

2. Managing the Deep Litter method in your coop through the winter months

Once you have your healthy 12-inch layer of litter on your coop floor, you are set for the winter months. You will need to follow some simple steps to keep your chicken coop in good health throughout the winter:

  • Stir up the bedding to break up any clumps every few days.
  • Keep layering clean bedding on top of the old bedding or any moist spots.
  • To keep your girls happily scratching, toss in a bit of chicken feed when you layer in the fresh straw.
  • If the floor becomes frozen (only in very cold climates), break it up with a pitchfork so your girls can begin scratching again.
  • You should be able to kneel down on the floor and your knees should remain dry.

3. Doing spring cleaning of your coop when winter ends

Your perfect opportunity for decluttering your chicken coop will come with the entrance of spring. Now you get to do your thorough spring cleaning in the chicken coop. Clean out most—not all—of the litter. Leave a base layer (1-2 inches) to inoculate new material with the established beneficial microbes.

As with any decluttering of junk (in this case poop) it’s not fast, easy or fun. It’ll take quite a while to shovel out 1-2 feet of poop encrusted litter. So, with each scoop of poop, just remind yourself that these few hours of pain make the long winter months so much more tolerable for you.

If the litter you remove is thoroughly decomposed and odorless, you can work it directly into your garden beds. If some of the fresher manure hasn’t thoroughly decomposed, simply add it to your other compost pile. If you want to speed up the composting process by helping to keep the compost pile hot, try some Chicken Poop Tea! To make the tea, just fill a couple of buckets half full of water, and then add in the poop until the buckets are full. Stir frequently—holding your nose–and keep the buckets covered. Your chicken poop tea is extremely strong, and should not be applied directly to your garden plants. Use it to keep your compost pile doing its thing—composting.

4. The Benefits of the Deep Litter Method

By now you understand the reasons why using the Deep Litter Method during the winter months is a win-win solution for your chicken’s health and happiness. So let me just finish by listing the main benefits for using this method.

  • It is the most natural and most rational method for manure management.
  • It brings winter happiness to the chicken owner because it lessens the need to do cold weather cleaning of coop.
  • It relieves winter boredom for the chickens who love having a place that is warm and safe, and which allows them to scratch around endlessly in the deep litter floor.
  • The microbial action in the litter turns a potentially disease-causing problem into a substrate for health—studies have shown that this method has positive feeding benefits.
  • The deep organic duff insulates the floor of the coop, while the warmth of its decomposition moderates the chill.
  • Finally, this process captures the fertility in the manure for soil building in your spring garden—the key to food self-sufficiency.

Need I say more? I love the Deep Litter Method of sparking joy for both my chickens and for me. No oxymoron here! 

The Deep Litter Method for Your Winter Chicken Coop

Sources:

  1. https://www.backyardchickens.com/a/deep-litter-method-the-easiest-way-to-deal-with-chicken-litter-dlm
  2. https://www.fresheggsdaily.com/2012/02/deep-litter-methodcoop-cleaning.html
  3. https://www.grit.com/animals/chicken-health-deep-litter-zm0z13jazgou.aspx?PageId=6
  4. https://www.motherearthnews.com/homesteading-and-livestock/deep-litter-method-zb0z1208zmat.aspx
  5. https://chickenjunkie.com/chicken-coops/cleaning-the-coop/chicken-poop-control-the-deep-litter-method/


Filed Under: chickens, Homesteading, Living Sustainably

How to Raise Turkeys

October 16, 2015 by Jackie Ritz Leave a Comment

Raising the turkey you will eat on Thanksgiving Day may be something you want to consider doing. Turkeys can be a fun addition to a small farm or homestead and I’m going to share a few things I have learned on how to raise your own turkeys. But before you start, there are a few things you need to consider.

  • If you are hoping to save money on your Thanksgiving bird by raising it yourself, you are likely to be disappointed. It will be hard to compete with the sale price of the commercially grown supermarket turkeys.
  • You will be challenged to keep your turkey free from predators. Just about every wild critter (even some domesticated ones) is on the prowl for a big, juicy turkey meal.
  • Turkeys have really cute personalities and love to be around people. It may be hard to decide if they are your family pet or your Thanksgiving Day meal.
  • Turkey raising is a challenge—get rid of your romantic notions about it. There will be great days, and there will be difficult days. If you succeed, you will produce a Thanksgiving turkey meal that is way more flavorful than any storebought bird could give you. But if you blow it, you’ll be buying that last minute, dried out bird at the market, hoping no one will notice.

If you’ve been reading our Natural Homestead blogs and posts, you know that we decided that raising our own pastured turkeys—including one for our Thanksgiving dinner—was just what we wanted to do. We purchased 5 2-month old turkeys (yes, we decided to skip the infant stage this first time around) to join our menagerie and forage to their heart’s content out in our pasture.  We built a turkey roost for them to use in the pasture during the day, and they will be able to roost in the closed barn at night.

In this blog I want to share some of our firsthand experiences, and more of our research into how to raise turkeys to help you make a choice about raising your own. We will consider:

  1. What are the differences between a standard breed and a heritage breed?
  2. What kind of shelter do I need to prepare for my turkeys?
  3. What do I need to know about feeding my turkeys?
  4. Are there special preparations I need to make in my pasture?
  5. What health issues could I face with my turkeys?
  6. When will my turkey be ready for eating?

1. What are the differences between a standard breed and a heritage breed?

Frank and I have made the decision to raise only Heritage Breeds of homestead animals on our Gather Heritage Farm. We want to have a part in saving endangered livestock from extinction. When we moved into our forever farm we knew that we could provide the necessary elements to be a part of this endeavor.

Heritage turkeys are raised outdoors, freely roam on pasture, and eat the varied diet nature intended them to eat. Most supermarket turkeys today are raised in crowded indoor pens, and are fed a constant diet of grains, fillers, and supplements like antibiotics—just to fatten them up to meet the demands of American shoppers.

While supermarket turkeys tend to be tasteless and dry, heritage birds are juicy and flavorful. They taste the way a turkey is supposed to taste. Heritage breeds include:

  • Beltsville Small White
  • Black
  • Jersey Buff
  • Narragansett
  • Royal Palm
  • Bourbon Reds
  • Slate
  • Standard Bronze
  • White Holland
  • White Midget

Heritage breeds will take longer to raise. If you raise one from early spring to fall it will weigh approximately 15-18 pounds. But the meat is denser, and more flavorful. There tends to be more leg meat and less breast meat.

2. What kind of shelter do I need to prepare for my turkeys?

If you decide to start with turkey poults (infants), you will need to provide the same basic care you would give to your baby chicks. When you bring them home, dip their beaks in water to teach them how to drink. They need to be in warm temperatures (95 degrees) for the first week, and gradually less heat as they feather out.

Heritage turkeys are more spunky than standard breeds, and can figure any way out of their pen—up, under, through, between. Make sure the fencing around your turkey pen is secure and can keep your turkeys in and their predators out! Fencing should be as high as possible, at least four feet. Use woven-wire fencing and metal T-posts or wooden posts.

If you are raising turkeys to breed or places for broody hens to sit on eggs, you will need a pen with solid sides and separate housing for toms and hens. Allow the toms and hens to forage separately.

Provide your growing turkeys with a turkey roost with a roof to keep them safe. The higher you make it, the safer they will be. Wild turkeys roost way up high in trees. A 5 by 8 foot roost will house about 20 turkeys.

We raise free-range turkeys so we don’t even have housing for them. They usually wind up sleeping on a barn stall or on their turkey roost that we built to go outside and is next to our yellow duck house. The turkey roost is over 7ft high so there is no way a predator can get them at night. 

3. What do I need to know about feeding my turkeys?

Their first food should be a high protein ration with about 28 percent protein fuel their fast growth. By 8 weeks they can be switched to a 20-22 percent feed, and after they begin foraging you can use a 18-20 percent protein, and give them some cracked grains to help their digestive systems utilize their feed.

When you are fattening them up for the Thanksgiving table, toss in excess or bug-infested apples, tomatoes, and other produce as treats. You can find full information on feeding your turkeys here.

4. Are there special preparations I need to make in my pasture?

If you have a large, lush pasture, your turkeys will be able to free range, moving from area to area as they deplete the grasses and eat the bugs. If you have a smaller pasture, you may want to consider whether you can provide enough food material for the birds to thrive. For pastured or limited range turkeys, alfalfa, clover, and grasses such as orchard grass serve turkeys very well; however, fescue is not recommended. Contact local Cooperative Extension agents to ascertain the best choice of pasture browse crops and planting strategy for your locale.

Remember that turkeys are very sensitive to numerous mycotoxins  (toxins produced by fungus and mold), so moldy grains and grasses should be avoided at all cost. Turkeys are excellent insect foragers. The only insects they will not eat are the ones they cannot catch.  

5. What health issues could I face with my turkeys?

Turkeys are pretty hardy, but there are some potential health concerns in raising them. Some of these include:

  • Blackhead (Histomoniasis)—a parasite found in earthworms from poultry droppings. Symptoms include bright yellow droppings and droopiness, diarrhea and weight loss.
  • Coccidiosis—a parasitic disease more common to commercial turkeys, recognized by watery diarrhea and malaise. It must be diagnosed by a vet.
  • Lice—turkeys get lice just like chickens. Make sure you treat them regularly with a lice powder that is suitable for raising organic turkeys.

With careful maintenance and diligence, you should be able to raise your turkeys disease-free and healthy.

6. When will my turkey be ready for eating?

Turkeys for meat are ready for slaughter at 24-28 weeks for standard breeds, but heritage breeds normally take longer to raise to slaughter readiness. Most will weigh 14-18 pounds by Thanksgiving time. You will need to keep that bird around another year to get it to a larger size.

Processing a turkey is more difficult than chickens because they are heavier, more energetic and more intelligent. They are also loaded with much more personality, and it may be very hard for you to consider doing anything hurtful to that family member. You can bring them to a processor to do the hard work for you or have someone else do the hard deed. 

Fortunately, if you choose to raise heritage breeds, you can allow your turkey family to grow and expand so you will always have some of these beautiful birds in your pasture. That’s having your turkey and eating it too!

How to Raise Your Own Thanksgiving Turkey

Sources

  1. https://smallfarm.about.com/od/farmanimals/tp/How-To-Raise-Turkeys.htm
  2. https://sagebrush-mama.hubpages.com/hub/The-Good-The-Bad-And-The-Ugly-Sides-Of-Raising-Your-Own-Turkey
  3. https://www.theselfsufficienthomeacre.com/2013/11/how-to-raise-turkeys.html
  4. https://www.sustainabletable.org/432/talking-turkey
  5. https://www.communitychickens.com/thinking-about-raising-turkeys/
  6. https://www.albc-usa.org/documents/turkeymanual/ALBCturkey-3.pdf

Filed Under: Homesteading, Living Sustainably, Natural Living

How to Grow Elderberries and make Elderberry Syrup

September 28, 2015 by Jackie Ritz 5 Comments

Elderberries are one of the most sustainable crops, and is being farmed by many farmers who are interested in nutritious, home-grown and organic farming. It is packed with Vitamins A, B, and C, iron, potassium, and powerful antioxidants. The plants are a hardy perennial, and are naturally disease resistant. Surprisingly, only 10 percent of the elderberries consumed in the United States are actually grown here. Making a elderberry syrup recipe is a great way to get all the nutrition from these delicious bushes into our body! 

Our farm wants to be a part of the group that wants to change that statistic. We are so happy to have some elderberry bushes on our farm already, and we plan to add more. I’ve already made my own homemade Elderberry Syrup and hope to have many more elderberries to harvest next Fall.

In this blog post I want to cover some of the basics in elderberry growing and harvesting and then using the berries to make an elderberry syrup. We will take a look at:

  1. Elderberry varieties to consider growing
  2. Planting new elderberry bushes
  3. Taking care of your elderberry bushes
  4. Harvesting your elderberries
  5. Nutritious, healthy ways to use your elderberry harvest
  6. Elderberry Syrup Recipe

1. Elderberry varieties to consider growing

There are several varieties of the American elderberry that are especially good fruit producers. Here are some of the best selections to try in your yard or farmland.

  • Adams—This American variety grows 8 to 10 feet tall. The large, juicy, dark purple fruits ripen in August and are great for making pies. The strong branches hold the berries upright. Plant a pollinator variety such as ‘Johns’ for maximum fruiting. This variety is often sold as “Adams No. 1” or “Adams No. 2.” There is little difference between these two selections.
  • Black Beauty—This striking European variety features purple foliage and lemon-scented pink flowers. It grows 6 to 8 feet tall and wide and can be grown in perennial borders or as a foundation plant.
  • Black Lace—This eye-catching European selection looks like a Japanese maple with its dark purple, deeply cut foliage. Like “Black Beauty,” this variety also grows 6 to 8 feet tall and wide, producing pink flowers and dark purple fruits.
  • Johns’—This early-producing American variety produces an abundance of berries that are especially good for making jelly. Growing 12 feet tall and wide, this variety is a good pollinator for “Adams.”
  • Nova—This American variety can be self-fruitful, but does best with another American elderberry growing nearby. Large, sweet fruit are produced on compact, 6-foot shrubs.
  • Variegated—This European variety has attractive green and white leaves and grows 6 to 8 feet tall and wide. The plant is less vigorous and productive than other elderberry varieties, but the foliage is attractive all season long.
  • York—This American variety produces the largest berries of all the elderberry selections. It matures in late August and only grows 6 feet tall and wide. It pollinates “Nova” well.­1

2. Planting new elderberry bushes

While your elderberry berries will grow on your bush the first year they are planted, you will want to be aware that the berries will do better the second year and each year after. The bushes will grow best in well-drained loamy soil. If your soil is sandy, you will need to add organic matter to prepare your soil. Before you plant, be sure to check your soil pH. Your local County Extension Office can supply you with the information you need for doing this.

All elderberries require cross-pollination with other varieties. Either plant two different varieties in their own spots close to each other in your garden, or plant two varieties in one hold. Since Nova and York are the two cultivars that grow the biggest crops, you may want to begin with these two, cross-pollinating them as you plant.

Here are some excellent planting tips:

  • Pick a location with full sun
  • Add manure or compost to your soil before planting
  • Plant your elderberry bushes 6-8 feet apart in rows 10 feet apart.
  • Water the plants thoroughly
  • Don’t apply any fertilizer during the first year.
  • Elderberries are shallow rooted: Keep them well watered the first season.

3. Taking care of your elderberry bushes

After the first year, your elderberry bushes will grow best if you fertilize annually using compost. Because they have shallow roots, mulch around the plants to control weeds that compete for water and nutrients.

Your bushes will grow suckers freely, sending up new branches each season. In the second and third years, these new branches will produce side branches that fruit heavily. In late winter, prune out branches that are more than 3 years old, leaving equal numbers of one- two- and three-year-old branches. Prune out dead or diseases branches as well.

There aren’t many significant pests or diseases affecting elderberries. However you will want to watch for cane borers and Japanese beetles. Be aware that birds love elderberries, and will compete with you to eat them before you can harvest the berries. To avoid the birds getting your harvest, cover the shrubs with netting once they begin to berry. If you are also raising chickens, your chickens can be one of your best defenses against both weeds and insects. You can also handpick the beetles, or use a natural, organic control such as AzaMax. (Here) 

4. Harvesting your elderberries

In most climates, there will be a 5-15 day period in mid-August through mid-September when the berries are ripening. Be sure to pick them before the birds do! Let them ripen on the shrub to a dark purple color. Prune off the entire cluster when ripe, and strip the berries into a bowl. You will need to keep the harvest refrigerated and process the berries as soon as possible. You can get 12-15 pounds of berries from one mature 3-4 year old shrub.

5. Nutritious, healthy ways to use your elderberry harvest

As I mentioned at the start of this post, elderberries are packed with vitamins, minerals, and antioxidants. One of the best-known benefits of the black elderberries is its power to boost the immune system, because of it strong, antiviral properties. The medicinal parts of the elderberry bush include the roots, bark, young shoots, leaves, flowers, and berries. Yup—the entire plant! 

The flowers are effective at reducing phlegm and encouraging sweating. They are also good for strengthening the upper respiratory track. The flowers help to soften the skin and are often added to lotions and creams. You can also make a flower poultice with them too! (Here) 

Elderberries can also be used in cooking, and there are many good, nutritious elderberry food recipes that you can research for yourself.

Elderberry Syrup Recipe

If you cannot grow your own elderberry bushes, then you can still reap the benefits of this plant by purchasing dried elderberries from HERE.

I want to really encourage you to find a local honey farmer and get the MOST local raw honey you can find. It’s not necessary to have local honey, but it is essential to have RAW honey that has not been pasteurized (to destroy it’s many health benefits). I am lucky enough to have our own honeybees, so we used the honey that we harvested in July from our backyard! 

INGREDIENTS:

  • 2 cups of filtered water 
  • 2/3 cup of dried elderberries or 1.5 cup of fresh
  • 1 cup of your most local raw honey you can find
  • 1 teaspoon of whole clove 
  • 1 stick of cinnamon
  • 1 knob of fresh ginger, peeled 

DIRECTIONS: 

  1. Bring the water, elderberries, and spices to a boil. Reduce to simmer on low for 30-45 minutes with a lid on. 
  2. During the simmering, use a potato masher and frequently mash the elderberries while simmering.
  3. Remove the saucepan from the heat.
  4. Pour the honey in a separate glass jar.
  5. Filter the hot syrup through a sieve or cheesecloth into the honey. You might need to grab a funnel. You will want to make sure you squeeze all the liquid out from the elderberries. This is why I like using a cheesecloth and twisting to make sure it’s completely drained out . 
  6. Stir the honey until it is dissolved. Make sure you use the hot syrup to dissolve the honey. 
  7. Date and label the bottle and then place in the refrigerator. The honey acts as a natural preservative so you syrup should be good for several months in the fridge. 

NOTES: 

  • Adults can take 1 tablespoon daily and children (over 1 years old) can take 1/2ts-1 ts daily. 
  • If feeling under the weather, adults can take 1 teaspoon every 2-4 hours and children can take 1/2 teaspoon, every 2-4 hours. 
  • Remember honey can cause botulism in infants! 
  • Cost/Savings: It cost me $2.17 if purchasing dried elderberries to make this recipe and only $$0.97 if using your own homegrown elderberries!
  • This recipe makes over 3 cups of elderberry syrup! You won’t beat that price anywhere! 

You will never regret your decision to try raising and harvesting elderberries. Elderberries are even better nutritionally than blueberries. They are wonderful for pies, jams, jellies, and homemade medicinal remedies. The flowers are delightful breaded and made into fritters. Join us at bringing these wonderfully versatile berries back as homegrown American treasures and enjoy the delicious and nourishing Elderberry Syrup Recipe! 

Elderberry Syrup Recipe

Sources

  1. https://www.garden.org/ediblelandscaping/?page=july_elderberry
  2. https://normsfarms.com/aboutus/our-story/
  3. https://www.gardeningknowhow.com/edible/fruits/elderberry/planting-elderberry.htm
  4. https://www.starkbros.com/growing-guide/how-to-grow/berry-plants/elderberry-plants/planting
  5. https://www.healing-from-home-remedies.com/elderberry-benefits.html

Filed Under: beekeeping, DIY Home Recipes, Homesteading, Living Sustainably, Natural Living

« Previous Page
Next Page »

Primary Sidebar

  • Facebook
  • Instagram
  • Pinterest
  • RSS
  • YouTube

Hi, I'm Jackie Ritz and welcome to The Paleo Mama! I'm a published author, certified herbalist, and voracious researcher of natural medicine and nutrition. I'm glad you're here and I hope you stick around for awhile!

Recent Posts

  • When God Says Pause: Why I Took a 5-Year Break from My Online Business
  • How to Quit Facebook but Keep Your Business Profile
  • Leaving the City for the Country
  • Natural Way to Heart Health

MEAL PLANS

Biblically clean meal plans that are for those love to cook real food

Read More

Footer

Our Blog

The Paleo Mama blog provides simple answers for healthier families through research, tutorials, recipes, and simple remedies for daily needs!

  • Health
  • Essential Oils
  • Recipes
  • Remedies
  • Natural Living
  • Meal Plans

Stick around!

You’ll get instant access to a library of natural remedies and real, paleo food, including our ebooks and free guides we send out.

  • Home
  • Disclosure/Disclaimer
  • Privacy Policy
  • Advertise
  • Contact Me

Copyright © 2025 · Wellness Pro on Genesis Framework · WordPress · Log in