• Skip to primary navigation
  • Skip to content
  • Skip to primary sidebar
  • Skip to footer

The Paleo Mama

Homegrown and Handmade

  • About
  • Blog
    • Podcast
  • Meal Plans
  • Essential Oils
  • Our Farm
    • Great Pyrenees Puppies
    • Goats
      • Goats for Sale
      • Goat Sales Policy
      • Nigerian Dwarf Bucks
        • Ranchocabra Lunar Eclipse

Homesteading

Essential Oils On a Farm

July 11, 2015 by Jackie Ritz 5 Comments

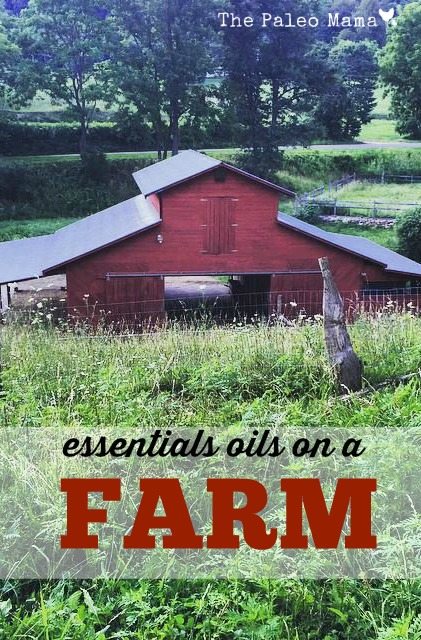
One of the statements I can remember my mother saying whenever she counseled with someone about a problem in a marriage relationship was: “You have to always remember that you bought the farm!” So what does that mean? It means that in relationships, just as in farming there are cute, cuddly animals and bountiful harvests; there are also weeds, predators after your chickens, fleas and ticks on your barnyard animals (and sometimes your kids), and lots of manure to deal with. However, I’m coming to realize that essential oils can be used for so many things and so in this post I’m going to share with you how to use essential oils on a farm. 

I know that truth a lot better today after just a few short years of homesteading, than I knew it in my head before I experienced it…homesteading is NOT easy, nor is it glorious. I want this post to help us find ways that we can deal with some of the more negative factors in homesteading through the use of essential oils.

Yes, that’s right, you can use essential oils on your livestock and in the care and management of your farm. But you don’t just start using essential oils indiscriminately wherever and however you choose. Just as you want only to better the health of your family members with your essential oils, so too that’s your goal with your animal family, and it takes a bit of forethought and knowledge to get it right.

If you are interested in my trusted brand and how to get started using essential oils, then CLICK HERE! 

I want to concentrate in this post on using essential oils on animals. There are many other uses for essential oils in farming, but we’ll start with our animal family in this blog. Let’s consider briefly the use of oils with:

  • Flies, Fleas and Ticks
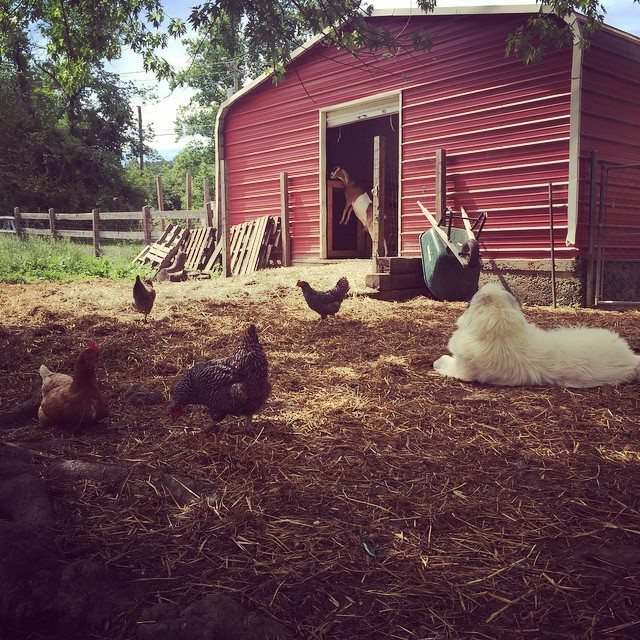
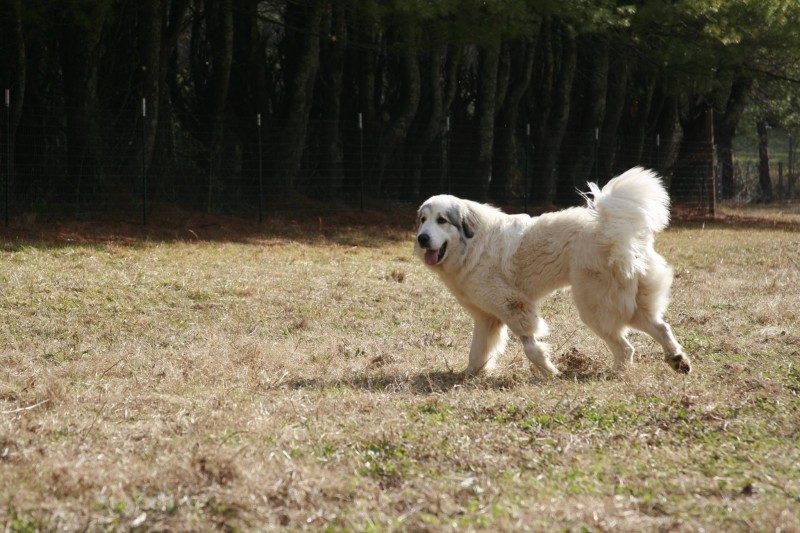
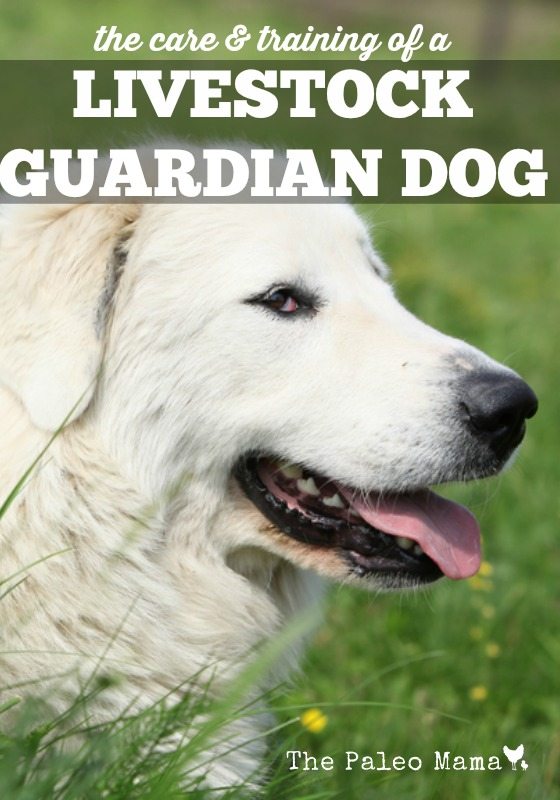
  • Cats and Dogs
  • Chickens
  • Goats
  • Dairy cattle
  • Pigs

Flies, fleas and Ticks

OK, I know we are not choosing to raise flies, fleas and ticks, but every barnyard animal will have to do battle with these pests. Flies are a major health concern all across the globe. The common housefly is a serious threat to people and animals alike because of the many infectious diseases they carry. Fleas and ticks like blood of any flavor—human, animal, or poultry.

Researchers in India did studies testing essential oil usage for dealing with flies. They discovered that peppermint oil successfully repelled larvae and egg laying, with ginger oil, cinnamon oil, and gooseberry oil also giving respectable assistance. (Source) You can find a Homemade Fly Spray Recipe using essential oils here. 

Finding a nontoxic insect repellent to use on your barnyard animals is not easy. Chemicals like prallethrin and piperonyl butoxide are often used in livestock sprays, as well as the proven toxic chemical, deet. These chemicals accumulate in the liver and put our animals at risk. However, researchers seeking organic and naturally healthier ways to get rid of insects and have developed nontoxic sprays using essential oils. You can find four of these natural livestock spray recipes here. 

Cats and Dogs

cats

There is a wealth of helpful research available online to help you find nontoxic, natural solutions for the health problems experienced by your household pets. It is important to remember that the essential oils blends and aromatherapy that humans can enjoy and handle might not produce the same reaction in our pets. Some oils can be quite dangerous. If used correctly, however, essential oils contain a host of biologically active and powerful compounds and are an indispensable part of integrative medical care. (Source)  You will need to research carefully to learn how to successfully use essential oils on your pets. 

There are cautions and principles for safe use you will need to be aware of. Do your research before trying anything. One veterinary who uses aromatherapy in the treatment of his animal patients has recommended the following essential oils that are safe for use. You need to see his recommendations for use and to know what they are used for here.  The oils he considers safe for use are:

  • Lavender
  • Cardamom
  • Fennel
  • Helichrysum
  • Frankincense
  • Spearmint

Once you are familiar with the essential oils safe for your pets, you can begin to develop essential oil remedies. You can find several suggestions for sprays, shampoo, flea collars, ear problems, paw pad care, skin irritations, doggie smell deodorizer, and calming mists here.  
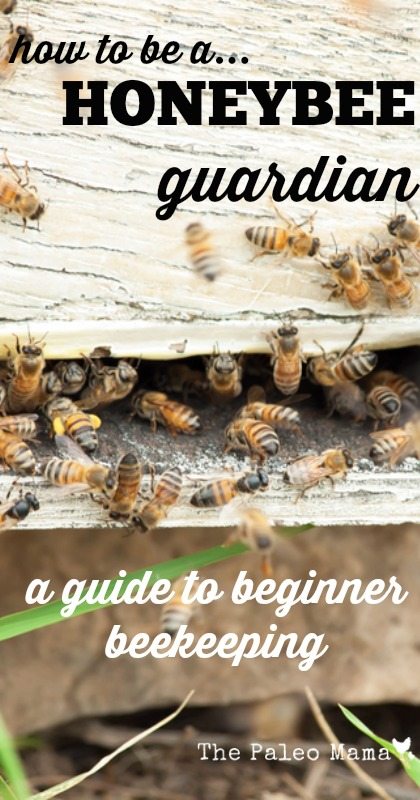
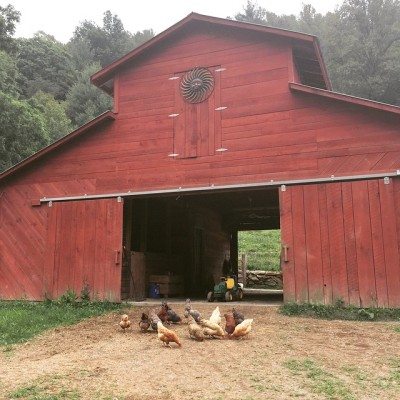
Chickens

chic

To be successful using essential oils on chickens you must first understand that chickens breathe differently than mammals. They do not have a diaphragm, and use the rib cage and breast bone to move the air in and out of the body. Their lung rely on air sacs to distributed oxygen to their bodies. As a result, chickens breathe in higher concentrations of oxygen and whatever else in is the air. (Source) 

A buildup of fumes from chicken droppings, spilled water and cleaning products irritates their breathing system and leads to illness. So using a coop cleaner made with natural products will clean the coop without irritating the chicken’s respiratory system.

Lemon essential oil and other citrus fruits have natural cleaning and disinfecting capabilities. You can easily make a homemade coop cleaner that is easy on your nose and easy on the chicken’s respiratory tract. Use the recipe you will here for cleaning out the old shavings and coop bedding, and to spray down the coop. 

You can also make a salve ointment with essential oils for chicken care. You will find one recipe using lavender and frankincense essential oils here.  Coconut oil is also a great carrier oil to use for homemade chicken ointment.

Heavily diluted oregano essential oil is used by many chicken owners for many uses. Using essential oils for chicken care is a wonderful natural approach. Just make sure you do your own research so you are comfortable with the choice that is right for you to use.

You can also find a recipe for Natural Garlic Juice Spray  here. 

We like to add a few cloves of garlic to our chickens waterer. The garlic infuses the water and provides a good immune support every time they take a drink of water. 

Goats

One essential oil that has proven success in improving health issues in goats is lavender oil. It has traditionally been used for everything from respiratory problems, to skin health, and even as a natural aid during labor. Emotional issues in goats can also be alleviated with the help of lavender oil. (Source) 

j


If a goat is being kept in a stall due to illness, you can put drops of oil around the stall to help eliminate some of the animal’s stress. Some goat farmers will also add a few drops to a vaporizer or diffuser to alleviate respiratory issues. Lavender oil can be very hard on the liver and kidneys of animals, so avoid internal use. You can research all aspects of raising goats here. 

Dairy cattle

Essential oils with dairy cattle is now being considered as a way to improve or alter rumen fermentation (the cow’s first stomach) in order to reduce methane gas production. If you are interested in learning more about using essential oils with dairy cattle, one resource lists the essentials oil that may be helpful along with their properties, and possible uses. (Here)

Essential oils can benefit cattle during summer months with heat stress and pesky insects. Flies, fleas, and lice irritate cattle. Strongly scented essential oils like rosemary, cedar, lavender, and eucalyptus naturally repel pests and lessen the stress on the herd. Cinnamon oil, known as a “hot oil,” and along with garlic oil, clove oil, and oregano oil can help to reduce fermented protein in the rumen. Garlic oil can help to relieve digestive upset and the production of methane gases. You can find specific instructions for their use here. 

Pigs

One non-conventional use of essential oils with pigs is in animal feed. Some time ago Porcine Epidemic Diarrhea Virus (PEDv) was spreading rapidly throughout pig farms and causing a drastic impact on pork supply and prices at the meat counter. To combat this epidemic, many pig farmers began using a pig-feed ingredient that contained essential oils, oregano, and chili powder along with other all-natural organic ingredients. There has been a big boost in immunity to PEDv as a result. Essential oils are known for their aromatic effect, and the combination of essential oils, oregano, and chili powder have made pig barns at feeding time smell like and Italian pizzeria. (Source) 

It’s so encouraging to Frank and I as newbies in the business of raising farm animals to find that more and more farms are putting essential oils into practice. A number of companies are even selling plant extracts as feed additives, but very few big companies are willing to readily offer that information. Essential oils are truly a secret weapon, an unsung hero being used successfully, but not quite openly. Our farm plans to continue openly trying to find more and more uses for these powerhouse essential oils in our farmyard.

If you are interested in my trusted brand and how to get started using essential oils, then CLICK HERE! 

Essential Oils Around Your Farm

Sources

  1. https://www.theprairiehomestead.com/2014/07/essential-oils-livestock.html
  2. https://www.hobbyfarms.com/crafts-and-nature/4-diy-bug-repellents-for-you-and-your-animals.aspx
  3. https://www.optimumchoices.com/animals_essential_oils.htm


Filed Under: DIY Home Recipes, Dogs, essential oils, Homesteading, Living Sustainably, Natural Living

Vegetable Gardening for Beginners

July 5, 2015 by Jackie Ritz Leave a Comment

I know you’ve heard me telling you about our dream farm we just moved to, with its ready-made flower and vegetable gardens. What a blessing for us! The former owner was a master gardener, and it’s going to take me some time to just get a grip on how to manage what has already been planted. But I’m determined to grow into a mini-master gardener as soon as possible so here is a few tips I am learning and wanted to share with all of my wonderful readers! 

One thing you also already know about me is that I like to live life from a laid-back, take-it-as-it comes point of view. That is, until I become really passionate about something I like doing—such as living a Paleo lifestyle, and proclaiming the virtues of using essential oils to maintain health instead of the chemicals most drugs shove into you.

So I know I’ll become just as passionate about gardening—but for now I want to share a few secrets I’ve found from my beginning research into gardening. Let’s just say this is a first installment on “Vegetable Gardening for Beginners.”

Let me start by saying I am aware that not everyone reading this will have ten wonderful acres of farmland on which to raise their fruits and vegetables. But hopefully you will find in this post some easy and potentially workable ways to start your garden no matter how much land you have—or don’t have.

I want to take a look at four starting points for any gardener:

  1. Where can you plant your garden?
  2. What are you going to plant in your garden?
  3. When are you going to plant your garden?
  4. When will you be able to enjoy the harvest from your garden?
  5. Where can you plant your garden?

1. Where can you plant your garden?

To get from wanting to have a garden to planting a garden you have to first of all determine where you will plant the garden. Are you stuck in an urban area where you see more concrete that dirt when you look out your window? Then you may want to bone up on Container Gardening. You can use just about any container— Smart Pots, wood, terra cotta, clay, an old sink, wheelbarrow, rubber boot, watering trough, and even cardboard boxes or bags or dirt. If you don’t even have a small balcony or patio to place your containers on, you can consider windowsill gardening from inside your home.

If you are fortunate to have some dirt—even a small area—where you can plant your vegetable garden outside, there are a few blunders you could make that would keep you from ever reaching the harvest stage. Avoid these five blunders:

  • Don’t bite off more than you can chew by planting your garden without considering the time and effort needed to maintain it. Do the necessary research to learn all you can, and then draw up a weekly checklist of maintenance tasks and stick to it.
  • Don’t ignore the light requirements for your plants. Full sun means six or more hours of direct sunlight, and some shade means that those plants don’t want to be wilting in the sun all day long.
  • Don’t forget to amend your soil. This is your most important starting task. Good soil means the right combination of silt, clay and organic material. Sandy soil requires working in a higher ratio of organic material to a depth of at least 4-6 inches. Clay soil needs to have compost material added to it.  Take a sample of your soil to your local university extension office for testing to determine what nutrients you need to add, or do it yourself using a store-bought soil sample test.
  • Don’t overdose your soil on added nutrients. Even the fertilizer made for organic gardening comes with specific instructions, which must be followed to the letter for best results. I like to use natural methods to eliminate garden pests.
  • Don’t overwater or underwater your garden. It is recommended that you stick your finger about an inch in the soil, and if it feels dry, water thoroughly. If the soil is still moist, wait a day and check again. Avoid watering above the plants, it can cause leaf spot and blight problems. Water directly over the plant’s roots.

2. What are you going to plant in your garden?

At first, when deciding what to plant in a garden with vegetables, it’s best to start small. Many gardeners get a little too excited at the beginning of the season and plant more than they need—and end up wasting food and feeling overwhelmed by their garden.

So first, take a look at how much your family will eat when you think about how to plan a vegetable garden. Keep in mind that vegetables such as tomatoes, peppers, and squash keep providing throughout the season — so you may not need many plants to serve your needs. Other vegetables, such as carrots, radishes, and corn, produce only once. You may need to plant more of these. You can find a list of 10 must-grow vegetables here. 

What you grow will be partially determined by how much space you have available. Remember that you don’t need a large space—you can have a good harvest from just a few container plants. Here are some great ideas for growing veggies in containers. 

3. When are you going to plant your garden?

Starting seeds indoors can help you get a jump-start on spring! Learn what you need and get tips for successful seed starting here. 

Knowing the right time to plant your seedlings outside in your garden depends on where you live. For example, I know that summertime gardening can be a challenge with hot, humid summers and mild winters in the South. Heat-tolerant plants will do best. You can get some ideas for when and how to garden for your area here. 

Vegetable gardening is divided into climate groups: cool season and warm season. Here are some tips to get it right for your area:

  • Plant for your zone. See this zone map. 
  • Cool season vegetables germinate best in cool soil. They are usually planted as soon as the soil can be worked in the spring.
  • Warm season crops can be started indoors, but wait until at least two weeks after the average frost date for your region to plant outdoors. Give them some shade while they adjust to outdoor temperatures.

4. When will you be able to enjoy the harvest from your garden?

During the time between planting and harvest you need to diligently care for your plants. Your veggies will grow faster and give better crops if you feed them. Choose natural products. Well-rotted animal manure from plant-eating critters (rabbits, goats, horses, sheep, chickens) is a great source. Look for prepackaged organic materials online or at your local garden center.

Build your own compost station. Adding good quality compost to your garden provides nutrients in a form plants can use, enriches soil health and enhances the soil food web, builds soil structure, improves drainage, and acts as a butter to toxins. You will find six ways to make great compost here. 

When harvest time comes, it comes big-time. For the gardener, the challenge now may be to keep ahead of a tsunami of vegetables. It’s best to take a basket out to the garden every day to see what has ripened. Picking vegetables as soon as they are ripe often encourages the plant to produce more. Most vegetables are at their peak of tenderness and flavor when they are relatively small.  Zucchini, for example, are best when they are no more than six or seven inches long. Then they get tough and woody. You will find some great harvesting tips for various vegetables and fruits here.

It’s crucial to keep track of what you planted and keep the seed packet so you know what to expect. There are many cultivars of vegetables today, bred for different characteristics such as size. You can plant a watermelon variety that ripens at eight inches across or one that’s not ready until the fruit weighs 30 pounds.  And it would be a shame to pick yardlong beans (which actually are best when they are 15 to 18 inches long) at the five to six inches that would be normal for pole beans.

When you harvest, look out for signs of trouble, such as yellowing leaves or rotting fruit, and remove the problem parts. Even if it’s something you can do little about—such as blossom end rot or cracking from too much rain—there’s no point in letting the plant put energy into fruit you won’t be able to eat.

If you do the proper research, and learn the lessons mentioned here in my blog, who knows? You may become the master gardener you always dreamed of being. Now…I’ve got to get back out to my gardening maintenance!

Vegetable Gardening for Beginners

Sources

  1. https://www.dummies.com/how-to/home-garden/gardening.html
  2. https://www.birdsandblooms.com/gardening/fruit-and-vegetable-gardening/5-common-mistakes-backyard-vegetable-garden/
  3. https://www.bhg.com/gardening/vegetable/vegetables/planning-your-first-vegetable-garden/
  4. https://www.bhg.com/gardening/vegetable/vegetables/when-to-plant-vegetables/

Filed Under: DIY, Homesteading, Living Sustainably

Log-Grown Shiitake Mushrooms

June 22, 2015 by Jackie Ritz 6 Comments

Moving onto a beautiful, fully-functioning farm like Frank and I just did is a bit like having your first child; it needs your love and care immediately—even if it didn’t come with a Farming for Dummies instructional manual. That’s what happened when we went for a walk on our land; we found oak logs already inoculated with lots of potentially tasty Shiitake mushrooms, and not much “this is how to take care of them” from the former owners on how to take care of these log-grown shiitake mushrooms. 

So, as with many other farming chores, we began our own research into raising Shiitake mushrooms successfully. I want to share some of the basic information we have uncovered that should allow us—and you, if you would like to join us by growing your own—to harvest some delicious and healthy log-grown Shiitake mushrooms.

In this blog post I will provide some basic, practical answers to these five important questions:

  1. Why grow Shiitake mushrooms?
  2. How do I prepare my logs for growing Shiitakes?
  3. What do I do with my inoculated logs?
  4. Why do I have to shock my inoculated logs before harvest?
  5. When can I harvest my Shiitakes?

By following the information in these answers, we will be able to reap a bountiful harvest of these delicious and healthy Shiitake mushrooms.

1. Why grow Shiitake mushrooms?

Are you thinking, “Why on earth would I want to grow fungi?” If you’ve never learned to appreciate the taste of the many different kinds of edible mushrooms, that’s the place for you to start! Get beyond your knowledge that mushrooms are fungi, and get some sample tastes of how delicious and healthy these mushrooms are. Shiitake mushrooms are the third most popular mushroom in the world, and they are perphaps the healthiest of them all! Here are four unbelievable benefits to Shiitakes:

  • They are loaded with B-Complex vitamins.
  • They are believed to deliver anti-cancer properties to your body when you eat them.
  • They are low in calories, yet high in fiber content and loaded with protein.
  • They contain a multitude of minerals. Just one raw serving contains 1/20 of the magnesium and potassium you need each day, along with 10 percent of the phosphorus. But eat them dried or raw because they lose up to ¾ of their nutritional value.

2. How do I prepare my logs for growing Shiitakes?

The name shiitake mean “mushroom of the oak,” but shiitake mushrooms will also grow on sugar maple, hophornbeam, ironweed, alder, poplars, and yellow birch. But the mycelium’s (the vegetative part of a fungus, consisting of a network of fine white filaments) favorite food for producing a flush of lovely brown shiitake caps is oak, either white or red.

It’s not necessary to cut down an oak tree in order to get the logs you need for your mushroom growing. You can read some expert tips for acquiring logs from unique sources here (page 10). However you cannot grow shiitake on dead wood, such as old logs in your yard or woodland, or on firewood, because local fungi have contaminated these logs or the logs have dried out.

Early spring, before the trees leaf out, is the season most suggested for inoculating bolts for mushroom production. The logs should be 4-6 inches in diameter, which gives a prime amount of sapwood (the lighter colored outer layer), which is the primary part of the log where the fungi will colonize.

You will need to have a supply of shiitake mushroom spawn (mushroom mycelium) which is already impregnated in wooden dowel plugs, either in liquid form or mixed with sawdust. If you are using impregnated wooden plugs, use a 3/8-inch drill bit to drill to a depth of 1-1/4 inches before pressing in the plugs. Drill in 10-inch intervals down the length of the log. Leave 2 inches between each row, and stagger the holes from one row to the next. Then you will need to cover each plugged hole with very hot food grade wax (cheese wax or even beeswax will work) to ensure an airtight, flexible seal. CLICK HERE to order mushroom spawn. 

3. What do I do with my inoculated logs?

Now you are ready to create your laying yard—the place where the inoculated logs will incubate, and where you can give routine maintenance to them. This should be in a place of year-round shade to keep the logs from drying out due to sun and wind. A laying yard under the canopy of a forest is best. If you have just a small number of logs and no wooded area, behind the north side of a house or shed, along with a shade cloth, can provide year-round shade. Remember that you need to be relatively close to both electricity (for drilling), and water (necessary to irrigate and soak the logs).

shrooms

There are several ways you can lay out your logs. A stack of criss-crossed logs works well, as well as forming an X-pattern by stacking logs end to end, leaning each log against a strong wire. Be sure to label each log with the date of inoculation, spawn type, and force date (see below). Keep the logs off the ground, stacking them on pallets or non-inoculated logs.

Your logs need an incubation period of 8 to 18 months, or spawn run, during which the fungus colonize the wood. You will need to maintain favorable conditions so the mycelium can spread through the logs as quickly and evenly as possible. Your maintenance will include:

  • Keeping the moisture content well above 30 percent.
  • Using artificial shading if the natural canopy of trees thins out.
  • Protect the logs against competing fungi.

There are at least five common fungi competitors you may encounter: Black Bulgur or Bachelor’s Buttons, Trichoderma, Hypoxlyon, Turkey Tail, Split Gill fungus. You can find further information about fungi competitors here (pages 28-29). 

4. Why do I have to shock my inoculated logs before harvest?

Shocking your logs, or forcing bolts, is a matter of speeding up Mother Nature. Shiitake mushrooms are one of the few mushrooms that can be made to fruit on demand. Shocking involves soaking logs in cold water for an extended period of time (12-24 hours) to induce fruiting. By shocking your logs on a schedule, you can generate a steady supply of shiitake mushrooms on a predictable rotation.

There are several ways to determine if your logs are ready for shocking. One option is to observe the mycelium growth (white discoloration) on the end of the bolt. During March-April, and October-November, logs are allowed to fruit naturally with being soaked. During the warmer months, May-August, groups of logs are forced by shocking them every seven weeks. You will find complete information for these shocking procedures here (pages 30-34). We shocked our logs this week by putting all 20 of them in the creek that runs through our property. You can, also, use a child’s swimming pool or a livestock trough. 

5. When can I harvest my Shiitakes?

Shiitake mushrooms are usually ready to be harvested 7-10 days after shocking. Gills should be visible, and the outer edge of the mushroom should be slightly curled under. It’s normal to expect ¼ to ½ pound of mushrooms per log, or a higher yield with two shockings per season. Over the course of five years, each log should produce 3-4 pounds of fresh mushrooms.

When harvesting mushrooms, the goal is to efficiently remove the mushrooms without damaging the bark. Most experiences growers simply twist and pull the mushrooms off the log using their hands. Gently brush off any dirt and place each mushroom in an open basket or paper sack or other vented container. If you see thrips (tiny, slender black insects crowing in the gills) on your mushroom, they will usually dislodge by tapping lightly on the top of the cap.

For high-quality mushrooms, it’s important to get the in the refrigerator as quickly as possible, certainly within one hour of harvesting. Do not seal them in an airtight container. If you want to freeze your mushrooms, you must steam them first with a mixture of 1 teaspoon lemon juice or 1/5 teaspoons of citric acid per pint of water for 5 minutes to reduce darkening. Steam whole mushrooms for 5 minutes, pieces for 3.5 minutes. Cool promptly, drain and package, leaving ½ inch headroom.

You can also dry shiitakes, which will preserve them for up to a year. You will find great information on storing and preserving mushrooms here (pages 43-44). 

Now all that is left…

…is enjoying these wonderfully tasty and healthy shiitake mushrooms. While you are waiting to harvest your Shiitake mushrooms, start collecting some delicious recipes for ways to add them to your diet. One of the first things I want to make when we harvest our first crop of Shiitake mushrooms is some delicious Shiitake Soup!

How to Grow Shiitake Mushrooms

Sources:

  1. https://www.healthy-holistic-living.com/mushroom-information.html
  2. https://www.treehugger.com/green-food/how-to-grow-shiitake-mushrooms.html
  3. https://northernwoodlands.org/articles/article/growing_shiitake_mushrooms
  4. https://www.uvm.edu/~susagctr/resources/ShiitakeGuide.pdf
  5. https://www2.ca.uky.edu/agc/pubs/for/for81/for81.pdf
  6. https://www.centerforagroforestry.org/pubs/mushguide.pdf

Filed Under: Homesteading, Living Sustainably, Natural Living

The Training of a Livestock Guardian Dog

June 19, 2015 by Jackie Ritz 15 Comments

I know that by now you have seen the many pictures I have posted of our wonderful Livestock Guardian dog, a beautiful Great Pyrenees named Esme. She has been a great addition to our family, and by now, at  more than eighteen months of age, she has developed into a fantastic guardian dog for our goats and chickens. The care and training of a Livestock Guardian Dog is an investment that will NOT disappoint, as long as you do it the right way. 

Great Pyrenees are one of the oldest dog breeds in the world. They were bred as dogs of war and then used during peacetime as sheep guarding dogs. They are one of the least aggressive of the large guardian dogs (LGD), so often people cherish them as family dogs. They are regal, independent and aloof compared to other dogs breeds, traits necessary to spend days alone guarding flocks. This independence shows when you call them—they come, but maybe not on the first call.  

Raising a livestock guardian dog is much different than raising a pet dog who lives with you in your home. Making the right decisions in the period of training will guarantee that you livestock dog performs his duties perfectly for the rest of his life. But choosing to raise him as a pet with little or no specific guardian training will give you a dog who cannot be trusted with your livestock.

Raising puppies to become livestock guardian dogs is a 12 month to 18 month venture. These breeds of dogs are slow to mature and thus are often not trustworthy and reliable before this age. I want to take a brief look at three major areas of training for a livestock guardian dog.

  • How do I teach my livestock guardian dog to bond with my livestock?
  • How does my livestock guardian dog learn to obey fence and gate boundaries?
  • How do I socialize my livestock guardian dog to people and my surroundings?

How do I teach my livestock guardian dog to bond with my livestock?

baby esme

Livestock guardian breeds come with an inherent ability to guard that which they bond to. When you bring your pup home be prepared for him to spend the night where you expect him to spend his nights as an adult. With the stock. Not in your house.

Every day the pup will need to exercise and have interaction with his charges. You can allow free time outside the puppy pen whenever you are around to keep an eye on the action. For the first few weeks, lock the pup up when you are not there to supervise. During the small puppy-stage (which doesn’t last long in a Great Pyrenees) we used a large dog kennel and kept it in the barn with the goats. Our Esme slept in the large dog kennel at night and during the day we put her in a separate fenced section. She could smell and be out with the goats and chickens, but the fence kept her from developing any bad habits of chasing the livestock. 

NEVER throw your puppy in with your livestock and expect him to naturally take on the role of a Livestock Guardian Dog. A Great Pyrenees does NOT equal a good Livestock Guardian Dog. A well-trained and time-invested Great Pyrenees DOES! 

Over the next several months supervise the pup and discipline any unwanted action toward the animals such as chasing, chewing, and biting. And by discipline, I do not mean you EVER hit or kick a livestock guardian dog. This will leave a bad impression and could ruin the demeanor of the dog forever. You firmly say, “NO…my chickens,” and then walk away from the dog and show them no attention. If they continue to misbehave, you lock them in their pen (which they utterly hate). You can also praise the pup for good behavior. Pet and feed the pup when he is with the livestock, not when he is away from them so that he never develops the bad habit of being possessive of his food. Do not take the pup up to the house for food and attention. As the pup matures you will notice if he is bonding to your livestock or not.

If the dog is to guard, it is not good to raise it around other non-Great Pyrenees dogs where it can pick up bad habits such as chasing poultry or livestock. Great Pyrenees don’t normally chase, but if the big puppy bounces up to a chicken and the chicken runs the other way, the dog will give bounce after it. Once chasing starts, the chicken soon becomes a diversion, and that dog can no longer be trusted with poultry. Closely monitor your Great Pyrenees puppy for its first 12-24 months if you desire to raise a trustworthy poultry guard. Some dogs take 2 years to become trustworthy around chickens. We found that Esme took 15 months till we were confident in leaving her alone with the chickens but the training was SOOOOOO worth it.

Esme 

How does my livestock guardian dog learn to obey fence and gate boundaries?

A large part of success with raising puppies is being able to teach them to respect boundaries. Under no circumstances is climbing over or crawling under the fences going to work. Supervise and correct any attempts to go over or dig under fences as you see them. Use the time that you have the dog nearby and bonding to stock to set up the enclosure with hot wires, and allow the dog to learn the consequences of crossing electric fences.

Gates also need to be included in the training. LGD’s are smart dogs and will figure out that fences may be not so good but gates are okay. They need to know they do not cross gates unless invited out by you or moving with the flock. When raising puppies doing the work of teaching the pup respect for fences will go a long way to eliminating the core problem seen in LGD’s—wandering away from the flock and farm.

Adult Great Pyrenees will naturally cover a one to two mile radius. If that’s not allowable, the dog will have to be trained to a smaller area.  Fences, electric fences, and invisible fences all work good. Neutering helps to keep a male dog at home. Close supervision and correction the first two years will help yield a dog that stays within the property lines. 

When you bring your new puppy home, make sure you walk the perimeter of your property every day for a few weeks so that pup understands it’s boundaries. 

How do I socialize my livestock guardian dog to people and my surroundings?

esme and ari

The calm nature of Great Pyrenees livestock guardian dogs around livestock, combined with proper training, will bring out the naturally gentle and submissive breeding that makes these dogs a wondrous thing to behold around small and delicate kids and lambs. However, we need to always remember that these dogs aren’t bred for obedience. Patience is a must. We expect our LGDs to think and react when we aren’t there to protect our flock. We cannot simultaneously expect independent thinking and mindless obedience. These dogs are ALWAYS multitasking; they are bred to reject human instructions where they see a better way to behave. This is what makes them the perfect pasture companions to our chickens, sheep, goats, cattle and even horses. This is also why we have trouble with them obeying fencelines and expanding their territory. They are good at what they do, and they know it. Be patient with them and they will be everything you expect, and then some.

Some livestock guardian dog trainers believe that LGD pups should be raised with the livestock they will be guarding, isolated from humans. In reality, this is an exaggeration of recommendations made by scientists in the USDA bulletin about selecting, raising, and using LGDs. The publication’s language about minimizing the dog-to-human bond has been incorrectly interpreted to mean elimination of contact with humans. Training cannot be accomplished without human contact. We love, pet, show affection to our Esme, and in return, we have seen that nurturing blossom into an incredible human-dog bond. 

Livestock guardian dogs are working dogs and a balance of how much interaction to have with the dog must be found. Be wary of how much attention you foster on the pup. The idea is not to make him into a pet but to let him know your touch by petting him and handling him. Let him know you control the food, and the access to stock and you set the boundaries. LGD’s grow into large independent natured dogs. You will need to stay on top of the pecking order, not by using force but by quietly assuming the role because it is your place and your stock and your duty to keep everyone safe.

The health of your Great Pyrenees livestock guardian dog

essss

Great Pyrenees generally stay in good health. Some more common problems may include mats in the fur (especially around the neck and ears), the double dew claws growing too long, ear infections (due to dirt and moisture in the ear), eye infections (pink eye), allergies and “hot spots”. Hot spots are caused when an area of the skin becomes inflamed. The fur will fall out, the skin will turn bright red and the dog wants to bite at it. Some ointment from the Vet and keeping the spot dry cures this problem or a mixture of lavender and melaleuca essential oils mixed into a all purpose salve (here’s my recipe I use).

Genetic problems include: underbite, entropia (small eyeballs), seizures and hip dysplaysia. Pronounced underbite shows up as wet spots under the chin and neck. Entropia is when the eyeballs are small for the socket size and the eye lashes stick inward causing irritation. This can be cured with simple surgery, but the dog should not be used for breeding. The cause of seizures is unknown, but from what we have heard, changing owners, being confined to a small area, or other highly stressful situations will tend to bring them on. Hip dysplasia is not quite as common as in other breeds because Great Pyrenees have not been over bred. The most common form of death that we hear about is being hit by a car or being stolen.

We had to have stomach surgery on our Esme due to the fact she ate two rocks that got lodged in her stomach and small intestine. Thankfully, she made a full recovery! We corrected this behavior by providing her plenty of raw marrow bones to chew on in the late puppy stage and continuing to feed her a large breed high quality puppy chow to supplement the raw feeding that we do with her when we have extra meat laying around. 

Conclusion:

Investing in a Livestock Guardian Dog was the BEST decision we made when we started our homestead. We found our puppy on Craigslist and she came from a working farm with working parents. We have invested hours of training into her and I couldn’t imagine our farm without her. The ultimate satisfaction of this investment comes when I look out the window and I see her laying down near where the goats are grazing and our free-range chickens are pecking happily in the dirt beside her. 

The Training of a Livestock Guardian Dog

Sources:

  1. https://www.ranching-with-sheep.com/raising-puppies.html
  2. https://www.lgd.org/civilizedpyr2.htm
  3. https://hoeggerfarmyard.com/early-training-of-livestock-guardian-dogs/
  4. https://www.milkandhoneyfarm.com/dogs/training.html

Filed Under: Dogs, goats, Homesteading, Living Sustainably

A Guide to Beginner Beekeeping

June 18, 2015 by Jackie Ritz 2 Comments

How to Be a Honey Bee Guardian

As you know by now, Frank and I and our two little budding farmers just moved into our dream farm! We are just beginning to get acquainted with all the things waiting for us—comfrey, potatoes, asparagus, black raspberries, blueberries, and tons of fresh herbs—just to mention a few. But one of the farm perks we are most excited about are our five established honeybee hives. We have already tasted the sweet honey, and we know many of the flowers and vegetables in the gardens are so succulent and good because our honey bees have been busy pollinating them all spring. We are so excited to jump into this world of beginner beekeeping and hope to learn more in the months and years ahead. 

In this blog post I want to introduce you to the wonderful world of beekeeping. We are newbies at it, but our former owners have given us wonderful instructions for the care of honeybees, and we are doing our research to learn even more. Now you get to benefit from what we know, which I am sure will increase more and more as we begin the joyful task of being honey bee guardians. Let’s take a look at:

  1. Why are so many honey bee colonies disappearing?
  2. How do honey bees provide benefits to our farms and homes?
  3. What is life like in the bee colony?
  4. What makes a good beehive home?
  5. What do beekeepers need to have?
  6. What can you do to help protect America’s honeybees?

1. Why are so many honey bee colonies disappearing?

Honey bees have been domesticated by humans for thousands of years. A bee is the only creature besides us who manufactures food for humans. Every third bite of food that you eat has been pollinated by a bee. Natural diseases can cause populations of bees to die off, but most bee colonies were able to bounce back from adversity—until the winter/spring of 2006/2007. In that season, the die-off of domesticated bees was so bad bee researchers coined a new phrase: Colony Collapse Disorder. The normal loss of colonies was about 10 percent, but that year it was over 30 percent. Some beekeepers lost more than 80 percent of their bees.

Since then, in the US bees have been dying off at alarming rates, and beekeepers are continuing to report staggering annual losses. WHY? WHAT IS HAPPENING TO THE BEES?

A new class of systemic, neurotoxic pesticides—neonicotinoids–was introduced in the 1990s, and quickly became in use pervasively, being used to treat food crop seeds, as well as in lawn care and flea products. These products persist for years in the soil, and permeate the plants to which they are applied, causing pollen and nectar gluttation droplets, which are deadly toxins to bees. Thousands of beehives have been killed off by colony collapse, while government regulators in America steadfastly fail to take action and create a policy that will be meaningful for bees and beekeepers.  

2. How do honey bees provide benefits to our farms and homes?

There are a lot of good reasons to have a few hives of honey bees around.  For garden and orchard crops, honey bees provide the necessary pollination so there’s something to harvest at the end of the season.  For a source of a natural sweetener—honey—there’s no rival, and if the other natural products of the hive—pollen or propolis—appeal to you, then a few hives are certainly useful.  Plus, there’s the added benefit of having all the light you want from fragrant and clean-burning beeswax candles.  Sweetness and light in the same package.

Remember that bees pollinate every third bite of food that you eat. Some of the specific plants and vegetables that require bee pollination include:

  • Apples
  • Almonds
  • Watermelon
  • Pumpkin
  • Squash
  • Cucumbers
  • Avocados
  • Mangos
  • Blueberries
  • Raspberries
  • Blackberries
  • Cranberries

Plants and food that benefit from bees include:

  • Tomatoes
  • Strawberries
  • Peppers
  • Eggplants
  • Soybeans
  • Lima beans (and other dry beans)
  • Sunflower seeds
  • Sesame seeds

3. What is life like in the bee colony?

The Bee Colony

Whether hidden in a hollow tree or kept in a beekeeper’s wooden hive, every colony of honeybees functions in the same way. A bee colony is made up of three types of bees: workers, drones, and a queen.

Worker Bees

Most of the bees in a hive are workers, sterile females that can number in the tens of thousands. Young worker bees are called house bees. They build and maintain the hive, feed the young, make honey and wax, and tend to the queen. Older workers fly from the hive to gather nectar and pollen for food and for use in making honey and wax.

As a worker bee buzzes from flower to flower, she gathers nectar and stores it in a specialized stomach called a honey sac. She also picks up pollen in her fine hairs and combs it into pollen baskets in her back legs. Heavily laden, she finds the shortest path home, making a “bee line” for the hive.

Interesting enough, female worker bees are the only honey bee that can sting you. 

Drones

There are hundreds of drones in a colony. They are males that develop from unfertilized eggs, and their only job is to mate with the queen. During the mating ritual, the queen flies high into the air, nearly 30 feet above the hive. Up to ten or more drones mate with the queen and then die. The queen returns with enough fertilization to lay eggs for years to come.

The Queen Bee

There is only one queen in a hive, and she can lay up to 2,000 eggs a day and may lay a million eggs in her lifetime. When a new queen is born, the old queen leaves the hive with about half of her workers to form a new colony.

When flowers are in bloom, bees work nonstop from sunrise to sunset, gathering pollen and nectar and pollinating flowers in the process. To be as busy as a bee is to be busy indeed.

4. What makes a good beehive home?

If you are thinking of starting beekeeping, the first thing you need to do is to decide where the bees are going to live. Where will the hives sit? If you live in tropical, or nearly so, locations, a bit of afternoon shade can be advantageous for both you and the bees.  But if you are further north, no shade at all is the best place to be.  Having the colony facing south or south east is ideal.

Getting started, like many new ventures, has a learning curve to be dealt with.  The most important part of that curve is assuming responsibility for the well being of a living being under your care… not unlike family pets, chickens, cattle or other friendly or productive animals.  A beehive may appear as only a box full of bugs, but a honey bee colony has a personality and lifestyle all its own, and as its keeper you must learn its ways and wiles so you do the best you can to protect it from the dangers of the bee world.  

Plan on how your bees will sit where you want them to sit.  Up off the ground is good, to keep the bottom off damp ground and to keep skunks, toads, ants and other nasties at bay.  Too, a beehive that sits up 18 inches or so off the ground (the recommended height) is easier to work because you won’t be putting heavy boxes full of honey all the way down and having to lift them all the way back up when you’re done.

5. What do beekeepers need to have?

Here are some very general recommendations.  A honey bee colony requires two deep brood boxes for the bees to live in, store some honey and pollen in, and raise their young.  A deep brood box (also called a hive-body) is one that holds eight or ten frames of comb and are 9-5/8” tall (or so… exact standards in beekeeping equipment are a bit fuzzy).  This can weigh as much as 90 pounds or so when full of bees, honey and pollen.  

Your beehive also needs additional boxes, called honey-supers (super = above), that are stacked above the brood boxes for the bees to store honey in.  These honey-supers can be the same size as a hive-body or, to confuse things, there are two sizes of smaller boxes—one is called a shallow honey-super because it is only 5 -11/16” tall.  This will weigh about 30 pounds or so when full of honey.  The other is a medium honey-super because it is 6-5/8” tall, and weighs about 50 or so pounds when full.  Which box to use will depend to some degree on your ability to heft.

A bee hive needs a floor, called a bottom board, that has a large, screened area so debris falls completely out of the boxes rather than accumulate inside.  The bee hive should also have an inner cover that sits directly on top of the top box (think of this like the ceiling in your house), and an outer cover that goes over the inner cover (much like the outside roof).  Together, these two covers keep the internal environment somewhat controlled and the elements out. 

You’ll need feeders... yes, you sometimes need to feed your bees. So what do bees eat?  Sugar syrup… a mix of half sugar and half water, fed in a container that the bees can get to inside, or sometimes outside the hive.  There are a variety of feeder styles available and each has advantages and disadvantages.  Find them in the catalogs you get from the advertisers in the journals you read, on the web (see references at the end) or from local suppliers you find out about at club meetings.  And don’t hesitate to ask other beekeepers what they use… and why they use what they do.

You will also need beekeeping attire—protective gear to wear when working bees.  A good veil to keep bees out of your hair, and a light-colored, light weight protective suit to keep your clothes clean when in the hives is a good start.  And beekeeping gloves.  Having bees walk on your hands the first few times in a hive can be very distracting, so use beekeeping gloves until you are comfortable with this aspect of the craft.

Along with the attire you get, you must have a smoker.  When you puff a little bit of smoke across the top of an open colony the bees inside retreat down to rapidly consume honey and they stay out of your way as you do your work.  Any communication between them inside is disrupted because the smoke masks all the chemical signals going on and they can’t talk…  the confusion goes on for several minutes while you work.  Then, when it begins to clear, they stop eating honey and start again to the top, a bit more smoke gives you a few more minutes to work undisturbed.  You have maybe 15 minutes though before all this smoke simply overloads the system and they quit eating and start checking out the problem.  That’s when it’s time to move to the next colony. 

6. What can you do to help protect America’s honeybees?

Gardeners who plant the right flowers and provide welcoming habitats can do their part in restoring the waning bee population.  We can nurture bees that will travel, pollinating fruit, vegetable and flowers around us, helping commercial growers to regain bees.  “Every single gardener can make a difference, even if you just plant one more container of flowers than you have previously, you can help!”, says the National Garden Bureau.

Small Steps

It doesn’t take much effort to help bees increase their population.  Here’s how to make a difference:

  • Plant flowers with open petals and upright stamens for easy access by our pollen-loving friends. Cosmos, zinnias and purple coneflowers are good examples.
  • Choose flowers that are heavy pollen producers like salvia, penstemon and goldenrod.  And pick colors that attract bees like blue salvia, yellow nasturtium, marigolds and sunflowers.
  • Herbs, oregano, mints, sage, lemon balm, rosemary, lavenders, thyme, cilantro and basil in particular, provide food for bees as well as humans.  So add them to your garden.   It’s simple to keep a potted herb garden on your back porch, close to the kitchen for cooking.  Bees will quickly discover it.  Pots keep invasives like mint in bounds, and they can be brought indoors for the winter to use.
  • Make sure your garden blooms from very early spring (crocus and early daffodils) to late fall asters to provide pollen as long as possible.
  • Limit or eliminate pesticides, which kill bees, and use compost instead of synthetic fertilizers that leave behind toxic chemicals.
Bees at  hive entrance.
Bees at hive entrance.

Sources:

  1. https://earthjustice.org/features/the-case-of-the-vanishing-honey-bee?gclid=CjwKEAjwtYSsBRCDx6rM1v_uqmsSJAAZgf2qKVGPIYrPW3Lu2j8kEgYBvqMMeGsDSE-W9c9w0OM0IhoCYXzw_wcB#
  2. https://www.panna.org/issues/publication/bee-change-tips-tools-protecting-honey-bees
  3. https://www.almanac.com/content/honeybees-garden-busy-can-bee
  4. https://homestead.org/KimFlottum/BeginningBeekeeping/Bees.htm?gclid=Cj0KEQjwkv-rBRDwoMLav-2l9KIBEiQAUTkDU6oTNtv5_aKKAFY9n0xWQsiKhNdyrI1CEp_twv9SzMIaAqOG8P8HAQ
  5. https://www.almanac.com/blog/gardening-blog/bee-buzz-blue-berries


Filed Under: beekeeping, DIY, Homesteading, Living Sustainably

Emergency Paleo Food Storage on $10 a Week

May 7, 2015 by Jackie Ritz 3 Comments

Emergency Paleo Food Storage

In a recent blog post we introduced you to the concept of stockpiling enough food to feed your family for a full year. We are beginning to do this ourselves, and we recommend it to you. We don’t want you to have a “Mother Hubbard Experience” of not having enough food in your cupboard so we want to take a further step to help you actually be able to do this without busting your budget. If you can budget just $10 per week to accumulate your stockpile, we will show you how to have the full year of  emergency paleo food storage by spending just $10 a week for 52 weeks.

How do I set up my budget for this?

This way of stockpiling food is the “low and slow” method. It takes time, 52 weeks, but it also only requires a low financial burden. If you are on a tight budget, this is the perfect plan for you. Remember that this plan begins by developing a master plan. You will need to:

  • Determine what you eat
  • Determine how much you need
  • Determine what you will use your $10 for each week.

It is our plan to grow and provide as much of our own food needs as possible. We will not need to purchase as many items at the grocer, but will be preserving and storing the bounty from our own harvested fruits and veggies, and the livestock and poultry from our own farm animals. If you also plan to grow as much of your own produce as possible, you may want to begin your 52-week accumulation by using the first 4 weeks, or $40, to stock up or save your seeds for the next planting year. It would be ideal to begin this process in the spring with the start-up of your planting year. 

I recommend that you use an envelope system for your weekly $10 and saving for your emergency paleo food storage. Make an envelope and label it, “Food Storage”. Each week you will purchase $10 worth of food items for your food storage and ONLY use the $10 you have in that envelope. If you have money left over from last week, move it over and use it for future food storage purchases. What the weekly envelope achieves for you is an easy way for you to roll over any spare change each week into the next week’s envelope. Don’t use credit cards for this process; interest rates are self-defeating and just create a bigger problem. To budget for this new process, you may need only to forego one restaurant meal a month or decide to rent a video to watch at home rather than paying full admission for your family at the theater. 

It will be very important for you to watch for seasonal sales, holiday sales, special offers at local co-ops or farms, and other money-saving opportunities.

How do I ensure that I am getting the specific foods we will need to continue our Paleo or gluten-free lifestyle.

I know that the majority of those who follow my blogs have very specialized eating styles, most of whom follow a Paleo lifestyle. Not all the information you can research on this subject takes into account the specialized Paleo needs. That’s why we want to help you do that with information we will share in this blog. 

As you develop your list, be sure to list the approved foods you are willing to use. For example, you will need a grain-free substitute for the flour grains that may be listed in an online proposed master list. Determine what you are willing to use: almond and coconut flours, flaxseed and quinoa, dairy substitutions like almond or coconut milk, cheese substitutes like nutritional yeast, and ghee as a storage ready butter substitute. 

Be sure that your emergency paleo food storage is weighted toward wonderful fruits and veggies that can keep well in a root cellar, and plan in advance the kinds of grain-free, dairy-free (unless you are primal) and protein-dense meals you can make from your storage foods. Stockpile your recipes also, including delicious soups and stews along with your favorite menu items.

What specific foods should I purchase each week to have a one-year supply in 52 weeks?

It will take you some time to thoughtfully plan out how you will accumulate the foods for your one-year storage plan. There are many proposed lists that  you can review, but ultimately your master list will be specific to your family’s needs, favorite foods, and what foods you will grow or produce yourself as opposed to those you need to purchase. 

There is a wonderful list available that is specific to the Paleo diet, and we recommend that you begin with that list. You will purchase the listed item for each week. For example, on week one, when you do your grocery shopping, you will purchase one refill pouch of Real Salt. The second week you will purchase 3-4 cans ($10 worth) of full-fat coconut milk. You can use the suggested purchases in that list to plan your own purchases, taking into account your family preferences, local and seasonal sales in your area, and relationships you may have already developed with co-ops, produce stands, or local farmers.

Your list will also need to be adapted to the preparation and preservation you can accomplish for your own home-grown fruits and vegetables, or home-raised livestock and poultry.

If you are not quite Paleo, but you eat real, whole food, then I recommend you take a look at this list. 

Hints from Experienced Food Storage “Addicts”

You can learn from those who have been doing this for some time. They have gone through the trial and error periods and have developed time-tested ways to be successful at storing food for a year. Here are just a few snippets of the advice they can provide to the novice stockpiler.

  1. “In the beginning when I started to plan for a year’s worth of household needs, I had absolutely no idea about how many…pounds of hamburger or coffee were used in my home in any given year. The way that I was able to determine that information was with a wall calendar diary and pen. Every time I’d open a package of chicken…or jar of peanut butter I’d note it on the calendar. I was determined and faithful about recording all food, supplies and ordinary household sundries. By the end of the first year I had a pretty good idea of what I was and wasn’t using and how much of each item I was consuming.” – Granny Miller
  2. “When living off food storage adequate vitamin and mineral consumption can be a problem.  Fresh sprouts pack an enormous punch relative to their size.  In a long term emergency situation, they may be the only fresh food you can get your hands on.  You don’t need a fancy sprouter, a simple canning jar with nylons, or cheesecloth in place of the lid will work beautifully.” – Eating Food Storage
  3. “Take the amount of food you would need to purchase to feed your family for a day and multiply that by 7. That is how much food you would need for a one-week supply. Once you have a week’s supply, you can gradually expand it to a month, and eventually three months.” – LDS
  4. “Every June I start anew the annual cycle of putting aside a year’s worth of food and supplies. The goal is to have all the food and supplies I need in my pantry, cupboards, closets and cellar by Halloween. My practical food storage education first began in the mid 1980’s when I attempted to store a winter’s worth of food and household sundries. I live in the snow belt on a rural back road and in those days it was not at all unusual for us to be literally snowed in and house bound for a week at a time; a few times every winter. My winter pantry proved to be such a wonderful convenience, and time and money saver, that by 1990 I extended my pantry and household stores to last 1 year. I took a lesson from my husband’s Appalachian grandmother and coincided the beginning of my food storage efforts with each year’s new gardening and growing season. For my household, the food year begins with planting the garden in spring and ends with the final harvest in the fall.” – Granny Miller
  5. “There are actually 2 types of food storage. When I finally realized that I need to have 2 plans it was like a light bulb went on. First, a shorter term emergency food supply. Short term emergency food supply is what will be used on a continuing basis. I consider my 3 – 12 month supply of food to be short term food storage. This food is used on a regular basis and is rotated and restocked regularly. A longer term emergency food supply. Figure out how much food you need to collect for your long term food storage. These foods will be the types of items that can be the basics of survival food.” – Simply Canning

Resources

  • https://www.intentionallydomestic.com/real-food-storage-on-10-a-week-paleo-diet-edition/
  • https://www.intentionallydomestic.com/build-your-food-storage-on-10-a-week-general-real-food/
  • https://www.thekitchn.com/how-to-start-a-food-storage-on-138765
  • https://www.backwoodshome.com/articles/hagan59.html
  • https://www.grainfreeliving.com/list-of-grain-and-grain-free-foods/
  • https://www.kitchenstewardship.com/2013/07/29/eating-grain-free-resources-and-recipes-all-in-one-place/

Emergency Paleo Food Storage on 10 a Week

Filed Under: Budget, Budget Shopping, Homesteading, Living Sustainably, Natural Living

« Previous Page
Next Page »

Primary Sidebar

  • Facebook
  • Instagram
  • Pinterest
  • RSS
  • YouTube

Hi, I'm Jackie Ritz and welcome to The Paleo Mama! I'm a published author, certified herbalist, and voracious researcher of natural medicine and nutrition. I'm glad you're here and I hope you stick around for awhile!

Recent Posts

  • When God Says Pause: Why I Took a 5-Year Break from My Online Business
  • How to Quit Facebook but Keep Your Business Profile
  • Leaving the City for the Country
  • Natural Way to Heart Health

MEAL PLANS

Biblically clean meal plans that are for those love to cook real food

Read More

Footer

Our Blog

The Paleo Mama blog provides simple answers for healthier families through research, tutorials, recipes, and simple remedies for daily needs!

  • Health
  • Essential Oils
  • Recipes
  • Remedies
  • Natural Living
  • Meal Plans

Stick around!

You’ll get instant access to a library of natural remedies and real, paleo food, including our ebooks and free guides we send out.

  • Home
  • Disclosure/Disclaimer
  • Privacy Policy
  • Advertise
  • Contact Me

Copyright © 2025 · Wellness Pro on Genesis Framework · WordPress · Log in