• Skip to primary navigation
  • Skip to content
  • Skip to primary sidebar
  • Skip to footer

The Paleo Mama

Homegrown and Handmade

  • About
  • Blog
    • Podcast
  • Meal Plans
  • Essential Oils
  • Our Farm
    • Great Pyrenees Puppies
    • Goats
      • Goats for Sale
      • Goat Sales Policy
      • Nigerian Dwarf Bucks
        • Ranchocabra Lunar Eclipse

Homesteading

The Deep Litter Method for Your Winter Chicken Coop

October 17, 2015 by Jackie Ritz 7 Comments

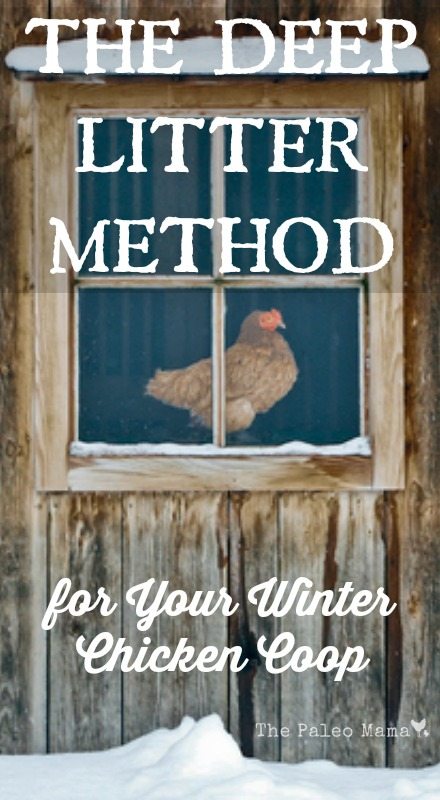
If you’ve been following me online, you already know that during the last six months or so I’ve been decluttering our home and farm using the KonMari Method (HERE) for simplifying, organizing, and storing only those things that “spark joy” for us. It’s been a real eye-opening time, and we’ve gotten rid of tons of stuff! SO…this post on The Deep Litter Method for your winter chicken coop may at first sound like an oxymoron! But I assure you it isn’t—what it is is one of the easiest and healthiest ways to prepare your chicken coop for the cold winter months.

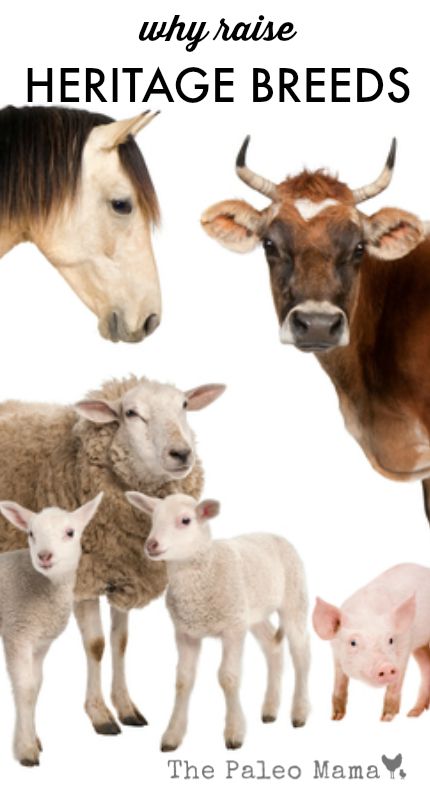
You see, my chickens are a real source of joy for us and make the perfect pet. We are raising heritage breeds, and thoroughly enjoying the ability to help protect these endangered breeds, as well as being thrilled with the dozens and dozens of eggs they give us, and the tasty chicken meals we are able to have from their gift of life to us when needed. Taking the best care of them at all times is our prime goal—especially during the cold months of our North Carolina winters.

The deep litter method allows your coop litter to build up over a period of time. As the chicken manure and bedding litter compost, it helps to heat the coop, keeping your chickens warmer. This is also called “The Old-Timers Method,” because it’s been used successfully by many chicken farmers for decades. And an added benefit (“joy” for us KonMari followers) is lots of beautiful compost for our spring gardens.

Let’s take a look at these things:

  • Preparing Your Coop for the winterizing Deep Litter Method
  • Managing the Deep Litter method in your coop through the winter months
  • Doing spring cleaning of your coop when winter ends
  • The Benefits of the Deep Litter Method

1. Preparing Your Coop for the Winterizing Deep Litter Method

You prepare your coop for the winter months by beginning with a deep cleaning. Pick a nice, sunny day and shovel out all the soiled straw and litter in the coop. This is also a great time to check the exterior of the coop for loose screws, hinges, shingles and to make any repairs necessary before winter.

Once your coop is cleaned thoroughly, put a fresh 6-inch layer of pine shavings down on the bare floor. This is the best bottom layer for the Deep Layer Method because they are small and will compost fairly quickly. Put a thin layer of straw over the shavings. Note: Do not use Diatomaceous Earth (DE) for this method. It will kill the good microbes and just is not beneficial to have in your composted soil.

Now you begin deep littering. Each morning turn over the pine shaving and straw, adding more straw as needed until you have a 12-inch layer. You are not removing anything, simply turning it over to expose new straw. You can also add leaves, grass clippings, and weeds during this initial preparation period. You may need to add a 12-inch board at the door of your coop to keep the litter inside for the winter.

Chicken manure is very high in nitrogen.  Mixing it with a source of carbon (either straw, shavings or dry leaves) will balance the mixture and hasten the rate of decomposition.  It is important that your composting material contain oxygen, so turning is crucial. Fortunately the hens will help you with that part, especially if you get in the habit of tossing some scratch or sunflower seeds into the coop for them before bedtime. They will learn to scratch through the litter to find the scratch when they wake up in the morning.  You can also turn the material with a rake. The turning and introduction of oxygen will reduce the chance of ammonia buildup.

After just a few weeks, the droppings, shavings and straw will start to decompose and you will end up with a fine dirt on the bottom.  As anyone who composts for their garden knows, when properly done, composting does NOT smell and does generate quite a bit of natural heat.  This is the same idea as you would do in a compost pile or bin, you’re just doing it inside your coop!

2. Managing the Deep Litter method in your coop through the winter months

Once you have your healthy 12-inch layer of litter on your coop floor, you are set for the winter months. You will need to follow some simple steps to keep your chicken coop in good health throughout the winter:

  • Stir up the bedding to break up any clumps every few days.
  • Keep layering clean bedding on top of the old bedding or any moist spots.
  • To keep your girls happily scratching, toss in a bit of chicken feed when you layer in the fresh straw.
  • If the floor becomes frozen (only in very cold climates), break it up with a pitchfork so your girls can begin scratching again.
  • You should be able to kneel down on the floor and your knees should remain dry.

3. Doing spring cleaning of your coop when winter ends

Your perfect opportunity for decluttering your chicken coop will come with the entrance of spring. Now you get to do your thorough spring cleaning in the chicken coop. Clean out most—not all—of the litter. Leave a base layer (1-2 inches) to inoculate new material with the established beneficial microbes.

As with any decluttering of junk (in this case poop) it’s not fast, easy or fun. It’ll take quite a while to shovel out 1-2 feet of poop encrusted litter. So, with each scoop of poop, just remind yourself that these few hours of pain make the long winter months so much more tolerable for you.

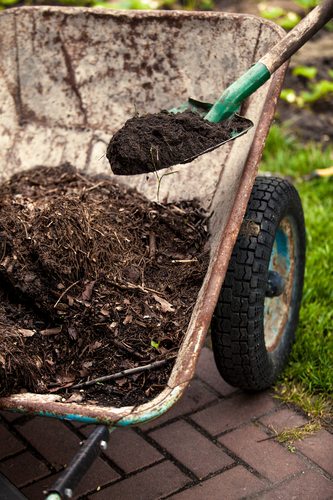
If the litter you remove is thoroughly decomposed and odorless, you can work it directly into your garden beds. If some of the fresher manure hasn’t thoroughly decomposed, simply add it to your other compost pile. If you want to speed up the composting process by helping to keep the compost pile hot, try some Chicken Poop Tea! To make the tea, just fill a couple of buckets half full of water, and then add in the poop until the buckets are full. Stir frequently—holding your nose–and keep the buckets covered. Your chicken poop tea is extremely strong, and should not be applied directly to your garden plants. Use it to keep your compost pile doing its thing—composting.

4. The Benefits of the Deep Litter Method

By now you understand the reasons why using the Deep Litter Method during the winter months is a win-win solution for your chicken’s health and happiness. So let me just finish by listing the main benefits for using this method.

  • It is the most natural and most rational method for manure management.
  • It brings winter happiness to the chicken owner because it lessens the need to do cold weather cleaning of coop.
  • It relieves winter boredom for the chickens who love having a place that is warm and safe, and which allows them to scratch around endlessly in the deep litter floor.
  • The microbial action in the litter turns a potentially disease-causing problem into a substrate for health—studies have shown that this method has positive feeding benefits.
  • The deep organic duff insulates the floor of the coop, while the warmth of its decomposition moderates the chill.
  • Finally, this process captures the fertility in the manure for soil building in your spring garden—the key to food self-sufficiency.

Need I say more? I love the Deep Litter Method of sparking joy for both my chickens and for me. No oxymoron here! 

The Deep Litter Method for Your Winter Chicken Coop

Sources:

  1. https://www.backyardchickens.com/a/deep-litter-method-the-easiest-way-to-deal-with-chicken-litter-dlm
  2. https://www.fresheggsdaily.com/2012/02/deep-litter-methodcoop-cleaning.html
  3. https://www.grit.com/animals/chicken-health-deep-litter-zm0z13jazgou.aspx?PageId=6
  4. https://www.motherearthnews.com/homesteading-and-livestock/deep-litter-method-zb0z1208zmat.aspx
  5. https://chickenjunkie.com/chicken-coops/cleaning-the-coop/chicken-poop-control-the-deep-litter-method/


Filed Under: chickens, Homesteading, Living Sustainably

How to Raise Turkeys

October 16, 2015 by Jackie Ritz Leave a Comment

Raising the turkey you will eat on Thanksgiving Day may be something you want to consider doing. Turkeys can be a fun addition to a small farm or homestead and I’m going to share a few things I have learned on how to raise your own turkeys. But before you start, there are a few things you need to consider.

  • If you are hoping to save money on your Thanksgiving bird by raising it yourself, you are likely to be disappointed. It will be hard to compete with the sale price of the commercially grown supermarket turkeys.
  • You will be challenged to keep your turkey free from predators. Just about every wild critter (even some domesticated ones) is on the prowl for a big, juicy turkey meal.
  • Turkeys have really cute personalities and love to be around people. It may be hard to decide if they are your family pet or your Thanksgiving Day meal.
  • Turkey raising is a challenge—get rid of your romantic notions about it. There will be great days, and there will be difficult days. If you succeed, you will produce a Thanksgiving turkey meal that is way more flavorful than any storebought bird could give you. But if you blow it, you’ll be buying that last minute, dried out bird at the market, hoping no one will notice.

If you’ve been reading our Natural Homestead blogs and posts, you know that we decided that raising our own pastured turkeys—including one for our Thanksgiving dinner—was just what we wanted to do. We purchased 5 2-month old turkeys (yes, we decided to skip the infant stage this first time around) to join our menagerie and forage to their heart’s content out in our pasture.  We built a turkey roost for them to use in the pasture during the day, and they will be able to roost in the closed barn at night.

In this blog I want to share some of our firsthand experiences, and more of our research into how to raise turkeys to help you make a choice about raising your own. We will consider:

  1. What are the differences between a standard breed and a heritage breed?
  2. What kind of shelter do I need to prepare for my turkeys?
  3. What do I need to know about feeding my turkeys?
  4. Are there special preparations I need to make in my pasture?
  5. What health issues could I face with my turkeys?
  6. When will my turkey be ready for eating?

1. What are the differences between a standard breed and a heritage breed?

Frank and I have made the decision to raise only Heritage Breeds of homestead animals on our Gather Heritage Farm. We want to have a part in saving endangered livestock from extinction. When we moved into our forever farm we knew that we could provide the necessary elements to be a part of this endeavor.

Heritage turkeys are raised outdoors, freely roam on pasture, and eat the varied diet nature intended them to eat. Most supermarket turkeys today are raised in crowded indoor pens, and are fed a constant diet of grains, fillers, and supplements like antibiotics—just to fatten them up to meet the demands of American shoppers.

While supermarket turkeys tend to be tasteless and dry, heritage birds are juicy and flavorful. They taste the way a turkey is supposed to taste. Heritage breeds include:

  • Beltsville Small White
  • Black
  • Jersey Buff
  • Narragansett
  • Royal Palm
  • Bourbon Reds
  • Slate
  • Standard Bronze
  • White Holland
  • White Midget

Heritage breeds will take longer to raise. If you raise one from early spring to fall it will weigh approximately 15-18 pounds. But the meat is denser, and more flavorful. There tends to be more leg meat and less breast meat.

2. What kind of shelter do I need to prepare for my turkeys?

If you decide to start with turkey poults (infants), you will need to provide the same basic care you would give to your baby chicks. When you bring them home, dip their beaks in water to teach them how to drink. They need to be in warm temperatures (95 degrees) for the first week, and gradually less heat as they feather out.

Heritage turkeys are more spunky than standard breeds, and can figure any way out of their pen—up, under, through, between. Make sure the fencing around your turkey pen is secure and can keep your turkeys in and their predators out! Fencing should be as high as possible, at least four feet. Use woven-wire fencing and metal T-posts or wooden posts.

If you are raising turkeys to breed or places for broody hens to sit on eggs, you will need a pen with solid sides and separate housing for toms and hens. Allow the toms and hens to forage separately.

Provide your growing turkeys with a turkey roost with a roof to keep them safe. The higher you make it, the safer they will be. Wild turkeys roost way up high in trees. A 5 by 8 foot roost will house about 20 turkeys.

We raise free-range turkeys so we don’t even have housing for them. They usually wind up sleeping on a barn stall or on their turkey roost that we built to go outside and is next to our yellow duck house. The turkey roost is over 7ft high so there is no way a predator can get them at night. 

3. What do I need to know about feeding my turkeys?

Their first food should be a high protein ration with about 28 percent protein fuel their fast growth. By 8 weeks they can be switched to a 20-22 percent feed, and after they begin foraging you can use a 18-20 percent protein, and give them some cracked grains to help their digestive systems utilize their feed.

When you are fattening them up for the Thanksgiving table, toss in excess or bug-infested apples, tomatoes, and other produce as treats. You can find full information on feeding your turkeys here.

4. Are there special preparations I need to make in my pasture?

If you have a large, lush pasture, your turkeys will be able to free range, moving from area to area as they deplete the grasses and eat the bugs. If you have a smaller pasture, you may want to consider whether you can provide enough food material for the birds to thrive. For pastured or limited range turkeys, alfalfa, clover, and grasses such as orchard grass serve turkeys very well; however, fescue is not recommended. Contact local Cooperative Extension agents to ascertain the best choice of pasture browse crops and planting strategy for your locale.

Remember that turkeys are very sensitive to numerous mycotoxins  (toxins produced by fungus and mold), so moldy grains and grasses should be avoided at all cost. Turkeys are excellent insect foragers. The only insects they will not eat are the ones they cannot catch.  

5. What health issues could I face with my turkeys?

Turkeys are pretty hardy, but there are some potential health concerns in raising them. Some of these include:

  • Blackhead (Histomoniasis)—a parasite found in earthworms from poultry droppings. Symptoms include bright yellow droppings and droopiness, diarrhea and weight loss.
  • Coccidiosis—a parasitic disease more common to commercial turkeys, recognized by watery diarrhea and malaise. It must be diagnosed by a vet.
  • Lice—turkeys get lice just like chickens. Make sure you treat them regularly with a lice powder that is suitable for raising organic turkeys.

With careful maintenance and diligence, you should be able to raise your turkeys disease-free and healthy.

6. When will my turkey be ready for eating?

Turkeys for meat are ready for slaughter at 24-28 weeks for standard breeds, but heritage breeds normally take longer to raise to slaughter readiness. Most will weigh 14-18 pounds by Thanksgiving time. You will need to keep that bird around another year to get it to a larger size.

Processing a turkey is more difficult than chickens because they are heavier, more energetic and more intelligent. They are also loaded with much more personality, and it may be very hard for you to consider doing anything hurtful to that family member. You can bring them to a processor to do the hard work for you or have someone else do the hard deed. 

Fortunately, if you choose to raise heritage breeds, you can allow your turkey family to grow and expand so you will always have some of these beautiful birds in your pasture. That’s having your turkey and eating it too!

How to Raise Your Own Thanksgiving Turkey

Sources

  1. https://smallfarm.about.com/od/farmanimals/tp/How-To-Raise-Turkeys.htm
  2. https://sagebrush-mama.hubpages.com/hub/The-Good-The-Bad-And-The-Ugly-Sides-Of-Raising-Your-Own-Turkey
  3. https://www.theselfsufficienthomeacre.com/2013/11/how-to-raise-turkeys.html
  4. https://www.sustainabletable.org/432/talking-turkey
  5. https://www.communitychickens.com/thinking-about-raising-turkeys/
  6. https://www.albc-usa.org/documents/turkeymanual/ALBCturkey-3.pdf

Filed Under: Homesteading, Living Sustainably, Natural Living

How to Grow Elderberries and make Elderberry Syrup

September 28, 2015 by Jackie Ritz 5 Comments

Elderberries are one of the most sustainable crops, and is being farmed by many farmers who are interested in nutritious, home-grown and organic farming. It is packed with Vitamins A, B, and C, iron, potassium, and powerful antioxidants. The plants are a hardy perennial, and are naturally disease resistant. Surprisingly, only 10 percent of the elderberries consumed in the United States are actually grown here. Making a elderberry syrup recipe is a great way to get all the nutrition from these delicious bushes into our body! 

Our farm wants to be a part of the group that wants to change that statistic. We are so happy to have some elderberry bushes on our farm already, and we plan to add more. I’ve already made my own homemade Elderberry Syrup and hope to have many more elderberries to harvest next Fall.

In this blog post I want to cover some of the basics in elderberry growing and harvesting and then using the berries to make an elderberry syrup. We will take a look at:

  1. Elderberry varieties to consider growing
  2. Planting new elderberry bushes
  3. Taking care of your elderberry bushes
  4. Harvesting your elderberries
  5. Nutritious, healthy ways to use your elderberry harvest
  6. Elderberry Syrup Recipe

1. Elderberry varieties to consider growing

There are several varieties of the American elderberry that are especially good fruit producers. Here are some of the best selections to try in your yard or farmland.

  • Adams—This American variety grows 8 to 10 feet tall. The large, juicy, dark purple fruits ripen in August and are great for making pies. The strong branches hold the berries upright. Plant a pollinator variety such as ‘Johns’ for maximum fruiting. This variety is often sold as “Adams No. 1” or “Adams No. 2.” There is little difference between these two selections.
  • Black Beauty—This striking European variety features purple foliage and lemon-scented pink flowers. It grows 6 to 8 feet tall and wide and can be grown in perennial borders or as a foundation plant.
  • Black Lace—This eye-catching European selection looks like a Japanese maple with its dark purple, deeply cut foliage. Like “Black Beauty,” this variety also grows 6 to 8 feet tall and wide, producing pink flowers and dark purple fruits.
  • Johns’—This early-producing American variety produces an abundance of berries that are especially good for making jelly. Growing 12 feet tall and wide, this variety is a good pollinator for “Adams.”
  • Nova—This American variety can be self-fruitful, but does best with another American elderberry growing nearby. Large, sweet fruit are produced on compact, 6-foot shrubs.
  • Variegated—This European variety has attractive green and white leaves and grows 6 to 8 feet tall and wide. The plant is less vigorous and productive than other elderberry varieties, but the foliage is attractive all season long.
  • York—This American variety produces the largest berries of all the elderberry selections. It matures in late August and only grows 6 feet tall and wide. It pollinates “Nova” well.­1

2. Planting new elderberry bushes

While your elderberry berries will grow on your bush the first year they are planted, you will want to be aware that the berries will do better the second year and each year after. The bushes will grow best in well-drained loamy soil. If your soil is sandy, you will need to add organic matter to prepare your soil. Before you plant, be sure to check your soil pH. Your local County Extension Office can supply you with the information you need for doing this.

All elderberries require cross-pollination with other varieties. Either plant two different varieties in their own spots close to each other in your garden, or plant two varieties in one hold. Since Nova and York are the two cultivars that grow the biggest crops, you may want to begin with these two, cross-pollinating them as you plant.

Here are some excellent planting tips:

  • Pick a location with full sun
  • Add manure or compost to your soil before planting
  • Plant your elderberry bushes 6-8 feet apart in rows 10 feet apart.
  • Water the plants thoroughly
  • Don’t apply any fertilizer during the first year.
  • Elderberries are shallow rooted: Keep them well watered the first season.

3. Taking care of your elderberry bushes

After the first year, your elderberry bushes will grow best if you fertilize annually using compost. Because they have shallow roots, mulch around the plants to control weeds that compete for water and nutrients.

Your bushes will grow suckers freely, sending up new branches each season. In the second and third years, these new branches will produce side branches that fruit heavily. In late winter, prune out branches that are more than 3 years old, leaving equal numbers of one- two- and three-year-old branches. Prune out dead or diseases branches as well.

There aren’t many significant pests or diseases affecting elderberries. However you will want to watch for cane borers and Japanese beetles. Be aware that birds love elderberries, and will compete with you to eat them before you can harvest the berries. To avoid the birds getting your harvest, cover the shrubs with netting once they begin to berry. If you are also raising chickens, your chickens can be one of your best defenses against both weeds and insects. You can also handpick the beetles, or use a natural, organic control such as AzaMax. (Here) 

4. Harvesting your elderberries

In most climates, there will be a 5-15 day period in mid-August through mid-September when the berries are ripening. Be sure to pick them before the birds do! Let them ripen on the shrub to a dark purple color. Prune off the entire cluster when ripe, and strip the berries into a bowl. You will need to keep the harvest refrigerated and process the berries as soon as possible. You can get 12-15 pounds of berries from one mature 3-4 year old shrub.

5. Nutritious, healthy ways to use your elderberry harvest

As I mentioned at the start of this post, elderberries are packed with vitamins, minerals, and antioxidants. One of the best-known benefits of the black elderberries is its power to boost the immune system, because of it strong, antiviral properties. The medicinal parts of the elderberry bush include the roots, bark, young shoots, leaves, flowers, and berries. Yup—the entire plant! 

The flowers are effective at reducing phlegm and encouraging sweating. They are also good for strengthening the upper respiratory track. The flowers help to soften the skin and are often added to lotions and creams. You can also make a flower poultice with them too! (Here) 

Elderberries can also be used in cooking, and there are many good, nutritious elderberry food recipes that you can research for yourself.

Elderberry Syrup Recipe

If you cannot grow your own elderberry bushes, then you can still reap the benefits of this plant by purchasing dried elderberries from HERE.

I want to really encourage you to find a local honey farmer and get the MOST local raw honey you can find. It’s not necessary to have local honey, but it is essential to have RAW honey that has not been pasteurized (to destroy it’s many health benefits). I am lucky enough to have our own honeybees, so we used the honey that we harvested in July from our backyard! 

INGREDIENTS:

  • 2 cups of filtered water 
  • 2/3 cup of dried elderberries or 1.5 cup of fresh
  • 1 cup of your most local raw honey you can find
  • 1 teaspoon of whole clove 
  • 1 stick of cinnamon
  • 1 knob of fresh ginger, peeled 

DIRECTIONS: 

  1. Bring the water, elderberries, and spices to a boil. Reduce to simmer on low for 30-45 minutes with a lid on. 
  2. During the simmering, use a potato masher and frequently mash the elderberries while simmering.
  3. Remove the saucepan from the heat.
  4. Pour the honey in a separate glass jar.
  5. Filter the hot syrup through a sieve or cheesecloth into the honey. You might need to grab a funnel. You will want to make sure you squeeze all the liquid out from the elderberries. This is why I like using a cheesecloth and twisting to make sure it’s completely drained out . 
  6. Stir the honey until it is dissolved. Make sure you use the hot syrup to dissolve the honey. 
  7. Date and label the bottle and then place in the refrigerator. The honey acts as a natural preservative so you syrup should be good for several months in the fridge. 

NOTES: 

  • Adults can take 1 tablespoon daily and children (over 1 years old) can take 1/2ts-1 ts daily. 
  • If feeling under the weather, adults can take 1 teaspoon every 2-4 hours and children can take 1/2 teaspoon, every 2-4 hours. 
  • Remember honey can cause botulism in infants! 
  • Cost/Savings: It cost me $2.17 if purchasing dried elderberries to make this recipe and only $$0.97 if using your own homegrown elderberries!
  • This recipe makes over 3 cups of elderberry syrup! You won’t beat that price anywhere! 

You will never regret your decision to try raising and harvesting elderberries. Elderberries are even better nutritionally than blueberries. They are wonderful for pies, jams, jellies, and homemade medicinal remedies. The flowers are delightful breaded and made into fritters. Join us at bringing these wonderfully versatile berries back as homegrown American treasures and enjoy the delicious and nourishing Elderberry Syrup Recipe! 

Elderberry Syrup Recipe

Sources

  1. https://www.garden.org/ediblelandscaping/?page=july_elderberry
  2. https://normsfarms.com/aboutus/our-story/
  3. https://www.gardeningknowhow.com/edible/fruits/elderberry/planting-elderberry.htm
  4. https://www.starkbros.com/growing-guide/how-to-grow/berry-plants/elderberry-plants/planting
  5. https://www.healing-from-home-remedies.com/elderberry-benefits.html

Filed Under: beekeeping, DIY Home Recipes, Homesteading, Living Sustainably, Natural Living

How to Raise Pastured Meat Rabbits

September 22, 2015 by Jackie Ritz 6 Comments

It is the basic intent for our title homestead to develop our farm on the principles of self-sufficiency, self- reliance and good stewardship of the resources God has given to us. We have recognized the negative effect of the consumer-based lifestyle of most Americans on both the quality of life and the health of this planet, and made the conscious decision to do everything we can to be self-sufficient in all ways. That’s why we are involved in homesteading, raising and preserving our own fruits and vegetables as much as is possible, using only natural and organic products both in our home and in our barnyard, and deliberately choosing only Heritage Breeds (endangered species) of animals and poultry to raise for both breeding and eating.

Part of that choice has been to raise pastured rabbits. Before we moved to this beautiful 10-1/2 acre farm we lived on a rented 3 acre farm, and raised meat rabbits as part of our barnyard menagerie there.

We have plans to again begin raising and breeding rabbits for meat and as a way to help preserve those rabbits that are part of endangered species. In this blog we hope to answer these questions on how to raise pastured meat rabbits:

  1. Why raise rabbits?
  2. What are the choices of rabbit breeds?
  3. What are the basic requirements for housing and feeding rabbits?
  4. When and how do you cull the rabbits for meat?

1. Why raise rabbits?

There are some considerations you need to confront before you choose to raise rabbits. These include:

  •  How much time do you have to dedicate to this project?
  • How much space is needed to raise rabbits?
  • Do you want to find a market for your animals?
  • How easy is butchering the animal?

Rabbits can be raised in both suburban area and on farms. They are not always considered livestock by governmental agencies, so may be permitted with other animals are not. However do check with your local zoning authorities first. Rabbits are fairly easy to raise. The does take care of themselves, so no special equipment other than the cages are needed.

However it can be fairly difficult to find a market for rabbit meat. While you may be permitted to process your own rabbit meat, regulations can prevent you from processing it to sell to others. In addition, because rabbits are so cute and cuddly, many people will be repulsed at the idea of killing and eating them. You may even grow to consider them as pets, and find that you are unable to follow through with the culling.

2. What are the choices of rabbit breeds?

Choosing to raise pastured rabbits allow your animals to exercise and behave as rabbits are meant to behave. It improves their overall quality of life, and gives the rabbit farmer a way to manage rabbit housing easily. Choosing the right breed for pasturing is important, because you want your meat rabbits to reach a good size on pasture.

A rabbit destined for meat should be compact and short, with a blocky appearance. There should be no visible hip bones, and it should be as wide as it is tall.

There are several typical meat rabbits, which include:

  • Californian
  • American Chinchilla
  • New Zealand
  • Standard Rex
  • Silver Fox Flemish Giant

A larger boned breed such as the Flemish should be bred with a less boney breed such as the Rex. Otherwise you will have more bone than meat on your processed rabbits.

If you are interested in raising heritage breeds, like we do, then these two breeds of rabbits are a great choice: 

  • American Chinchilla—on the critical list, this is the most rare of the Chinchilla breeds. Despite the breed’s fine meat producing qualities, today’s producers prefer an all-white rabbit. The American Chinchilla is a large, hardy, gentle animal, with a mature weight of 9-12 pounds. They produce large litters, have good mothering instinces, and reach market weight quickly.
  • Silver Fox—a threatened breed, the silver fox is a beautiful rabbit. Does have large litters, produce plenty of milk, are excellent mothers, and make wonderful foster mothers. Silver Fox are known for their docile and gentle nature. They are born either solid black or bue, and begin to show the silvering of their fur by 4 weeks. The Silver Fox will reach 9-12 pounds when mature.

3. What are the basic requirements for housing and feeding rabbits?

It is not difficult to raise pastured rabbits. The rabbits should live in wire cages placed right on the ground. Bucks and does are housed individually. Each morning you will need to move each cage one length down the pasture to a new patch of grass. In the evening you can offer them hay, fresh vegetables, and pellets. This method is the same as maintaining a chicken tractor.

The rabbits will eat the grass—approximately six square feet per day per rabbit—to a close crop. When you shift the cage in the morning, the manure is spread, providing yesterday’s patch of grass instant organic fertilizer. You should not return the cases to those spots for at least a few months up to a year to allow the grass and other plants to recover.

There are many benefits to raising meat rabbits on pasture. Here are a few:

  • Moving cages, checking water bottles and providing food takes less than ten minutes daily.
  • The rabbits eat significantly less purchased food, preferring lush pasture. The adult rabbits only eat about half a cup of pellets a day while on pasture, and are sleek and muscular.
  • The areas on which the bunnies have been are lush and healthy compared to non-grazed areas. They are helping you to have a pasture that is a productive ecosystem with no synthetics and no mowing.

Your rabbits will thrive on this lifestyle from day one. Rabbits have a reputation for having delicate digestive systems, but pastured rabbits rarely suffer upsets from the pasture nutrition.

If you are breeding your rabbits, you will want to remove the does who are ready to give birth from the pasture and keep them in indoor cages. Keep the does and kits together for about five weeks after birth. At five weeks you can return the doe to pasture, but keep the kits indoors for one more week. After a week alone, you can put all the bunnies in a cage together on the pasture.

Each rabbit pen should be approximately 3 feet by 8 feet and about 2 feet high. The one critical aspect of the wire cages used to house your rabbits is the construction of the floor. You can make the roof from corrugated aluminum roofing, and the sides from wire mesh. The bottom of the pen should have thin, wooden slats running the 8-foot length of the pen, with a reinforcing middle cross bar. The slats should be about 2-3 inches apart.

The pen should always be moved in the direction of the slats (moving the 8-foot sides forward each time). This is because rabbits will only feed on the tips of grasses and plants that are point upwards. They like to nibble from the tips down toward the roots. If the stalks are bent downwards, the rabbits will ignore the greenery and only eat whatever other feed is provided.

Your pasture will supply 25-40 percent of the rabbit’s dietary needs. They will eat clover and grasses, but prefer “stemmy” or “scrubby” plants like beet greens, comfrey, and other plants with developed stalks. During the winter months when they are unable to be on the pasture, they will do well with root crops like carrots, parsnips, rutabaga, and hay. Alfalfa pellets (non-medicated) will supply the additional needed nutrition.

When and how do you cull the rabbits for meat?

Culling your rabbits for meat is nobody’s favorite part of raising rabbits. It is good to remember that the methods used to slaughter small and large livestock in factory farming is far worse that culling your own rabbits. Killing your own meat is a respectful and honorable thing to do. You gave the rabbits a good life and will be giving them a clean death, which is better than either factory life or wild life for a rabbit.

Your meat rabbits will be ready for butchering at 10 to 12 weeks, and will dress out to about 4-5 pounds of meat. Humane rabbit killing is very important, as any stress during the process can result in the release of adrenaline and other endocrine hormones that may negatively affect the flavor of the rabbit meat, and will toughen the meat.

There are three preferred methods for butchering. I will list each, and will give you the source where you can begin your own research into the specifics of this process. (Source) 

  • The broomstick method (our preferred method)
  • The Arterial Bleed
  • A fatal blow

If your farm’s rabbit meat tastes sweet like chicken, that means the rabbit died peacefully and humanely. 

If the butchering process scares you but you still want to give raising meat rabbits a go, you can usually find a small processor near you who will butcher and dress your rabbits for a fee. 

Raising pastured meat rabbits is a great for the backyard homesteader with very little acreage and great for the homesteader with lots of land. I’m confident you will love the taste of home-raised rabbit meat and the delicious stock and pate’ you can make with the bones and organs! 

How to Raise Pastured Meat Rabbits

Sources

  1. https://www.rudolphsrabbitranch.com/rrrpt1.htm
  2. https://www.mofga.org/Publications/MaineOrganicFarmerGardener/Winter20092010/Rabbits/tabid/1392/Default.aspx
  3. https://www.livestockconservancy.org/index.php/heritage/internal/conservation-priority-list#Rabbits
  4. https://www.motherearthnews.com/homesteading-and-livestock/rabbits-on-pasture-intensive-grazing-with-bunnies-zbcz1504.aspx
  5. https://www.outofthismess.com/animals-1/rabbits/rabbit-culling/


Filed Under: Homesteading, Living Sustainably

20 Fall Diffuser Blends

September 21, 2015 by Jackie Ritz 1 Comment

Fall Diffuser Blends

Summer is screeching to a stop here in the mountains of Western North Carolina. The leaves are beginning to evolve into the the most beautiful colors and I find myself reaching for my sweater each morning as I head outside to do the farm chores. 

For a homesteader, Fall brings a period of urgency to prepare for the winter ahead. It, also, brings a relief that most the garden work is done and the period of harvest is nearly over. 

I love the smell of autumn and pumpkin pie and the sweet smell of homemade applesauce. It’s deeply nourishing to me and warms my soul. 

It, also, reminds me of my childhood and oatmeal spice cookies and gingerbread men who get their head bitten off. 

As, Autumn sweeps into our lives, I want to share with you all a few blends I love making with essential oils to diffuse around the house. 

Diffusing essential oils is a safe, non-toxic and therapeutic way to:

1) make your house smell good, and

2) boost your immune system during the months our bodies need it.  

I wish you the best autumn season, filled with lots of joy and memories spent with those you love! And I want to thank my amazing essential oil team who helped me put this round-up post together! 

Fall Diffuser Blends

You can purchase all your essential oils that you need and diffuser here.

Cozy Home Blend

  • 3 drops of Wild Orange
  • 2 drops of Cassia
  • 2 drops of Cedarwood 

Pumpkin Pie Diffuser Blend

Pumpkin Pie diffuser blend

  • 3 drops of Cardamon 
  • 2 drops of Cinnamon Bark or Cassia
  • 1 drop of Wild Orange 
  • 1 drop of Clove 

Trick or Treat Blend 

  • 2 drops of Wild Orange 
  • 2 drops of Frankincense
  • 2 drops of Cassia 

Crispy Autumn Blend 

  • 3 drops of Wild Orange 
  • 3 drops of Patchouli 
  • 1 drop of Clove 

Spiced Apple Cider Blend 

Spiced Apple Cider diffuser blend

  • 3 drops of Wild Orange 
  • 2 drops of Cinnamon or Cassia
  • 2 drops of Ginger 

Cozy Holiday Blend 

  • 2 drops of Wild Orange 
  • 2 drops of Cassia 
  • 2 drops of White Fir 

Thanksgiving Joy Blend 

Thanksgiving Joy Diffuser blend

  • 3 drops of Cypress
  • 2 drops of Sandalwood 
  • 2 drops of White Fir

Cool Nights Blend

  • 3 drops of Cedarwood 
  • 2 drops of Bergamot 
  • 2 drops of Wild Orange 

You can purchase all your essential oils that you need and diffuser here.

Warm Spice Blend 

  • 2 drops of Cardamon 
  • 2 drops of Cinnamon or Cassia 
  • 2 drops of Clove 

Spiced Chai Blend

  • 3 drops of Cardamon 
  • 2 drops of Cassia
  • 2 drops of Clove 
  • 1 drop of Ginger

A Walk Through the Forest Blend 

  • 2 drops of Lime
  • 2 drops of Lemon
  • 1 drop of Wild Orange 
  • 1 drop of Bergamot 
  • 1 drop of White Fir

Oatmeal Cookie Blend 

  • 2 drops of Cedarwood 
  • 2 drops of Cassia 
  • 2 drops of Wild Orange 

Apple Pie Blend 

  • 2 drops of Clove 
  • 2 drops of Cinnamon 
  • 2 drops of Ginger 

Give Thanks Blend 

  • 2 drops of Ginger 
  • 2 drops of Coriander 
  • 2 drops of Cinnamon 
  • 1 drop of Clove 

Cuddle by the Fire Blend 

  • 3 drops of Cinnamon 
  • 2 drops of Clove 
  • 2 drops of White Fir 

You can purchase all your essential oils that you need and diffuser here.

Orange Pomander Blend

  • 3 drops of Wild Orange 
  • 2 drops of Clove 
  • 2 drops of Rosemary 

Fall Leaves Blend 

  • 5 drops of Wild Orange 
  • 1 drop of Patchouli 
  • 1 drop of Ginger 

Log Cabin Blend 

  • 2 drops of Cassia 
  • 2 drops of Cedarwood 
  • 2 drops of Wild Orange 

Fall Romance Blend 

  • 3 drops of Sandalwood 
  • 2 drops of Patchouli 
  • 2 drops of Rose (or Geranium) 

Holiday Joy Diffuser Blend 

  • 3 drops of Frankincense 
  • 2 drops of Wild Orange 
  • 2 drops of Peppermint 

Sweet Baby Jesus Blend 

  • 4 drops of Frankincense 
  • 4 drops of Myrrh 

You can purchase all your essential oils that you need and diffuser here.

Fall Diffuser Blends


Filed Under: DIY Home Recipes, essential oils, Homesteading, Living Sustainably, Natural Living

Why Raise Heritage Livestock Breeds?

August 12, 2015 by Jackie Ritz 2 Comments

Why Raise Heritage Breeds

Gather Heritage Farm, our new 10-acre farm we recently purchased, has chosen to concentrate on growing tomorrow from the heritage of yesterday. We are concentrating on choosing heritage breeds (rare livestock breeds) for our homestead menagerie, and on filling our gardens with heritage and heirloom plants. We understand the importance of heritage—because we are the benefactors of our own rich heritage from our ancestors and I’m excited to answer all the common questions on why raise heritage livestock breeds.

Martin and Mary Kidder, my ancestral grandparents from the 1800s, also raised plants and animals on a farm probably much like ours. I have her diary from 1879, and find I can draw inspiration from the record of how she lived her life. Farming was hard then, probably much harder than anything I will have to face. On one particularly busy day she wrote:

Martin gone down to ditching and I have been into almost everything. Cleaning house. Taking care of butter. Doing all the chores both outdoors and indoors. Making tomato preserves, and last—but not least—drawing water out of the well. It was not no little chore either, but done. But O my how my back aches. Good-bye, I am going to bed.

There have already been nights when I felt exactly like that—my back ached, but my chores were done and all I wanted to do was to crawl into bed. But her heritage to me is much more valuable than identifying with her aching back. Her indomitable spirit is what gives me strength. On June 12th, her 28th birthday, she wrote:

How swiftly time onward doth roll and brings us nearer eternity. May I not have to at the close of another year look back and regret, but may it be a year well spent.

She kept that spirit on good days and bad days. On January 7th, she wrote:

O dear, a little bad luck. Our nice fat hog is dead. Think it was blind staggers ailed him. Makes us feel rather blue. But then it might have been worse. Let us count our blessings.

So for us—the Ritz family of Gather Heritage Farm—raising heritage plants and animals allows us to help preserve essential genetic traits, things like self-sufficiency, foraging ability, maternal instincts, and resistance to diseases and parasites. Heritage breeds store a wealth of genetic resources that are important for tomorrow—heritage animals and plants are the seed of yesterday that will build a better tomorrow.

Let me introduce you to some of our current heritage-laden animal family members and some of the other animals we chose to raise.

Silver Appleyard Ducks

Silver Appleyard Duck

We have eleven Silver Appleyard ducks, a critically endangered breed of ducks. In a 2000 census of domestic waterfowl in North America, only 128 Silver Appleyard ducks were reported. The Silver Applewood is named after Reginald Appleyard, who developed it in England. His ambition was to create a very attractive breed of large duck that would also be a prolific producer of white, large eggs.

According to the American Livestock Breeds Conservancy, “there is a critical need for more conservation breeders of Appleyards. Their excellent laying ability, meaty carcasses, and lovely plumage make them a great addition to any small farmstead.” (Source) 

American Buff Geese

We have two American Buff geese, a critically endangered breed, which we hope to raise and breed se we can help to preserve this wonderful breed. The American Buff goose was developed in North America and is descended from the wild Greylag goose, found in Europe and Northern Asia.

The American Buff geese, unlike other geese, are very calm and have a wonderful disposition—qualities I find important in animals and humans alike. They are good parents, attending well to their goslings. These attributes make the breed well suited for the average home flock. They are very smart, very friendly, and very affectionate.

Heritage Breed Chickens 

Chantecler (critically endangered)- The Chantecler originated in the Quebec Province of Canada and is a fine example of a dual-purpose breed. This breed is noted for its ability to withstand harsh winters. The lady I purchased my Chanteclers from mentioned that they will continue to lay large brown eggs when in the coldest of winters. 

Rhode Island Red (recovering)- these chickens are American’s best known breed is the most successful dual purpose bird, and remains an excellent farm chicken. 

Black Java (threatened) -the Java is considered the second oldest breed of chicken developed in America. The Java is a great homesteading bird and thrives in a free range environment. 

Orpington – this dual purpose American chicken breed bird is reaching the “recovering” status according to the Livestock Conservancy. They have a fast growth rate which makes them an excellent breed for meat, and also lay large light to dark brown eggs. 

Freedom Ranger Meat Chickens

Although not a true heritage breed, Freedom Ranger Chickens are a hybrid breed (a cross between commercial and heritage breeds) and a good alternative to the fast-growing commercial Cornish Cross. This breed is perfect for free range environments. They are active and robust birds with tri-colored feathers, and thrive in foraging and pasture environments. They produce tender, succulent meat with more yellow omega 3 fat and less saturated fat than fast growing breeds.

Freedom Ranger breeding stock is imported from the regions of Burgundy and Brittany (France). The genetic stock is derived from the American and European old heritage breed of chicken and was developed in the early 1960s to meet the highest standards of the French Label Rouge Free Range program. They are said to have a superior taste because they are a slower growing bird than the fast-growing commercial brands.

Turkeys

Narragansett (threatened) – this turkey is a descendant of the English and European colonists beginning in the 1600’s. Narragansett turkeys have traditionally been known for their calm disposition, good maternal abilities, early maturation, egg production, and excellent meat quality. As recently as 50 years ago, they were well regarded for production qualities.

Royal Palm (watch list) – The Royal Palm is a strikingly attractive and small-sized turkey variety. They are white with a sharply contrasting, metallic black edging on the feathers. Royal Palms are active, thrifty turkeys, excellent foragers, and good flyers. Standard weights are 16 pounds for young toms and 10 pounds for young hens.

Nubian Goats

Nubian Goat

Although not a heritage goat breed, we chose our Nubian goats because they produce lots of yummy milk high in butterfat—and because they are just so darn cute. The Nubian is a relatively large, proud dairy goat of mixed origin. The ancestors of today’s Nubian have African and Indian heritage, developed further in England, where they are known as Anglo-Nubians. They have long, floppy, wide ears that are longer than their heads.  

They are very intelligent and personable, and love the attention you give to them. They have fun personalities, and can be very talkative. They are natural escape artists, so you need strong fencing. They provide lots of milk, and I’ve made wonderful tasting cheeses and creamy soaps with their milk.

Alpine Goats

Our Alpine goats originated in the Swiss Alps, and are excellent milkers with large, well-shaped udders. Alpines first appeared in America in 1922. They are hardy and agile, and adapt to just about any climate. Like our Nubians, they have a talent for escape, so sturdy fencing is needed. We count on the services of Esme, our LGD, to watch over and tend to the antics and wandering habits of our family goats.

Because of their fun colors, milk output, and friendly dispositions, raising our goats has become a Gather Heritage Farm delight.

Great Pyrenees Livestock Guardian Dog

esme

Esme, our Great Pyrenees LGD, has developed into a fantastic guardian dog for our barnyard menagerie. Great Pyrenees are one of the oldest dog breeds in the world. They were bred as dogs of war and then used during peacetime as sheep guarding dogs. They are one of the least aggressive of the large guardian dogs (LGD), so often people cherish them as family dogs. They are regal, independent and aloof compared to other dogs breeds, traits necessary to spend days alone guarding flocks.

Investing in a Livestock Guardian Dog was the BEST decision we made when we started our homestead. We found our puppy on Craigslist and she came from a working farm with working parents. We have invested hours of training into her and I couldn’t imagine our farm without her. The ultimate satisfaction of this investment comes when I look out the window and I see her laying down near where the goats are grazing and our free-range chickens are pecking happily in the dirt beside her. 

As you can tell, Gather Heritage Farm takes heritage very seriously. We know that one of the best ways to ensure a better tomorrow is to plant the heritage of yesterday firmly in the soil of today and watch it bloom in the harvest of tomorrow.

Why Raise Heritage Livestock Breeds

Filed Under: Homesteading, Living Sustainably

« Previous Page
Next Page »

Primary Sidebar

  • Facebook
  • Instagram
  • Pinterest
  • RSS
  • YouTube

Hi, I'm Jackie Ritz and welcome to The Paleo Mama! I'm a published author, certified herbalist, and voracious researcher of natural medicine and nutrition. I'm glad you're here and I hope you stick around for awhile!

Recent Posts

  • When God Says Pause: Why I Took a 5-Year Break from My Online Business
  • How to Quit Facebook but Keep Your Business Profile
  • Leaving the City for the Country
  • Natural Way to Heart Health

MEAL PLANS

Biblically clean meal plans that are for those love to cook real food

Read More

Footer

Our Blog

The Paleo Mama blog provides simple answers for healthier families through research, tutorials, recipes, and simple remedies for daily needs!

  • Health
  • Essential Oils
  • Recipes
  • Remedies
  • Natural Living
  • Meal Plans

Stick around!

You’ll get instant access to a library of natural remedies and real, paleo food, including our ebooks and free guides we send out.

  • Home
  • Disclosure/Disclaimer
  • Privacy Policy
  • Advertise
  • Contact Me

Copyright © 2025 · Wellness Pro on Genesis Framework · WordPress · Log in