• Skip to primary navigation
  • Skip to content
  • Skip to primary sidebar
  • Skip to footer

The Paleo Mama

Homegrown and Handmade

  • About
  • Blog
    • Podcast
  • Meal Plans
  • Essential Oils
  • Our Farm
    • Great Pyrenees Puppies
    • Goats
      • Goats for Sale
      • Goat Sales Policy
      • Nigerian Dwarf Bucks
        • Ranchocabra Lunar Eclipse

Homesteading

What’s the Difference Between Duck Eggs & Chicken Eggs?

June 11, 2016 by Jackie Ritz 1 Comment

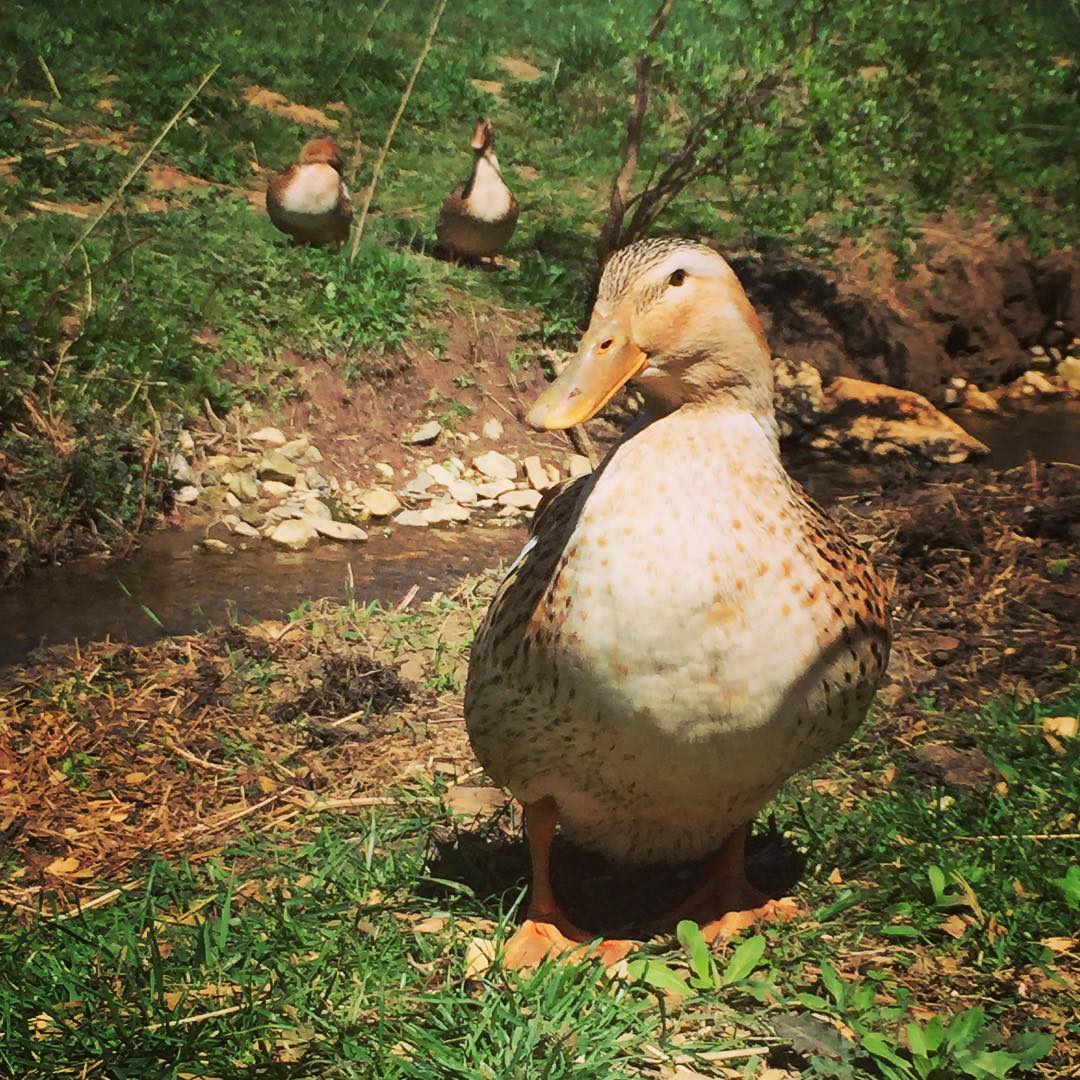
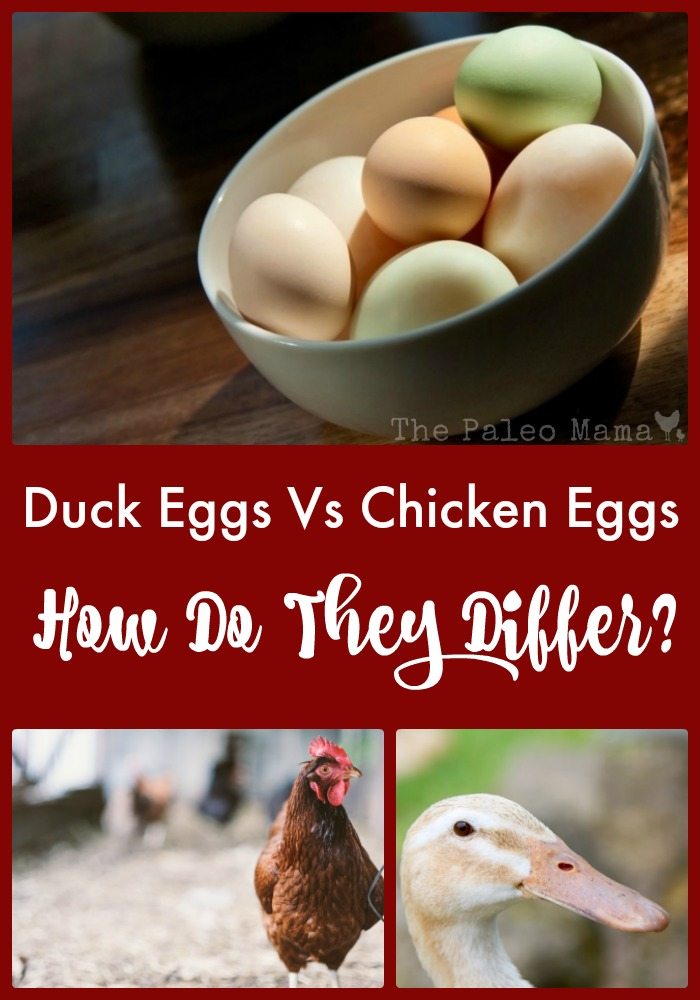
We have a daily supply of both chicken eggs and duck eggs from our barnyard critters. We have several Silver Appleyard Heritage Breed ducks that lay lots of large white eggs for us. We also have lots of heritage breed chicken who happily free range around our barnyard and leave us dozens of multi-colored eggs daily. We love both, and are often asked what the difference is between the two. I want to give you a few facts about duck eggs vs chicken eggs in this blog post. Let me try to answer these questions in this blog:

  • How do they compare nutritionally?
  • What are the benefits of eating each type egg?
  • How do they differ in taste?
  • How do I use duck eggs in cooking?

How do they compare nutritionally?

Here is a simple chart that compares the eggs nutritionally:

Facts Chicken Eggs (Large) Duck Eggs
Calories 71 130
Total Fat 5 g. 10 g.
Cholesterol 211 mg. 619 mg.
Sodium 70 mg. 102 mg.
Total Carbohydrates 0 g. 1 g.
Protein 6 g. 9 g.

 When it comes to comparing other nutrients like vitamins and minerals, the same rule applies to both eggs: it depends on what the bird eats. As a general rule, both chicken and duck eggs offer vitamin A, vitamin B-12, vitamins D and E, and selenium and iron. Duck eggs have more Omega 3 fatty acids, and are an alkaline-producing food. Chicken eggs are an acid food.

Ducks or chickens that are fed poultry food will not be as healthy, or provide as many nutrients, as those that are allowed to free range and forage things like algae, weeds, and grass. That is the main reason why I am totally confident in saying that barnyard duck and chicken eggs are so much healthier to eat than those you could get at your local supermarket.

What are the benefits of eating each type egg?

Duck

I want to give you some of the benefits of eating either duck or chicken eggs. Generally the benefits are similar, but there are some differences, which I’ll list. Because I am all about pastured poultry, the benefits I’m listing are related to pasture-raised poultry. For me, these benefits far outweigh any you can get from farm-raised, supermarket quality eggs. Here are some of the main benefits:

  • Both duck and chicken eggs contain healthy Omega-3 fats. These fats contribute to heart health, normalize and regulate your cholesterol triglyceride levels, aid healthy brain function, and give support against autoimmune disorders, arthritis, and cancer.
  • Pasture-raised poultry have significantly higher vitamin E content in their eggs. Vitamin E provides protection against toxins in the air, eye disorders, neurological diseases, and provide benefits for your skin and hair care.
  • Both duck and chicken eggs provide protein with high biological value (HBV). They provide a complete range of amino acids, and are considered a “complete protein.”
  • Because duck eggs generally have a thicker shell, they will stay fresher longer.   
  • People who cannot eat chicken eggs due to allergies can often eat duck eggs.

There are so many overall benefits to eating either duck or chicken eggs that I consider them an important part of my family’s daily menu plan. We love our barnyard critters for the beautiful, healthy eggs they continue to give us, and there are many times when we would choose to eat an egg over anything else.

How do duck eggs and chicken eggs differ in taste?

Laura_Coppelman_-4282

There really is not a lot of difference in the taste between a duck egg and a chicken egg. Duck eggs tend to be a bit more intense in taste than a chicken egg because of what a duck eats. They prefer to eat bugs, snails, slugs, and other high-protein critters over plant matter, and that diet impacts the flavor of their eggs.

How do I use duck eggs in cooking?

You can use duck eggs just the same as you use chicken eggs generally. But because there is a higher protein content in duck eggs, you need to be sure you are not overcooking them and turning them rubbery. Here are a few of my favorite ways to cook with duck eggs.

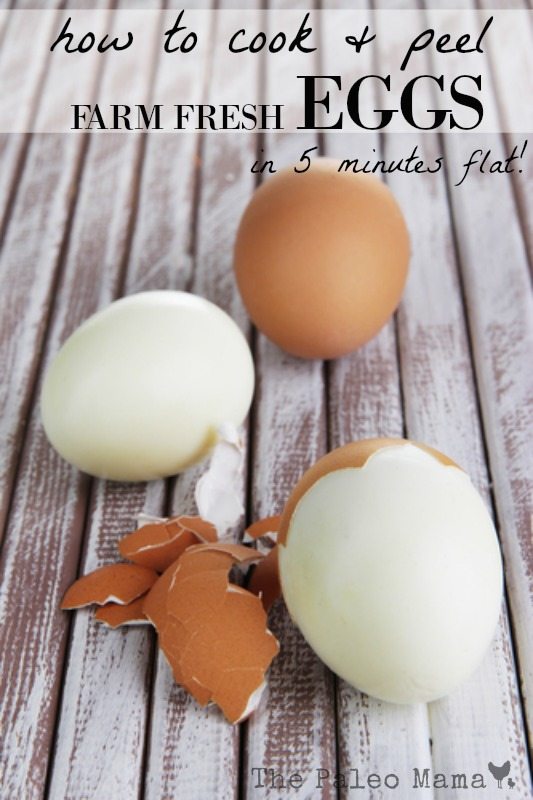
  • Hardboiled duck eggs—Place your duck eggs in a pot, cover with cold water, and bring to a boil. As soon as the water boils, remove the pot from the heat and let it stand for 12 minutes. Drain the eggs and shake the pan vigorously to crack the shell, this lets them cool faster and prevent overcooking. Cover with cold water and ice and let them cool before you peel them.
  • Fried duck eggs—I fry my duck eggs just like chicken eggs. They tend to stay more compact and thicker, so they take a bit longer to fry through.
  • Baking with duck eggs—I love using duck eggs in cakes, pies, cookies, custards, and other baked items. The white of duck eggs have more protein and will whip up higher, giving you lighter, taller baked goods. If the duck eggs you are using are much larger than your normal chicken eggs, try using 2 duck eggs when a recipe calls for 3 chicken eggs.

Three Duck Egg Recipes

I want to give you three recipes for using duck eggs. If you just try out these recipes, I’m sure you will want to continue cooking with duck eggs whenever you can. Not only are they an excellent source of healthy nutrition, they are also so tasty!

1. Homemade Duck Egg Mayo—

If you think homemade mayo using chicken eggs is delicious, just wait until you taste this homemade mayo using duck eggs. There are many different methods for making homemade mayo, but the one I like best makes use of my immersion blender. I find it easier and faster, and the mayo thick and creamy when it’s done.

Ingredients: 1 large duck egg, juice of half a lemon (about 1 TBSP), about a half teaspoon of Dijon or whole-grain mustard, ½ tsp sea salt, and ¼ tsp. white pepper, 1 cup light olive oil (or perhaps ½ cup extra virgin olive oil and ½ cup avocado oil).

Directions: Put all the ingredients is a wide mouth Mason jar. Let the ingredients sit while the oils rise to the top. Put your immersion blender in the jar sitting firmly on the bottom. Without raising it, turn it on high so the mayo will begin to emulsify. Once it starts to look like real mayo (less than a minute) you can move the immersion blender up and down to mix in any oil not yet emulsified. Place your thick, delicious mayo in a covered jar and keep in the refrigerator. It will last about one week.

2. Duck Egg Crustless Quiche—

We love to use our homegrown veggies, raw milk and duck eggs in a delicious quiche. We serve these for just about any meal, and the recipe can vary depending on what garden veggies we have available at the time.

Basic Ingredients: 3-4 duck eggs, about 1 ½ cups raw goat or cow milk, about a cup of homemade goat milk mozzarella cheese, sea salt and pepper to taste. Optional ingredients: freshly harvested Kale, Spinach or Chard, diced freshly harvested tomatoes, green onions, Shitake mushrooms just picked, fresh herbs.

Directions: Preheat the oven to 400 degrees. Beat the eggs, beat in the milk and stir in the cheese and salt and pepper, Stir in any of your optional fillings. Lightly grease a casserole dish. Bake about 20-30 minutes, removing the quiche when it is firm in the middle and the edges are just starting to brown. Let it sit a few minutes while you set the table and call your family, then slide a knife around the edges, slice and serve.

3. Garden Veggie and Duck Egg Breakfast Muffins—

Here’s another really good way to use your garden veggies and duck eggs in a breakfast muffin. You can vary the veggies according to what you have freshly harvested.

Ingredients: 1 ½ cups garden veggies (zucchini, summer squash, eggplant, spinach, kale), 2 Shitake mushrooms, diced (other mushrooms are fine), about ⅓ cup fresh juice from your garden tomatoes (or sauce you have already made), 6 duck eggs, fresh herbs (basil, parsley, rosemary, etc.), sea salt to taste.

Directions: Preheat the oven to 350 degrees. Use 6 extra-large muffin cups (I like to use a silicone muffin pan). Fill the muffin cups about ⅓ full with a diced mixture of the veggies and mushrooms. Put a teaspoon of the tomato juice or sauce on top of the veggie mix. Crack a duck egg on top of each muffin cup. Season the egg with some dried herbs and sea salt. Bake for 15 minutes or until the whites are set and the yokes partially baked. Remove from oven and let sit a couple minutes. You can serve these warm or cold. Store your leftovers in a covered container in the fridge.

I know you are going to discover that duck eggs are an awesome treat…kind of a ramped-up version of chicken eggs. We love our duck eggs, and think you will too.

Duck Eggs Vs Chicken Eggs

Sources

  1. https://countrysidenetwork.com/daily/poultry/eggs-meat/egg-facts-duck-eggs-vs-chicken-eggs/
  2. https://articles.mercola.com/omega-3.aspx
  3. https://modernfarmer.com/2015/06/everything-you-need-to-know-about-duck-eggs/


Filed Under: chickens, Homesteading

Three Steps to Starting Your First Veggie Garden

May 5, 2016 by Jackie Ritz 1 Comment

When we began dreaming of moving out of our suburban lifestyle to a piece of God’s great country “out there” where we could plant our roots and start living a self-sustaining lifestyle, we had a lot of wants and wishes, but very little know-how! We knew we wanted to be homesteaders, but what does that really mean? Through our rose-colored glasses we could see beautiful rows of growing organic vegetables and fruits, and pastures filled with grass-fed, free-range poultry and animals. But if you had asked us then, “What is the first thing you need to do to make homesteading a reality?”, we would not have been able to answer that question.

So I understand all too well the paralyzing doubts and fears of really being able to make that happen. If you are dreaming of having a garden filled with organic, nutritious fresh vegetables, but don’t know how or where to start, I want to give you three steps to starting your your first veggie garden  to build your confidence that you can do it. All you need is a little piece of land (or some containers sitting on your patio) and a bit of helpful start-up information. It’s really not that difficult to get started. Let’s look at the basic steps you need to take to go from dreaming to doing.

  1. Determine how much land—either actual land or soil in pots—you have available for your garden, and prepare it appropriately for your plants.
  2. Start small—choose three to five veggies or fruits you most want to grow yourself—and get them ready to plant in your garden.
  3. Be consistent in caring for your plants—which includes watering, weeding, feeding, and keeping out the garden pests.

Those are three pretty simple steps to take, but you need a little bit of know-how before you will be successful with any of those steps. So let’s look a little closer at each step.

1. Preparing your land

There are some important things to consider about the land you have. It’s important to know that almost all vegetables need about six hours of full sun each day. Be sure the land where you want to plant your garden receives as much sun as that. You also need to know what type of soil you have. You can take a sample of your soil to your county extension office, and they will tell you what your soil lacks and how to amend it. Or you can test your own soil with a Mason Jar Soil test. You can find complete directions for this self-soil-test here. You can also grab a Rapitest Soil Tester from your local garden store or purchase it online here. 

If you do not have the perfect combination of clay, silt, and sand—which is pretty rare—you will need to amend your soil with some organic materials. These materials may include yard trimmings, compost, crop residues, and manures. This handy guide you can download will be helpful to you. 

One of the easiest and most helpful tools you can have for successful gardening is your own organic compost material. Compost is the single most important supplement you can give your garden soil. There are many guides available online to help you get started with your own compost bin, including this one. Your first year of gardening, you will need to purchase compost through your garden store or online. 

This year we decided to try out raised row gardening. It’s super easy and requires some straw, soil amendments, and compost. It requires you planting your seeds or transplants in straw rows. Old World Garden has a great blog post series on raised row gardening that you can read here. 

You will want to add 2-3 inches of soil amendments to your soil. In most cases this will involve loosening the dirt and mixing the organic soil amendments into the dirt. Be sure you are working with moist soil. If your soil is either too wet or too dry you will not get the best mixture of soil for growing your plants.

You will also want to plan your garden. You will want to make the best use of the land you have available. For example, you should place plants with similar water, fertilizer, and sun exposure requirements together. You will also want to be sure you are leaving enough room between your rows (approximately 2 feet) to allow you to walk between, to lay your hose for watering, and to push a small wheelbarrow for weeding waste. You can find a lot of great tips online, including a free “Vegetable Garden Planner” software program here. 

2. Choosing your garden plants

Choosing your garden plants doesn’t have to mean growing the same vegetables your grandmother…or your neighbor…or the gardener with the perfect garden…grows. Plan the design with the types of food your family likes to eat! My family loves tomatoes, so this year we planted 21 tomato plants! Remember that gardening is a matter of trial and error, so choose the plants that are easiest to grow when you are just beginning. Some of the easiest vegetables to grow are lettuce, peppers, tomatoes, and cucumbers. Some plants, like lettuce and sunflowers, are easy to grow from seeds, but an easier method for the beginner gardener is buying young plants, or transplants, and plant them in your prepared soil. Transplants are available in your garden store!

You may decide to grow the vegetables you need for a simple salad. Lettuces grow quickly, and are easy to harvest. They take up very little space. Tomatoes are probably the most popular vegetable for beginners, and can be supported with a stake or cage as they grow. Try the smaller varieties of tomatoes, such as cherry and grape tomatoes. Plant some basil next to your tomato plants to naturally repel tomato pests. Cucumbers grow almost like weeds, and also are easily staked for support. Just remember to purchase tomato, pepper and cucumber stakes early and insert them into the ground to support your plants BEFORE the roots get too big. You don’t want to stake them too late or you risk damaging the roots. 

You may also want to try some root vegetables, like carrots, turnips, and radishes. You can plant them early in the spring and leave them until the fall. Green beans and zucchini are also easy to grow. Maybe you have some room to add some bell peppers or jalapenos to flavor your home-grown salad.

3. Give consistent care to your garden.

To have a successful harvest in your garden, you need to add four chores to your gardening schedule: watering, weeding, feeding, and keeping out the garden pests. Let’s consider each of these chores.

You want to be sure your plants—and their roots—stay moist. In order to keep your garden well watered, follow these tips:

  • Focus on the root zone. Wetting the foliage is a waste of water and can promote the spread of disease. This is why I prefer a soaker hose for my garden. You can even add a timer to your soaker hose and forget about it!
  • Water only when needed. Too much water is just as damaging as too little.
  • Water deeply and thoroughly. Your soil should be moist to a depth of 6-12 inches.
  • Water in the morning. It’s much more difficult for plant diseases to get a foothold when the foliage is dry.
  • Use the right tool. Use a soaker hose or create a drip irrigation system instead of a sprinkler.1

Weeding can seem like the chore that never ends. But there are some simple strategies to maintain a well-groomed garden. If you decide to do the raised row gardening, you will find that you have much less weeds! 

  • Let sleeping weeds lie. Only the weed seeds in the top 2 inches of your soil will germinate and grow. Dig only when you need to, and cover the freshly dug soil with mulch after you dig.
  • Mulch, mulch, mulch. Mulch keeps the soil cool and moist and deprives weeds of light. I wait till my plants are about 6-10 inches tall and then spread straw on the top of the soil and use it as mulch. You don’t need to spend lots of money on expensive mulch. Straw works great!
  • Weed when the weeding is good. “Pull when wet, hoe when dry” is wise advice. After a drenching rain, put on your garden gloves and get started. Try using an old fork to twist out weed roots, or an old steak knife to cut the weeds popping up through the mulch. Be sure to chop off weed heads before they go to seed.
  • Mind the gaps between plants. Close plant spacing will choke out emerging weeds with shade, but while the plants are growing, be sure to weed between them.
  • Water the plants, not the weeds. Keep your soaker hoses close to the plants, and let the nearby weeds go thirsty.

The key to a good garden is a good soil. Just like we need nourishment, so do plants. Understanding just a little bit about feeding your plants can help them grow big and strong and healthy. Organic and natural fertilizers add essential nutrients to the soil where they become available to the plants over time. There are three essential micronutrients your plants need: nitrogen, phosphorus, and potassium.

You can make your own organic fertilizer with some of the common items found in your kitchen or around your house. There is much good information online about how to do this, including this great resource, which provides four easy homemade fertilizer recipes.  Here is a list of some of these common ingredients:

  • Aquarium water
  • Banana
  • Blackstrap molasses
  • Coffee grounds
  • Cooking water
  • Egg shells
  • Epsom salts
  • Fireplace or fire pit ash
  • Gelatin
  • Green Tea
  • Hair
  • Matches

If you lack the confidence for making your own organic fertilizer, be sure that you purchase your organic fertilizers from a company that produces awesome, trustworthy organic fertilizers. Follow the recommendation of an experienced gardener, or a well-researched list of reputable organic fertilizer producers. You can find one good resource here. 

Be prepared to do a little warfare against those garden pests that want to take over your veggies and prevent you from ever getting your first good harvest. Be sure to read my earlier post about Natural Remedies for Garden Pests.  There are twelve bothersome garden pests to be aware of, and I give you helpful information for dealing with each. These 12 garden pests are:

  • Slugs
  • Squash bugs
  • Aphids
  • Imported cabbageworms
  • Squash vine borers
  • Japanese beetles
  • Tomato hornworms
  • Cutworms
  • Grasshoppers
  • Cucumber beetles
  • Corn earworms
  • Whiteflies

If you are eager to have a healthy, organic garden, you will want to limit your plants’ exposure to unhealthy chemicals. There are ways to deal naturally with garden pests, and you will want to incorporate these methods into your gardening efforts. In addition to the information I share in my earlier blog post, there are good suggestions online, including here. 

Once you are prepared with this information, all that’s left for you to do it simply BEGIN! By harvest time you will be surprised by the generous supply of fresh, organic, homegrown vegetables you have produced yourself. You’ve just taken one giant leap into your dream of becoming a modern homesteader, and  your family will be able to enjoy the healthy bounty from your garden.

Sources

  1. https://www.gardeners.com/how-to/when-to-water/8108.html 
  2. https://www.keeperofthehomestead.com/blog/5-ways-to-start-homesteading-today
  3. https://www.bhg.com/gardening/yard/garden-care/ten-steps-to-beginning-a-garden/#page=1
  4. https://preparednessmama.com/starting-a-garden/
  5. https://www.vegetable-gardening-online.com/planning-a-vegetable-garden.html
  6. https://lifehacker.com/the-seven-easiest-vegetables-to-grow-for-beginner-garde-1562176780

Filed Under: essential oils, Gardening, Homesteading, Living Sustainably

How To Peel Farm Fresh Eggs

December 14, 2015 by Jackie Ritz 11 Comments

Y’all. I gave up on eggs about a year ago. My 25 free-range chickens do an amazing job at giving us the BEST and most delicious farm fresh eggs. I mean BEE YOU TIFUL. However, have you ever tried to peel eggs that come straight from a farm? Eggs that were laid that very morning and collected by eager hands in the afternoon? 

It’s impossible. 

I have tried EVERYTHING. Every, single method was a big fat fail. 

Yes, I tried baking soda. Yes, I tried cold water bath. Yes, I tried boiling and then removing from the stove for 15 minutes with a lid on and then tossed in a ice water. I tried vinegar. I tried it all. 

Then a miracle happened. 

It’s called a Instant Pot. It’s called a gift from heaven above. It’s called redemption!

So, if you haven’t purchased an Instant Pot then you are missing out on SOOOOO much. 

An Instant Pot is a pressure cooker, yogurt maker, slow cooker, rice cooker, steamer…..it’s a gift from God, my friends. And, no, it’s not your mama’s pressure cooker. An Instant Pot is smaller than most slow cookers. 

I thought it was too good to be true, but after a few months of using it to boil my farm fresh eggs, I have a 100% success rate. AND, all my eggs come out perfectly peeled when before they looked like something out of a horror movie. 

How to Peel Farm Fresh Eggs (and cook them): 

Step #1: Buy an Instant Pot. There’s no way around this…just buy it! I use mine 7x a week now! 

Step #2: Pour 1 cup of water into the Instant Pot. Leave the trivet in the pot. 

Step #3: Place 10-12 room temperature eggs on top of the trivet. 

Step #4: Secure the lid. Push the “steam” button and adjust time to 5 minutes. 

Step #5: When the Instant Pot beeps at the end of 5 minutes, use the quick release technique and allow all the steam to release through the valve. 

Step #6: Place eggs in a cold water bath with some ice for a few minutes. 

Step #7: Peel in peace without butchering your beautiful eggs! 

How to peel farm fresh eggs

Filed Under: chickens, Homesteading, Living Sustainably

Homemade Gift Ideas for the Homesteader

November 14, 2015 by Jackie Ritz 1 Comment

Gift Ideas

The holiday season has already begun. Every year it arrives, and so often chaos, stress, and uneasiness about gift giving comes with it. But it doesn’t have to be that way for those  prepared with several homemade gift ideas for the homesteader in your life that loves the beauty of things “from scratch”. 

In this blog I want to get your season started right by sharing some of my favorite homemade gift ideas for those homesteaders-at-heart in your life. You can make these easily for your friends and family and give them healthy, original gifts that are so much better than last-minute store-bought items. I will follow up with a second blog on ideas for making homemade tasty food gifts for your loved ones.

Get your shopping list ready and prepare to impress your loved ones with these great gift ideas. I am including three groups of DIY homemade gifts:

  1. DIY Homemade Beauty Products
  2. DIY Health Supporting Products
  3. DIY Home Cleaning Products

For most of these recipes, you are going to need high-quality essential oils. 

essential oils and medical flowers herbsI LOVE LOVE LOVE dōTERRA and would love to help you get started using essential oils. dōTERRA is sold exclusively through independent distributors like me. Working from home, these advocates, like myself, introduce, educate about, and sell essential oils in their local markets through person-to-person contact and globally through websites (like this one!). If you want to take a peak at the starter kits which include most of the essential oils you will need for these recipes, CLICK HERE and let me know if you have any questions! 

DIY Homemade Beauty & Health Products

(Click here to get my DIY Beauty Recipes eBOOK for even more ideas!)

Sugar Scrub BarsSugar Scrub Bars

I love making my own sugar scrub. I, also, love making my life easier which is why I made these sugar scrub bars. All I have to do is grab a bar before getting in the bath or shower. No more opening up a mason jar and scooping out the scrub and letting water get into the scrub. Now I just take a bar and start lathering it over my body. It’s easy to hold and easy to make! (Find Recipe here) 

Lavender Body Butter

I have an obsession with making body butter. There’s something about putting together the simplest of ingredients and then whipping it up into this luxurious, natural, and nourishing lotion. This Lavender Body Butter does just that; it’s simple to make, only four ingredients and uses lavender essential oil. (Find Recipe here) 

Spiced Chai Lip Balm RecipeSpiced Chai Lip Balm www.thepaleomama.com

I love chai tea and the way the spices in a chai tea smell. I have been making my own lip balm for years now, usually I just put my Healing Salve on my lips, but I wanted something a little “fancier” so I created a delicious Spiced Chai Lip Balm recipe that I know you will enjoy. (Find recipe here) 

Whipped Sleepytime Rub

Winding down at night can be tough at times. I know my mind keeps going for minutes and sometimes hours after I lay my head down on my pillow. The same goes for our kids.

Our nightly routine has become essential at our house. I notice that the nights we go from dinner to bed is CRAZY. The kids are not ready to rush rush rush and then get in bed. So, I stopped expecting it from them and started taking our bedtime routine a little more seriously.

Whipped Sleepytime Rub www.thepaleomama.comNow we eat dinner at the table as family and then we slowly start getting ready for bed. The kids take a nice relaxing bath, sometimes a detox bath, with certain essential oils in it, and then we get all snuggled up in our pajamas and read books.

During our reading time I apply this Whipped Sleepytime Rub made with essential oils to my kids. They absolutely love this! The 3 main oils I choose to apply are Frankincense, Lavender, and Vetiver because these oils promote a nice, restful sleep. (Find recipe here)

DIY Health Supporting Products

Elderberry Syrup

Elderberries are packed with Vitamins A, B, and C, iron, potassium, and powerful antioxidants. Making an elderberry syrup recipe is a great way to get all the nutrition from these delicious bushes into our body! (Find recipe here) 

Comfrey Salve

Homemade Comfrey Salve

One of my favorite things about my new homestead is our very own comfrey patch. Of course, you don’t need to grow your own comfrey to make a nourishing salve with it. There are several places online that you can purchase dried, organic comfrey leaves to make this simple and homemade comfrey salve. 

Comfrey has been in use as a medicinal herb for more than 200 years. The allantoin content of comfrey aids in healing wounds, sores, burns, swollen tissue, and broken bones. It can be applied externally to bruises, sprains, arthritic bones of any inflamed tissue, and acts as an anti-inflammatory and pain reliever. (Find recipe here) 

All-Purpose Salve

My goal in creating this recipe is to minimize your medicine cabinet and prove to you that, once again, nature has given us the remedy. This all-purpose salve is good for so many things. The coconut oil and olive oil bring nourishment, while the beeswax is known to lock in moisture, foster cells, and protect skin from damaging environmental factors. For children, the BEST two essential oils to have on hand are melaleuca and lavender.

(Find recipe here) 

DIY Home Cleaning Products

Multi-Purpose Floor Cleaner

When it comes to cleaning your floors, you don’t need expensive products to do the job. Essential oils are great at cleaning up the dirt while leaving a refreshing, clean aroma in the air. Cleaning your floors with essential oils is completely safe, non-toxic, frugal, and easy!

The beauty of using essential oils on your floors, is that you don’t have to worry about using a specific oil on a specific service. Each essential oil will work on your floors. This recipe works if you have tile, hardwood, linoleum, ceramic, laminate, and vinyl. You can mix any of the oils I recommend above to make this recipe or use one single oil. (Find recipe here) 

DIY Laundry Detergent—$0.02 a Load

I’ve been making my own laundry detergent for years now. I was so scared at first to switch over to natural-homemade detergent because there was this mindset that store-bought is best…store-bought smells better…store-bought makes my clothes fresher. However, when we did our budget makeover, I decided to take homemade detergent into my own hands and come up with a DIY laundry detergent recipe that saves a TON of money. (Find recipe here)

Wool Dryer Balls with Essential Oils

 Wool Dryer Balls from The Paleo MamaSince I have made the switch to using wool dryer balls, instead of dryer sheets, my pocket-book is much happier, and so is my energy bill! I love my wool dryer balls with essential oils and I know you will making the switch too! Here are some of the reasons why you should try these wool dryer balls:

  • They can cut your drying time in half
  • They help reduce static
  • They save you money on your energy bill
  • They are chemical-free, unlike dryer sheets
  • They can be re-used over-and-over again
  • They increase the fluffiness of your clothes
  • They are safe to use with cloth diapers

(Find recipe here)

All of these easy-to-make homemade products would make fantastic holiday gifts for your friends and loved ones. You will have fun making them, and your loved ones will appreciate the efforts you make to prepare gifts offering healthy, economical alternatives to the chemically laden products you can purchase at stores.

Gift Ideas for the Homesteader


Filed Under: Budget, Budget Shopping, DIY, DIY Beauty Recipes, DIY Home Recipes, essential oils, Homesteading, Living Sustainably

How to Make a Simple Chocolate Mousse

November 5, 2015 by Jackie Ritz Leave a Comment


Ever wondered what kind of blogs bloggers like to read? Well, I have a few that top my list and The Elliott Homestead is one of them. I love Shaye’s writing style, her posts are always encouraging, and the way she connects with her readers. Bonus — she’s a real life friend of mine and when she asked me if she could share a post on my blog on how to make a simple chocolate mousse, I — of course — said yes! Welcome Shaye! 

Hello fellow homesteaders! So glad to meet you… even if it is digitally. I’m always humbled by the community that exists around a common love for animals, farms, and good food. Which is obviously why you’re reading Jackie’s blog in the first place! It’s a beautiful place to hang out and be inspired. I’m humbled she’s invited me to share in a bit of that love. 

In the spirit of celebrating the farm and all the goodies it gives us, I wanted to share with you my super-simple chocolate mousse, make fresh with cream from the family cow and eggs from the chickens. It’s a sweet celebration and whips up in just a few minutes! 

I hope you enjoy it’s simplicity – from my farm to yours! 

Simple Chocolate Mousse Recipe 

Ingredients
  1. 8 oz. high quality dark or semi-sweet chocolate
  2. 4 Tbsp. butter
  3. 2 cups cold cream
  4. 3 egg whites
  5. Pinch sea salt
  6. Garnishes: Berries, powdered sugar, shaved chocolate, pistachios, maple syrup etc.
Instructions
  1. Melt chocolate and butter in double boiler. Meanwhile, whip the egg whites with a pinch of sea salt until stiff peaks form. Set aside. Whip the cream until fluffy and stiff.
  2. Gently fold in half of the chocolate mixture into whipped cream. Then gently fold in the other half of the chocolate. Lastly, gently fold in the whipped egg whites.
  3. When combined, refrigerate for 1 hour.
  4. Garnish with fresh berries, nuts, shaved chocolate, maple syrup, additional whipped cream etc.
      By Shaye Elliott

Filed Under: Homesteading, Living Sustainably, My Recipes

Raising Irish Dexter Cows

October 27, 2015 by Jackie Ritz 5 Comments

Irish Dexter Cows

We recently added Cleo and Rosalind to our family. These two girls are registered Irish Dexter cows, an endangered heritage breed that gives great milk and tasty meat. We are so excited to finally have cows in our barnyard heritage menagerie!

In this blog post I want to introduce you to this wonderful breed of cattle, and to share some of the pros and cons for raising Dexters. Cleo and Rosalind have already endeared themselves with each of our family members, and I know you would have the same pleasant experience if you were able to bring some Dexters into your family.

We will take a look at:

  1. The heritage breed of Irish Dexter Cows
  2. Why would I choose to raise Dexters?
  3. What specific benefits will my Dexters provide?
  4. The Buyers’ check list when purchasing Dexter cattle.

1. The heritage breed of Dexter Cattle

dexter prize

Today’s Dexter cattle descend from a herd of hardy Irish mountain cattle assembled by Mr. Dexter, agent to Lord Hawarden, around 1750. Dexter roots trace to the tiny Celtic cattle of ancient Eire. Irish fanciers established a Dexter registry in 1887 and an American version followed in 1911. Yet North American Dexters were ever scarce; today they’re included on the American Livestock Breed Conservancy’s Conservation Priority List, classified as rare. (If you’d like to help preserve an endangered heritage livestock breed, consider raising Dexters. They need your helping hand.)

Dexters are strikingly small cattle. Most Dexters are colored in shades of deepest ebony to sun-tinged, reddish-black. Reds and duns are far less common and grade from palest red to darkest mahogany; reds have black and pink noses, while duns have brown noses. Black-tipped white horns usually accent their small, neat heads, although a line of polled (hornless) Dexters now exists. There are two types: a longer-legged version (Kerry type) and a Dexter with shorter legs.

Dexters are dual-purpose cattle. Thanks to the breed’s foraging ability, and its high feed conversion and meat-to-bone ratios, a grass-fed Dexter steer will finish in 18 to 24 months, dressing out at 50 to 60 percent live weight. Dexter beef is fine-textured, tender and delicious. And Dexter cows give 1.5 to 3 gallons of roughly 4 percent butterfat milk daily, at a rate of up to one quart of cream per gallon.

Dexters are famous for their strong maternal instinct, easy calving, sweet dispositions and longevity. They do, however, occasionally throw dwarf “bulldog” calves.

2. Why would I choose to raise Dexters?

Rose

There are some very practical reasons to choose to raise Dexter cattle. Raising a Dexter cow has been compared to eating one potato chip—it’s almost impossible to settle for just one! Here are some of the benefits you will find:

  • If you want to have a cow, you’ll need less pasture and far less space to house a mini version like a Dexter.
  • If you must pen her and feed cut-and-carry forage, it’s doable.
  • Her wee hooves and bantam weight equate with far less pasture damage, and she’s designed to eat grass, not concentrates.
  • She’ll neatly thrive on one half the feed of her full-size kin and use it to produce much less waste for you to cart away. 
  • Come autumn, you’ll haul less hay. And you’ll tote fewer buckets of water to quench her thirst during the deep, hard winter freeze.
  • If you are a small-scale farmer hoping to qualify land for ag-tax breaks or to turn a profit, this is a very good thing indeed.

3. What kind of care do I need to give my Dexters?

The care of your Dexter cows will not put a huge strain on your homestead budget. Your barn facility and pasture area will not need to be as strong and large as what you would need for larger breeds.

Dexter cattle are not as susceptible to cattle diseases as other breeds. They will rarely need to be attended to by a veterinarian. Dexters are also highly intelligent and have a steady temperament, which means they are not hard to handle. Some additional specifics related to their care includes:

  • While they so not need as much housing as other breeds, they will need a place to get out of the wind and snow if you live in a cold winter climate.
  • You will need to be certain you have secure fencing.
  • You can get by on 2-3 acres for them, but your forage needs to be nutritious and in excellent shape.
  • They may require additional hay, which you will need to have ready.
  • Make sure you have a veterinarian to help you learn about cattle care and preventative medicine, and who will come to your property if needed.

4. What specific benefits will my Dexters provide?

Looking after a Dexter can be fun for children and can give them a sense of accomplishment. With proper attention and training, a Dexter can be easily handled by even the greenest homesteader. Dexters can be trained like oxen to plow or pull wagons, and their strength belies their size. At the same time, that size makes them less intimidating to children and adults.

They’re the perfect size for the family homestead. One Dexter cow will give about 1 to 2 gallons of milk a day, a much more manageable amount for a single family than the 8 to 10 gallons a typical Holstein yields.

If you raise a Dexter for beef, you’ll need room in the freezer for about 400 pounds of meat, rather than 600 to 800 pounds you’d get from a typical full-size steer. They are known as prolific milkers and produce a significantly higher milk yield than other breeds. Their milk is of very high quality and has high levels of protein and butterfat.

The meat from Dexter cattle has a pleasantly unique taste and texture that makes it suitable for boutique meat markets. Grain-fed Dexters will yield 250 pounds at 12 months, and 475 to 500 pounds at 24 months, dressing at about 60 percent of their live weight. These results can be obtained by supplemental feeding of only 5 to 7 pounds of grain per day for the last two to three months. Grass-fed animals yield about 55 percent of their live weight.

Dexters typically live long lives and can be bred until the ages of 14 or 15. Considering that a Dexter can be bred from as early as a year old and through harsh weather conditions, this trait is a clear advantage over other breeds.

Dexters are known as “easy calving cattle.” This means that they can successfully give birth without assistance and that they rarely experience any birthing difficulties. Also, the rate of live births of this type of cattle is relatively high. Because of these characteristics, Dexter bulls are often used instead of valuable heifers of larger cattle for breeding. This almost always results in larger numbers of safe, unassisted births.

1. The Buyers’ check list when purchasing Dexter cattle.

Dexter Cattle

The American Dexter Cattle Association (ADCA) has given some valuable information in its Buyers’ check list (Here) that the wise homesteader will review before purchasing any Dexter cattle.

Buyers’ Check List

  • Never buy an animal sight unseen.
  • Be sure the animal is registered (registration certificate in Dexter Owner’s Handbook). 
  • If the animal is not registered, ask for it to be registered BEFORE you purchase it, at the very least make sure it can be. Animals without registration papers may not be able to be registered. If there is any question about the registration paper of the animal to be purchased, its sire or dam, the buyer may be buying a grade animal. (Avoid disappointment later.) If there is a question about registration, contact the Registrar. Remember, there are animals that cannot be registered.
  • Heifers and cows over one year and bulls over two years may require Parentage Verification. (Avoid costly bills later or worse not being able to register them)
  • Be sure the tattoo number on the paper matches the number in the animal’s ear.
  • Make sure the animal can meet your state’s health requirements (for example blood testing for brucellosis, etc.)
  • As a precaution, ask that the animal receive any necessary shots (such as for B.V.D.) prior to shipping.
  • If buying a bull, you may want to request semen testing.
  • Be sure the price is right–shop around—call other breeders—don’t buy the first Dexter you see—go visit several herds if possible.
  • Ask to see progeny or sire and dam, of the animal you are buying. Anything you can see will be helpful to you in making your decision. Hint check the online pedigree pages, there may be pictures posted.
  • Be sure if you purchase a bred cow that you get the proper signatures on the white application for registry so you can get your calf registered.
  •  Make sure the animal fits your needs (if you want to milk the animal make sure she has a good sound udder).
  • Make sure to see copies of any genetic testing that you deem important such as Chondrodysplasia, PHA, Color, A2 Beta-Casein, or Genotyping. Make sure they are on file with the ADCA and will be printed on your registration certificate.

Remember these valuable buyer-beware points. Look at the herds of several breeders before making your decision to buy.  You will see the differences in management as well as differences in the animals themselves.  Beware buying animals at the sale barn as you are buying someone else’s problems or culls—those animals are there for a reason.

The more you know the better decisions you will make, and identifying breeders who are willing to provide advice and service after the sale will make your transition much smoother, helping you on the learning curve that always comes with a new adventure.

But once you have your Dexters, they will very quickly charm their way into the hearts of each family member. They will be much more than homestead cattle—they will become family pets!

Irish Dexter Cows


(PHOTO CREDIT: Image 1, 2, and 3 used with permission from Kirkhaven Farm)

Sources

  1. https://www.livingthecountrylife.com/animals/livestock/raising-dexter-cattle/
  2. https://www.hobbyfarms.com/livestock-and-pets/raising-small-cows-15001.aspx
  3. https://raisingbeefcattle.wordpress.com/raising-dexter-cattle-for-beginners/
  4. https://www.motherearthnews.com/homesteading-and-livestock/all-about-irish-dexter-cattle-zbcz1312.aspx
  5. https://www.dextercattle.org/PDF%20files/ADCA%20membership%20book.pdf

Filed Under: Grassfed Beef, Homesteading, Natural Living

« Previous Page
Next Page »

Primary Sidebar

  • Facebook
  • Instagram
  • Pinterest
  • RSS
  • YouTube

Hi, I'm Jackie Ritz and welcome to The Paleo Mama! I'm a published author, certified herbalist, and voracious researcher of natural medicine and nutrition. I'm glad you're here and I hope you stick around for awhile!

Recent Posts

  • When God Says Pause: Why I Took a 5-Year Break from My Online Business
  • How to Quit Facebook but Keep Your Business Profile
  • Leaving the City for the Country
  • Natural Way to Heart Health

MEAL PLANS

Biblically clean meal plans that are for those love to cook real food

Read More

Footer

Our Blog

The Paleo Mama blog provides simple answers for healthier families through research, tutorials, recipes, and simple remedies for daily needs!

  • Health
  • Essential Oils
  • Recipes
  • Remedies
  • Natural Living
  • Meal Plans

Stick around!

You’ll get instant access to a library of natural remedies and real, paleo food, including our ebooks and free guides we send out.

  • Home
  • Disclosure/Disclaimer
  • Privacy Policy
  • Advertise
  • Contact Me

Copyright © 2025 · Wellness Pro on Genesis Framework · WordPress · Log in