• Skip to primary navigation
  • Skip to content
  • Skip to primary sidebar
  • Skip to footer

The Paleo Mama

Homegrown and Handmade

  • About
  • Blog
    • Podcast
  • Meal Plans
  • Essential Oils
  • Our Farm
    • Great Pyrenees Puppies
    • Goats
      • Goats for Sale
      • Goat Sales Policy
      • Nigerian Dwarf Bucks
        • Ranchocabra Lunar Eclipse

goats

How to Wean a Goat

August 3, 2018 by Jackie Ritz Leave a Comment

Did y’all know that we launch a YouTube channel a few months ago and we have been vlogging every, single day for 2 months?! It has been a BLAST! I mean, it’s another thing to do and to learn about. Who would have thunk that the world of YouTube was so in depth! 

But we wanted to better connect with all of you. Social media wasn’t really doing it for us anymore so after much encouragement from many of my blogging friends, especially DaNelle at Weed em & Reap, we decided to official launch our channel and be committed to growing it. 

I’d love it if you would subscribe to our channel and watch some of our latest videos…oh and let me know what you think while you are over there. 

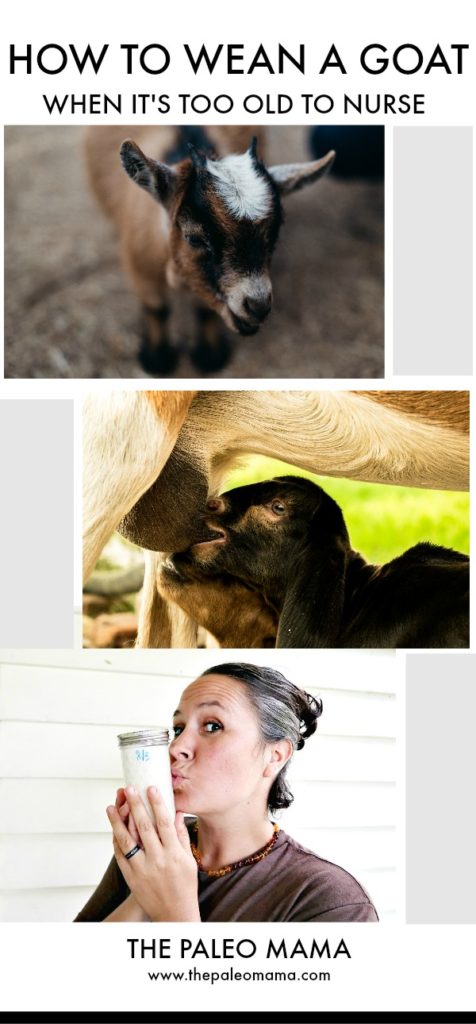
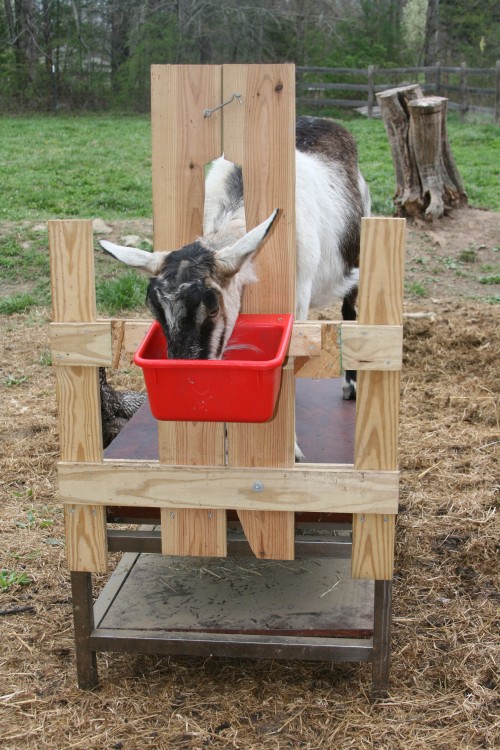
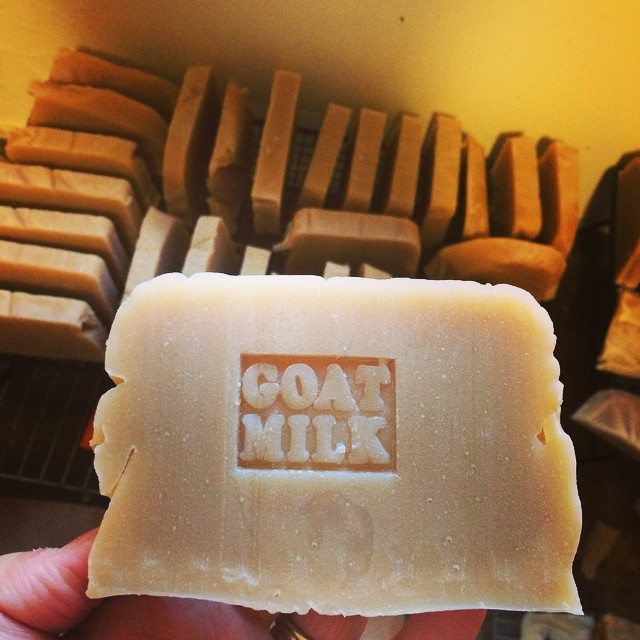
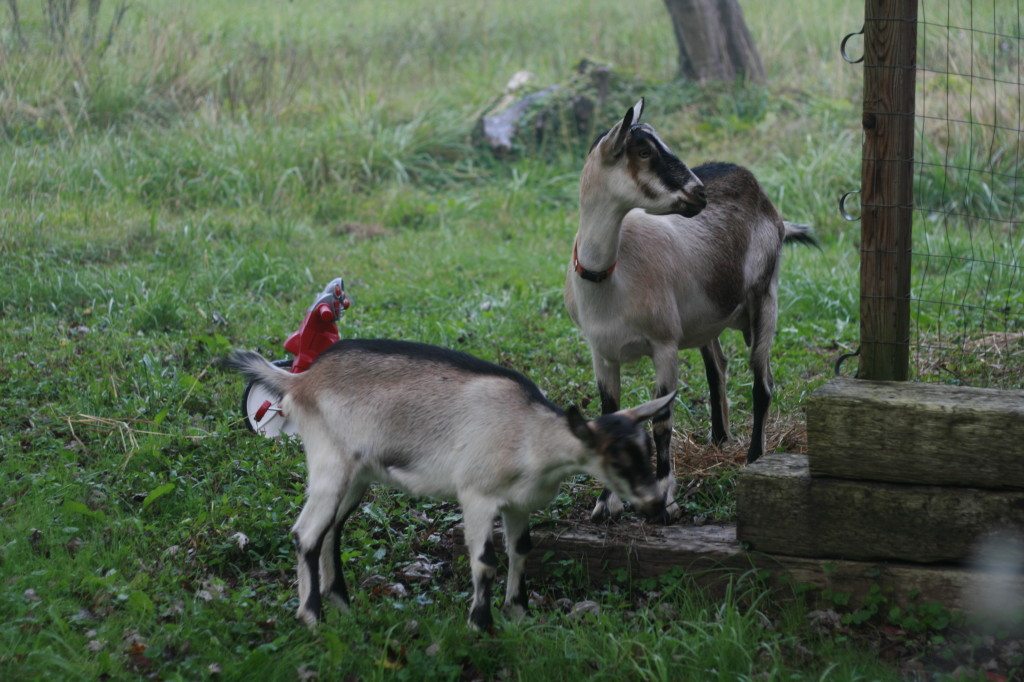
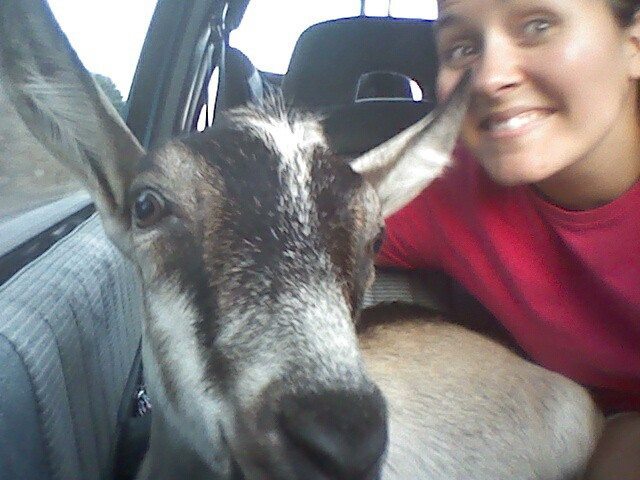
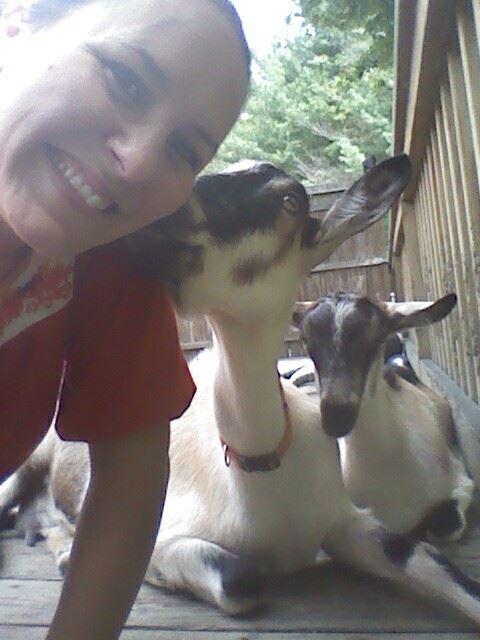
Our latest video was inspired by Weed em & Reap, who  shared a trick for weaning her goat. We have a 5-month old Nigerian Dwarf doeling that is drinking so much milk. I mean all…day…long she is nursing. She’s old enough to be weaned but we don’t want to fuss with separating so we are attempting this trick. 

You can watch all about it below and PURRTY PLEASE subscribe! 

Related posts and videos:

  • Raising Milk Goats YouTube Playlist 
  • My post on How to Raise Dairy Goats
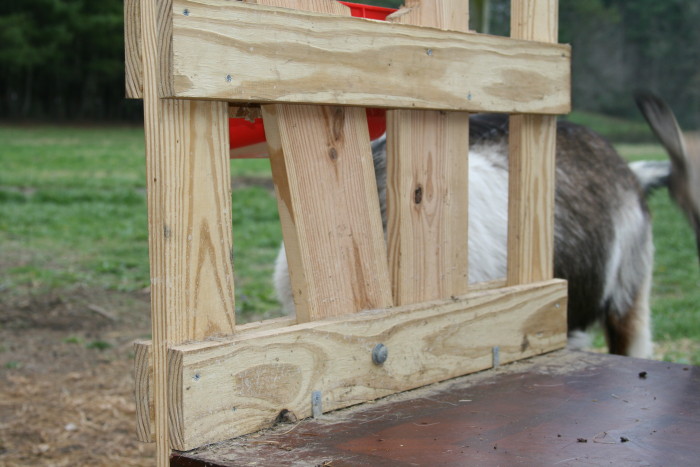
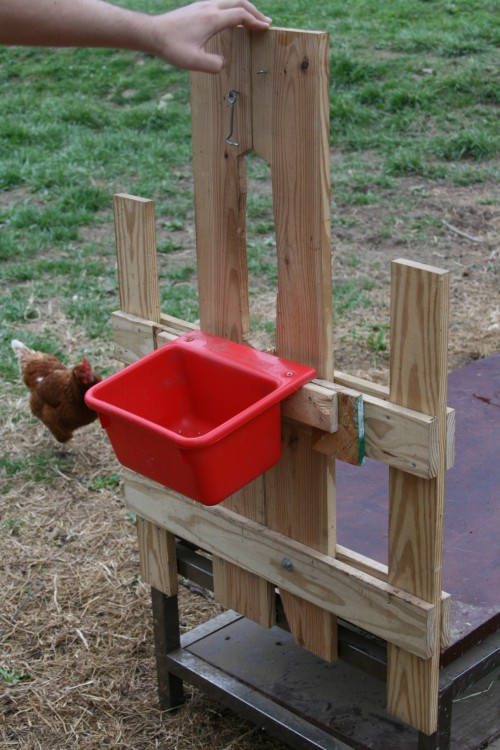
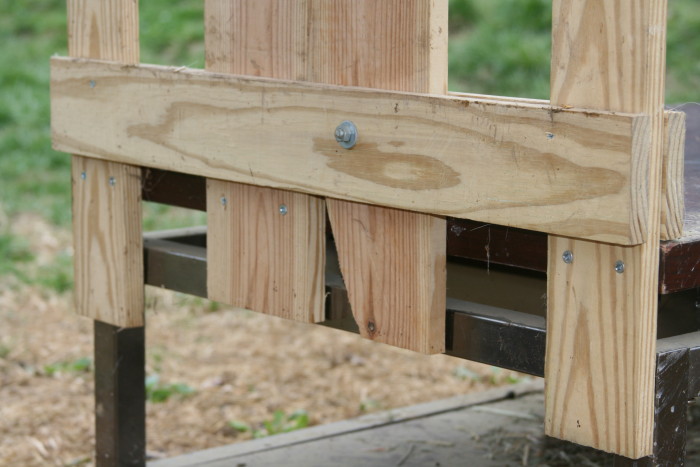
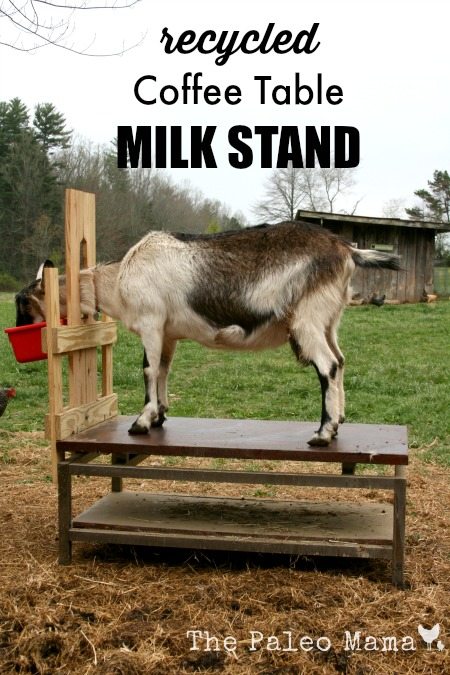
  • Recycled Coffee Table Milk Stand (directions)


Filed Under: goats, Homesteading, YouTube

The Training of a Livestock Guardian Dog

June 19, 2015 by Jackie Ritz 15 Comments

I know that by now you have seen the many pictures I have posted of our wonderful Livestock Guardian dog, a beautiful Great Pyrenees named Esme. She has been a great addition to our family, and by now, at  more than eighteen months of age, she has developed into a fantastic guardian dog for our goats and chickens. The care and training of a Livestock Guardian Dog is an investment that will NOT disappoint, as long as you do it the right way. 

Great Pyrenees are one of the oldest dog breeds in the world. They were bred as dogs of war and then used during peacetime as sheep guarding dogs. They are one of the least aggressive of the large guardian dogs (LGD), so often people cherish them as family dogs. They are regal, independent and aloof compared to other dogs breeds, traits necessary to spend days alone guarding flocks. This independence shows when you call them—they come, but maybe not on the first call.  

Raising a livestock guardian dog is much different than raising a pet dog who lives with you in your home. Making the right decisions in the period of training will guarantee that you livestock dog performs his duties perfectly for the rest of his life. But choosing to raise him as a pet with little or no specific guardian training will give you a dog who cannot be trusted with your livestock.

Raising puppies to become livestock guardian dogs is a 12 month to 18 month venture. These breeds of dogs are slow to mature and thus are often not trustworthy and reliable before this age. I want to take a brief look at three major areas of training for a livestock guardian dog.

  • How do I teach my livestock guardian dog to bond with my livestock?
  • How does my livestock guardian dog learn to obey fence and gate boundaries?
  • How do I socialize my livestock guardian dog to people and my surroundings?

How do I teach my livestock guardian dog to bond with my livestock?

baby esme

Livestock guardian breeds come with an inherent ability to guard that which they bond to. When you bring your pup home be prepared for him to spend the night where you expect him to spend his nights as an adult. With the stock. Not in your house.

Every day the pup will need to exercise and have interaction with his charges. You can allow free time outside the puppy pen whenever you are around to keep an eye on the action. For the first few weeks, lock the pup up when you are not there to supervise. During the small puppy-stage (which doesn’t last long in a Great Pyrenees) we used a large dog kennel and kept it in the barn with the goats. Our Esme slept in the large dog kennel at night and during the day we put her in a separate fenced section. She could smell and be out with the goats and chickens, but the fence kept her from developing any bad habits of chasing the livestock. 

NEVER throw your puppy in with your livestock and expect him to naturally take on the role of a Livestock Guardian Dog. A Great Pyrenees does NOT equal a good Livestock Guardian Dog. A well-trained and time-invested Great Pyrenees DOES! 

Over the next several months supervise the pup and discipline any unwanted action toward the animals such as chasing, chewing, and biting. And by discipline, I do not mean you EVER hit or kick a livestock guardian dog. This will leave a bad impression and could ruin the demeanor of the dog forever. You firmly say, “NO…my chickens,” and then walk away from the dog and show them no attention. If they continue to misbehave, you lock them in their pen (which they utterly hate). You can also praise the pup for good behavior. Pet and feed the pup when he is with the livestock, not when he is away from them so that he never develops the bad habit of being possessive of his food. Do not take the pup up to the house for food and attention. As the pup matures you will notice if he is bonding to your livestock or not.

If the dog is to guard, it is not good to raise it around other non-Great Pyrenees dogs where it can pick up bad habits such as chasing poultry or livestock. Great Pyrenees don’t normally chase, but if the big puppy bounces up to a chicken and the chicken runs the other way, the dog will give bounce after it. Once chasing starts, the chicken soon becomes a diversion, and that dog can no longer be trusted with poultry. Closely monitor your Great Pyrenees puppy for its first 12-24 months if you desire to raise a trustworthy poultry guard. Some dogs take 2 years to become trustworthy around chickens. We found that Esme took 15 months till we were confident in leaving her alone with the chickens but the training was SOOOOOO worth it.

Esme 

How does my livestock guardian dog learn to obey fence and gate boundaries?

A large part of success with raising puppies is being able to teach them to respect boundaries. Under no circumstances is climbing over or crawling under the fences going to work. Supervise and correct any attempts to go over or dig under fences as you see them. Use the time that you have the dog nearby and bonding to stock to set up the enclosure with hot wires, and allow the dog to learn the consequences of crossing electric fences.

Gates also need to be included in the training. LGD’s are smart dogs and will figure out that fences may be not so good but gates are okay. They need to know they do not cross gates unless invited out by you or moving with the flock. When raising puppies doing the work of teaching the pup respect for fences will go a long way to eliminating the core problem seen in LGD’s—wandering away from the flock and farm.

Adult Great Pyrenees will naturally cover a one to two mile radius. If that’s not allowable, the dog will have to be trained to a smaller area.  Fences, electric fences, and invisible fences all work good. Neutering helps to keep a male dog at home. Close supervision and correction the first two years will help yield a dog that stays within the property lines. 

When you bring your new puppy home, make sure you walk the perimeter of your property every day for a few weeks so that pup understands it’s boundaries. 

How do I socialize my livestock guardian dog to people and my surroundings?

esme and ari

The calm nature of Great Pyrenees livestock guardian dogs around livestock, combined with proper training, will bring out the naturally gentle and submissive breeding that makes these dogs a wondrous thing to behold around small and delicate kids and lambs. However, we need to always remember that these dogs aren’t bred for obedience. Patience is a must. We expect our LGDs to think and react when we aren’t there to protect our flock. We cannot simultaneously expect independent thinking and mindless obedience. These dogs are ALWAYS multitasking; they are bred to reject human instructions where they see a better way to behave. This is what makes them the perfect pasture companions to our chickens, sheep, goats, cattle and even horses. This is also why we have trouble with them obeying fencelines and expanding their territory. They are good at what they do, and they know it. Be patient with them and they will be everything you expect, and then some.

Some livestock guardian dog trainers believe that LGD pups should be raised with the livestock they will be guarding, isolated from humans. In reality, this is an exaggeration of recommendations made by scientists in the USDA bulletin about selecting, raising, and using LGDs. The publication’s language about minimizing the dog-to-human bond has been incorrectly interpreted to mean elimination of contact with humans. Training cannot be accomplished without human contact. We love, pet, show affection to our Esme, and in return, we have seen that nurturing blossom into an incredible human-dog bond. 

Livestock guardian dogs are working dogs and a balance of how much interaction to have with the dog must be found. Be wary of how much attention you foster on the pup. The idea is not to make him into a pet but to let him know your touch by petting him and handling him. Let him know you control the food, and the access to stock and you set the boundaries. LGD’s grow into large independent natured dogs. You will need to stay on top of the pecking order, not by using force but by quietly assuming the role because it is your place and your stock and your duty to keep everyone safe.

The health of your Great Pyrenees livestock guardian dog

essss

Great Pyrenees generally stay in good health. Some more common problems may include mats in the fur (especially around the neck and ears), the double dew claws growing too long, ear infections (due to dirt and moisture in the ear), eye infections (pink eye), allergies and “hot spots”. Hot spots are caused when an area of the skin becomes inflamed. The fur will fall out, the skin will turn bright red and the dog wants to bite at it. Some ointment from the Vet and keeping the spot dry cures this problem or a mixture of lavender and melaleuca essential oils mixed into a all purpose salve (here’s my recipe I use).

Genetic problems include: underbite, entropia (small eyeballs), seizures and hip dysplaysia. Pronounced underbite shows up as wet spots under the chin and neck. Entropia is when the eyeballs are small for the socket size and the eye lashes stick inward causing irritation. This can be cured with simple surgery, but the dog should not be used for breeding. The cause of seizures is unknown, but from what we have heard, changing owners, being confined to a small area, or other highly stressful situations will tend to bring them on. Hip dysplasia is not quite as common as in other breeds because Great Pyrenees have not been over bred. The most common form of death that we hear about is being hit by a car or being stolen.

We had to have stomach surgery on our Esme due to the fact she ate two rocks that got lodged in her stomach and small intestine. Thankfully, she made a full recovery! We corrected this behavior by providing her plenty of raw marrow bones to chew on in the late puppy stage and continuing to feed her a large breed high quality puppy chow to supplement the raw feeding that we do with her when we have extra meat laying around. 

Conclusion:

Investing in a Livestock Guardian Dog was the BEST decision we made when we started our homestead. We found our puppy on Craigslist and she came from a working farm with working parents. We have invested hours of training into her and I couldn’t imagine our farm without her. The ultimate satisfaction of this investment comes when I look out the window and I see her laying down near where the goats are grazing and our free-range chickens are pecking happily in the dirt beside her. 

The Training of a Livestock Guardian Dog

Sources:

  1. https://www.ranching-with-sheep.com/raising-puppies.html
  2. https://www.lgd.org/civilizedpyr2.htm
  3. https://hoeggerfarmyard.com/early-training-of-livestock-guardian-dogs/
  4. https://www.milkandhoneyfarm.com/dogs/training.html

Filed Under: Dogs, goats, Homesteading, Living Sustainably

Recycled Coffee Table Milk Stand

April 6, 2015 by Jackie Ritz 9 Comments

We had the fantastic pleasure of moving over 4 times in one year! Yippee! I think I would rather poke my eyes out than move another time with 2 small kids. However, out of all the broken furniture, dings, scratches, missing pieces, came a beautiful creation that my husband made for me — my very own Recycled Coffee Table Milk Stand! 

My amazing and creative husband is going to share how we made this simple, recycled creation! Welcome hunny! 

Thank you for the introduction, Jackie! I’m so excited to be sharing my first, official blog post ever!

What can we do with a bed that is missing one of the components to put it back together, a desk that is completely busted, or a coffee table that has a gash on it so big that no table cover can mask it…making you too embarrassed to use it ever again?

Well put that together with a move to the mountains of western North Carolina, and have a wife that desires raising goats for the wonderful, nutritious milk they make…what do you have?

A recycled coffee table milk stand!

This recycled coffee table milk stand has proven to be exceptional, best part is, I did not have to create it from the floor up – just designed a stanchion that attaches to the side of the existing table, and voila – a milking stand!

What is a stanchion?  Well, for non-milking folks, it is the portion of the milk stand that holds the goat’s head steady (without pinching!) and a food trough, allowing the milker to keep the goat occupied while they efficiently resource that wonderful milk!

So like any budding homesteader coming from the city, where did I go first?  Of course, Google and YouTube!  A quick search of “milk stand stanchion” brought up hundreds of ideas that others have done, allowing me to get the gist and inspiration to make one that works for me.

Starting with the coffee table mentioned above, the other supplies you will need will depend on your final design.  But, to get those creative juices flowing, here is the example of what worked for us:

Materials (yours WILL vary based on your design and coffee table/piece of furniture!):

  • 2 – 1”x4” board cut to 2 pieces measuring 42” each (figured this out by measuring the distance needed to brace my stanchion against the coffee table, comfortably stabilizing the stanchion)
  • 1 – 1”x4” board cut to 4 pieces measuring 38” each (figured this for the cross-pieces needed to stabilize and secure the stanchion to the rest of the stanchion) (see pictures)
  • 1 – 1”x6” board cut to 2 pieces measuring 38″ each (figured this by measuring from the surface top of the table to where the goat’s neck could comfortably fit through to get to the food)
  • 1 – carriage bolt with washers and nut (ours was 3 1/2 inches long. Make it long enough to fit through cross-pieces and 1×6 board to serve as a pivot for the board to latch it in place during use) (see pictures)
  • 2 – “L” brackets with screws for supporting the stanchion onto the surface of the table
  • Find a hanging bucket (at a local feed store) or online (we have this one). 
  • You will need 1-2 inch wood screws for screwing the boards together and also we used (4) 3 and 1/2 inch screws to fully secure the stanchion to the existing table wood surface, for further strength.

Step-By-Step: 

Step 1: Secure the 1″x 4″ (42 inch) boards to the table, using (4) 3 1/2 inch wood screws.

Step 2: Screw the “cross” pieces (1″x 4″ by 38″) to the pieces you just screwed into the coffee table.  Make sure that one of the pieces rests onto the coffee table top as to provide a surface to further use the “L” brackets to stabilize the stanchion later to it.

IMG_0631

Step 3: Using a jigsaw, cut into the 1″ x 6″ pieces, making sure to “mirror” the cuts to make a hole for the goat neck.  We cut about 2″ into the plank, then down about 8-9 inches, making this hole.  ENSURE to notch one of the planks by cutting a section off of the inside corner (where the two planks touch when the hole is made).  This will allow the plank to pivot on the carriage bolt, allowing it to open the planks, giving you more room to maneuver the goat’s head into position when the planks are pushed together to secure the goat’s head and neck!)

IMG_0610

Step 4: Slide the 1″ x 6″ planks down toward the surface of the coffee table.  Drill a hole big enough to slide the carriage bolt through to create your pivot for the plank.  Screw the other plank into the coffee table surface.  Only screw the plank without the bolt to the cross pieces for additional support.

Step 5: Drill and screw the “L” brackets onto the bottom cross piece and to the surface of the coffee table.

Step 6: Attach the hanging feed bucket to the stanchion with a couple of scrap pieces of wood, to create a gap to hang it from.  Further secure the bucket by screwing it into the stanchion.

IMG_0625

A couple of quick caveats for making your recycled coffee table milk stand: of the two boards used for holding the goat’s neck, you will need to cut out a section into each of the board (either by hand or by jig saw) to create a “hole” for holding the goat’s neck with a wide enough berth to comfortably allow the goat to move their head around!  In addition, if you look at the pictures, I point out where I additionally cut a diagonal section to allow one of the boards to pivot, opening more room for the goat to be held by the stanchion.

IMG_0626

Overall cost was about $30 – in addition, if you do not happen to have a table saw to cut the longer boards, most home improvement stores will cut them for you for free!  Bonus!

I hope this gives you that final inspiration needed to get started repurposing that old, tired, scratched coffee table or piece of furniture into a hard-working functioning recycled coffee table milk stand of your very own!

Recycled Coffee Table Milk Stand Pin

Filed Under: goats, Homesteading, Living Sustainably

Traditional Goat Milk Soap Recipe

October 22, 2014 by Jackie Ritz 21 Comments

Goat Milk Soap Recipe .001

Why Goat’s Milk

Goat’s milk is packed with vitamins, minerals natural fats, and protein. It carries a pH of around 6.4 which is very similar to a normal skin pH of 5.6, which makes it great for skin tolerance. You can find vitamins A, B2, B6, B12, and Niacin in goat’s milk and many who cannot tolerate dairy, find that they have no problems with goat’s milk.

Those who have very sensitive skin, find that paying over $5 for a bar of goat’s milk soap is worth it! I’ve had several people come up to me and tell me that my soap was the one of the only bars of soap that they could use without breaking out or having a skin reaction.

Anyone Can Make Soap

Soap is NOT hard to make. What is hard to make is all that fancy soap…which I don’t understand anyways. It’s just you, naked in the shower or bath, rubbing a bar of soap on your body. Why do you need swirls and fun shapes? If you enjoy doing that, then by all means, go for it! But I make soap for my family and most the time the kids end up making holes in the bar and pretending like Spiderman can surf on it.

This is a very basic, traditional recipe that I created. I use lard and I use lye. This is NOT a vegan recipe. I also use the traditional method of cold-process. This process uses a short prep time and a long cure time. It’s the easiest, in my opinion, because you are mostly waiting on the soap to cure and harden. This is the way our ancestors prepared soap and it’s the way I prefer to make my soap. Since I use raw goat’s milk, I prefer to keep the milk unheated to prevent destroying any vitamins and minerals.

Why Lard and Lye

Lard was traditionally used in making soap and has a very long history of in soap-making.  I get my lard from a local farm for a really good price, but you can order pastured lard from here. Lard is the hardening fat in this soap – it’s what makes the bar hard so that it doesn’t turn into a big pile of glob while you are taking a shower.

I, also, like lard because of the aging time. When you make a cold-process soap, you are going to need to let your soap age (or cure) for 3-6 weeks. If you do not use a hardening fat, like lard, then it’s going to take your soap much longer to cure. I find that 3-4 weeks is perfect for this recipe.

Now lye is necessary for the alkali, when combined with the goats milk, loosens and attracts dirt, allowing it to be washed away. After 24 hours, the lye is not even present and by the time the 3-4 weeks is up, there is no trace of lye in the soap.

Supplies Needed:

For anything that touches the lye, you will need separate supplies and those supplies should never be used on anything else. Also, this is going to make an UNSCENTED bar. I have tried using essential oils and it requires way TOO MUCH. Alternatively, if you would like, you can add a few drops of essential oil to your bar of soap when you are washing in the shower.

  • Immersion blender
  • Glass bowls for mixing
  • Rubber spatulas
  • Digital Kitchen Scale
  • Tall stainless-steel pot for melting oils
  • 2 Thermometers
  • Safety Equipment – rubber gloves, long sleeve shirt, and goggles
  • Knife to cut the soap
  • Soap Molds or Old Loaf Pans – I prefer the rustic cut of the soap and prefer to use loaf pans.
  • Parchment paper

Ingredients Needed:

You can change your fats and oils if you would like. This is just the recipe that I created and enjoy the most. I have made several other recipes and I really prefer mine as it is very moisturizing, lathers very well, and includes sustainable fats.

  • 2 ounces of Beeswax
  • 18 ounces of Coconut oil
  • 5 ounces of Castor Oil
  • 26 ounces of pastured Lard
  • 6 ounces of Olive oil
  • 8.40 ounces (or 238.39 grams) of 100% pure Lye
  • 18.9 ounces of Frozen Goats Milk (raw or pasteurized) – easiest way to freeze goats milk for soap-making, is to pour the measured out goats milk into a gallon ziplock bag. Then freeze the bag flat.

Step-By-Step Instructions:

  1. Collect all your supplies and block off your kitchen. I usually do this when my kids are down for a nap because of the lye.
  2. Put parchment paper in your loaf pans to get them ready.
  3. Measure out all the fats and oils (everything but the lye and milk) and put in your tall stainless-steel pot.
  4. Put your stove on LOW and slowly melt the oils and the fats. Put a thermometer in and make sure it never goes above 100 degrees. Once melted, remove from stove.
  5. Take your bag of frozen goats milk and smash it up into smaller pieces. Add it to a large glass bowl.
  6. Slowly sprinkle your lye over the frozen milk and mix with a spatula at the same time. MAKE SURE you are wearing your safety gear!
  7. Mix until the frozen milk is melted. Check the temperature of the mixture with a thermometer and do not let it go over 110 degrees. If it does, no worries, just cool it down by placing the bowl in a larger bowl filled with ice water.
  8. Now check on your oils and make sure they are melted and the temp is not over 100 degrees. If it is, then cool it down by placing it in the bowl of ice water.
  9. You want your oil mixture and your lye mixture to be within 10 degrees of each other.
  10. Now slowly pour your lye mixture into your oil mixture. As you are pouring, put your immersion blender on LOW and start to mix.
  11. When all the lye mixture is added, turn your immersion blender on HIGH and mix until you reach “trace”. Trace is when you can take a spoon or spatula and you can draw a line in your mixture. It usually takes me 2 minutes to reach trace with this recipe…sometimes less.
  12. Once you reach trace, you are going to need to move very fast. Immediately, pour your mixture into your 2 loaf pans or your soap molds. Use your rubber spatula to clean the bowl and smooth out the top of the loaf pan.
  13. Put the pans in a dark spot out of reach of kids. Leave it alone for 24 hours. After around 24 hours, the lye is inactive and you can touch the soap.
  14. After 24 hours, remove your soap from the loaf pans and cut into individual bars.
  15. Place the bars in a dark area and let them cure for 3-4 weeks! I know, it’s torture to wait, but it’s sooooo worth it!
  16. After 3-4 weeks the bars should be ready to go!

 See Picture Tutorial Below…..

Working on reaching trace. 

16081_10152632866727013_915759999358523822_n

After you reach trace, pour into your loaf pans and allow to sit for 24 hours. 

soap1

After 24 hours, cut into individual-sized soap bars and cure for 3-4 weeks. 

soap 2

Waiting 3-4 weeks for the soap to harden! It’s worth the wait! 

10703599_10152663692747013_4306114713772124454_n


I hope you enjoy this recipe as much as my family does! 

Traditional Goat Milk Soap Recipe .001

Filed Under: Budget, DIY Beauty Recipes, DIY Home Recipes, goats, Homesteading, Living Sustainably, My Recipes, Natural Living

Why My Paleo Family Drinks Raw Milk

October 28, 2013 by Jackie Ritz 48 Comments

rawmilk

Milk. Dairy. Cheese. Those words alone elicit some of the most heinous comments from people who eat Paleo. I have been called some of the most vicious names, cursed at in emails, told to change my name to The PRIMAL Mama, and despised on Facebook comments because my Paleo family drinks raw milk. Wait…did I just say Paleo and milk in the same sentence? Shouldn’t I say “Primal”? Whatever.

I hate the two words: Paleo versus Primal. It’s like you are forced to choose one-or-the-other. What if I don’t want to choose? Can I still be Paleo and drink raw milk? I think so, but many don’t.

I believe the biggest argument for people opposed to raw milk is they believe that early man did not drink milk or consume any dairy. According to this study, dairy consumption entered the human race 9,000 years ago when they discovered old pottery fragments with trace amounts of milk fat.

Also, this study states:

“Researchers have also been surprised by another new discovery based on Neolithic bones from Turkey. Despite the long-time establishment of dairy herding, the recovered bones of this Mesopotamian farm population didn’t indicate lactose tolerance. (Yes, do the double take.) Apparently, they didn’t like the milk itself but used it to make fermented, no-lactose products like yogurt, kefir and cheese. Their consumption pattern differs dramatically from that of Europeans after dairy herding spread throughout Northern regions (source).”

Wanna know what early man DEFINITELY did not eat? 

  • Almond Flour Bread
  • Coconut Milk
  • Coconut Flour Cupcakes
  • Nut Butter
  • Store-Bought Chicken Breasts
  • Canned Salmon and Tuna
  • Homemade Chocolates
  • Smoothies
  • Homemade Paleo Cookies

*Raising hand in the air* –  I am guilty of eating every, single one of those foods on the list. Am I advocating eating dairy? I wouldn’t say that. I am just trying to give another perspective. Obviously, if dairy gives you explosive diarrhea, acne, worsens your allergies, causes your baby to have colic, gives you eczema (although raw dairy usually clears this up), or makes you feel lousy – then don’t eat it!

notpaleo

Why We Drink RAW Milk (Much Different Than Pasteurized Milk): 

1. I Know The Source and the Quality of Our Milk– We have our own milk goats and I hand milk then in the morning. I know exactly what they are eating. I control their environment. They have an enormous amount of lush, green pasture to graze on. They are healthy, clean, and happy goats. However, even before I had goats, we drank raw milk but we were very selective about where we got the milk from and visited the farms frequently.

_MG_6913

jersey

Pasteurized Organic milk bought in the store still has questionable dairy practices. In some organic dairies, the cows or goats are often confined, and deprived of their natural diet of grasses. Instead, they are fed grains and other inexpensive fodder, including waste grains from distilleries. Unless labeled otherwise, you can betcha that store-bought milk is completely grain fed, even organic milk.

2. It Improves Our Oral Health – Hereford, Texas became known as the “Town without a Toothache” in 1942 due to the pioneering work of dentist George Heard and author of Man Versus Toothache. Dr. Heard explains the town’s secret:

After a newcomer has lived in Hereford a few years, provided he had drunk lots of raw whole milk, he develops resistance to tooth decay. Even the tooth cavities which he brings with him when he comes to Hereford will be glazed over, if he has drunk raw milk. For years I made inquiry of my patients as to their milk habits. Almost invariably I found that the possessor of a mouth full of sound teeth had been a consistent milk drinker from early childhood. A surprisingly large number liked either buttermilk, clabber, or both. The significant fact is that the milk those patients drank came from cows that had grazed on native grass…” – (source). 

Several Ayurvedic texts, more than 2,000 years old, describe milk, yes, raw grass-fed milk, as a cure for literally hundred of ailments. Milk was either drunk immediately after milking, known as sweet milk, or it naturally began to sour and was transformed into cheese or yogurt.

Why is it so good for oral health though? Raw milk is very rich in fat-soluble vitamins, like Vitamin A, K, and E. It is, also, rich in water soluble vitamins like C and B-complex. A quart of raw milk from grassed cows contain 50% more vitamin E and 7% more folate than pasteurized milk.  Moreover, fresh raw milk naturally contains vitamin C which is completely absent from pasteurized milk (source). All these vitamins are extremely necessary for good oral health.

Raw milk is extremely necessary if you are interested in remineralizing your teeth and healing present cavities. There was a 6 month period that I could not find a decent source for raw milk for my family. In those 6 months (and all the while eating Paleo) my daughter came down with 2 cavities in her teeth and so did I. Coincidence? I, immediately, got out my trusted resource, Cure Tooth Decay, and started the remineralizing process on both our teeth. We are, currently, in the process of curing the few cavities that we obtained from lacking vitamins in our diet. If you are interested in this protocol, then I, HIGHLY, recommend you get this book.

3. Fermented Raw Milk is Loaded with Beneficial Probiotics – Having probiotics in your diet is an essential aspect of nutrient absorption. Soured milk, yogurt, kefir, whey, and buttermilk have highly absorbable forms of calcium. Soured or fermented raw milk is, also, low in sugar, known as lactose.

Pasteurization Kills Milk – pasteurization came into being to try to clean up dirty milk from factory feed lots.* It was never meant for clean milk from healthy animals grazing on a healthy green pasture.

In order to absorb calcium from milk, we need the enzyme phosphatase which is naturally present in raw milk. Pasteurization at 165 degrees or milk, destroys phosphatase. Pasteurization also cooks and destroys the other signifiant vitamins found in raw milk, including Vitamin C and the probiotic organisms.

4. Raw Milk is Very High in Calcium – most people have been told that milk makes them sick, or they can’t digest dairy, or even have experienced negative side effects from drinking pasteurized milk. However, for the majority of these people, these negative effects do not occur when they drink raw milk. However, eliminating raw milk in your diet brings up the question of where to get proper calcium. On average, an adult needs somewhere between 1-1.5 grams of calcium per day. On a dairy-free diet, you will need to consume lots of vegetables, 1-2 cups of bone broth, and a moderate amount of sea food to get the adequate calcium in your diet.

According to Nutrition Data, here are some of the top foods with calcium:

           Food                           Calcium in Milligrams 

Hard/Soft Cheese – 2 ounces        404

Canned Sardines with bones        351

Yogurt, Whole Milk- 1 cup            296

Canned Salmon with bones          277

Whole Milk – 1 cup                           276

Cooked Collard Greens-1 cup         204

Cooked Taro Root-1 cup                  171

Cooked Kale-1 cup                            147

Cooked Broccoli – 2 cups                 120

Cooked Scallops – 3.5 ounces        115

So What? Are You Saying I Need to Include Raw Milk in My Paleo Diet? Absolutely not. And I even recommend you eliminate for a one month period if you have never done that. During this elimination process you can evaluate how you feel and if any issues that you may have clear up or lessen with the removal of dairy. I think that the addition of raw milk is a matter of preference and taste and being able to source it.

I just think that we need to take a more holistic look at raw milk and not discredit it nor compare it to it’s evil counterpart – pasteurized milk. They are not the same thing and if you cannot find raw milk near you, then I recommend you don’t drink milk. It’s not necessary to your Paleo diet, however it can be very beneficial to your WHOLE health.

arimilk
My 4 year old milking our goat

Conclusion: 

This is where I believe Paleo is lacking. I believe that Paleo should be a guideline of health. We know modern grains are bad for you. We know that beans and legumes hold nowhere near the nutrition that a steamy pile of vegetables holds. We know it’s best to choose healthy meats from trusted farms. We know that processed foods are loaded with crap. But how can the Paleo world be so two-faced that it can recommend you eat a Chocolate Cake made with store-bought almond flour, processed coconut sugar, and chocolate and then go and throw sand at you for drinking a glass of fresh, raw milk? I don’t know…I don’t get it and I wanted to express my point of view. So, there ya go! Take it for what it is!


               Sources: 

  • *McAfee, Mark. “The Fifteen Things that Pasteurization Kills.”
  • https://nourishedkitchen.com/10-reasons-drink-raw-milk/
  • https://www.nutritiondata.com
  • https://www.marksdailyapple.com/milk-dairy-human-diet/#axzz2iwySZ6L4


Shared on: The Prairie Homestead

Filed Under: goats, Paleo Education Tagged With: cow milk, cure tooth decay, fermented dairy, goat milk, is raw milk paleo, paleo dairy, primal, vitamins in raw milk, where to get real milk

The Udder Truth: City Girl Adventures in Goat Milking

September 22, 2013 by Jackie Ritz 22 Comments

uddertruth

Hi everyone! I’m Jackie, a city girl turned farm girl. I grew up in Orlando, Florida and all my life had a calling for living on a farm. I would run into farmers and tell them that my dream was to have a farm. They would look at me like I was crazy and say, “I didn’t know people dreamed of doing this.” 

So, after years of dreaming of having a farm, we finally made it a reality! Three weeks ago we moved to the mountains of Western North Carolina to fulfill our farming and homesteading dreams. One of the first things I did, even before we moved to North Carolina, was look for a goat. I wanted to be able to have fresh milk every day. So, I bought a goat. I bought two goats.

bothgoats

We moved to North Carolina, ditched our sleek, sedan, pimped out Altima and bought a old, cornflour blue, pickup truck. We hopped into our new “ride” to pick up our goats. The kids sat, excitedly, in the back seat and we arrived at our destination. “Ok…now what?” Ummm, ok…the big mama goat got shoved into a dog kennel in the truck bed…and I’m talking SHOVED. Poor thing. The (not-so) baby goat sat ON MY LAP in the front seat. “Helloooooo goat”.

takegoathome

So, here we are, a family from the city that just moved into the country and we are driving in a 21 year old pickup truck with 2 goats that are bleating incredibly loud! “Oh what a dream.” One is pooping in the dog kennel, the other is trying to climb into the driver seat, and my husband is getting hit on by a local redneck woman driving next to us. “Hello, I’m the wife and, yes, we those are goats. Hot, right?” The kids had no idea what to think. But we arrived home safely, tucked the goats into their new barn, and said goodnight till the morning.

Oh the day has finally come! Oh sweet morning! I have dreamed of this for years…milking my beautiful goat out in the mountain breeze; pumping fresh, warm milk into a shiny new bucket. I jump up from bed at around 4am, I just couldn’t sleep. Let’s do this. I washed and sanitized the bucket as all the articles had said, and I set out to milk my new goat. As I walk out into the cool air in my new rubber boots carrying my shiny, new bucket, the thoughts of chèvre, feta cheese, and goat milk ice cream dance in my head.

Into the barn I go. I prepare the milk stand that my husband, so graciously built, for me. Then call Sophie, the mama, to the stand. She doesn’t move. She stares me down. “Oh, Sophie, come on you old goat. I’m your new owner…I know you got some delicious milk for me.” I, literally, have to drag her to the milk stand. It’s almost abusive. My desire for milk is becoming squashed by a stubborn goat. “Oh, no Sophie, I will get some milk. Don’t spoil my dream.“What is her problem? I bribe her to the stand with grains. Up she goes and I lock her head in. Ok, here we go.

udder

What in the world am I doing? Am I really about to milk a goat? One look at those hairy teats and I about lose it. Oh city-girl Jackie…where am I again? Some old farmhouse milking a goat…my mother is probably dying laughing at the thought of this.

I grab my homemade, organic, udder wash for Sophie and go for it. Get them teats all nice and clean. Clean teats make clean milk. Thank God I was by myself. It took me almost 10 minutes to clean them teats. Sophie was almost done with her food. “NOoooo, slow down, I still have to milk you.”

Alright, here we go….I grab my shiny silver bucket and give her teats a squeeze. Nothing. Ok, let’s try this again. Squeeeeeze. Sophie about jumps a mile high. Sorry girl. I’ll get this. I squeeze again and I shoot myself in the neck with milk. At least there’s milk! All I can think about is all the times I spent milking myself!

“Do her teats feel like my nipples did?” God, I sure hope not.  I aim, set, and fire away…I’m doing it with two hands. “Look at me, twooooo hands!!!” As soon as I start getting it, Sophie steps in the nice, new, shiny, clean bucket and my heart sinks. “Are those poop particles floating around in there now? Shoot, I guess I can’t use this milk.”  I leave the goat strapped into the milk stand and run in to get another bucket to use. I come back and get back into my rythym. Squeeze, aim, and fire away. Sophie wiggles and squirms and kicks me over and over again. “WHAT????”

She squats and an enormous amount of pee comes out. Really? Is this really happening? A goat is, literally, peeing on me.

I clean the table…then I clean her udder again. “I want some friggin milk.” Squeeze, aim, fire…squeeze, aim, fire. The sound of milk hits the bucket and I smile. I am here…no longer a dream. I’m milking a goat…my goat. So beautiful!

“OMG what is eff is that falling from the sky???” The sound of a million little goat turds hit the table. I back away and look at the goat. How could she disgrace herself like that?

I clean the table again…then her udder AGAIN…and she kicks me over and over. I manage to get about 3 tablespoons of milk that morning. Whew…what to do with 3 tablespoons of milk?

Thankfully, Sophie and I have an understanding now. I let her poop and pee before bringing her to the milk stand and she gives me almost a half gallon of milk every morning.

soph

_MG_7152

shared on : Prairie Homestead

Filed Under: About Me, goats Tagged With: farm life, first time milking a goat, gluten-free, goat milk, grain-free, homesteading, milking a goat, paleo, primal

Primary Sidebar

  • Facebook
  • Instagram
  • Pinterest
  • RSS
  • YouTube

Hi, I'm Jackie Ritz and welcome to The Paleo Mama! I'm a published author, certified herbalist, and voracious researcher of natural medicine and nutrition. I'm glad you're here and I hope you stick around for awhile!

Recent Posts

  • When God Says Pause: Why I Took a 5-Year Break from My Online Business
  • How to Quit Facebook but Keep Your Business Profile
  • Leaving the City for the Country
  • Natural Way to Heart Health

MEAL PLANS

Biblically clean meal plans that are for those love to cook real food

Read More

Footer

Our Blog

The Paleo Mama blog provides simple answers for healthier families through research, tutorials, recipes, and simple remedies for daily needs!

  • Health
  • Essential Oils
  • Recipes
  • Remedies
  • Natural Living
  • Meal Plans

Stick around!

You’ll get instant access to a library of natural remedies and real, paleo food, including our ebooks and free guides we send out.

  • Home
  • Disclosure/Disclaimer
  • Privacy Policy
  • Advertise
  • Contact Me

Copyright © 2025 · Wellness Pro on Genesis Framework · WordPress · Log in