• Skip to primary navigation
  • Skip to content
  • Skip to primary sidebar
  • Skip to footer

The Paleo Mama

Homegrown and Handmade

  • About
  • Blog
    • Podcast
  • Meal Plans
  • Essential Oils
  • Our Farm
    • Great Pyrenees Puppies
    • Goats
      • Goats for Sale
      • Goat Sales Policy
      • Nigerian Dwarf Bucks
        • Ranchocabra Lunar Eclipse

DIY Beauty Recipes

Roller Bottle Health Support

December 17, 2014 by Jackie Ritz 33 Comments

Roller Bottle Remedies

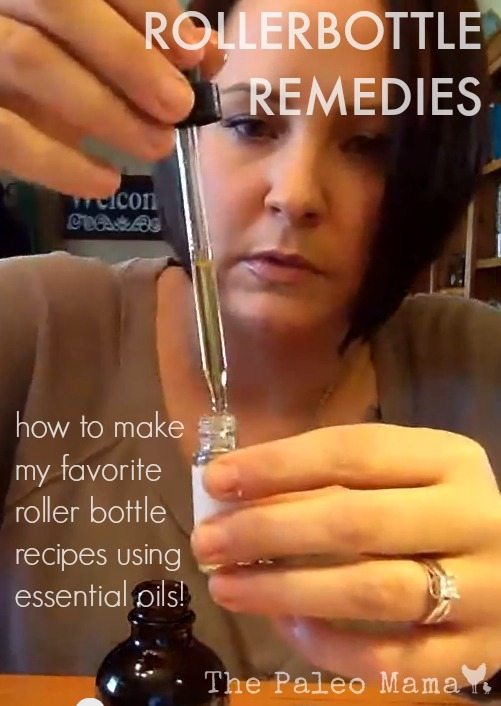
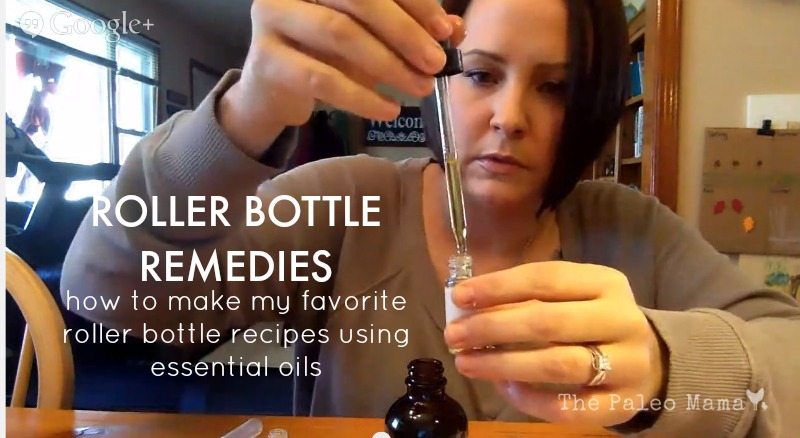
Roller bottles are a great way to create natural solutions for your children and family. They are portable and you can create blends that are already diluted. You can add your favorite essential oils to the roller bottle and carry them around in your purse or diaper bag! 

Recipes and resources are posted below!

CLICK HERE to get started using essential oils by purchasing your wholesale starter kit! 

Mild Oils that I recommend for babies under 1 years old using proper dilution (chart posted below):

  • Roman Chamomile
  • Lavender
  • “calming” blend
  • Melaleuca
  • Frankincense
  • Lemon
  • Wild Orange

9 Roller bottle Recipes I Discuss:

CLICK HERE to get started using essential oils by purchasing your wholesale starter kit! 


SUPPLIES NEEDED:

  • Roller bottles (I use 5 ml and I explain why in the video)
  • Carrier oil like almond oil, jojoba oil, or fractionated coconut oil.
  • Pipette to help drop the carrier oil into the bottle.

1. Focus Blend: 

  • Wild Orange
  • Peppermint

2. Clear Breathing Blend:

  • “Respiratory” blend
  • Lime

3. Immune Boosting Blend:

  • Oregano
  • Lemon
  • “Protective” blend

4. Tummy Blend: 

  • Wild Orange
  •  “Digestive” blend

5. Immune System Support Blend: 

  • “Respiratory” blend
  • Eucalyptus
  • Frankincense

6. Seasonal Blend: 

  • Lemon
  • Lavender
  • Peppermint

7. Sleepytime Blend 

  • Roman Chamomile
  • Bergamot
  • Frankincense

8. Skin Support Blend: 

  • Lavender
  • Melaleuca

CLICK HERE to get started using essential oils by purchasing your wholesale starter kit! 


Roller Bottle Remedies  The Paleo Mama

Filed Under: DIY Beauty Recipes, essential oils, Natural Living

A Beginner’s Kit to Making DIY Beauty Recipes

December 8, 2014 by Jackie Ritz 15 Comments

A-Beginners-Kit

I’ve been making my own home and beauty recipes for years now. It took me awhile to accumulate everything I needed to have on hand for making my own homemade products. So, I wanted to share with you all a beginner’s kit to making DIY recipes and everything that you need to get started.

I’ve sourced ingredients and supplies all over the place and have found that most of the items you can find on Amazon for cheap. I HIGHLY recommend you join Amazon Prime to get the free 2-day shipping. It costs about $75 for the year to do Amazon Prime, however, you quickly get that back!

So, if I had to narrow down to the most needed, this is what I would recommend you buy….

Beginner’s Basic Kit to Making DIY Beauty Recipes:

_MG_9480

1) Coconut Oil 

This tops the list and you will need it in many recipes! Whether you are making soap, toothpaste, all purpose salve, pain rubs, or sleepytime cream for this kids, coconut oil is a necessity. Now, you don’t need the high quality coconut oil that you cook with. I find that a great expeller-pressed works best! I buy mine from Tropical Traditions and wait for a sale combined with free shipping! Go sign up for their newsletter to get notified when there is a sale and a free shipping code! If you prefer to stick with Amazon, then I recommend this coconut oil. If you have a Sam’s or Costco near you, then you can find coconut oil at a great price!

2) Almond Oil

Having almond oil on hand to use as a carrier oil to making rollerball recipes with essential oils or a homemade anti-aging face serum is much needed! Almond oil has many benefits for the skin and hair and it makes a great makeup remover! CLICK HERE to buy.

3) Beeswax

I recommend you find a local beekeeper and talk to him about buying beeswax in bulk. I get mine for $5lb. However you can find beeswax on Amazon in easy-to-use pellets! Cutting a huge block of beeswax is very difficult so these pellets are easy to measure and use in your DIY recipes! CLICK HERE to buy.

4) Essential Oils 

Essential oils are the most important part of most DIY beauty recipes, so you should make sure you purchase the best brand. This is one item I DO NOT recommend you purchase off Amazon. Many essential oils from Amazon are tampered with and the quality is questionable. Since you are putting these DIY recipes on your body, I recommend you purchase therapeutic-grade essential oils. This is the brand I recommend and have used for over a year with confidence. You can purchase them directly from me through my referral link and I recommend you snag a wholesale starter kit. These kits have the most used oils for a discounted price! CLICK HERE to buy and check out the starter kits.

5) Metal Tins for Storage

I love using 2oz metal tins to make all purpose salve, and homemade deodorant. When you are using essential oils in a recipes, you cannot use plastic. These small metal tins are cheapest on Specialty Bottle but you can find them on Amazon too!

6) Dropper Bottles

If you use liquid stevia then SAVE your bottles! I use these dropper bottles to make hand sanitizer, face serum, and so many more things! You can find them in a 6-pack from Amazon for a great price! CLICK HERE to buy.

7) Dried Herbs

I find that Amazon has the cheapest price on bulk organic dried herbs. I buy a lot of calendula for soap and salve-making so I like THIS brand from Amazon. I, also, use other dried herbs like lavender, comfrey, and rosemary.

8) Glass Spray Bottles 

If you are making my hand sanitizer then you need a glass spray bottle. It fits perfectly into your purse and you can keep one on your countertop for disinfecting purposes. CLICK HERE to buy.

9) Olive Oil 

I try to stick with organic ingredients. This organic olive oil is the best deal I have been able to find. I believe you can find this at Costco too! Sometimes on Tropical Traditions I can find a better deal. I use olive oil to make my goat’s milk soap and homemade healing salve. CLICK HERE to buy organic olive oil.

10) Soap Molds

Silicone molds can be used to make soap or a lotion bars. So if you are ready to dive into soap-making then I love this mold from Amazon! CLICK HERE to buy. However, I prefer the rustic look of cutting your own soap, so I just use an old silicone loaf pan and cut the soap myself. CLICK HERE to buy.

11) Mason Jars of All Sizes

Mason jars are such an important part of making your own recipes and they are dirt cheap! You can find them at Walmart and places like Ace Hardware on sale!

12) Bentonite Clay

I use bentonite clay for making my own toothpaste and deodorant (posting recipe soon!). I also like to use it in a detox bath and to make my own facial mask! So many ways to use this gift from the earth. CLICK HERE to buy.

12) Cacao Butter

I use a lot of this stuff! It’s great to use to help recipes that have a coconut oil base hold. You can find this in my Spiced Chai Lip Balm recipe. CLICK HERE to buy.

That’s it!

Well, those are my top 13 necessities! I hope you enjoy creating your own DIY beauty recipes as much as I do! You can CLICK HERE to take a look at all my DIY recipes using essential oils and CLICK HERE to see 20 DIY Homemade Gifts that you can make for your friends and family!

Once again, I highly recommend you purchase a wholesale essential oil starter kit. You save the most money purchasing this way, AND you get a wholesale membership for purchasing any oils in the future at a huge discount!

A-Beginners-Kit-to-Making-DIY-Beauty-Recipes-

Filed Under: DIY Beauty Recipes, essential oils, Homesteading, Living Sustainably, Natural Living

DIY Facial Serum

December 4, 2014 by Jackie Ritz 41 Comments

I’ve traded in my expensive over-the-counter facial products for simple and natural ingredients! Not only are they 100% natural, but they are, also, safer and MORE effective than anything you could purchase from the store.

I’ve been using the oil cleansing method on my face for years. I love it and will never go back to cleansers and moisturizers. CLICK HERE to see what the oil cleansing method is and learn more about this safe and effective way to cleanse your face.

Lately, as I’m getting a tad bit older, I’ve been using specific anti-aging essential oils to help promote healthy skin. I created a “facial serum” that uses my favorite essential oils and are known for their anti-aging benefits! Take a look at the oils below…

1) Lavender – Lavender is great for all skin types, but very powerful for mature skin. It is widely known for its calming and relaxing properties but also is great for soothing mild skin irritations. 

2) Frankincense – Frankincense is one of the most prized and valued essential oils.  It’s used in many beauty products to slow the signs of aging and to promote a youthful, radiant skin.

3) Geranium – Uses of Geranium essential oil date back to ancient Egypt when Egyptians used Geranium oil to beautify skin.  As an essential oil, Geranium has been used to promote clear, healthy skin—making it ideal for skin care products (source).

4) Myrrh – Ancient records show that Myrrh was deemed so valuable that at times it was valued at its weight in gold. It is also soothing to the skin—promoting a smooth, youthful looking complexion.

I buy only therapeutic-grade essential oils. You can click here to purchase your very own wholesale starter kit at wholesale prices!!!

DIY Facial Serum Recipe

INGREDIENTS:

  • 50ml glass dropper bottle (where to buy online) – we save old stevia bottles and use them for things like this!
  • 4 Tablespoons of Almond oil (where to buy) or Jojoba oil (where to buy)
  • 7 drops each of Lavender, Frankincense, Geranium, and Myrrh Essential Oils (where to buy)
  • Empty 2 capsules of Vitamin E (OPTIONAL)

DIRECTIONS: 

  1. Add everything to your glass dropper bottle. Shake.
  2. Apply at night before bed!

DIY Facial Serum


Filed Under: DIY, DIY Beauty Recipes, essential oils, My Recipes, Natural Living

20 DIY Homemade Gifts

November 24, 2014 by Jackie Ritz 2 Comments

20 gifts

Lately there has been such a hype of essential oils, and rightly so! Essential oils are finally becoming recognized as great natural solutions!

This Christmas, I’m making all my own homemade gifts and many of the recipes use essential oils. I think most people love and appreciate the time and work you put into homemade gifts, so I love doing this for my friends and family.

Are you up for making homemade gifts for your friends and family this year? I’m including 20 recipes that are in my favorite essential oil starter kit. You can read more about the brand I stand behind and how to purchase a starter kit for yourself HERE. 

So, go on over HERE and grab your starter kit and you’ll be set to start making your own homemade gifts for Christmas! Not only will you have the essential oils you need, but you will, also, have a wholesale membership for your essential oil needs (so shop at wholesale price all year long), a support system for using your oils, and quality essential oils to use in your home. You will have a lot left over! Each bottle holds 250 drops!!!

What Essential Oils Do You Need? 

  1. Lavender
  2. Lemon
  3. Melaleuca
  4. Peppermint
  5. Frankincense
  6. Protective Blend
  7. Oregano
  8. Breathe
  9. Digestive Blend
  10. Soothing blend

Purchase your starter Kit HERE! 

20 DIY Homemade Gifts

  1. Lavender Oatmeal Facial Scrub – so simple and uses ground oatmeal!
  2. Peppermint Candy Cane Sugar Scrub – a wonderful holiday gift for your girlfriend!
  3. Homemade Frankincense Soap – by the soap base and you’re good to go!
  4. DIY Chest Rub – a homemade “vapor” rub alternative!
  5. Lavender Lemon Lip Balm – perfect for the winter season!
  6. Muscle Salve – feels wonderful on those aches and pains!
  7. DIY Coconut Salt Scrub – I recommend lavender or lemon!
  8. DIY Hand Gel – uses a protective blend to boost immunity!
  9. Fast Fizzing Bath Bombs – throw in the tub or shower for a spa-like experience!
  10. DIY Lotion Bars – easy to make and no junk ingredients!
  11. DIY Clay Mask – add lavender to this recipe because it’s great for the skin!
  12. All Purpose Salve – a salve that can be used for everything!
  13. Tallow Butt Balm – great for the little diaper rashes and sore bums!
  14. DIY Laundry Detergent – use Orange or Lemon to really clean those clothes!
  15. DIY Remineralizing Tooth Powder for Kids – a simple recipe that the kids will love!
  16. Detox Bath in a Jar – throw some epsom salt and essential oils in a mason jar!
  17. DIY Essential Lip Balm – another great recipe for the lips!
  18. Simple Peppermint Citrus Scrub – choose lemon and peppermint!
  19. DIY Aromatherapy Play-dough – great homemade gift for the kids!
  20. DIY Deodorant Stick – use melaleuca and lavender!

CLICK HERE to get started and purchase a wholesale starter kit and start making your own gifts for the Holidays!

20 Homemade Gifts

Filed Under: DIY Beauty Recipes, DIY Home Recipes, essential oils, My Recipes

Traditional Goat Milk Soap Recipe

October 22, 2014 by Jackie Ritz 21 Comments

Goat Milk Soap Recipe .001

Why Goat’s Milk

Goat’s milk is packed with vitamins, minerals natural fats, and protein. It carries a pH of around 6.4 which is very similar to a normal skin pH of 5.6, which makes it great for skin tolerance. You can find vitamins A, B2, B6, B12, and Niacin in goat’s milk and many who cannot tolerate dairy, find that they have no problems with goat’s milk.

Those who have very sensitive skin, find that paying over $5 for a bar of goat’s milk soap is worth it! I’ve had several people come up to me and tell me that my soap was the one of the only bars of soap that they could use without breaking out or having a skin reaction.

Anyone Can Make Soap

Soap is NOT hard to make. What is hard to make is all that fancy soap…which I don’t understand anyways. It’s just you, naked in the shower or bath, rubbing a bar of soap on your body. Why do you need swirls and fun shapes? If you enjoy doing that, then by all means, go for it! But I make soap for my family and most the time the kids end up making holes in the bar and pretending like Spiderman can surf on it.

This is a very basic, traditional recipe that I created. I use lard and I use lye. This is NOT a vegan recipe. I also use the traditional method of cold-process. This process uses a short prep time and a long cure time. It’s the easiest, in my opinion, because you are mostly waiting on the soap to cure and harden. This is the way our ancestors prepared soap and it’s the way I prefer to make my soap. Since I use raw goat’s milk, I prefer to keep the milk unheated to prevent destroying any vitamins and minerals.

Why Lard and Lye

Lard was traditionally used in making soap and has a very long history of in soap-making.  I get my lard from a local farm for a really good price, but you can order pastured lard from here. Lard is the hardening fat in this soap – it’s what makes the bar hard so that it doesn’t turn into a big pile of glob while you are taking a shower.

I, also, like lard because of the aging time. When you make a cold-process soap, you are going to need to let your soap age (or cure) for 3-6 weeks. If you do not use a hardening fat, like lard, then it’s going to take your soap much longer to cure. I find that 3-4 weeks is perfect for this recipe.

Now lye is necessary for the alkali, when combined with the goats milk, loosens and attracts dirt, allowing it to be washed away. After 24 hours, the lye is not even present and by the time the 3-4 weeks is up, there is no trace of lye in the soap.

Supplies Needed:

For anything that touches the lye, you will need separate supplies and those supplies should never be used on anything else. Also, this is going to make an UNSCENTED bar. I have tried using essential oils and it requires way TOO MUCH. Alternatively, if you would like, you can add a few drops of essential oil to your bar of soap when you are washing in the shower.

  • Immersion blender
  • Glass bowls for mixing
  • Rubber spatulas
  • Digital Kitchen Scale
  • Tall stainless-steel pot for melting oils
  • 2 Thermometers
  • Safety Equipment – rubber gloves, long sleeve shirt, and goggles
  • Knife to cut the soap
  • Soap Molds or Old Loaf Pans – I prefer the rustic cut of the soap and prefer to use loaf pans.
  • Parchment paper

Ingredients Needed:

You can change your fats and oils if you would like. This is just the recipe that I created and enjoy the most. I have made several other recipes and I really prefer mine as it is very moisturizing, lathers very well, and includes sustainable fats.

  • 2 ounces of Beeswax
  • 18 ounces of Coconut oil
  • 5 ounces of Castor Oil
  • 26 ounces of pastured Lard
  • 6 ounces of Olive oil
  • 8.40 ounces (or 238.39 grams) of 100% pure Lye
  • 18.9 ounces of Frozen Goats Milk (raw or pasteurized) – easiest way to freeze goats milk for soap-making, is to pour the measured out goats milk into a gallon ziplock bag. Then freeze the bag flat.

Step-By-Step Instructions:

  1. Collect all your supplies and block off your kitchen. I usually do this when my kids are down for a nap because of the lye.
  2. Put parchment paper in your loaf pans to get them ready.
  3. Measure out all the fats and oils (everything but the lye and milk) and put in your tall stainless-steel pot.
  4. Put your stove on LOW and slowly melt the oils and the fats. Put a thermometer in and make sure it never goes above 100 degrees. Once melted, remove from stove.
  5. Take your bag of frozen goats milk and smash it up into smaller pieces. Add it to a large glass bowl.
  6. Slowly sprinkle your lye over the frozen milk and mix with a spatula at the same time. MAKE SURE you are wearing your safety gear!
  7. Mix until the frozen milk is melted. Check the temperature of the mixture with a thermometer and do not let it go over 110 degrees. If it does, no worries, just cool it down by placing the bowl in a larger bowl filled with ice water.
  8. Now check on your oils and make sure they are melted and the temp is not over 100 degrees. If it is, then cool it down by placing it in the bowl of ice water.
  9. You want your oil mixture and your lye mixture to be within 10 degrees of each other.
  10. Now slowly pour your lye mixture into your oil mixture. As you are pouring, put your immersion blender on LOW and start to mix.
  11. When all the lye mixture is added, turn your immersion blender on HIGH and mix until you reach “trace”. Trace is when you can take a spoon or spatula and you can draw a line in your mixture. It usually takes me 2 minutes to reach trace with this recipe…sometimes less.
  12. Once you reach trace, you are going to need to move very fast. Immediately, pour your mixture into your 2 loaf pans or your soap molds. Use your rubber spatula to clean the bowl and smooth out the top of the loaf pan.
  13. Put the pans in a dark spot out of reach of kids. Leave it alone for 24 hours. After around 24 hours, the lye is inactive and you can touch the soap.
  14. After 24 hours, remove your soap from the loaf pans and cut into individual bars.
  15. Place the bars in a dark area and let them cure for 3-4 weeks! I know, it’s torture to wait, but it’s sooooo worth it!
  16. After 3-4 weeks the bars should be ready to go!

 See Picture Tutorial Below…..

Working on reaching trace. 

16081_10152632866727013_915759999358523822_n

After you reach trace, pour into your loaf pans and allow to sit for 24 hours. 

soap1

After 24 hours, cut into individual-sized soap bars and cure for 3-4 weeks. 

soap 2

Waiting 3-4 weeks for the soap to harden! It’s worth the wait! 

10703599_10152663692747013_4306114713772124454_n


I hope you enjoy this recipe as much as my family does! 

Traditional Goat Milk Soap Recipe .001

Filed Under: Budget, DIY Beauty Recipes, DIY Home Recipes, goats, Homesteading, Living Sustainably, My Recipes, Natural Living

Oil Pulling With Essential Oils

August 6, 2014 by Jackie Ritz 14 Comments


Oil Pulling is an ancient detoxification practice that involves swishing oil around in your mouth for 15-20 minutes. The benefit of doing this is to reduce the amount of harmful bacteria, reduce dental plaque, remineralize your teeth, help with gum issues, and strengthen your gums. You can give your teeth an extra boost by oil pulling with essential oils.

When you swish oil around in your mouth, plaque get stuck to the oil and dissolve in the liquid oil. So you are removing a lot of bacteria, which is found in plague and leads to all kinds of oral health problems, every time you oil pull.

I added oil pulling to my life when I found out I had 6 cavities! I was able to heal these cavities naturally by eating a traditional diet with the proper nutrients and supplements added. You can click here to read more about how I healed my tooth decay. 

What Oil to Use:

Traditionally, sesame seed or sunflower oil was used among the early oil-pullers, however, my personal favorite is coconut oil because it has so many health benefits. You can use any oil that you like, just stay away from canola or vegetable oil.

Adding Essential Oils to Your Oil Pulling Regime:

Adding in therapeutic-grade, 100% pure, essential oils into your oil pulling regime is a great way to give your health a supercharge!  I buy my essential oils at wholesale price and I encourage you to do the same! You can CLICK HERE and learn how to get your essential oils from me at wholesale cost!

Here’s a few suggestions to help with oral issues:

  1. Peppermint essential oil.
  2. Clove essential oil.
  3. Basil essential oil.
  4. Melaleuca essential oil.
  5. Myrrh essential oil.
  6. OnGuard essential oil (my favorite choice).

How to Oil Pull:

  1. First thing in the morning, put 1 teaspoon-1 tablespoon of coconut/or sesame oil in your mouth. Use 1 teaspoon if you are just starting out or if you have a gag reflex. Swish it around till it melts.
  2. Open your mouth and add 2 drops of your favorite essential oil.
  3. Swish the oil around in your mouth (like you would with mouthwash) for 15-20 minutes. I like to push it through my teeth and around the sides of my mouth. Don’t swish hard or your cheeks will start to hurt! I do this while I’m doing my morning chores and milking the goat! But you can also do it while your getting ready in the morning!
  4. Spit the oil out in your trash can! Do not swallow it…it is now loaded with bacteria and toxins.
  5. Brush your teeth with a safe toothpaste! I use my homemade toothpaste, but THIS ONE is great if you can’t make your own!
  6. Happy Oil-Pulling!

 CLICK here to Start Using Essential Oils! 

Oil Pulling


Filed Under: DIY, DIY Beauty Recipes, essential oils, Living Sustainably, Natural Living, Nutrition

« Previous Page
Next Page »

Primary Sidebar

  • Facebook
  • Instagram
  • Pinterest
  • RSS
  • YouTube

Hi, I'm Jackie Ritz and welcome to The Paleo Mama! I'm a published author, certified herbalist, and voracious researcher of natural medicine and nutrition. I'm glad you're here and I hope you stick around for awhile!

Recent Posts

  • When God Says Pause: Why I Took a 5-Year Break from My Online Business
  • How to Quit Facebook but Keep Your Business Profile
  • Leaving the City for the Country
  • Natural Way to Heart Health

MEAL PLANS

Biblically clean meal plans that are for those love to cook real food

Read More

Footer

Our Blog

The Paleo Mama blog provides simple answers for healthier families through research, tutorials, recipes, and simple remedies for daily needs!

  • Health
  • Essential Oils
  • Recipes
  • Remedies
  • Natural Living
  • Meal Plans

Stick around!

You’ll get instant access to a library of natural remedies and real, paleo food, including our ebooks and free guides we send out.

  • Home
  • Disclosure/Disclaimer
  • Privacy Policy
  • Advertise
  • Contact Me

Copyright © 2025 · Wellness Pro on Genesis Framework · WordPress · Log in