• Skip to primary navigation
  • Skip to content
  • Skip to primary sidebar
  • Skip to footer

The Paleo Mama

Homegrown and Handmade

  • About
  • Blog
    • Podcast
  • Meal Plans
  • Essential Oils
  • Our Farm
    • Great Pyrenees Puppies
    • Goats
      • Goats for Sale
      • Goat Sales Policy
      • Nigerian Dwarf Bucks
        • Ranchocabra Lunar Eclipse

DIY

Fermented Superfoods

February 6, 2017 by Jackie Ritz 1 Comment

Whether shoppers are seeking gut health or go-for-it flavor, fermented foods and probiotics are growing like good bacteria—and they’re not just for hippies anymore. Probiotic foods have become more popular due to studies that show they can benefit both the digestive and immune systems, and fermented and pickled foods are at the top of the trend. Fermentation involves using a food’s naturally-occurring yeasts, bacteria, and other microbes to break it down. That’s how cabbage becomes sauerkraut, grapes become wine, and cucumbers become pickles.

Over the past year or so, I’ve blogged several times about fermented foods that I have tried—and loved. For example:

  • My family loves our sourdough bread, cultured from a sourdough starter that is over 160 years old.
  • I am a Kombucha addict. I love the taste, the smell, and the squishy scoby’s (fermented starter) that I use to make the drink.
  • Our entire family sometimes simply pigs out on homemade sauerkraut (recipe here).

I want to take a closer look at the trend of fermented foods. If they’ve reached top dog status in health and wellness circles, then it’s time we learned a bit more about them.

Why Eat Fermented Foods?

Fermented foods have been used as medicine throughout history. Chinese workers ate acid-fermented vegetables while building the Great Wall of China. The Japanese have had Kimchi as part of their daily menu for centuries. The Romans used sauerkraut to treat and prevent intestinal infections. Captain Cook used sauerkraut and lime juice to prevent scurvy on his three-year journey around the world. Many African cultures use acid-fermentation to preserve gruels made from corn and sorghum.

It was once thought that the main purpose of fermentation and pickling was food preservation. People in my grandmother’s generation did a lot of it. I remember my mother talking about jars of sauerkraut in the cellar, and a crock of pickled pig’s feet (yes, yuck!) always available on the bottom shelf of the cupboard. But today we have recognized the danger of the unhealthy bacteria that is present in our bodies—and the health problems it can cause. Fermented foods are rich in good bacteria, and act as natural probiotics to support digestive health and balance bacteria in our bodies.

Fermented foods, as a group, are highly nutritious and digestible. Fermentation pre-digests foods, making nutrients more bioavailable, or easier for the body to absorb, and in many cases fermentation generates additional nutrients or removes anti-nutrients or toxins

—Sandor Katz, The Art of Fermentation

With more and more fermented food cropping up in the supermarkets and local farmers’ markets, let me suggest 5 good reasons why we should be eating more of them.

  1. You can’t digest your food alone. Good bacteria is what helps to break down what your body can’t do on its own.
  2. The good bacteria fight the bad—and usually win. We swallow disease-causing bacteria every day. But we don’t always get sick from it because the good bacteria in our body fights off the bad.
  3. Good bacteria helps your body produce many fat-soluble vitamins, including Vitamins B1, B2, B3, B5, B6, B12, and K.
  4. In order for your body to be healthy it needs balance between the bad bacteria that is problematic to your health, and the good bacteria that becomes the probiotic to allow the balance to set in.
  5. Good bacteria helps to restore your gut health after taking antibiotics. That’s a prime time for eating fermented foods because antibiotics destroy both the bad and good bacteria.[1]

Fermented food contain live cultures, which are tiny organisms in our intestines that help digest fiber, and protect us from carcinogens and other disease-related toxins.

What Are Some of the
Fermented Foods Available?

There are many different kinds of fermented foods available today. Many vegetables are great fermented, and it’s a great way to preserve your fresh harvest. Let me list 8 of the healthiest food and vegetables that you might want to try.

  1. Yogurt—this is the most consumed fermented dairy product in the United States today. But choose your yogurt carefully. Look for four things: it comes from goat or sheep milk, it’s grass-fed, it’s organic, and it doesn’t contain sugar. If you make your own (the best option), I recommend this yogurt culture.
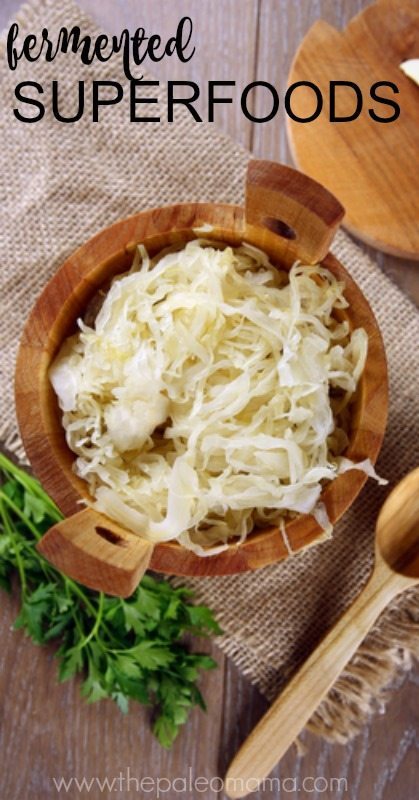
  2. Sauerkraut—traditional sauerkraut is one of the best-known fermented foods. It is prepared from water, salt, and cabbage. Be sure to purchase raw sauerkraut, or make it yourself (recipe to follow below). I recommend this raw sauerkraut.
  3. Kombucha—made from tea, clean water, sugar, yeast and bacteria, Kombucha has become extremely popular in the last few years. After fermenting it becomes carbonated, and is a great substitute for the less-healthy soda you may consume. It is fun and easy to make yourself (see my blog) for the recipe I use to make it. I recommend this Kombucha culture scoby starter.
  4. Kefir—this is a fermented milk product (cow, goat, or sheep milk) and tastes just about like liquid yogurt. If you are choosing to drink kefir, make sure it’s organic and not loaded with sugar. If you make your own kefir, I recommend this kefir starter.
  5. Kimchi—you’ve probably tasted Kimchi at some point when you were eating Asian food. It is a spicy fermented cabbage, dating back to the 7th century. You can make your own Kimchi (recipe recommended).
  6. Pickles—we are all familiar with pickles. As a kid growing up, we knew there was always a huge jar of dill pickles in our refrigerator for snacking. When you buy pickles, choose a food manufacturer that uses organic products and ferments it the old fashion way. 
  7. Miso—you’ve probably seen and even ate miso soup when you were eating oriental food. It is created by fermenting. Because it is made from soy, which in most American products is a GMO product, many avoid it altogether. But miso is made from fermented sources of soy, which yields a completely different set of nutrients. Stick to organically grown fermented soy products like miso, tempeh or natto.
  8. Raw Cheese—raw milk cheeses are made with milk that has not been pasteurized. Goat milk, sheep milk, or A2 cow’s milk (milk containing beta-casein, found only in Jersey, Asian and African cows) produce soft cheeses high in probiotics. These cheeses can include: Mozzarella, Havarti, Baby Swiss, Sharp Cheddar, Colby, and Pepper Jack. But NOTE: You won’t find them in the same aisle with sliced sandwich cheeses and pre-shredded cheese (with wood pulp). Look in the imported European cheeses counter. I make our own raw cheeses, using this mesophilic cheese culture.

Can I Make My Own Fermented Foods?

Absolutely! That’s one of my main reasons for writing this blog. I love it when we can keep up with the latest health and wellness trends by making our own products. There are many websites that can help you get started, including this one. I currently make several fermented foods, including sauerkraut, kombucha, sourdough bread, and my most recent love, Fire Cider. I want to share a couple of my recipes with you.

Kombucha

Kombucha is an ancient elixir that has a history of starting in China and, somehow, made its way over here to America. It is a sort of “tea” that is infused by fermentation with beneficial bacteria, probiotics, and yeast and is great for your gut and overall health. It is made from either using black or green tea, and some herbal teas, some sugar (which the yeast feeds on), and lots of patience.

Why do I drink it? Well, first of all, I’m cheap. I am a self-proclaimed cheapo and the cost of probiotics is just ridiculous. The cost to make a gallon of Kombucha is around $1! The cost to buy a 16 ounce bottle of Kombucha from a health food store is $4! The cost to buy a bottle of probiotics is $40! Hmmm, tough decision but I’ll stick with my cheap Kombucha!

You can find my easy, 6-step method for making Kombucha here.

Sauerkraut

I don’t think you can find better sauerkraut than that prepared by Germans for centuries before this. We have a German restaurant here in Asheville, North Carolina that serves the best sauerkraut I’ve ever tasted. But you can make your own, just as I do, by following an easy recipe passed down from Germany.

You will use shredded cabbage, juniper berries, caraway seeds, yellow mustard seeds, pickling salt, and filtered water. You can find the recipe, which is the one I use, here.

Eat Some Fermented Food Every Day

Fermented and cultured foods are a wonderful source of probiotic bacteria needed to support good health. Here are some simple ways you can add some to your menu every day.

Breakfast

Have some kefir to start your day.

Add some fermented salsa to your scrambled eggs.

Lunch

Enjoy some chopped pickles in your salad, tuna, or ham salad sandwiches.

Use fermented mayo instead of store-bought mayo.

Dinner

Make sauerkraut one of your evening side dishes.

Try making your own Italian dressing with kombucha.

Snacks

Have a slice of sourdough bread with some kefir dill spread.

Serve a kefir soft-serve ice cream for dessert.

So now you have some of the tools you need to get started adding fermented foods to your diet. Experiment with many, and do your own research to find the ones you like best. Most of all—GET STARTED!

To ferment your own food is to lodge a small but eloquent protest – on behalf of the senses and the microbes – against the homogenization of flavors and food experiences now rolling like a great, undifferentiated lawn across the globe.

—Michael Pollan

Fermented Superfoods Pin

Sources

  1. https://www.drdavidwilliams.com/gut-health-and-the-benefits-of-traditional-fermented-foods/
  2. https://draxe.com/fermented-foods/
  3. https://www.globalhealingcenter.com/natural-health/the-9-best-fermented-foods-for-your-gut/

[1] https://www.everydayhealth.com/diet-nutrition/diet/reasons-eat-more-fermented-foods/

Filed Under: DIY, Health, My Recipes, Natural Living

How to Declutter Your Life

October 25, 2016 by Jackie Ritz Leave a Comment

A year ago I read the New York Times Best Seller by Marie Kondo, titled The Life-Changing Magic of Tidying Up. Its principles really grabbed me, and I determined to clean out the clutter of my life. I started with my closet, and didn’t stop until I’d cleaned out clutter from every nook of my house. Then I worked on clearing out the clutter of my mind. It was such a valuable experience for me as I learned how to declutter my life and my mind. 

Many of you are recognizing the dissatisfaction found in the excess of things, and are beginning to do some major cleaning. You are simplifying your lives, and as you do you are finding great freedom in owning less. All over the world, people are embracing simplicity as a way of life. There is even a growing trend to tiny house living, which is living in less than about 300 square feet.

One of the top trending topics in the Health and Wellness world right now is just that—learning to live with less. Part of the trend is due to Marie Kondo’s book, but there are so many other contributors to this trend. Some of them are:

  • The discovery that accumulating more stuff just doesn’t lead to more satisfaction in life.
  • The rising costs of Living Big, and the parallel rising consumer debt.
  • The ache in people’s hearts to get back to a simpler lifestyle, like we did. 
  • The clutter of stuff in our homes that just keeps us busier taking care of it all.
  • The ability to consolidate the kitchen tools needed with one power tool (such as the Instant Pot popularity).
  • The lack of storage for stuff, such as closet space, kitchen space, storage space in the garage, and rooms too-full of furniture for ease of entertaining.
  • Seeing your family closeness disintegrate as each member focuses on individual goals for getting more stuff, more technology, the latest iPhone
  • Growing old and recognizing that you have more stuff than you do friends.

So I want you to take a look at the possibility of living with less—and the benefits it brings you when you do. We’ll concentrate of three steps of how to declutter your life:

  1. Learn why and how to get rid of your stuff.
  2. Find ways to store the things you keep.
  3. Now that you are living with less, focus on things that make you love your new life.

Learn Why and How to Get Rid of Your Stuff

It is important to start with the Whys of decluttering your life. That’s where I had to start. I had to ask questions like:

  • Why did I buy all these clothes?
  • Why do I spend time looking through catalogs and online stores even though I have so much already?
  • Why do I envy the things I see others able to accumulate?

To be successful at decluttering your life, you must begin by decluttering your mind. Maybe you buy all the latest styles in clothing because as a child your mother could only afford to give you hand-me-downs from garage sales and used clothing stores. Maybe you envied the got-everything girl in your high school class, and determined that when you were leading your own life, you’d find a way to get everything you wanted. Maybe you missed out on real family closeness as a child, and as you grew you learned to satisfy the longings in your heart with stuff instead of relationships.

Asking yourself some hard questions about your reasons for having stuff isn’t easy. It makes us wonder about the true motivations that drive us to the actions we take in life. But until you recognize your cluttered thinking, and take steps to declutter those thoughts that drive you to accumulating more stuff, you won’t be successful at decluttering your home.

When you are ready to move on, you will probably discover that you really don’t know How to get the job done. How do you start? Where do you start? Marie Kondo says this:

Tidy in the right order. There are only two tasks involved—discarding and deciding where to keep things. Discarding must come first. Be sure to completely finish the first task before starting the next. Do not even think of putting your things away until you have finished the process of discarding.[1]

So how to get rid of the stuff in your home and life is a lot like how you eat an elephant—you do it one bite at a time. You might want to download the free “Konmari” APP so that you can keep track of what you have done and what you need to do next.

Let’s take a look at how you can find the right order to begin your decluttering. There are two guiding principles you can use:

  1. Think in concrete terms so that you can vividly picture what it would be like to live in a clutter-free space.[2]
  2. Take each item in your hand and ask: “Does this spark joy?” If it doesn’t dispose of it.[3]

Does this spark joy

What is the right order for you?

The right order for you is very likely to be different than the right order was for me. Maybe you start with where you have the biggest mess. Maybe it’s where you don’t have enough room? Or maybe it’s where you know in your heart that you have simply accumulated too much.

For many women the place to start is likely to be the clothes closet. Some women have clothes from every fashion trend, in every size, from every big box store’s sale of the year. So many clothes that there isn’t any room for more—and there hasn’t been room for your husband’s clothes in years. So start here, and be ruthless in your cleaning. Sort your clothes into categories: tops, bottoms, underwear, outerwear, purses and accessories. If each piece of clothing doesn’t give you joy, or it’s stained, ripped, too big or too small, or unworn for a year, decide now to either give it away or toss it.

When you have finished your ruthless assessment of your clothes closet, finish this category by finding more effective ways to store your clothes. Not everything has to hang on hangers. Fold what can be folded, and have bins in which you rotate your clothing according to the seasons. In order to stay true to your new less is more philosophy, make it a rule that every time you bring home a new piece of clothing, you discard one in the same category from out of your closet.

(Here’s a quick folding tutorial video from Marie Kondo)


Follow this way of ordering your decluttering for each area in your home. Probably the next biggest stuff problem is in the kitchen. The kitchen gets heavy traffic, and is often overused, overstuffed, and over dirty. You have too many dishes, too many kitchen appliances, too many pots and pans, and too many bulk items in the pantry. Start here by sorting the kitchen into categories, and then tackle each category one by one—not stopping until you are finished with this one. Get rid of items you don’t need, appliances and kitchen tool you never use, duplicate dishes and pots and pans (duplicates that are not needed), and stuff you have too much of: mugs, food containers, storage containers, pot holders, countertop clutter, and stuff stored on top of the refrigerator or on its doors (pictures, etc.). Don’t forget to clean out the fridge, freezer, and pantry. It’s likely you have items with expired dates, freezer-burned foods, and spices several years old.

Find new and better ways to store things

Then tackle the second step of organizing and finding storage solutions for what you keep. I love using mason jars for storage, and other large, glass storage containers. Because plastic containers have been proven to leach chemicals into our food and drink, I do not use plastic in our kitchen. Glass and stainless steel are much safer options.

Determine that you will continue through the categories of items in your home that need to be considered for discard. Don’t stop until you have finished with everything. Years ago my mother told me the story of the woman who was given one white rose. She sat that rose on her kitchen table, and immediately thought, “I can’t leave it there with all those dirty dishes and things,” so she proceeded to clean her kitchen table, then her stove, then her sink, and finally her entire kitchen. Then she took that one white rose in to sit on the living room side table beside her favorite chair. The same thing happened, and she proceeded to clean up her entire living room. Then she continued until her entire home had been dejunked, cleaned, and was sparkling clean. Visualize your home without any distracting clutter. What would it look like?

Now that you are living with less, focus on
things that make you love your new life.

The magic of decluttering lies in the newfound joy of discovering all the stuff you really can live without! You will find greater contentment in your life, and in the growing relationships you now have time to build upon. I believe there are at least four important principles for learning to be contented with less. They are:

  1. Live beyond the temporary—I like the verse in Matthew 6:20 (niv): “But store up for yourselves treasures in heaven, where moth and rust do not destroy, and where thieves do not break in and steal.”
  2. Learn to give—Giving expands our heart and helps to keep our hands open to receive gratefully and to give cheerfully.
  3. Grow a thankful heart—Change your focus from what you don’t have to what you do have. Contentment is not the fulfillment of what you want, but the realization of how much you already have.
  4. Live within your means—That is a practice that Frank and I are attempting to incorporate into every day of our life. For example:
  • Our farm pickup is years old, rusty, dirty, but perfectly suited for what we use it for.
  • I still buy the majority of my clothes from second-hand stores.
  • We try to live sustainably, using the things we raise and grow instead of shopping at the high-priced and unhealthy big box food stores.
  • We love to furnish our home with gently used or repurposed furniture, loving the look of what I call our shabby chic home.

If you put your house in order now, you will be able to pour your time and passion into what brings you the most joy, your mission in life. Life truly begins after you have put your house in order.[4]

How to Declutter

[1] Marie Kondo, The Life-Changing Magic of Tidying Up (Berkeley, CA: Ten Speed Press, 2014), 35.

[2] Ibid., 36.

[3] Ibid., 41

[4] Ibid., 204

Filed Under: Budget, Budget Shopping, DIY, family, Living Sustainably, Natural Living

Why I DIY & Why YOU Should, Too!

August 25, 2016 by Jackie Ritz 1 Comment

yoooo

By Dr. Eric Zielinski

Don’t miss your chance to attend the online and free Essential Oil summit and learn more about DIY and more! 

Most people don’t realize how lucrative “beauty” is. It is one of the fasting growing industries in the world, and recent reports suspect that the global beauty market will reach $265 billion in 2017! Now, don’t get me wrong, making money isn’t a bad thing. What concerns me is the real cost that the marketplace doesn’t like to talk about; namely, the health risks associated with a vast majority of products sold on store shelves today.

This, my friend, is why my wife and I DIY and why I hope you will, too!

Your Skin is a Sponge 

The reason why we’ve become aware of the harm that body care products can cause is because of the discovery that human skin is literally a sponge. Scientists have proven that more than 60% of the chemicals in our body care products absorb through our skin and into our blood stream, but this is just one part of the equation! Think about all the hairspray you inhale when doing your hair, the lipstick that you unconsciously lick throughout the day, or the minute mascara particles that enter your eyes!

If you’re using an abundant life giving concoction made with a healthy base and therapeutic grade essential oils, then you have nothing to worry about. You can do a happy dance because you’re doing your body good! On the other hand, if your favorite cosmetic line is filled with harmful fillers and preservatives, then you better on dance yourself to the doctor’s office for a early check-up because you’re poisoning yourself!

Yes, I jest, but this is no laughing matter. This is serious business, folks, and the safe rule of thumb to live by is if you won’t eat it, you shouldn’t put it on your skin!

Hidden Toxins in Your Body Care Products

It is becoming increasingly difficult to purchase pure, wholesome body care products and unsuspecting customers are duped by labels claiming they are “all natural, “organic” and “GMO-free.”  Yes, these qualities are all very important to maintain the integrity of your health, but they are not a guarantee of purity because harmful fillers and preservatives are oftentimes slipped in your favorite lotion or cream.

Some of the most dangerous (and common!) culprits to be on the lookout for are:

  • Coal Tar
  • DEA (Diethanolamine)
  • Formaldehyde
  • Fragrance/Parfum
  • Mineral oil
  • Lauryl sulfates
  • Parabens 
  • Propylene glycol (PEG)
  • Talc  

The bottom line is that you need to be avid label reader, and make sure that you are not being inadvertently poisoned by the products that you’re using every day!

Easy DIY Natural Solutions

Two of the most dangerous culprits in the beauty market are cosmetics and lotions; both of which are extremely easy to do-it-yourself (DIY).

Cosmetics

By and large, the vast majority of women use one or more cosmetic items to enhance their look. Sadly most of these are made up of synthetic ingredients that are caked on their face for hours on end. We mustn’t forget what we have already learned – these chemicals are blinked into your eyes, seeped into your pores, and accidentally licked into your mouths every single day of the year and this accumulates over your lifespan.

The primary way to stop this vicious cycle is to implement some easy-to-implement natural solutions and lipstick is the first place to start. Essentially a jazzed up lip balm, you can DIY by following this recipe:

Ingredients

  • 2 teaspoons sweet almond oil or coconut oil
  • 1 teaspoon beeswax / beeswax beads
  • 1 teaspoon cocoa or Shea butter
  • Dash coloring powder (beet, cinnamon or powder) 
  • Essential Oils (where The Paleo Mama recommend purchasing from)

Instructions

  1. Melt oil, beeswax and butter in a saucepan over low heat.
  2. Stir in optional coloring powder
  3. Remove from heat and stir in a drop or two of essential oil for fragrance and nourishment, like frankincense, geranium, lavender, lemongrass, nerloi, rose, or ylang ylang.
  4. Place mixture in lipstick tubes or a small tin container.
  5. Put in refrigerator to cool and use when desired.

As a word of caution, don’t forget that many cold-pressed citrus oils are phototoxic, meaning they can cause excessive sensitivity when exposed to the sun. If you’d like to use citrus oils in your lipstick, be sure to use the ones on this list:

  • Bergamot Oil (FCF)
  • Blood Orange Oil
  • Lemon Oil (Steam Distilled)
  • Lime Oil (Steam Distilled)
  • Mandarin Oil
  • Sweet Orange Oil
  • Orange Leaf Oil
  • Satsuma Oil (Cold/Expeller Pressed)
  • Tangelo Oil
  • Tangerine Oil
  • Yuzu Oil

Lotion

We all can use a little moisturizing love to take care of the skin that works so hard for us now and again, right? But, at what cost are we doing so? Granted, lotion is a very basic product (or should be), but most contain a mile-long list of chemicals that are a recipe for nothing good for our health!

Don’t forget to keep an eye out for the harmful fillers and preservatives like parabens, mineral oil and fragrance when purchasing your lotion. If you get discouraged because you can’t find one with the fragrance that you enjoy without all the junk in it, then doing it yourself is the way to go. And, oh, how simple it is! 

By and large, the easiest and most effective moisturizer is a simple ointment reminiscent of something our ancestors used to enjoy. All you need is a healthy, non-toxic base and some essential oils. Easy peesy!

  • 1 oz of the carrier oil of your choosing (fractionated coconut, jojoba, almond, olive, grape seed are all great options)
  • 5-7 drops of your favorite essential oil (geranium, helichrysum, frankincense, lavender, myrrh, rose and sandalwood are all good choices)

If you want a thicker lotion or cream-type of consistency, try:

  • 1/4 cup Shea butter
  • 1/8 cup sweet almond oil
  • 1 tablespoon beeswax 
  • 20 drops of essential oils

Don’t forget the warning about photosensitization and citrus oils. You certainly don’t want sunspots and excessive burns, because you’re going to be out in the sun too much one day.

Guest posted By Dr. Eric Zielinski (thanks Eric!) 

Filed Under: DIY, DIY Beauty Recipes, DIY Home Recipes, essential oils Tagged With: essential oils

Homemade Gift Ideas for the Homesteader

November 14, 2015 by Jackie Ritz 1 Comment

Gift Ideas

The holiday season has already begun. Every year it arrives, and so often chaos, stress, and uneasiness about gift giving comes with it. But it doesn’t have to be that way for those  prepared with several homemade gift ideas for the homesteader in your life that loves the beauty of things “from scratch”. 

In this blog I want to get your season started right by sharing some of my favorite homemade gift ideas for those homesteaders-at-heart in your life. You can make these easily for your friends and family and give them healthy, original gifts that are so much better than last-minute store-bought items. I will follow up with a second blog on ideas for making homemade tasty food gifts for your loved ones.

Get your shopping list ready and prepare to impress your loved ones with these great gift ideas. I am including three groups of DIY homemade gifts:

  1. DIY Homemade Beauty Products
  2. DIY Health Supporting Products
  3. DIY Home Cleaning Products

For most of these recipes, you are going to need high-quality essential oils. 

essential oils and medical flowers herbsI LOVE LOVE LOVE dōTERRA and would love to help you get started using essential oils. dōTERRA is sold exclusively through independent distributors like me. Working from home, these advocates, like myself, introduce, educate about, and sell essential oils in their local markets through person-to-person contact and globally through websites (like this one!). If you want to take a peak at the starter kits which include most of the essential oils you will need for these recipes, CLICK HERE and let me know if you have any questions! 

DIY Homemade Beauty & Health Products

(Click here to get my DIY Beauty Recipes eBOOK for even more ideas!)

Sugar Scrub BarsSugar Scrub Bars

I love making my own sugar scrub. I, also, love making my life easier which is why I made these sugar scrub bars. All I have to do is grab a bar before getting in the bath or shower. No more opening up a mason jar and scooping out the scrub and letting water get into the scrub. Now I just take a bar and start lathering it over my body. It’s easy to hold and easy to make! (Find Recipe here) 

Lavender Body Butter

I have an obsession with making body butter. There’s something about putting together the simplest of ingredients and then whipping it up into this luxurious, natural, and nourishing lotion. This Lavender Body Butter does just that; it’s simple to make, only four ingredients and uses lavender essential oil. (Find Recipe here) 

Spiced Chai Lip Balm RecipeSpiced Chai Lip Balm www.thepaleomama.com

I love chai tea and the way the spices in a chai tea smell. I have been making my own lip balm for years now, usually I just put my Healing Salve on my lips, but I wanted something a little “fancier” so I created a delicious Spiced Chai Lip Balm recipe that I know you will enjoy. (Find recipe here) 

Whipped Sleepytime Rub

Winding down at night can be tough at times. I know my mind keeps going for minutes and sometimes hours after I lay my head down on my pillow. The same goes for our kids.

Our nightly routine has become essential at our house. I notice that the nights we go from dinner to bed is CRAZY. The kids are not ready to rush rush rush and then get in bed. So, I stopped expecting it from them and started taking our bedtime routine a little more seriously.

Whipped Sleepytime Rub www.thepaleomama.comNow we eat dinner at the table as family and then we slowly start getting ready for bed. The kids take a nice relaxing bath, sometimes a detox bath, with certain essential oils in it, and then we get all snuggled up in our pajamas and read books.

During our reading time I apply this Whipped Sleepytime Rub made with essential oils to my kids. They absolutely love this! The 3 main oils I choose to apply are Frankincense, Lavender, and Vetiver because these oils promote a nice, restful sleep. (Find recipe here)

DIY Health Supporting Products

Elderberry Syrup

Elderberries are packed with Vitamins A, B, and C, iron, potassium, and powerful antioxidants. Making an elderberry syrup recipe is a great way to get all the nutrition from these delicious bushes into our body! (Find recipe here) 

Comfrey Salve

Homemade Comfrey Salve

One of my favorite things about my new homestead is our very own comfrey patch. Of course, you don’t need to grow your own comfrey to make a nourishing salve with it. There are several places online that you can purchase dried, organic comfrey leaves to make this simple and homemade comfrey salve. 

Comfrey has been in use as a medicinal herb for more than 200 years. The allantoin content of comfrey aids in healing wounds, sores, burns, swollen tissue, and broken bones. It can be applied externally to bruises, sprains, arthritic bones of any inflamed tissue, and acts as an anti-inflammatory and pain reliever. (Find recipe here) 

All-Purpose Salve

My goal in creating this recipe is to minimize your medicine cabinet and prove to you that, once again, nature has given us the remedy. This all-purpose salve is good for so many things. The coconut oil and olive oil bring nourishment, while the beeswax is known to lock in moisture, foster cells, and protect skin from damaging environmental factors. For children, the BEST two essential oils to have on hand are melaleuca and lavender.

(Find recipe here) 

DIY Home Cleaning Products

Multi-Purpose Floor Cleaner

When it comes to cleaning your floors, you don’t need expensive products to do the job. Essential oils are great at cleaning up the dirt while leaving a refreshing, clean aroma in the air. Cleaning your floors with essential oils is completely safe, non-toxic, frugal, and easy!

The beauty of using essential oils on your floors, is that you don’t have to worry about using a specific oil on a specific service. Each essential oil will work on your floors. This recipe works if you have tile, hardwood, linoleum, ceramic, laminate, and vinyl. You can mix any of the oils I recommend above to make this recipe or use one single oil. (Find recipe here) 

DIY Laundry Detergent—$0.02 a Load

I’ve been making my own laundry detergent for years now. I was so scared at first to switch over to natural-homemade detergent because there was this mindset that store-bought is best…store-bought smells better…store-bought makes my clothes fresher. However, when we did our budget makeover, I decided to take homemade detergent into my own hands and come up with a DIY laundry detergent recipe that saves a TON of money. (Find recipe here)

Wool Dryer Balls with Essential Oils

 Wool Dryer Balls from The Paleo MamaSince I have made the switch to using wool dryer balls, instead of dryer sheets, my pocket-book is much happier, and so is my energy bill! I love my wool dryer balls with essential oils and I know you will making the switch too! Here are some of the reasons why you should try these wool dryer balls:

  • They can cut your drying time in half
  • They help reduce static
  • They save you money on your energy bill
  • They are chemical-free, unlike dryer sheets
  • They can be re-used over-and-over again
  • They increase the fluffiness of your clothes
  • They are safe to use with cloth diapers

(Find recipe here)

All of these easy-to-make homemade products would make fantastic holiday gifts for your friends and loved ones. You will have fun making them, and your loved ones will appreciate the efforts you make to prepare gifts offering healthy, economical alternatives to the chemically laden products you can purchase at stores.

Gift Ideas for the Homesteader


Filed Under: Budget, Budget Shopping, DIY, DIY Beauty Recipes, DIY Home Recipes, essential oils, Homesteading, Living Sustainably

The Different Types of Coconut Oil

August 20, 2015 by Jackie Ritz 2 Comments


It’s no secret that coconut oil has been used for centuries in many different ways. There are so many different types of coconut oil, but most of them are 100 percent natural oil, and full of antioxidants and saturated fats—the good ones—that contain medium chain fatty acids (MDFAs) that provide so many good things:

  • MDFAs burn fast and are used as energy
  • MDFAs help to avoid weight gain
  • MDFAs will not raise cholesterol
  • MDFA have no risk of heart attack, strokes, or heart disease
  • MFDAs help to boost the metabolism

At one time it was very popular in the United States. But a strong propaganda campaign in the late 1970s promoted the use of corn oil and soy oil, and spread the message that because coconut oil was high in saturated fat it should be considered harmful for the human body. Fortunately today we understand the good benefits of the saturated fat content of coconut oil, and it is slowly being accepted as the powerfully healthy oil it is.

Coconut oil is used extensively in tropical countries like India, Sri Lanka, Thailand, Jamaica, New Guinea, Samoa, and the Philippines. These countries use it for:

  • Treatment for illnesses
  • Healing for injuries
  • Moisturizer for hair
  • Massage oil for babies
  • Even as a drink to boost the immune system

In this blog post I want to remind you of how healthy coconut oil is for you and your family. There are so many benefits to it, and so many ways to use it. We will take a closer look at some of these benefits and uses.

The Types of Coconut Oil

What kind of coconut oil is best to buy? How do I choose a coconut oil? These are the questions we all have when we begin to add this nutrient to our lives. Today there are many choices when it come to buying coconut oil. Let’s briefly review some of these choices.

There are two basic categories of coconut oil: those that are mass produced and need to be refined, and those that start with fresh coconut and are much less refined. All coconut oil is refined because oil doesn’t grow on a tree…coconuts do.

Virgin Coconut Oil

This is the least refined oil. It is coconut oil produced without starting with dried coconut (called “copra”) that has been removed from the shell and is inedible and needs more refining to produce coconut oil. The types of Virgin Coconut Oils include:

  • Extra-virgin coconut oil—There are no commonly understood or accepted definitions for “extra” virgin coconut oil, as there are in the olive oil industry. It is simply a marketing term and nothing else. 
  • Virgin coconut oil produced using a “wet-milling” process whereby the oil is extracted from fresh coconut meat without drying the meat first. This is the best kind of coconut oil for you!
  • Virgin coconut oil produced by pressing the oil out of dried coconut. This is the most common type of coconut oil found online and in stores today.

Refined Coconut Oil

Copra-based refined coconut oils are called “RBD coconut oils” (refined, bleached, deodorized). The RBD refining process does nothing to alter the fatty acid profile of coconut oil, so all the medium chain fatty acids are kept intact. There are several types of refined coconut oils available:

  • Expeller-pressed coconut oils
  • Hydrogenated coconut oil
  • Liquid coconut oil

As you examine your choices for coconut oil in the market today, your choice will largely be determined by how you intend to use the oil, and your budget. If you want the highest quality virgin coconut oil possible, this chart summarizes what is currently available in the market and rated on a scale of 1 to 10.

types-coconut-oil-rating

The Benefits of Coconut Oil

There really are so many healthful benefits to coconut oil. Because most of us very interested in filling our menus with as much real food and natural and organic products as possible, we have probably begun using coconut oil in our daily menus. It is solid like butter at room temperature, and it doesn’t break down or become rancid like many other oils. It even smells good to most people. 

But there are many other uses as well. Let’s look closer at some of them.

  1. As a cooking oil—It can be used for nearly any cooking use, including stove-top cooking and sauteéing, for stir frying, baking grain-free cookies, muffins, cakes, etc., and even for adding to your smoothies or using it to make home-made, sauces, and desserts.
  2. In coffee or tea—I’d been hearing rumors about people putting butter in their coffee. Supposedly, this is called a Bulletproof Coffee. Why on earth would someone want to put butter in their coffee??? I took the plunge! And I must say, IT IS UN-friggin-BELIEVABLE! It came out frothy, smooth, and filling! I love my coffee in the morning, in fact, it’s one thing I have always said I will never give up. I’ve given up enough in my life…my coffee is staying! 
  3. As part of a daily cleansing and beauty regimen—It can be used making toothpaste or used in oil pulling. It’s a wonderful foundation for my all-purpose healing salve, I add it to the nightly detox bath my kids take, it is great to use in your shampoo or as shave lotion, and it can be used in home-made deodorant.
  4. As nature’s perfect massage oil for babies and infants—Mothers around the world have been using coconut oil to massage their babies for centuries. It prevents so many irritating skin problems in babies, and keeps them soft and smooth as butter. 
  5. To help in weight loss—The medium-chain fatty acids in coconut oil help to get rid of excessive weight. It is easy to digest, and it help your thyroid and endocrine systems operate in good health. It increases the metabolic rate by removing stress on the pancreas, and lets you burn more energy and lose the weight. Many people trying to lose weight made and drink a “weight loss supplement” daily containing coconut oil, raw apple cider vinegar, and honey.

 There are so many additional benefits to coconut oil that I highly recommend you doing your own additional research to discover ways you can incorporate it into your family’s lifestyle. You won’t regret it!

Where to buy coconut oil?

I purchase all my coconut oil through Tropical Traditions. For cooking, I prefer the Gold Label coconut oil, however if you do not like the taste of coconut, then I recommend you get the expeller pressed. For making soap and salves, I like to get the 100% pure coconut oil. 

Different Types of Coconut Oil

Resources

1. https://wellnessmama.com/2072/benefits-of-coconut-oil/

2. https://www.organicfacts.net/health-benefits/oils/health-benefits-of-coconut-oil.html

3. https://coconutoil.com/what-type-of-coconut-oil-is-best-how-to-choose-a-coconut-oil/

Filed Under: DIY, DIY Beauty Recipes, DIY Home Recipes, essential oils, Natural Living, Starting Paleo

Homemade Comfrey Salve

July 23, 2015 by Jackie Ritz 11 Comments


One of my favorite things about my new homestead is our very own comfrey patch. Of course, you don’t need to grow your own comfrey to make a nourishing salve with it. There are several places online that you can purchase dried, organic comfrey leaves to make this simple and homemade comfrey salve. 

Comfrey has been in use as a medicinal herb for more than 200 years. The allantoin content of comfrey aids in healing wounds, sores, burns, swollen tissue, and broken bones. It can be applied externally to bruises, sprains, arthritic bones of any inflamed tissue, and acts as an anti-inflammatory and pain reliever.

**Comfrey should never be taken internally and caution should be taken if using while pregnant.**

Homemade Comfrey Salve 

INGREDIENTS: 

  • 1 cup of dried comfrey leaf or roots (where to buy) 
  • 1/2 cup coconut oil (where to buy)
  • 1/2 cup olive oil (where to buy) 
  • 1/4 cup (2oz) of beeswax (where to buy) 
  • 25 drops of Lavender essential oil (where to buy) 
  • 25 drops of Melaleuca essential oil (where to buy) 

DIRECTIONS: 

  1. Put the coconut oil, beeswax and olive oil in a double boiler. Melt on medium heat. 
  2. Macerate the comfrey into small pieces with a food processor and a small amount of olive oil. 
  3. Add the comfrey and simmer on low for 1 hour if using comfrey leaves and 2 hours if using comfrey roots. Make sure to stir a few times during the process. 
  4. Strain the mixture into a bowl through a cheesecloth making sure to squeeze out all the oil. 
  5. Let cool for a few minutes. 
  6. Add the essential oils and stir.
  7. Pour into a glass or tin jars and store for up to a year! Makes 1 cup!

Homemade Comfrey Salve The Paleo Mama


Filed Under: DIY, DIY Beauty Recipes, essential oils, Homesteading, Living Sustainably

Next Page »

Primary Sidebar

  • Facebook
  • Instagram
  • Pinterest
  • RSS
  • YouTube

Hi, I'm Jackie Ritz and welcome to The Paleo Mama! I'm a published author, certified herbalist, and voracious researcher of natural medicine and nutrition. I'm glad you're here and I hope you stick around for awhile!

Recent Posts

  • When God Says Pause: Why I Took a 5-Year Break from My Online Business
  • How to Quit Facebook but Keep Your Business Profile
  • Leaving the City for the Country
  • Natural Way to Heart Health

MEAL PLANS

Biblically clean meal plans that are for those love to cook real food

Read More

Footer

Our Blog

The Paleo Mama blog provides simple answers for healthier families through research, tutorials, recipes, and simple remedies for daily needs!

  • Health
  • Essential Oils
  • Recipes
  • Remedies
  • Natural Living
  • Meal Plans

Stick around!

You’ll get instant access to a library of natural remedies and real, paleo food, including our ebooks and free guides we send out.

  • Home
  • Disclosure/Disclaimer
  • Privacy Policy
  • Advertise
  • Contact Me

Copyright © 2025 · Wellness Pro on Genesis Framework · WordPress · Log in