• Skip to primary navigation
  • Skip to content
  • Skip to primary sidebar
  • Skip to footer

The Paleo Mama

Homegrown and Handmade

  • About
  • Blog
    • Podcast
  • Meal Plans
  • Essential Oils
  • Our Farm
    • Great Pyrenees Puppies
    • Goats
      • Goats for Sale
      • Goat Sales Policy
      • Nigerian Dwarf Bucks
        • Ranchocabra Lunar Eclipse

chickens

Souping – A Healthier Alternative to Juicing

October 27, 2016 by Jackie Ritz Leave a Comment


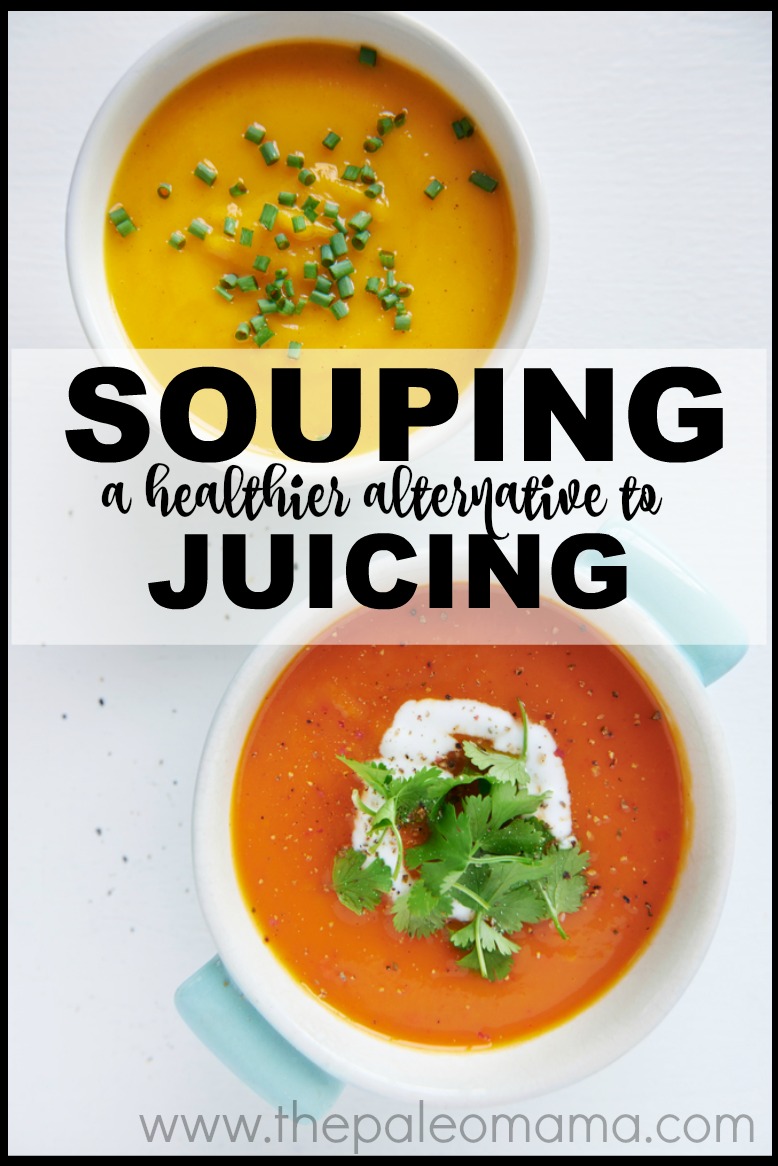
For years the best-known body system cleanse has been juicing. Juicing involves extracting the juice from fruits and vegetables using a cold-press juicer. The juice is loaded with vitamins, minerals, antioxidants, anti-inflammatory compounds and phytonutrients all in one easy drink. Juice cleanses have been widely used to cleanse the body and often are suggested as a sporadic fast of several days detox the body and kick start body systems into optimal function. But there have been negatives to juicing, including: the high cost of the fruits and vegetables as well as the expensive juicer you need to prepare the juices; negative symptoms like dizziness, headaches, weakness, and overwhelming hunger; and the high sugar/low fiber content of the juices after pressing.

What Is Souping?

Let’s start with this definition for souping:

It is a soup-only cleanse to heal and nourish your body with wholesome ingredients. It allows your body to detox naturally while simultaneously reducing inflammation, giving your body the nutrients it needs, and increasing circulation.[1]

Today many people have found juice cleanses to be too extreme, and are discovering that souping promises an easier detox than a juice cleanse. Just as there are many different approaches to juicing, so too there are many suggested approaches for souping. These include:

  • A 24-hour raw cleanse
  • A 3-day boost to your digestive system cleanse
  • The 5-day soup cleanse,
  • Following a prescribed program of specific soups
  • Choosing or making the soups you use for the cleanse

Each of these approaches share one common feature—you eat only soup for every meal of the day, and you follow this regimen for a chosen number of days.

I can easily see why souping is growing in popularity. There is nothing more soothing to me than a warm, tasty, homemade soup made with homemade bone broth (recipe here).  I want to take a closer look at this newer trend, and see if we can see what all the excitement is about!

What’s Healthier: Souping or Juicing?

Which is healthier is somewhat of a preference choice of the individual considering a cleanse. There are benefits and downsides to both. Take a look at some of the qualities of each in the table below: 

Souping Juicing
Offers variety Raw only product
Can be served in hot, warm or cold Served fresh (cold)
Contains fiber Almost no fiber, very high in carbohydrates and sugar
Contains proteins Enormous amounts of vitamins and minerals
Made from: fruits, vegetables, legumes, and even meat Made from vegetables and fruits only
More effective in suppressing hunger Easier to digest
More appropriate for long-term cleanses More appropriate for short-term cleanses
Lower in calories Higher in calories

Many people find that souping is more economical—if you are making your own soups. If you have tried juicing in the past, no doubt you’ve discovered that it takes a lot of fresh fruits and vegetables to get only a couple glasses of juice. Soups are really inexpensive to make, and you don’t need an expensive piece of equipment to make soup. In addition, you can store your soup in the fridge for several days, and for months in the freezer. Soups will not leave you feeling hungry, and you can use a wide variety of herbs, spices, and broth to make your soup.

How Many Days Do I Stay on the Soup Cleanse

There are a number of Soup Cleanse Programs that provide the soups you use and prescribe the number of days you stay on them, including:

  1. Splendid Spoon Soup Cleanse 
  2. Soupure 
  3. Dr. Oz’s 3-Day Souping Detox 
  4. Soupelina 
  5. Café West Express 

While these canned programs are handy to use and provide you with low calorie, low sodium, fiber-rich soups, you will find that they are pretty expensive to use. Since making soup is so easy, it is my recommendation that you take the plunge into making your own great tasting and often healthier homemade soups to use.

If you are making your own soups, and not following a Soup Cleanse Program the number of days you continue eating soups is up to you. However, like any other low-calorie plan, it is not advised that you eat only soups for more than a week or so.

What Kinds of Soup Do I Use?

Soup cleanses uses vegetables that are super low on the glycemic scale, which are also packed with fiber. Great veggies to include are: onions, beets, carrots, cauliflower, spinach, and dark, leafy greens and root vegetables. You can add fruits, legumes, and even meat, but this will raise the calorie count, so only 2-4 ounces of protein or legumes are recommended for each serving of soup.

The options are wide open for what you should include in your detox soup. You will want to use the healthiest, freshest ingredients possible. Stay away from any creamed soups, soups loaded with things like beans and beef (think chili), and soups filled with complex carbohydrates like root vegetables. Don’t add any grains (pasta, noodles) to your detox soups.

You can find many recipes for detox soups online. Note: One very important recommendation from me: Use only homemade bone broth as the base for your soups. Some of the variety of soups include:

  1. Vegetable only soup—There are dozens of good vegetable soup recipes online. One that you might want to consider can be found here. 
  2. Chicken Detox Soup—Chicken soup is loved by almost everyone, and it really doesn’t take a recipe to make. I love using my homemade bone broth, and throwing it into my slow cooker with some carrots, celery, maybe some onion, and my favorite spices (parsley, basil, rosemary, turmeric). But if you prefer to use a recipe, here is one that makes a great chicken detox soup. 
  3. Vegetarian Hot and Sour Soup—Traditionally this soup is made with pork or beef. I recommend using chicken or portabello mushrooms instead. You can find a recipe here.
  4. Potassium Balancing Soup—Potassium is one nutrient that can be lacking in a diet. This detox soup pays extra attention to it, and can bring it back into balance.
  5. Detox Green Machine Soup—This soup is all vegetables and herbs blanched, then pureed into a healthy, low-cal, detoxifying soup. (Here) 
  6. Carrot, Cumin and Ginger Detox Soup—Carrots are a good source of antioxidant Vitamin A and fiber. Cumin and ginger have curative properties and act as a cleansing agent for the body. You will find the recipe here. 

Why Should I Consider a Soup Cleanse?

Are feeling lethargic and fuzzy-headed? Have you gradually slipped off the healthy eating wagon and fell into a habit of eating unhealthy “Comfort” foods? Do you want to get healthier and to live a longer, more vibrant life? Are you trying to heal a chronic condition? Then cleansing is essential to your health and longevity. There are so many benefits to cleansing, including:

  • More energy
  • Healthier hair, skin and nails
  • Less frequent colds and flu
  • Reduced risk for chronic disease
  • Mental clarity and a sense of wellbeing
  • Freedom from food cravings
  • Freedom from joint and muscle pain and headaches
  • Sound and restful sleep
  • No more digestive distress
  • Enhanced libido
  • A much younger and more energetic body[2]

My Favorite Soup Recipes

I want to help you get started by sharing three of my favorite soup recipes. These will get you started, and are inexpensive and easy to make. Try them—you will like them!

1. Homemade Bone Broth

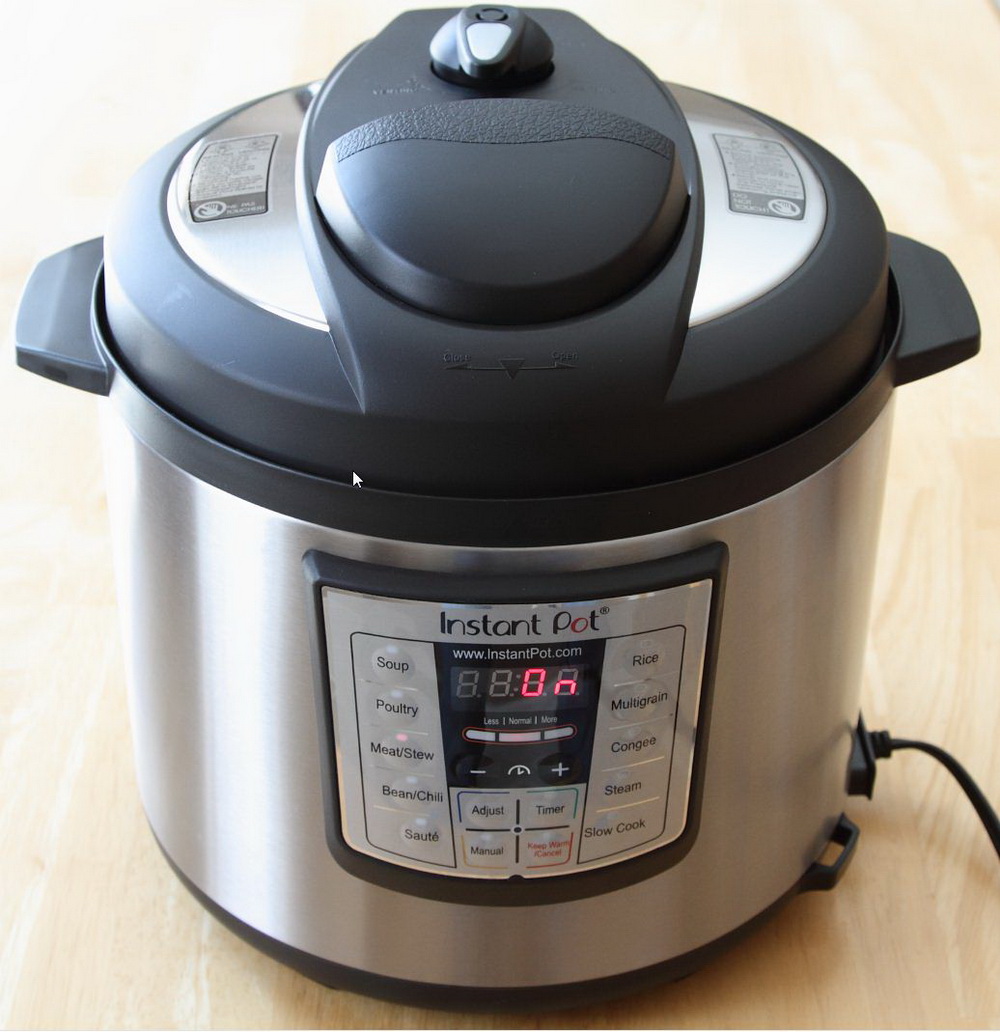
Homemade bone broth will be the base for just about any detox soup you make. I am absolutely passionate about making bone broth, and I make it at least once a week, using the bones from our own harvested chickens, or bones I’ve begged or purchased from neighbors, farm stands, farmer’s markets, and have even been known to beg for them from restaurants. I use either my slow cooker or instant pot to make the soup, which actually makes itself—all I have to do is throw the ingredients into the pot.

Items Needed

  • Slow cooker or Instant Pot (the instant pot is my preferred method now)
  • Approximately 2-3  good quality, organic bones (beef, pork, chicken, turkey, etc)
  • 1-2 Tbsp. of raw, apple cider vinegar (like this one) 
  • Vegetable scraps: I use 1 onion, 1 celery stalk, 1 carrot, 3 cloves garlic, 1 in knob of ginger, handful of herbs, salt and pepper

Instructions for Slow Cooker: 

Turn your slow cooker to high. Add your bones and vegetable scraps. Add raw apple cider vinegar (vinegar helps to extract minerals from the bones, but can alter the taste of the broth, so go easy with it). Add water to cover the bones, leaving about 1 inch of room at the top. Let it cook for 24 hours at least—48 hours or longer is ideal.

Allow it to cool a bit, and then pour it through a strainer and allow to cool fully. If you’ve used a lot of bones, your broth will gel in the fridge, but don’t fret if it doesn’t gel.

Instructions for Instant Pot (preferred method): 

Add your bones, 1 carrot, 1 celery stalk, onion, ginger, and apple cider vinegar to your Instant Pot. Add water to cover the bones. Press the “soup” button and adjust the time to 90 minutes. Allow it to naturally release. Cool for a little bit and pour it through a strainer and allow to cool fully. If you used a lot of bones, your broth will gel in the fridge, but don’t fret if it doesn’t gel (mine always gels in my Instant Pot…never in my Slow cooker). 

2. Homemade Chicken Vegetable Soup

There is nothing better than homemade chicken soup to soothe a cold or sniffles or to gobble up on a cold, blustery day. My homemade Chicken Vegetable Soup is adapted to the combination of spices and vegetables that my family loves. You can specialize it to your own preferences for your detox soup.

Ingredients

  • 4-5 cups of homemade chicken bone broth
  • 2-3 lbs. cut up or shredded chicken (we often use leftovers)
  • 2-3 cups carrots, chopped
  • 1-2 cups celery, chopped
  • ½ cup onion, chopped
  • 1 tsp, ginger, grated (or use ½ tsp. ginger spice)
  • 3-4 cloves garlic, minced
  • ½ Tbsp. basil
  • ½ Tbsp. parsley
  • 1 tsp. turmeric
  • Salt and pepper to taste
  • About 3-4 cups water

Instructions

Put your chicken broth in a crock pot and add your chopped vegetables and spices. Add water to cover your ingredients and leave an inch of water or so above the ingredients (depends on how juicy you want your soup). Cover the crock pot and cook on high for 4-5 hours, or low for 6-8 hours. Remove the chicken and shred it (if it wasn’t already shredded). Add it back to the crock pot and cook on low an additional hour. Adjust the salt and pepper before you serve it.

3. Homemade Turkey Soup

I love having enough leftover turkey after a great Thanksgiving meal to make some homemade turkey soup. My mother made sure she bought the biggest turkey available, and make turkey broth the day before Thanksgiving so she could throw the soup together right from the Thanksgiving table. I recommend my homemade turkey soup for anytime—not only during the holidays.

Ingredients

  • 1 gallon homemade turkey stock
  • 1 Tbsp. parsley
  • 1 Tbsp. pepper
  • 1 Tbsp. Himalayan sea salt
  • 1 tsp. oregano
  • 1 tsp. sage
  • 1 tsp. garlic salt
  • 1 tsp. poultry seasoning.
  • 1 lb. sliced or diced carrots
  • 1 bunch cut-up celery
  • At least 2 cups reserved turkey

Instructions

Put turkey stock in crock pot. Add spices and cut up vegetables. Mix well into stock. Cook on low 3-4 hours. Add reserved turkey pieces (cut into bite size pieces), and continue cooking 1-2 more hours. Taste and adjust seasoning as needed. This makes a great detox soup, and it freezes well.

Get Started

So…is the new trend of souping something you want to try. It is a pretty flexible plan, and you can make your choices of nutritious, low-calorie soups. Research online to find some of the best recipes you can for your family. You can soup cleanse for 3-7 days, eating only soups for each meal, or you can choose to eliminate one meal and substitute soup. Be sure that you are consuming only the most nutritious, healthy soups and/or other meal items. Be sure you drink lots of water while you are on the cleanse. This will help to move the toxins out of your body. I guarantee that when you finish, the negative symptoms that made you begin will be gone! 

Try it—you will like it.

souping an alternative to juicing

[1] https://www.harpersbazaar.com/beauty/diet-fitness/a14306/everything-you-need-to-know-about-souping/

[2] https://bodyecology.com/articles/your_body_needs_to_cleanse_pt2.php


Filed Under: 21 Day Sugar Detox, Budget, chickens, Grassfed Beef, Health, Homesteading, Ketogentic, Living Sustainably, My Recipes

What’s the Difference Between Duck Eggs & Chicken Eggs?

June 11, 2016 by Jackie Ritz 1 Comment

We have a daily supply of both chicken eggs and duck eggs from our barnyard critters. We have several Silver Appleyard Heritage Breed ducks that lay lots of large white eggs for us. We also have lots of heritage breed chicken who happily free range around our barnyard and leave us dozens of multi-colored eggs daily. We love both, and are often asked what the difference is between the two. I want to give you a few facts about duck eggs vs chicken eggs in this blog post. Let me try to answer these questions in this blog:

  • How do they compare nutritionally?
  • What are the benefits of eating each type egg?
  • How do they differ in taste?
  • How do I use duck eggs in cooking?

How do they compare nutritionally?

Here is a simple chart that compares the eggs nutritionally:

Facts Chicken Eggs (Large) Duck Eggs
Calories 71 130
Total Fat 5 g. 10 g.
Cholesterol 211 mg. 619 mg.
Sodium 70 mg. 102 mg.
Total Carbohydrates 0 g. 1 g.
Protein 6 g. 9 g.

 When it comes to comparing other nutrients like vitamins and minerals, the same rule applies to both eggs: it depends on what the bird eats. As a general rule, both chicken and duck eggs offer vitamin A, vitamin B-12, vitamins D and E, and selenium and iron. Duck eggs have more Omega 3 fatty acids, and are an alkaline-producing food. Chicken eggs are an acid food.

Ducks or chickens that are fed poultry food will not be as healthy, or provide as many nutrients, as those that are allowed to free range and forage things like algae, weeds, and grass. That is the main reason why I am totally confident in saying that barnyard duck and chicken eggs are so much healthier to eat than those you could get at your local supermarket.

What are the benefits of eating each type egg?

Duck

I want to give you some of the benefits of eating either duck or chicken eggs. Generally the benefits are similar, but there are some differences, which I’ll list. Because I am all about pastured poultry, the benefits I’m listing are related to pasture-raised poultry. For me, these benefits far outweigh any you can get from farm-raised, supermarket quality eggs. Here are some of the main benefits:

  • Both duck and chicken eggs contain healthy Omega-3 fats. These fats contribute to heart health, normalize and regulate your cholesterol triglyceride levels, aid healthy brain function, and give support against autoimmune disorders, arthritis, and cancer.
  • Pasture-raised poultry have significantly higher vitamin E content in their eggs. Vitamin E provides protection against toxins in the air, eye disorders, neurological diseases, and provide benefits for your skin and hair care.
  • Both duck and chicken eggs provide protein with high biological value (HBV). They provide a complete range of amino acids, and are considered a “complete protein.”
  • Because duck eggs generally have a thicker shell, they will stay fresher longer.   
  • People who cannot eat chicken eggs due to allergies can often eat duck eggs.

There are so many overall benefits to eating either duck or chicken eggs that I consider them an important part of my family’s daily menu plan. We love our barnyard critters for the beautiful, healthy eggs they continue to give us, and there are many times when we would choose to eat an egg over anything else.

How do duck eggs and chicken eggs differ in taste?

Laura_Coppelman_-4282

There really is not a lot of difference in the taste between a duck egg and a chicken egg. Duck eggs tend to be a bit more intense in taste than a chicken egg because of what a duck eats. They prefer to eat bugs, snails, slugs, and other high-protein critters over plant matter, and that diet impacts the flavor of their eggs.

How do I use duck eggs in cooking?

You can use duck eggs just the same as you use chicken eggs generally. But because there is a higher protein content in duck eggs, you need to be sure you are not overcooking them and turning them rubbery. Here are a few of my favorite ways to cook with duck eggs.

  • Hardboiled duck eggs—Place your duck eggs in a pot, cover with cold water, and bring to a boil. As soon as the water boils, remove the pot from the heat and let it stand for 12 minutes. Drain the eggs and shake the pan vigorously to crack the shell, this lets them cool faster and prevent overcooking. Cover with cold water and ice and let them cool before you peel them.
  • Fried duck eggs—I fry my duck eggs just like chicken eggs. They tend to stay more compact and thicker, so they take a bit longer to fry through.
  • Baking with duck eggs—I love using duck eggs in cakes, pies, cookies, custards, and other baked items. The white of duck eggs have more protein and will whip up higher, giving you lighter, taller baked goods. If the duck eggs you are using are much larger than your normal chicken eggs, try using 2 duck eggs when a recipe calls for 3 chicken eggs.

Three Duck Egg Recipes

I want to give you three recipes for using duck eggs. If you just try out these recipes, I’m sure you will want to continue cooking with duck eggs whenever you can. Not only are they an excellent source of healthy nutrition, they are also so tasty!

1. Homemade Duck Egg Mayo—

If you think homemade mayo using chicken eggs is delicious, just wait until you taste this homemade mayo using duck eggs. There are many different methods for making homemade mayo, but the one I like best makes use of my immersion blender. I find it easier and faster, and the mayo thick and creamy when it’s done.

Ingredients: 1 large duck egg, juice of half a lemon (about 1 TBSP), about a half teaspoon of Dijon or whole-grain mustard, ½ tsp sea salt, and ¼ tsp. white pepper, 1 cup light olive oil (or perhaps ½ cup extra virgin olive oil and ½ cup avocado oil).

Directions: Put all the ingredients is a wide mouth Mason jar. Let the ingredients sit while the oils rise to the top. Put your immersion blender in the jar sitting firmly on the bottom. Without raising it, turn it on high so the mayo will begin to emulsify. Once it starts to look like real mayo (less than a minute) you can move the immersion blender up and down to mix in any oil not yet emulsified. Place your thick, delicious mayo in a covered jar and keep in the refrigerator. It will last about one week.

2. Duck Egg Crustless Quiche—

We love to use our homegrown veggies, raw milk and duck eggs in a delicious quiche. We serve these for just about any meal, and the recipe can vary depending on what garden veggies we have available at the time.

Basic Ingredients: 3-4 duck eggs, about 1 ½ cups raw goat or cow milk, about a cup of homemade goat milk mozzarella cheese, sea salt and pepper to taste. Optional ingredients: freshly harvested Kale, Spinach or Chard, diced freshly harvested tomatoes, green onions, Shitake mushrooms just picked, fresh herbs.

Directions: Preheat the oven to 400 degrees. Beat the eggs, beat in the milk and stir in the cheese and salt and pepper, Stir in any of your optional fillings. Lightly grease a casserole dish. Bake about 20-30 minutes, removing the quiche when it is firm in the middle and the edges are just starting to brown. Let it sit a few minutes while you set the table and call your family, then slide a knife around the edges, slice and serve.

3. Garden Veggie and Duck Egg Breakfast Muffins—

Here’s another really good way to use your garden veggies and duck eggs in a breakfast muffin. You can vary the veggies according to what you have freshly harvested.

Ingredients: 1 ½ cups garden veggies (zucchini, summer squash, eggplant, spinach, kale), 2 Shitake mushrooms, diced (other mushrooms are fine), about ⅓ cup fresh juice from your garden tomatoes (or sauce you have already made), 6 duck eggs, fresh herbs (basil, parsley, rosemary, etc.), sea salt to taste.

Directions: Preheat the oven to 350 degrees. Use 6 extra-large muffin cups (I like to use a silicone muffin pan). Fill the muffin cups about ⅓ full with a diced mixture of the veggies and mushrooms. Put a teaspoon of the tomato juice or sauce on top of the veggie mix. Crack a duck egg on top of each muffin cup. Season the egg with some dried herbs and sea salt. Bake for 15 minutes or until the whites are set and the yokes partially baked. Remove from oven and let sit a couple minutes. You can serve these warm or cold. Store your leftovers in a covered container in the fridge.

I know you are going to discover that duck eggs are an awesome treat…kind of a ramped-up version of chicken eggs. We love our duck eggs, and think you will too.

Duck Eggs Vs Chicken Eggs

Sources

  1. https://countrysidenetwork.com/daily/poultry/eggs-meat/egg-facts-duck-eggs-vs-chicken-eggs/
  2. https://articles.mercola.com/omega-3.aspx
  3. https://modernfarmer.com/2015/06/everything-you-need-to-know-about-duck-eggs/


Filed Under: chickens, Homesteading

How To Peel Farm Fresh Eggs

December 14, 2015 by Jackie Ritz 11 Comments

Y’all. I gave up on eggs about a year ago. My 25 free-range chickens do an amazing job at giving us the BEST and most delicious farm fresh eggs. I mean BEE YOU TIFUL. However, have you ever tried to peel eggs that come straight from a farm? Eggs that were laid that very morning and collected by eager hands in the afternoon? 

It’s impossible. 

I have tried EVERYTHING. Every, single method was a big fat fail. 

Yes, I tried baking soda. Yes, I tried cold water bath. Yes, I tried boiling and then removing from the stove for 15 minutes with a lid on and then tossed in a ice water. I tried vinegar. I tried it all. 

Then a miracle happened. 

It’s called a Instant Pot. It’s called a gift from heaven above. It’s called redemption!

So, if you haven’t purchased an Instant Pot then you are missing out on SOOOOO much. 

An Instant Pot is a pressure cooker, yogurt maker, slow cooker, rice cooker, steamer…..it’s a gift from God, my friends. And, no, it’s not your mama’s pressure cooker. An Instant Pot is smaller than most slow cookers. 

I thought it was too good to be true, but after a few months of using it to boil my farm fresh eggs, I have a 100% success rate. AND, all my eggs come out perfectly peeled when before they looked like something out of a horror movie. 

How to Peel Farm Fresh Eggs (and cook them): 

Step #1: Buy an Instant Pot. There’s no way around this…just buy it! I use mine 7x a week now! 

Step #2: Pour 1 cup of water into the Instant Pot. Leave the trivet in the pot. 

Step #3: Place 10-12 room temperature eggs on top of the trivet. 

Step #4: Secure the lid. Push the “steam” button and adjust time to 5 minutes. 

Step #5: When the Instant Pot beeps at the end of 5 minutes, use the quick release technique and allow all the steam to release through the valve. 

Step #6: Place eggs in a cold water bath with some ice for a few minutes. 

Step #7: Peel in peace without butchering your beautiful eggs! 

How to peel farm fresh eggs

Filed Under: chickens, Homesteading, Living Sustainably

The Deep Litter Method for Your Winter Chicken Coop

October 17, 2015 by Jackie Ritz 7 Comments

If you’ve been following me online, you already know that during the last six months or so I’ve been decluttering our home and farm using the KonMari Method (HERE) for simplifying, organizing, and storing only those things that “spark joy” for us. It’s been a real eye-opening time, and we’ve gotten rid of tons of stuff! SO…this post on The Deep Litter Method for your winter chicken coop may at first sound like an oxymoron! But I assure you it isn’t—what it is is one of the easiest and healthiest ways to prepare your chicken coop for the cold winter months.

You see, my chickens are a real source of joy for us and make the perfect pet. We are raising heritage breeds, and thoroughly enjoying the ability to help protect these endangered breeds, as well as being thrilled with the dozens and dozens of eggs they give us, and the tasty chicken meals we are able to have from their gift of life to us when needed. Taking the best care of them at all times is our prime goal—especially during the cold months of our North Carolina winters.

The deep litter method allows your coop litter to build up over a period of time. As the chicken manure and bedding litter compost, it helps to heat the coop, keeping your chickens warmer. This is also called “The Old-Timers Method,” because it’s been used successfully by many chicken farmers for decades. And an added benefit (“joy” for us KonMari followers) is lots of beautiful compost for our spring gardens.

Let’s take a look at these things:

  • Preparing Your Coop for the winterizing Deep Litter Method
  • Managing the Deep Litter method in your coop through the winter months
  • Doing spring cleaning of your coop when winter ends
  • The Benefits of the Deep Litter Method

1. Preparing Your Coop for the Winterizing Deep Litter Method

You prepare your coop for the winter months by beginning with a deep cleaning. Pick a nice, sunny day and shovel out all the soiled straw and litter in the coop. This is also a great time to check the exterior of the coop for loose screws, hinges, shingles and to make any repairs necessary before winter.

Once your coop is cleaned thoroughly, put a fresh 6-inch layer of pine shavings down on the bare floor. This is the best bottom layer for the Deep Layer Method because they are small and will compost fairly quickly. Put a thin layer of straw over the shavings. Note: Do not use Diatomaceous Earth (DE) for this method. It will kill the good microbes and just is not beneficial to have in your composted soil.

Now you begin deep littering. Each morning turn over the pine shaving and straw, adding more straw as needed until you have a 12-inch layer. You are not removing anything, simply turning it over to expose new straw. You can also add leaves, grass clippings, and weeds during this initial preparation period. You may need to add a 12-inch board at the door of your coop to keep the litter inside for the winter.

Chicken manure is very high in nitrogen.  Mixing it with a source of carbon (either straw, shavings or dry leaves) will balance the mixture and hasten the rate of decomposition.  It is important that your composting material contain oxygen, so turning is crucial. Fortunately the hens will help you with that part, especially if you get in the habit of tossing some scratch or sunflower seeds into the coop for them before bedtime. They will learn to scratch through the litter to find the scratch when they wake up in the morning.  You can also turn the material with a rake. The turning and introduction of oxygen will reduce the chance of ammonia buildup.

After just a few weeks, the droppings, shavings and straw will start to decompose and you will end up with a fine dirt on the bottom.  As anyone who composts for their garden knows, when properly done, composting does NOT smell and does generate quite a bit of natural heat.  This is the same idea as you would do in a compost pile or bin, you’re just doing it inside your coop!

2. Managing the Deep Litter method in your coop through the winter months

Once you have your healthy 12-inch layer of litter on your coop floor, you are set for the winter months. You will need to follow some simple steps to keep your chicken coop in good health throughout the winter:

  • Stir up the bedding to break up any clumps every few days.
  • Keep layering clean bedding on top of the old bedding or any moist spots.
  • To keep your girls happily scratching, toss in a bit of chicken feed when you layer in the fresh straw.
  • If the floor becomes frozen (only in very cold climates), break it up with a pitchfork so your girls can begin scratching again.
  • You should be able to kneel down on the floor and your knees should remain dry.

3. Doing spring cleaning of your coop when winter ends

Your perfect opportunity for decluttering your chicken coop will come with the entrance of spring. Now you get to do your thorough spring cleaning in the chicken coop. Clean out most—not all—of the litter. Leave a base layer (1-2 inches) to inoculate new material with the established beneficial microbes.

As with any decluttering of junk (in this case poop) it’s not fast, easy or fun. It’ll take quite a while to shovel out 1-2 feet of poop encrusted litter. So, with each scoop of poop, just remind yourself that these few hours of pain make the long winter months so much more tolerable for you.

If the litter you remove is thoroughly decomposed and odorless, you can work it directly into your garden beds. If some of the fresher manure hasn’t thoroughly decomposed, simply add it to your other compost pile. If you want to speed up the composting process by helping to keep the compost pile hot, try some Chicken Poop Tea! To make the tea, just fill a couple of buckets half full of water, and then add in the poop until the buckets are full. Stir frequently—holding your nose–and keep the buckets covered. Your chicken poop tea is extremely strong, and should not be applied directly to your garden plants. Use it to keep your compost pile doing its thing—composting.

4. The Benefits of the Deep Litter Method

By now you understand the reasons why using the Deep Litter Method during the winter months is a win-win solution for your chicken’s health and happiness. So let me just finish by listing the main benefits for using this method.

  • It is the most natural and most rational method for manure management.
  • It brings winter happiness to the chicken owner because it lessens the need to do cold weather cleaning of coop.
  • It relieves winter boredom for the chickens who love having a place that is warm and safe, and which allows them to scratch around endlessly in the deep litter floor.
  • The microbial action in the litter turns a potentially disease-causing problem into a substrate for health—studies have shown that this method has positive feeding benefits.
  • The deep organic duff insulates the floor of the coop, while the warmth of its decomposition moderates the chill.
  • Finally, this process captures the fertility in the manure for soil building in your spring garden—the key to food self-sufficiency.

Need I say more? I love the Deep Litter Method of sparking joy for both my chickens and for me. No oxymoron here! 

The Deep Litter Method for Your Winter Chicken Coop

Sources:

  1. https://www.backyardchickens.com/a/deep-litter-method-the-easiest-way-to-deal-with-chicken-litter-dlm
  2. https://www.fresheggsdaily.com/2012/02/deep-litter-methodcoop-cleaning.html
  3. https://www.grit.com/animals/chicken-health-deep-litter-zm0z13jazgou.aspx?PageId=6
  4. https://www.motherearthnews.com/homesteading-and-livestock/deep-litter-method-zb0z1208zmat.aspx
  5. https://chickenjunkie.com/chicken-coops/cleaning-the-coop/chicken-poop-control-the-deep-litter-method/


Filed Under: chickens, Homesteading, Living Sustainably

Primary Sidebar

  • Facebook
  • Instagram
  • Pinterest
  • RSS
  • YouTube

Hi, I'm Jackie Ritz and welcome to The Paleo Mama! I'm a published author, certified herbalist, and voracious researcher of natural medicine and nutrition. I'm glad you're here and I hope you stick around for awhile!

Recent Posts

  • When God Says Pause: Why I Took a 5-Year Break from My Online Business
  • How to Quit Facebook but Keep Your Business Profile
  • Leaving the City for the Country
  • Natural Way to Heart Health

MEAL PLANS

Biblically clean meal plans that are for those love to cook real food

Read More

Footer

Our Blog

The Paleo Mama blog provides simple answers for healthier families through research, tutorials, recipes, and simple remedies for daily needs!

  • Health
  • Essential Oils
  • Recipes
  • Remedies
  • Natural Living
  • Meal Plans

Stick around!

You’ll get instant access to a library of natural remedies and real, paleo food, including our ebooks and free guides we send out.

  • Home
  • Disclosure/Disclaimer
  • Privacy Policy
  • Advertise
  • Contact Me

Copyright © 2025 · Wellness Pro on Genesis Framework · WordPress · Log in