• Skip to primary navigation
  • Skip to content
  • Skip to primary sidebar
  • Skip to footer

The Paleo Mama

Homegrown and Handmade

  • About
  • Blog
    • Podcast
  • Meal Plans
  • Essential Oils
  • Our Farm
    • Great Pyrenees Puppies
    • Goats
      • Goats for Sale
      • Goat Sales Policy
      • Nigerian Dwarf Bucks
        • Ranchocabra Lunar Eclipse

beekeeping

25 Ways to Use Beeswax

November 18, 2015 by Jackie Ritz 6 Comments

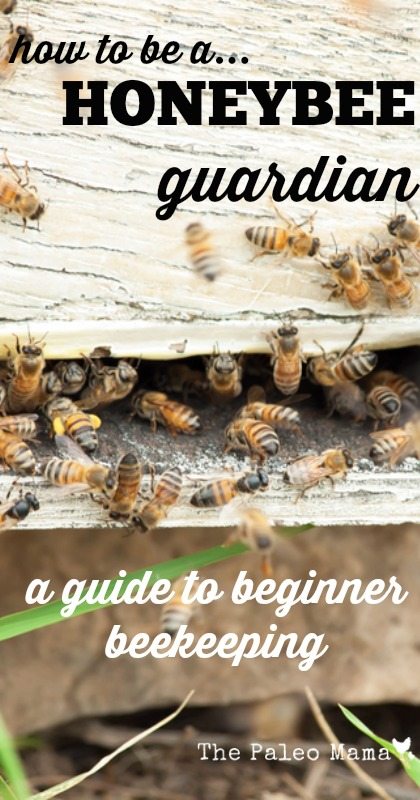
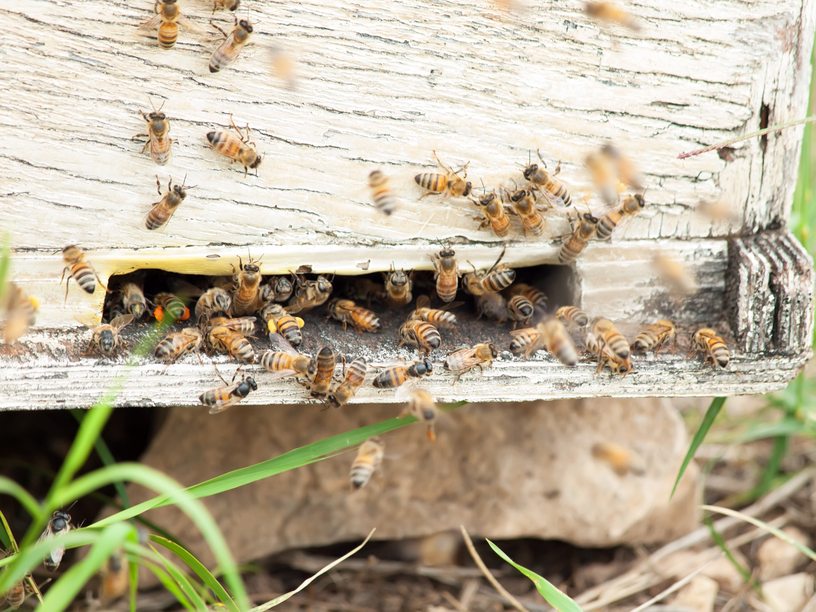
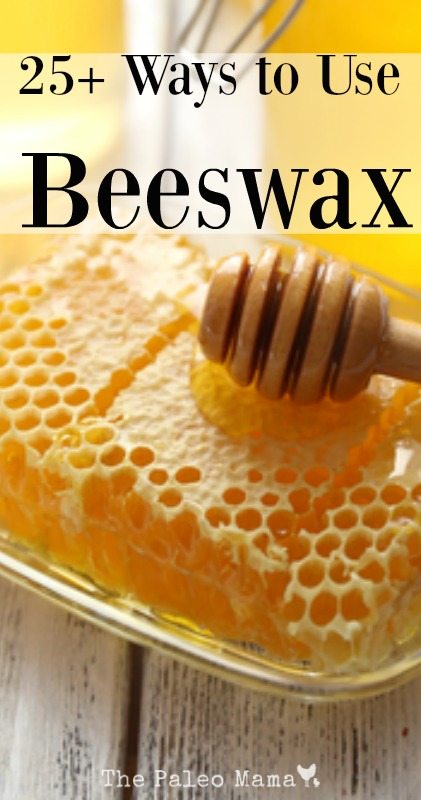
Recently after moving onto our farm, we harvested our first honey from the five established honeybee hives already there. (You can read about our first experience here.)  It was so exciting to find that we had several gallons of pure, sweet honey just waiting for us. But I’m not sure if I was more excited about the honey or about the beautiful beeswax that came with the honey! One of the great benefits of raising honeybees is the awesome potential of the many homemade uses you can find for the beeswax the honeybees produce to build their honeycombs. These 25 ways to use beeswax should keep you busy and give you lots of ideas for homemade gifts! 

There are dozens and dozens of uses for beeswax. In this blog post I want to tell you about twenty or so of my favorite uses. I’ll include the following:

  1. Basic Information About Beeswax
  2. Great Uses for Beeswax Around the House and Garden
  3. Beeswax Is a Great Helper in the Kitchen
  4. Using Beeswax in Homemade Health and Beauty Products
  5. Beeswax Products You Can Make for Your Children

1. Basic Information About Beeswax

Bees

Only honeybees make beeswax. Honey bees make six-sided cells that are space-efficient and the best shape to accommodate a round, growing honey bee larva. To make comb, the bees remove the bits of wax called “wax scales” from the undersides of their abdomen and chew and mold them into place. The production of beeswax is stimulated when there is a great supply of flower nectar such as when clover and alfalfa bloom. Bees do not build comb before it is needed. Pollen is the adult honey bee’s source of protein and they collect it in great quantity. The gums and resins, which beekeepers call “propolis,” are used to varnish the inside of the bee’s nest. 

Beeswax has been used since the beginning of civilization. It has been found in the pharaohs’ tombs, in sunken Viking ships, and Roman ruins. Beeswax is virtually the duct tape of old, with thousands of uses and being virtually indispensable.

Pure beeswax is solid at room temperature. It will have a putty-like consistency above 80-90 degrees F, and will melt around 145-147 degrees F. It never goes bad, but does get a powder called bloom on it when stored at cooler temperatures. A blow drier will remove the bloom, or you can use a soft rag to buff the bloom off. You can wrap it in plastic to prevent dust, dirt and fuzz sticking to it.

2. Great Uses for Beeswax Around the House and Garden

There are many ways you can use beeswax around the house for maintenance and to enhance the environment. I want to give you a few ideas that may be things you’d like to try.

Candles—We love our homemade beeswax candles to much that, of course, that is the first idea I want to pass on to you. We love the ambiance they give, and the wonderful scents we can create with the natural pleasant odor of the beeswax mixed with our favorite essential oils. There’s nothing better than sitting down with the family in the evening, lighting our beeswax candles, pouring some chamomile tea with raw honey and watching our favorite TV show, Little House on the Prarie. I’ll be sharing my own recipe for making these candles soon, but here is a link to an easy recipe you can try.  

Grafting wax—Gardeners have been using beeswax for grafting two plants together for hundreds of years. Beeswax is non-toxic, and does not deteriorate, lasting for the months necessary to allow the plants to grow together. You can find a simple formula for making grafting wax here. 

Waxing thread—It is a big advantage to keep a small cake of beeswax in your sewing box. If you wax the thread before you use it, not only is it easier to thread the needle, but it will also keep your thread from knotting up as you use it.

Oiling furniture joints—Beeswax is a great lubricant for those squeaky furniture joints. It is great for helping your doors and window to move smoothly, and so much healthier for your environment that the chemical products available.

Preventing rust—Coat your hand tools, cast iron, and shovels with beeswax to keep them from rusting. You can even rub the beeswax on the handles of your tools to protect them against wear and tear.

Homemade furniture polish—Beeswax is a fantastic furniture polisher. Melt 1 TBSP. of grated beeswax with 3 TBSP. of coconut oil. When this cools and hardens, use a clean cloth to rub it onto your wood furniture. Buff with a soft clean cloth until all the residue is removed.

2. Beeswax Is a Great Helper in the Kitchen

Granite polisher—Do you love your granite countertops but hate the dinghy look they have after hard use? Polish them with molten beeswax, wiped on and allowed to dry, then wiped off with a suede piece of cloth.

Grease-free baking pans—Keep a block of beeswax ready to use to rub over your baking pans and cookie sheets before using. Beeswax is completely edible, so this is perfectly safe. Over time you pans will take on a permanent coat of wax, eliminating the need to grease them every time.

Cleaning your iron—When your iron starts to get gummy or scorched, you can make a homemade iron cleaner with beeswax that is chemical-free, economical and sustainable. You will find a tutorial for making it here.

Cheese waxing—If you, like me, like to make your own cheeses, beeswax is the best natural cover for cheeses. When your cheese has completely dried, you can apply hot wax, which ensure a proper seal for your cheese. Beeswax works well for this because it has a low melting point.

Using beeswax to help in plucking poultry—OK, I’m including this one because I have a homesteading kitchen! Beeswax is a great help in defeathering and removing down from your poultry. You will find a video on how to pluck a duck using beeswax here. 

Barbecuing with beeswax—Whether you have an outdoor grill or a stove-top indoor grill, coating your grill with beeswax before using it makes clean up a whole lot easier.

3. Using Beeswax in Homemade Health and Beauty Products

Beeswax locks in moisture, protects skin from environmental factors, and fosters skin cells. Because of its moisture locking properties, it is naturally nourishing and effectively softens skin. It is even speculated that honeycomb has traces of Vitamin A, which help restore and replenish skin.

There are many homemade health and beauty products you can make using beeswax. Here are a few of my favorite:

All-Purpose Salve—When you have little ones in the house, there seems to be an endless supply of boo-boos, bug bites and itchy skin. You can make this all-purpose salve to have on hand, using beeswax and your favorite essential oils with other ingredients. (Here)

Lavender Body Butter— There’s something about putting together the simplest of ingredients and then whipping it up into this luxurious, natural, and nourishing lotion. This Lavender Body Butter does just that; it’s simple to make, only four ingredients and uses lavender essential oil. By adding beeswax to the recipe, you also have a healthy sunscreen lotion. (Here) 

Baking Soda-Free Deodorant—You can make your own natural deodorant following my suggestions here.  For those who have had difficulty with getting this “firm” enough, and not pasty, try adding 1-2 tablespoons of beeswax, which will help to give you a more solid consistency.

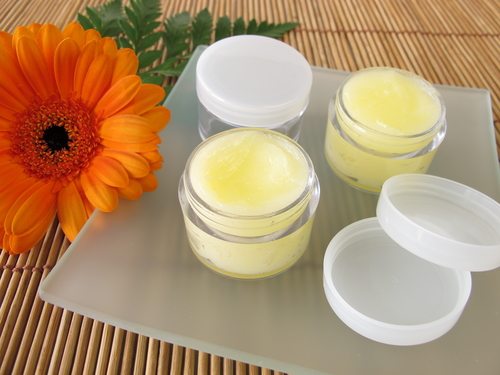
Spiced Chai Lip Balm—Homemade lip balms are some of the easiest things to make using beeswax. Because I love chai tea and the wonderful aroma of the chai tea spices, I created this delicious Spiced Chai Lip Balm recipe, using beeswax. 

Homemade Comfrey Salve— One of my favorite things about my new homestead is our very own comfrey patch. Of course, you don’t need to grow your own comfrey to make a nourishing salve with it. There are several places online that you can purchase dried, organic comfrey leaves to make this simple and homemade comfrey salve. Try using my recipe here.  

Whipped Magnesium Body Butter—Here is another great suggestion for making homemade Magnesium Body Butter.  It will help you to supplement your body with more magnesium, and you can adapt the recipe by substituting 2-3 tablespoons of beeswax for some of the recommended almond oil. Your butter will be slightly more solid, but will be easy to apply when you need it.

Homemade Mustache Cream—Beeswax is a regular component of mustache creams. Facial hair for men is the trend right now, and you can make the men in your life some great mustache wax. You will find great information and three recipes here. 

Homemade styling gel for hubby’s Mohawk or other trendy hairstyle—The men in your life will love this all-natural styling gel that can be used on those trendy men’s hairstyles that need some extra support. You can choose to make a heavy-hold gel or a medium-hold gel. All the instructions you need can be found here.  You may even find a use for this with your own hair styles or those for your children.

4. Beeswax Products You Can Make for Your Children

Beeswax modeling clay—Making beeswax modeling clay with your young ones is a fantastic homeschooling project. You can teach math skill, color theory, and discuss bees and the work they do as you work together and enjoy the warm honey scent of melted beeswax. You can find complete instructions here. 

Beeswax Gummy Bears and Jelly Beans—This is a fun experience you can do with your kids. You can adapt my recipe for Fruit Gummy Snacks (here) for this by using small jelly bean molds or miniature Easter egg molds and adding a couple of tablespoons of beeswax just before you pour the mixture into the molds. Beeswax is completely edible, and will coat your jelly beans to give them a harder texture.

Diaper rash cream—This is somewhat harder to make, and requires a double boiler, but you will have a healthy, chemical-free diaper rash cream to use on your little ones that will keep them free from rashes and other diaper irritants. You can find full instructions here. 

Homemade baby lotion—This is another great homemade product using beeswax for your little ones. It is so filled with healthy ingredients and has such a pleasant aroma. (Here) 

Making Beeswax candles with your kids—Make a wonderful holiday tradition by making homemade beeswax candles as gifts for Christmas. The process is easy and fun for all, and your friends and family members will treasure the candles for a very long time. You can find complete instructions here. 

I promised you this would be 20+ ways to use beeswax, and we ended up with 25 great uses for that wonderful beeswax specially made for you by your honeybees! If you do not have your own honeybees, check with local farmers, or you can order natural beeswax here. 

Be sure you try some of these suggested uses for beeswax. You will love them, and it just might convince you to begin doing your own beekeeping. The raw organic honey is delicious, and you will find so many ways to use the beeswax when the honey bees no longer need it.

25 ways to use beeswax

Sources

  1. https://www.mainebee.com/articles/beeswax_history.php
  2. https://hiveharvest.com/beeswax-facts-and-faqs/
  3. https://www.naturallyloriel.com/17-cool-and-unusual-uses-for-beeswax/
  4. https://www.onegoodthingbyjillee.com/2013/12/21-brilliant-benefits-of-beeswax.html

Filed Under: beekeeping, DIY Beauty Recipes, DIY Home Recipes, essential oils

How to Grow Elderberries and make Elderberry Syrup

September 28, 2015 by Jackie Ritz 5 Comments

Elderberries are one of the most sustainable crops, and is being farmed by many farmers who are interested in nutritious, home-grown and organic farming. It is packed with Vitamins A, B, and C, iron, potassium, and powerful antioxidants. The plants are a hardy perennial, and are naturally disease resistant. Surprisingly, only 10 percent of the elderberries consumed in the United States are actually grown here. Making a elderberry syrup recipe is a great way to get all the nutrition from these delicious bushes into our body! 

Our farm wants to be a part of the group that wants to change that statistic. We are so happy to have some elderberry bushes on our farm already, and we plan to add more. I’ve already made my own homemade Elderberry Syrup and hope to have many more elderberries to harvest next Fall.

In this blog post I want to cover some of the basics in elderberry growing and harvesting and then using the berries to make an elderberry syrup. We will take a look at:

  1. Elderberry varieties to consider growing
  2. Planting new elderberry bushes
  3. Taking care of your elderberry bushes
  4. Harvesting your elderberries
  5. Nutritious, healthy ways to use your elderberry harvest
  6. Elderberry Syrup Recipe

1. Elderberry varieties to consider growing

There are several varieties of the American elderberry that are especially good fruit producers. Here are some of the best selections to try in your yard or farmland.

  • Adams—This American variety grows 8 to 10 feet tall. The large, juicy, dark purple fruits ripen in August and are great for making pies. The strong branches hold the berries upright. Plant a pollinator variety such as ‘Johns’ for maximum fruiting. This variety is often sold as “Adams No. 1” or “Adams No. 2.” There is little difference between these two selections.
  • Black Beauty—This striking European variety features purple foliage and lemon-scented pink flowers. It grows 6 to 8 feet tall and wide and can be grown in perennial borders or as a foundation plant.
  • Black Lace—This eye-catching European selection looks like a Japanese maple with its dark purple, deeply cut foliage. Like “Black Beauty,” this variety also grows 6 to 8 feet tall and wide, producing pink flowers and dark purple fruits.
  • Johns’—This early-producing American variety produces an abundance of berries that are especially good for making jelly. Growing 12 feet tall and wide, this variety is a good pollinator for “Adams.”
  • Nova—This American variety can be self-fruitful, but does best with another American elderberry growing nearby. Large, sweet fruit are produced on compact, 6-foot shrubs.
  • Variegated—This European variety has attractive green and white leaves and grows 6 to 8 feet tall and wide. The plant is less vigorous and productive than other elderberry varieties, but the foliage is attractive all season long.
  • York—This American variety produces the largest berries of all the elderberry selections. It matures in late August and only grows 6 feet tall and wide. It pollinates “Nova” well.­1

2. Planting new elderberry bushes

While your elderberry berries will grow on your bush the first year they are planted, you will want to be aware that the berries will do better the second year and each year after. The bushes will grow best in well-drained loamy soil. If your soil is sandy, you will need to add organic matter to prepare your soil. Before you plant, be sure to check your soil pH. Your local County Extension Office can supply you with the information you need for doing this.

All elderberries require cross-pollination with other varieties. Either plant two different varieties in their own spots close to each other in your garden, or plant two varieties in one hold. Since Nova and York are the two cultivars that grow the biggest crops, you may want to begin with these two, cross-pollinating them as you plant.

Here are some excellent planting tips:

  • Pick a location with full sun
  • Add manure or compost to your soil before planting
  • Plant your elderberry bushes 6-8 feet apart in rows 10 feet apart.
  • Water the plants thoroughly
  • Don’t apply any fertilizer during the first year.
  • Elderberries are shallow rooted: Keep them well watered the first season.

3. Taking care of your elderberry bushes

After the first year, your elderberry bushes will grow best if you fertilize annually using compost. Because they have shallow roots, mulch around the plants to control weeds that compete for water and nutrients.

Your bushes will grow suckers freely, sending up new branches each season. In the second and third years, these new branches will produce side branches that fruit heavily. In late winter, prune out branches that are more than 3 years old, leaving equal numbers of one- two- and three-year-old branches. Prune out dead or diseases branches as well.

There aren’t many significant pests or diseases affecting elderberries. However you will want to watch for cane borers and Japanese beetles. Be aware that birds love elderberries, and will compete with you to eat them before you can harvest the berries. To avoid the birds getting your harvest, cover the shrubs with netting once they begin to berry. If you are also raising chickens, your chickens can be one of your best defenses against both weeds and insects. You can also handpick the beetles, or use a natural, organic control such as AzaMax. (Here) 

4. Harvesting your elderberries

In most climates, there will be a 5-15 day period in mid-August through mid-September when the berries are ripening. Be sure to pick them before the birds do! Let them ripen on the shrub to a dark purple color. Prune off the entire cluster when ripe, and strip the berries into a bowl. You will need to keep the harvest refrigerated and process the berries as soon as possible. You can get 12-15 pounds of berries from one mature 3-4 year old shrub.

5. Nutritious, healthy ways to use your elderberry harvest

As I mentioned at the start of this post, elderberries are packed with vitamins, minerals, and antioxidants. One of the best-known benefits of the black elderberries is its power to boost the immune system, because of it strong, antiviral properties. The medicinal parts of the elderberry bush include the roots, bark, young shoots, leaves, flowers, and berries. Yup—the entire plant! 

The flowers are effective at reducing phlegm and encouraging sweating. They are also good for strengthening the upper respiratory track. The flowers help to soften the skin and are often added to lotions and creams. You can also make a flower poultice with them too! (Here) 

Elderberries can also be used in cooking, and there are many good, nutritious elderberry food recipes that you can research for yourself.

Elderberry Syrup Recipe

If you cannot grow your own elderberry bushes, then you can still reap the benefits of this plant by purchasing dried elderberries from HERE.

I want to really encourage you to find a local honey farmer and get the MOST local raw honey you can find. It’s not necessary to have local honey, but it is essential to have RAW honey that has not been pasteurized (to destroy it’s many health benefits). I am lucky enough to have our own honeybees, so we used the honey that we harvested in July from our backyard! 

INGREDIENTS:

  • 2 cups of filtered water 
  • 2/3 cup of dried elderberries or 1.5 cup of fresh
  • 1 cup of your most local raw honey you can find
  • 1 teaspoon of whole clove 
  • 1 stick of cinnamon
  • 1 knob of fresh ginger, peeled 

DIRECTIONS: 

  1. Bring the water, elderberries, and spices to a boil. Reduce to simmer on low for 30-45 minutes with a lid on. 
  2. During the simmering, use a potato masher and frequently mash the elderberries while simmering.
  3. Remove the saucepan from the heat.
  4. Pour the honey in a separate glass jar.
  5. Filter the hot syrup through a sieve or cheesecloth into the honey. You might need to grab a funnel. You will want to make sure you squeeze all the liquid out from the elderberries. This is why I like using a cheesecloth and twisting to make sure it’s completely drained out . 
  6. Stir the honey until it is dissolved. Make sure you use the hot syrup to dissolve the honey. 
  7. Date and label the bottle and then place in the refrigerator. The honey acts as a natural preservative so you syrup should be good for several months in the fridge. 

NOTES: 

  • Adults can take 1 tablespoon daily and children (over 1 years old) can take 1/2ts-1 ts daily. 
  • If feeling under the weather, adults can take 1 teaspoon every 2-4 hours and children can take 1/2 teaspoon, every 2-4 hours. 
  • Remember honey can cause botulism in infants! 
  • Cost/Savings: It cost me $2.17 if purchasing dried elderberries to make this recipe and only $$0.97 if using your own homegrown elderberries!
  • This recipe makes over 3 cups of elderberry syrup! You won’t beat that price anywhere! 

You will never regret your decision to try raising and harvesting elderberries. Elderberries are even better nutritionally than blueberries. They are wonderful for pies, jams, jellies, and homemade medicinal remedies. The flowers are delightful breaded and made into fritters. Join us at bringing these wonderfully versatile berries back as homegrown American treasures and enjoy the delicious and nourishing Elderberry Syrup Recipe! 

Elderberry Syrup Recipe

Sources

  1. https://www.garden.org/ediblelandscaping/?page=july_elderberry
  2. https://normsfarms.com/aboutus/our-story/
  3. https://www.gardeningknowhow.com/edible/fruits/elderberry/planting-elderberry.htm
  4. https://www.starkbros.com/growing-guide/how-to-grow/berry-plants/elderberry-plants/planting
  5. https://www.healing-from-home-remedies.com/elderberry-benefits.html

Filed Under: beekeeping, DIY Home Recipes, Homesteading, Living Sustainably, Natural Living

A Guide to Beginner Beekeeping

June 18, 2015 by Jackie Ritz 2 Comments

How to Be a Honey Bee Guardian

As you know by now, Frank and I and our two little budding farmers just moved into our dream farm! We are just beginning to get acquainted with all the things waiting for us—comfrey, potatoes, asparagus, black raspberries, blueberries, and tons of fresh herbs—just to mention a few. But one of the farm perks we are most excited about are our five established honeybee hives. We have already tasted the sweet honey, and we know many of the flowers and vegetables in the gardens are so succulent and good because our honey bees have been busy pollinating them all spring. We are so excited to jump into this world of beginner beekeeping and hope to learn more in the months and years ahead. 

In this blog post I want to introduce you to the wonderful world of beekeeping. We are newbies at it, but our former owners have given us wonderful instructions for the care of honeybees, and we are doing our research to learn even more. Now you get to benefit from what we know, which I am sure will increase more and more as we begin the joyful task of being honey bee guardians. Let’s take a look at:

  1. Why are so many honey bee colonies disappearing?
  2. How do honey bees provide benefits to our farms and homes?
  3. What is life like in the bee colony?
  4. What makes a good beehive home?
  5. What do beekeepers need to have?
  6. What can you do to help protect America’s honeybees?

1. Why are so many honey bee colonies disappearing?

Honey bees have been domesticated by humans for thousands of years. A bee is the only creature besides us who manufactures food for humans. Every third bite of food that you eat has been pollinated by a bee. Natural diseases can cause populations of bees to die off, but most bee colonies were able to bounce back from adversity—until the winter/spring of 2006/2007. In that season, the die-off of domesticated bees was so bad bee researchers coined a new phrase: Colony Collapse Disorder. The normal loss of colonies was about 10 percent, but that year it was over 30 percent. Some beekeepers lost more than 80 percent of their bees.

Since then, in the US bees have been dying off at alarming rates, and beekeepers are continuing to report staggering annual losses. WHY? WHAT IS HAPPENING TO THE BEES?

A new class of systemic, neurotoxic pesticides—neonicotinoids–was introduced in the 1990s, and quickly became in use pervasively, being used to treat food crop seeds, as well as in lawn care and flea products. These products persist for years in the soil, and permeate the plants to which they are applied, causing pollen and nectar gluttation droplets, which are deadly toxins to bees. Thousands of beehives have been killed off by colony collapse, while government regulators in America steadfastly fail to take action and create a policy that will be meaningful for bees and beekeepers.  

2. How do honey bees provide benefits to our farms and homes?

There are a lot of good reasons to have a few hives of honey bees around.  For garden and orchard crops, honey bees provide the necessary pollination so there’s something to harvest at the end of the season.  For a source of a natural sweetener—honey—there’s no rival, and if the other natural products of the hive—pollen or propolis—appeal to you, then a few hives are certainly useful.  Plus, there’s the added benefit of having all the light you want from fragrant and clean-burning beeswax candles.  Sweetness and light in the same package.

Remember that bees pollinate every third bite of food that you eat. Some of the specific plants and vegetables that require bee pollination include:

  • Apples
  • Almonds
  • Watermelon
  • Pumpkin
  • Squash
  • Cucumbers
  • Avocados
  • Mangos
  • Blueberries
  • Raspberries
  • Blackberries
  • Cranberries

Plants and food that benefit from bees include:

  • Tomatoes
  • Strawberries
  • Peppers
  • Eggplants
  • Soybeans
  • Lima beans (and other dry beans)
  • Sunflower seeds
  • Sesame seeds

3. What is life like in the bee colony?

The Bee Colony

Whether hidden in a hollow tree or kept in a beekeeper’s wooden hive, every colony of honeybees functions in the same way. A bee colony is made up of three types of bees: workers, drones, and a queen.

Worker Bees

Most of the bees in a hive are workers, sterile females that can number in the tens of thousands. Young worker bees are called house bees. They build and maintain the hive, feed the young, make honey and wax, and tend to the queen. Older workers fly from the hive to gather nectar and pollen for food and for use in making honey and wax.

As a worker bee buzzes from flower to flower, she gathers nectar and stores it in a specialized stomach called a honey sac. She also picks up pollen in her fine hairs and combs it into pollen baskets in her back legs. Heavily laden, she finds the shortest path home, making a “bee line” for the hive.

Interesting enough, female worker bees are the only honey bee that can sting you. 

Drones

There are hundreds of drones in a colony. They are males that develop from unfertilized eggs, and their only job is to mate with the queen. During the mating ritual, the queen flies high into the air, nearly 30 feet above the hive. Up to ten or more drones mate with the queen and then die. The queen returns with enough fertilization to lay eggs for years to come.

The Queen Bee

There is only one queen in a hive, and she can lay up to 2,000 eggs a day and may lay a million eggs in her lifetime. When a new queen is born, the old queen leaves the hive with about half of her workers to form a new colony.

When flowers are in bloom, bees work nonstop from sunrise to sunset, gathering pollen and nectar and pollinating flowers in the process. To be as busy as a bee is to be busy indeed.

4. What makes a good beehive home?

If you are thinking of starting beekeeping, the first thing you need to do is to decide where the bees are going to live. Where will the hives sit? If you live in tropical, or nearly so, locations, a bit of afternoon shade can be advantageous for both you and the bees.  But if you are further north, no shade at all is the best place to be.  Having the colony facing south or south east is ideal.

Getting started, like many new ventures, has a learning curve to be dealt with.  The most important part of that curve is assuming responsibility for the well being of a living being under your care… not unlike family pets, chickens, cattle or other friendly or productive animals.  A beehive may appear as only a box full of bugs, but a honey bee colony has a personality and lifestyle all its own, and as its keeper you must learn its ways and wiles so you do the best you can to protect it from the dangers of the bee world.  

Plan on how your bees will sit where you want them to sit.  Up off the ground is good, to keep the bottom off damp ground and to keep skunks, toads, ants and other nasties at bay.  Too, a beehive that sits up 18 inches or so off the ground (the recommended height) is easier to work because you won’t be putting heavy boxes full of honey all the way down and having to lift them all the way back up when you’re done.

5. What do beekeepers need to have?

Here are some very general recommendations.  A honey bee colony requires two deep brood boxes for the bees to live in, store some honey and pollen in, and raise their young.  A deep brood box (also called a hive-body) is one that holds eight or ten frames of comb and are 9-5/8” tall (or so… exact standards in beekeeping equipment are a bit fuzzy).  This can weigh as much as 90 pounds or so when full of bees, honey and pollen.  

Your beehive also needs additional boxes, called honey-supers (super = above), that are stacked above the brood boxes for the bees to store honey in.  These honey-supers can be the same size as a hive-body or, to confuse things, there are two sizes of smaller boxes—one is called a shallow honey-super because it is only 5 -11/16” tall.  This will weigh about 30 pounds or so when full of honey.  The other is a medium honey-super because it is 6-5/8” tall, and weighs about 50 or so pounds when full.  Which box to use will depend to some degree on your ability to heft.

A bee hive needs a floor, called a bottom board, that has a large, screened area so debris falls completely out of the boxes rather than accumulate inside.  The bee hive should also have an inner cover that sits directly on top of the top box (think of this like the ceiling in your house), and an outer cover that goes over the inner cover (much like the outside roof).  Together, these two covers keep the internal environment somewhat controlled and the elements out. 

You’ll need feeders... yes, you sometimes need to feed your bees. So what do bees eat?  Sugar syrup… a mix of half sugar and half water, fed in a container that the bees can get to inside, or sometimes outside the hive.  There are a variety of feeder styles available and each has advantages and disadvantages.  Find them in the catalogs you get from the advertisers in the journals you read, on the web (see references at the end) or from local suppliers you find out about at club meetings.  And don’t hesitate to ask other beekeepers what they use… and why they use what they do.

You will also need beekeeping attire—protective gear to wear when working bees.  A good veil to keep bees out of your hair, and a light-colored, light weight protective suit to keep your clothes clean when in the hives is a good start.  And beekeeping gloves.  Having bees walk on your hands the first few times in a hive can be very distracting, so use beekeeping gloves until you are comfortable with this aspect of the craft.

Along with the attire you get, you must have a smoker.  When you puff a little bit of smoke across the top of an open colony the bees inside retreat down to rapidly consume honey and they stay out of your way as you do your work.  Any communication between them inside is disrupted because the smoke masks all the chemical signals going on and they can’t talk…  the confusion goes on for several minutes while you work.  Then, when it begins to clear, they stop eating honey and start again to the top, a bit more smoke gives you a few more minutes to work undisturbed.  You have maybe 15 minutes though before all this smoke simply overloads the system and they quit eating and start checking out the problem.  That’s when it’s time to move to the next colony. 

6. What can you do to help protect America’s honeybees?

Gardeners who plant the right flowers and provide welcoming habitats can do their part in restoring the waning bee population.  We can nurture bees that will travel, pollinating fruit, vegetable and flowers around us, helping commercial growers to regain bees.  “Every single gardener can make a difference, even if you just plant one more container of flowers than you have previously, you can help!”, says the National Garden Bureau.

Small Steps

It doesn’t take much effort to help bees increase their population.  Here’s how to make a difference:

  • Plant flowers with open petals and upright stamens for easy access by our pollen-loving friends. Cosmos, zinnias and purple coneflowers are good examples.
  • Choose flowers that are heavy pollen producers like salvia, penstemon and goldenrod.  And pick colors that attract bees like blue salvia, yellow nasturtium, marigolds and sunflowers.
  • Herbs, oregano, mints, sage, lemon balm, rosemary, lavenders, thyme, cilantro and basil in particular, provide food for bees as well as humans.  So add them to your garden.   It’s simple to keep a potted herb garden on your back porch, close to the kitchen for cooking.  Bees will quickly discover it.  Pots keep invasives like mint in bounds, and they can be brought indoors for the winter to use.
  • Make sure your garden blooms from very early spring (crocus and early daffodils) to late fall asters to provide pollen as long as possible.
  • Limit or eliminate pesticides, which kill bees, and use compost instead of synthetic fertilizers that leave behind toxic chemicals.
Bees at  hive entrance.
Bees at hive entrance.

Sources:

  1. https://earthjustice.org/features/the-case-of-the-vanishing-honey-bee?gclid=CjwKEAjwtYSsBRCDx6rM1v_uqmsSJAAZgf2qKVGPIYrPW3Lu2j8kEgYBvqMMeGsDSE-W9c9w0OM0IhoCYXzw_wcB#
  2. https://www.panna.org/issues/publication/bee-change-tips-tools-protecting-honey-bees
  3. https://www.almanac.com/content/honeybees-garden-busy-can-bee
  4. https://homestead.org/KimFlottum/BeginningBeekeeping/Bees.htm?gclid=Cj0KEQjwkv-rBRDwoMLav-2l9KIBEiQAUTkDU6oTNtv5_aKKAFY9n0xWQsiKhNdyrI1CEp_twv9SzMIaAqOG8P8HAQ
  5. https://www.almanac.com/blog/gardening-blog/bee-buzz-blue-berries


Filed Under: beekeeping, DIY, Homesteading, Living Sustainably

Primary Sidebar

  • Facebook
  • Instagram
  • Pinterest
  • RSS
  • YouTube

Hi, I'm Jackie Ritz and welcome to The Paleo Mama! I'm a published author, certified herbalist, and voracious researcher of natural medicine and nutrition. I'm glad you're here and I hope you stick around for awhile!

Recent Posts

  • When God Says Pause: Why I Took a 5-Year Break from My Online Business
  • How to Quit Facebook but Keep Your Business Profile
  • Leaving the City for the Country
  • Natural Way to Heart Health

MEAL PLANS

Biblically clean meal plans that are for those love to cook real food

Read More

Footer

Our Blog

The Paleo Mama blog provides simple answers for healthier families through research, tutorials, recipes, and simple remedies for daily needs!

  • Health
  • Essential Oils
  • Recipes
  • Remedies
  • Natural Living
  • Meal Plans

Stick around!

You’ll get instant access to a library of natural remedies and real, paleo food, including our ebooks and free guides we send out.

  • Home
  • Disclosure/Disclaimer
  • Privacy Policy
  • Advertise
  • Contact Me

Copyright © 2025 · Wellness Pro on Genesis Framework · WordPress · Log in