• Skip to primary navigation
  • Skip to content
  • Skip to footer

The Paleo Mama

Homegrown and Handmade

  • About
  • Blog
    • Podcast
  • Meal Plans
  • Essential Oils
  • Our Farm
    • Great Pyrenees Puppies
    • Goats
      • Goats for Sale
      • Goat Sales Policy
      • Nigerian Dwarf Bucks
        • Ranchocabra Lunar Eclipse

Blog

Household Chores for Kids Under Seven

July 20, 2015 by Jackie Ritz Leave a Comment

Household Chores

No parent chooses to raise a kid to be a TV-and-video-game-addicted-couch-potato, but unfortunately that’s exactly what can happen unless we learn how to motivate our kids to better pursuits. And one of the best ways to begin to inspire kids to do more than sit in front of the tube is to teach them how to work with their natural, intrinsic drive to be productive, creative contributors to the household. Kids want to feel like they are part of something bigger than themselves, so don’t let them drag their feet about doing household chores. Dan Pink, author of Drive: What Motivates Us tells us why household chores are good for kids: “Chores show kids that families are built on mutual obligations and that family members need to help each other.”

Kids are not born with the work ethic. Character traits of tolerance, perseverance and self-discipline are learned—and must be taught by us parents. It’s up to us to teach our kids the difference between wanting and getting, and how to postpone gratification in order to accomplish and succeed later as an adult.

I have found that both my six-and-a-half year old and my four year old love to help me with chores when I can help them see that they are enjoyable and entertaining. My six year old has been helping me with my essential oil tasks since I began. She also has already become Little Miss Farmer, and gathers eggs, picks flowers, finds new vegetables growing on our new farm, takes care of the chickens, gets Sunflower seeds ready for roasting, and helps me cook and bake. Barefoot Boy loves to search for our free range chicken eggs, help pick berries (yes, he eats most of them!), and take care of the goats.

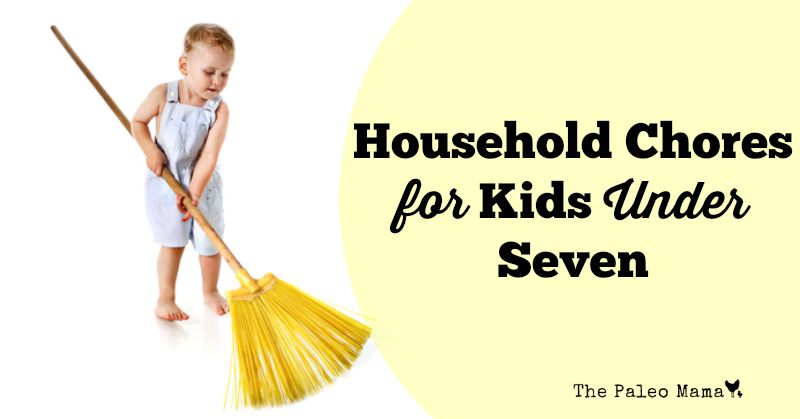
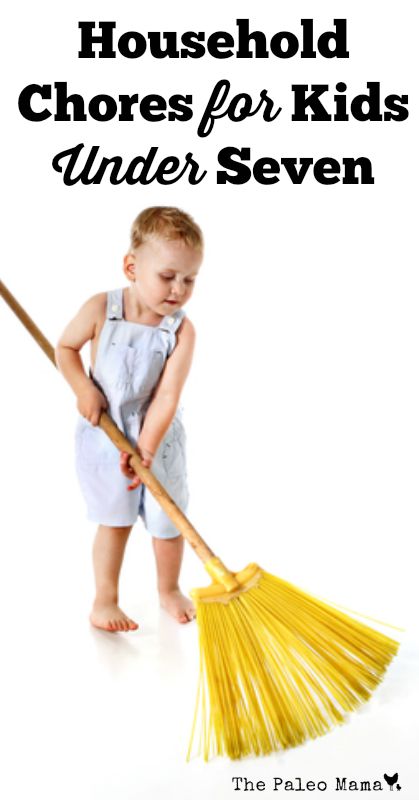
None of those things are consistent, everyday chores for them yet, but they have already learned to be productive family members. In this blog I want to help us all take these sometimes chores a step further, and give you some ideas for household chores for kids under seven, that my kids, and yours, can do every day.

I want to look at four important considerations when planning and assigning chores to our kids.

  1. Tips and Pitfalls to keep in mind about kids and chores.
  2. Age-appropriate chores for children birth through age seven or so.
  3. Ways to consistently check up on your children’s faithfulness to their chores.
  4. How to appropriately reward your children for their help with the family chores.

1. Tips and Pitfalls to keep in mind about kids and chores.

Sometimes there is a fine line between motivating our children to do their chores and overwhelming them with demands and responsibilities that de-motivate them. Here are a few pitfalls to avoid.

  • Don’t insist on perfection—No one is perfect. It’s better to have a relaxed approach to how well our kids do their chores.
  • Don’t delay—Your kids are probably more capable than you think. Kids can do a lot of chores at an early stage. Remember that they learn best by doing.
  • Don’t be stingy with praise—Get that praise going right away! Don’t wait until the chores is done. Praise and encourage your children as they do their chores.
  • Don’t be inconsistent—If your children aren’t expected to regularly follow through with their chores, they may start putting them off in the hopes someone else will do them for them.

And here are a few tips that will make it easier to get started.

  • Be specific with instructions—Be explicit. If you want your son to clean his room, tell him exactly what to do: “Put your clothes in the closet, your books on the shelf, dishes in the kitchen, and toys in the toy box.”
  • Ease into chores for children—First show them how to do the chore step by step. Next, let your child help you do it. Then have your child do the chore as you supervise. Once she’s mastered it, let her do it alone.
  • Go easy with reminders and deadlines—Don’t micromanage your kids. Use the when/then technique. For example, say: “When the pets are fed, then you can have your dinner.”
  • Kids want to help—Take advantage of their natural desire and encourage their excitement about doing chores.
  • Kids have a short attention span—If your child seems to be struggling consistently with doing a certain chore, it may be too involved for him, or he may not be able to do it as well as he wants to.

2. Age-appropriate chores for children birth through age seven or so.

Our children are capable of doing so many more things than we even realize at times that it would be hard to give you an exhaustive list of everything your children can do at a specific age. You can do your own research to find many kinds of chores that might be appropriate for your children. But I would like to suggest several chores for each of three age groupings.

Chores for children ages 2 to 3

  • Put toys away
  • Fill pet’s food dish
  • Put clothes in hamper
  • Wipe up spills
  • Pile books and magazines

Chores for children 4 to 5

  • Brush hair and teeth
  • Make their own beds
  • Empty wastebaskets
  • Pull weeds, if you have a garden
  • Clear table
  • Water flowers
  • Set the table
  • Take out the garbage

Chores for children 6 to 7

  • Sort laundry
  • Sweep floors
  • Weed and rake eaves
  • Help make and pack lunch
  • Keep bedroom tidy
  • Care for pets
  • Help put away groceries

3. Ways to consistently check up on your children’s faithfulness to their chores.

Teaching kids about chores, money, and work is definitely a lifelong process. One of the most successful ways to inspire your children’s faithfulness to their chores may be through the use of a chore chart. This can be used not only to provide motivation, but also to help teach your children financial responsibility.

Since children are much more excited about cute pictures than simple words, use a chore chart that is visually stimulating to your children. You can do your own research and find many, many ideas for chore charts online. (You can find several different printable charts here.) 

A few that we have used and love are: 

  • Melissa & Doug Magnetic Chart – great for kids under 4
  • Accountable Kids System – we adore this system for our nearly 4 year old and 6 year old. 

You will want to place your chore chart in a visible location, and make sure to review your children’s accomplishments every day. Love, praise, and acknowledgment are your secret weapons to keep them diligent to their chores.

4. How to appropriately reward your children for their help with the family chores.

When you begin assigning chores to your children be sure that you and your spouse have discussed what kinds of rewards or incentives you will be using with them. Maybe you think chores are just part of belonging to the family. As part of the family you expect them to chip in, help out, and do things around the house

You may want to set up some kind of a reward system. It can be a powerful tool to motivate them. The rewards can be earned privileges, playdates, maybe a movie with a friend, or whatever else you choose to be appropriate. Some parents will choose to reward their kids for their chores with money, thereby teaching important lessons about earning.

Our family was able to pay off our debts and become financially stable through the help of Dave Ramsey’s Financial Peace University. You can read our story here.  I would highly recommend his Financial Peace Junior materials, which are designed to help you teach your children about money. It doesn’t just give you the tools to teach your kids to win with money—it shows you how. You can find it here. 

Since our children learn the most by watching us, be sure that you are modeling a positive work attitude yourself. Show pride in your accomplishments and share your insights with your kids. Let them see that your career is not just work, it’s an opportunity to grow and to achieve financial stability. Teaching your children to be independent and to have life skills will allow them to feel empowered, and helps to develop healthy self-esteem. Give your children every opportunity to become ready for whatever life brings to them. It starts with simple household chores.

Household Chores for Kids Under Seven

Source

  1. https://www.parents.com/kids/development/social/motivate-kids-to-do-chores/
  2. https://www.today.com/parents/what-chores-what-age-guide-parents-2D80555366
  3. https://www.webmd.com/parenting/features/chores-for-children
  4. https://childparenting.about.com/od/familyhome/a/choreschild.htm
  5. https://www.freeprintablebehaviorcharts.com/chore_list.htm
  6. https://www.parents.com/kids/development/social/motivate-kids-to-do-chores/
  7. https://www.livingwellspendingless.com/2014/09/19/great-chores-kids/


Filed Under: family, Homeschooling, Natural Living

Natural Remedies for Garden Pests

July 17, 2015 by Jackie Ritz 6 Comments

By now you’ve probably read my first post on gardening: Vegetable Gardening for Beginners. One of the things that can defeat a new gardener faster than anything else (I know it sure would defeat me!) is waging war with all the garden pests that want to take over your veggies and prevent you from ever getting your first good harvest. For that reason I’m adding this second installment on my post about gardening, and calling it Natural Remedies for Garden Pests.

But I’m confessing right up front that I don’t have all the answers (very few of them in fact) about this war on garden pests. So in this post I’m going to give you a list of what many experienced gardeners believe to be the 12 biggest garden pests, and add a round-table blog with each that helps us to see a way that we can be successful in the war against that pest. 

Here are a few natural alternatives to pest control that you will see mentioned in many of these posts: 

  • Diatomaceous Earth – a soft, crumbly, porous sedimentary deposit formed from the fossil remains of diatoms
  • Plant Collars – protects slugs and other pests from getting on the plant
  •  Borax & Sugar – used to kill ants around the base of the plant 
  • Row Covers – protects young plants
  • Natural Dish Washing Liquid – used to make homemade pest spray 
  • Bt Spray – an organic formulation that kills insects and larvae
  • Dipel Dust – used by commercial organic growers to control insects on vegetables. 
  • Japanese Beetle Trap – uses a pheromone and catches the beetles and traps them. 
  • Spinosad – an organic insect spray 
  • Essential Oils (where to buy) – rosemary, melaleuca, peppermint, thyme are just a few essential oils you can use that can help with garden insects. Here’s 9 clever ways to use essential oils on your home garden! 


Twelve bothersome garden pests in home gardens

1. Slugs

More than half of all gardeners say that these slimy critters cause trouble year after year. One gardening expert shared results from several other gardeners on dealing with slugs. These experts included several natural ways to eliminate slugs from your garden, including: garden critters like chickens and chipmunks, beer, crushed egg shells, salt water, copper, homemade garden soap, and hand picking. You will find details for each of these slug deterrents here. 

2. Squash Bugs

More than half of gardeners in one survey reported that squash bug had sabatoged summer and winter squash harvests. The Free Range Life gardening blog shares 6 Ways to Control Squash Bugs in Your Garden (see here). These include: hand picking, planting companion plants, attracting beneficial insects, using diatomaceous earth, watching your mulch, and avoiding over-planting your squash. You will find more information on The Free Range Life website.

3. Aphids

These pesky little enemies tried to take over the gardens of half the gardeners in the survey. However several home gardeners responded with effective warfare methods, which included: pruning, applying insecticidal soap, attracting beneficial insects, and planting companion plants. Home gardener at Gardening Know How (find here) gives detailed information for how to get rid of aphids naturally.

4. Imported cabbageworms

Experienced gardeners recommend that if you see these little white butterflies in your garden, you need to take action to protect your plants before these cabbageworm moths lay eggs. There are several ways to control them naturally, including attracting paper wasps and yellow jackets. Other gardeners recommend biological pesticides, but report that companion planting, and garlic-pepper sprays had disappointing failure rates. One experienced gardener (find here), shared 8 natural ways to get rid of nasty cabbage moths.

5. Squash vine borers

These vine borers caused trouble for nearly half of the gardeners surveyed. Most gardeners recommended that the best control methods were crop rotation and growing resistant squash varieties. The Toxic Free NC website (find here) gives wonderful recommendations for dealing with these garden enemies.

6. Japanese beetles

Although Japanese beetles are not a big problem in extremely hot or cold climates, they came in number 6 with most gardeners. There are several effective ways to get rid of these garden pests, including: handpicking, and companion plants, but things like garlic-pepper spray and row covers had high failure rates. Many home gardeners enlist the help of guinea fowl and ducks, as well as springtime bug-eating birds. The experienced gardener at Veggie Gardener.com shares several natural ways to control these garden enemies (find here). 

7. Tomato hornworms

42 percent of gardeners surveyed battled infestations f tomato hornworms. Many gardeners preferred handpicking because these pests are large and easy to spot. Gardeners also recommended using the help of wasps and companion plants for reducing their hornworm problems. The Veggie Gardener.com knows these nuisance caterpillars can destroy a plant in no time—they are eating machines. This website gives several tips for finding and eliminating these pests in each stage of their life (find here).

8. Cutworms

Although many gardeners reported problems with cutworms, most recommended the common practice of using rigid collars to protect their young seedlings. One gardener with ten years experience said that it wasn’t until he became a Montana homesteader that he ever came across this garden pest. However he learned that cutworms can quickly decimate your garden. Read the research and tips he discovered for dealing with these enemies of your garden (find here). 

9. Grasshoppers

Grasshoppers have been a big concern to gardeners since biblical times. Many gardeners expressed that they felt the problem was getting worse with grasshoppers. Some experienced gardeners mentioned two interesting setups using chickens: a chicken moat around the fenced garden perimeter, and a series of three small fenced garden with gates into the chicken yard for easy rotation of pecking services. You can find directions for how to construct a chicken moat for effective garden pest control here.

10. Cucumber beetles

The danger with these pests is the fact that they transmit deadly bacterial wilt to cucumbers and melons. Some effective treatments mentioned included handpicking, good garden cleanup of plant debris, and row covers. Others found success with companion planting and yellow sticky traps. The Gardening Knowhow.com website will provide you with very thorough information for identifying and controlling cucumber beetles in your garden (find here). 

11. Corn earworms

These were listed as serious pests by many of the gardeners surveyed, and a variety of methods for eliminating them included: using instruments to add oil to the ears of corn, choosing resistant corn varieties, and popping off the end of the ear. Planet Natural.com gives a great description of these garden pests, discusses the damage they do to the ears of corn, and describes several natural ways for getting control of corn earworms (find here). 

12. Whitefly problems

Whitefly-plagued gardeners used exclamation points to emphasize their frustration with these tiny sucking pests. Many gardeners found insecticidal soap effective, including homemade insecticidal soaps. These common insects have developed resistance to many synthetic pesticides, but there are proven organic techniques for eliminating them, including yellow sticky traps, the Bug Blaster, natural predators, and organic or homemade pesticides and insecticidal soaps. You can find lots of information here. 

Now that you’ve read through this list of 12 dangerous garden pests, you are probably hoping—just like I am—that none, or at least only one or two, of these garden pests find their way into your garden. But just remember…you may lose a battle or two with some of these garden pests, but if you arm yourself with this information and have ready the weapons you will need to get rid of these enemies, you can win the war and reap a wonderful harvest from your garden. Let’s go get busy driving off these pests!

Natural Remedies for Garden Pests The Paleo Mama

Sources

  1. https://www.motherearthnews.com/organic-gardening/pest-control/organic-pest-control-zm0z11zsto.aspx
  2. See links above for individual pest information.


Filed Under: DIY Home Recipes, essential oils, Homesteading, Living Sustainably

How to Raise Meat Chickens on Pasture

July 14, 2015 by Jackie Ritz 4 Comments

How to Raise Meat Chickens on Pasture

Just before we moved, we processed our a brood of meat chickens, and have 50 delicious frozen meat chickens (broilers) in our freezer, waiting for us to use. Some of you may remember going to “Grandma’s House” and having a tasty chicken dinner. Others, like me, have probably heard other people talking about the whole experience of raising—and butchering—chickens. Maybe you’ve even played with the detached chicken feet by pulling on the cut muscles and making those feet still “walk.”…maybe not! 

Screen Shot 2015-07-14 at 4.43.10 PM

Raising chickens today is very different than how it was done in the “old days.” The average supermarket chicken never sees the light of day, and may be only 4-5 weeks old when butchered. They are grown in very close quarters with thousands of other birds. Their beaks have been cut off so that the stress of being in uncomfortable living conditions doesn’t lead to pecking their fellows to death. Is it any wonder chicken and eggs today don’t taste like they used to?

It’s for these reasons, and because we want to be sure that the food we eat is as organic and free of pesticides and chemicals as possible that we raise both egg-laying hens and meat chickens. In this blog post we’ll take a look at how to raise meat chickens on pasture, called broilers in most instances. There are 5 steps we will investigate:

  1. Should you raise meat chickens?
  2. How do you raise baby chicks?
  3. What kind of coop should you choose?
  4. When do your baby chicks move outside?
  5. How do you go about processing your meat chickens?

1. Should you raise meat chickens?

It may seem so easy:

  • Buy chicks
  • Feed chicks
  • Harvest and package
  • Eat

But raising meat chickens is very different than raising pullets (egg-laying chickens). There is a greater cost, they require greater maintenance, they stink more, and it is physically, emotionally, and financially draining to do your own butchering. One chicken farmer shared the costs for raising 45 meat chickens from chick to chicken dinner. It was a whopping $1,404.35, or about $40 per bird. (Source)   That’s a pretty expensive chicken dinner. 

But although you need to consider all aspects of raising meat chickens before you start, I have no intention of trying to discourage you from doing it. We will do it again, and we hope you will see the value in it also. We estimated it cost us a little over $20 per bird and for us that is worth it. We know how each chicken lived it’s life, what it ate, and if it was ever sick. 

Make sure you do your own research before you begin. Put a plan together that includes answers to these questions:

  • Will you use a pen or day-range production system?
  • How many birds will you raise the first year?
  • Who will do the work?
  • When do you want your first chicks to arrive?
  • Who will process the broilers?
  • Where will you market the birds, and what do you need to do to make that happen?

You will also need to decide what kind of meat chickens you will raise. The kind of meat chicken that is mass produced is the Cornish Rock Cross, which is a bird that grows so fast that sometimes its heart explodes and its legs give out because it can’t support its unnatural weight. Another slower growing chicken is Freedom Rangers, which is a hybrid breed (cross between commercial and a heritage breed) but has less problems than the Cornish Cross. You may even choose to stick with the older standard breeds like the Delaware or Barred Rock (also laying birds).

2. How do you raise baby chicks?

If you are lucky enough to have a hatchery close by, then you can simply go there to buy your chicks. But if you are like most people, the internet is your answer. We chose to raise a less “commercial” breed this year. This is a hybrid breed this year called Freedom Rangers (you can order them here) and a good alternative to those fast-growing Cornish X. When your chicks arrive in the mail, you will need to have your brooder, feed and water, and a way to keep them clean in order to keep them healthy.  The equipment you will need includes:

Brooding Lamp—This is a 250 watt red light in a reflective housing that provides heat for the chicks, who have no feathers yet to keep them warm. The Brinsea EcoGlow Brooder for Chicks (Here) uses less power and is much safer than a traditional bulb.

Thermometer—The best ones to use are those used to watch food temperatures, which has a probe on a wire attached to a separate base.

Bedding—Paper towels work great for a few days because the chicks tend to want to eat the shavings. Place them on top of pine shavings and then switch to just the pine shavings, a few inches thick. Cedar is toxic to poultry. Make sure there are enough shavings to keep them dry. Put fresh shavings down each day or consider the deep litter method by adding fresh shavings to the top everyday. 

Feeders and Waterers—You are probably feeding a number of chicks, and you don’t want them running out of feed or water. Something like the Little Giant 11 lbs Plastic Hanging Poultry Feeder (Here) will keep you from running out. You have a couple of choices for a waterer. Chicken Nipples (Here) are cheap and easy to hook up. Or you may want something movable like the 5 Gallon Chicken Waterer (Here). Just be sure to give the base a good rinse once in a while.

3. What kind of coop should you use?

There are a couple of different types and features to consider. A chicken coop with a run is a more permanent design. It includes a fenced-in area outside to run around, and a sheltered space inside the coop. You can find several different designs online. If you are able to completely free range your chickens, a wagon-type chicken tractor is the best method. It is a chicken coop on a trailer or wagon frame that you can move about with either a small tractor or an ATV. Your chickens will go in it at night and you can close it up to protect them from predators. In the morning you move them to a new spot, open the door and let them range and forage.

We used a chain link fence with a tarp roof as a coop this year. We would lock them up at night to keep them safe from predators and then open the coop door for them all day long. We had zero predator attacks, but that could be due to the fact we have a livestock guardian dog.  

4. When do your baby chicks move outside?

chickens

When you see that your chicks have feathered out they are old enough to go outside. Give them 12 hours with feed, and 12 without. Most chicks forage more in the morning when they are moved to a new location, and will fill up on grass, which helps to cut feed costs. Your local feed store can help you decide on the right grain mix. If you are raising your birds chemical free, you will need to avoid medicated feeds and use alternatives (such as vinegar or garlic cloves in the water) to keep the chicks thriving. A broiler will eat 9-15 pounds of feed during its lifetime.

We held feed in the morning when they woke up hungry till about 10am. This forced them to forage and peck around the grass and bugs when we let them out. This isn’t necessary if you are unable to do this because of work schedules. 

It will be critical to keep water in front of the birds at all times, especially in hot weather. Check the pens several times a day to be sure your waterers are working properly or purchase a very large waterer. 

Losing a bird or two either to health issues or predators throughout their life span is normal for these chickens. Keep a close eye on them so you can spot any sick ones and isolate them from the others.

5. How do you go about processing your meat chickens?

butcher

Most broilers are ready to process at eight weeks of age, and will be four to six pounds processed weight. Our Freedom Rangers took about ten weeks and they all came out to 5-6 pounds finished! Our Cornish X’s that we raised 2 years ago took only 8 weeks. 

Butchering your own chickens is not for the faint of heart. You first need to kill them quickly, dunk them in hot water, get their feathers off, gut them, and package them. An easier way is to take them to a processor or butcher shop. You will be eating this food, so do your research. Talk to them about costs and packaging. Most will vacuum seal the birds, at a cost per bird.

If you are planning on processing your own chickens for meat, you will find complete instructions for setting up your processing station and processing your birds here. 

There is an emotional component to raising chickens. We raise them from babies, laugh at their antics and work hard to give them a good life with nutritious food and a comfortable home. Then it becomes time to kill them. We choose to treat all living things with reverence and thank them for providing food for us. That doesn’t mean that there’s not some sadness, but over-all, this works best for us.

How to Raise Meat Chickens on Pasture

Sources

  1. https://greenthumbfarming.com/raising-meat-chickens/
  2. https://stonybrookfarm.wordpress.com/farming-practices/farming-practices-meat-chickens-aka-broilers/
  3. https://ecofriendly.com/raising-meat-chickens/
  4. https://www.chickenthistlefarm.com/pasture-raised-chickens/
  5. https://www.motherearthnews.com/homesteading-and-livestock/raising-chickens-for-meat-zmaz09jjzraw.aspx

Filed Under: Uncategorized

The Treasure in My Scars

July 13, 2015 by Jackie Ritz 6 Comments

jackie T

We hide them behind clothes and I’m fines and thick makeup.

We hide them by biting our lips and looking the other way. 

By trying forget about them and pushing them deep down. 

Deep inside the pit that we don’t let anyone down in. 

We hide and cry and ask why we were given these ugly scars. 


But in the dark of the night we run our fingers over them. 

We remember the pain, 

the hurt,

the anguish that those scars bring us. 

We let those scars consume us and bring us even deeper into the night. 


We think things we shouldn’t because of those scars, 

We do things we shouldn’t because of those scars. 

They consume us. 

They make us believe that we will never heal. 

They make us believe no one will ever understand.

The pain.

The agony

The story deep inside those scars. 


I look at my deep, deep scar. 

How could I ever look at this hideous piece of flesh that used to be whole? 

How could anyone ever see me as whole again? 


How could I forget how ugly this world is? 

How could I forget that my best friend saw the ugliness of this world and it consumed her? 

That she took a revolver to end her pain? 

How could I forget that my life was ripped in shreds? 

Scattered and broken and left open. 


I look at my scars and they don’t tell me that I’m hurt anymore. 

I’m not sure when I saw the change take place. 

I’m not sure when the scars became beautiful to me. 

I’m not sure when it was that I started to look at them and smile.


My scars don’t tell me that something hurt me. 

They tell me that something healed me. 

That God heals. 


Others look at my scars and they don’t see the grotesque and raw story behind them.

They see hope.

They see a truth behind them.  

My scars are my lighthouse. 

The treasure that my scars hold is beyond me. 

I’m just another tired, exhausted, messed up woman who wears them and has chosen to not hide them anymore. 


I lost myself in the darkness somehow.

But chose to not stay there. 

I chose to find the treasure in my scars. 

Treasure in My Scars


Filed Under: About Me

How to Cook a Stewing Hen

July 11, 2015 by Jackie Ritz 9 Comments


Have you ever wondered what to do with that too-old-to-even-lay-eggs-much-anymore chicken that still pecks around in your flock? Or did one of your hens get injured and there is no saving her? Many people have asked if it’s possible to cook this spent hen and how to cook a stewing hen.

Just like some of their human counterparts, spent hens grow cranky and surly in their old age, and some even pick up nasty habits like pecking at eggs and people who come to collect the eggs. Granny Miller.com says, “One…hen was so quarrelsome and aggressive with me that I gave up trying to be nice or reasonable with her. To collect her eggs I would unceremoniously lift her up by the neck and off her nest; and then throw her out the open door. It never fazed her a bit—next day it was the same routine.”1

Just like their outward behavior, these stewing hens are tough and stringy, and have compact, scrawny breasts and long and muscular legs. You can’t roast a stewing hen successfully, but once you know how to cook the hen correctly, a stewing hen yields delicious meat and rich, flavorful chicken stock. Many cooks will use nothing for chicken stews, soup, and stock, and others say that because they enjoyed an active lifestyle and a balanced natural diet they have a distinct chicken taste that is impossible to duplicate.

If you don’t raise your own free-range chickens, you might be so lucky to see stewing hens at your local farmers market. If so, be sure to grab it up in a hurry because the flavor of a stewing hen is incredible. Remember, meat chickens have been bred for muscle meat, whereas pastured laying chickens are bred for egg production. This lighter and leaner chicken requires a little more extra care in cooking — remember long and low! 

So let’s adopt the policy of Great-Grandma—let’s waste not, want not—and discover how to maximize the usefulness and taste of those old, better-with-age, stewing hens we will all encounter in the process of raising pastured, free range chickens. We’ll look at three steps in the process:

  1. What is my old stewing hen good for?
  2. What’s the best way to cook my stewing hen?
  3. What are some sample recipes I could use?

1. What is my old stewing hen good for?

I’ve already mentioned that stewing hens make the best chicken stew, chicken soup, and chicken broth. But their usefulness in your menu planning doesn’t stop there. The possibilities are endless—chicken tacos, enchiladas, stir fries, pasta sauce, chicken and dumplings, and BBQ pulled chicken sandwiches, just to name a few. (Note: You may also have experienced the tirades of that aggressive, mean-spirited, old rooster who attacks your other barnyard animals and even your kids. He can be prepared in just the same way that an old stewing hen is cooked, and will give you the same depth of flavor to your stews and stocks.) The hen’s age brings a wonderfully rich flavor and the grass they eat yields a delightful yellow fat (which you will be able to use!).

It can be hard to decide when to cull your older laying hens. Some keep their hens for a few years before culling, and others choose to cull at the onset of the hen’s first molt. Your chickens will produce larger eggs in their second year, and each year after, but there will be fewer eggs farther between each molt. They may be 8-10 years old before they cease to produce any eggs.

I’ve heard of some people who refuse to cull their own laying hen of many, many years and drive their spent chickens to a forest or woods and let them loose – letting nature decide how their life will end. However, this wonderful bird has given them hundreds upon hundreds of delicious eggs, why not continue to allow this bird to nourish you even more by providing you, yet another, delicious meal with her meat and then nearly 4 quarts of stock with her bones and organs? Waste not, want not! 

2. What’s the best way to cook a stewing hen?

Your stewing hen has lots of rich flavor if you know how to extract it. The only way to cook them is over low heat with lots of liquid—to stew them. As muscles get older, they develop lots of connective tissue, and a long slow cooking time is needed to bread that tissue down, which in turn flavors the broth around it tremendously. This is the same principle behind all braised dishes, which makes use of cheaper tough cuts—while they are not suited for fast preparations like grilling, they are the more flavorful parts of meat. Some of the traditionally most flavorful restaurant menu entrees, like Coq au Vin, traditionally prepared from a younger rooster, can be prepared with your old rooster and hen—just as long as you remember that your tough old bird won’t be fork tender for several hours.

You will cull your stewing hen and prepare it for cooking just as you would any chicken. But once you start the cooking process, everything is different. There are several slow cooking methods you can use, including stewing in a low temp oven or in a dutch oven on the stove top for several hours (see how to cook your hen on the stove top here), using a pressure cooker (see Granny Miller’s recipe for cooking in a pressure cooker here), or putting your stewing hen in your crock pot. I prefer the crock pot method (I use this crockpot ) because it is so much easier.

One of the first things you will notice about your stewing hen is the amount of yellow fat around her vent area, which is fairly typical in an older hen. With any method, you will want to skim off the fat once the cooking is complete. Don’t throw that fat away—it makes a very good shortening for dumplings and pie crusts for any type of meat pie.

3. What are some sample recipes I could use?

You will soon become an expert at cooking and using the delicious broth and meat from your stewing chickens. However, here are a few sample recipes to get you started.

Bone Broth

I’ve blogged about the healing benefits of good bone broth before. An old proverb says: “Good broth will resurrect the dead.” That’s an exaggeration, but it speaks of the great value of this wholesome food. You can read my blog on Bone Broth here, and find my recipe for preparing your broth. Remember that slow cooking is required for your stewing hen, so you will want to leave your hen cooking longer than 2 hours before you try to separate the meat from the bones, and put the carcass back in the crock pot to simmer another 12-24 hours.

Chicken Stew

When cooler temperatures are in the air, it’s time to make soups and stews. Most cooks agree that the best chicken stew begins with a pastured stewing hen. It’s the magic ingredient to give you flavor, texture, and color you will never get from a hen who lived its life in a cage, or even from a young hen raised in the pasture. You will find a great Chicken Stew recipe here.  If you want to make a traditional meal of chicken and dumplings, you might want to try the Paleo Chicken and Dumplings recipe found here. 

Paleo Kickin’ BBQ Shredded Chicken

Many of your regular chicken stew, soup, or shredded recipes can be adapted for your stewing hen, as long as you remember that low and slow cooking is the requirement. You may want to use two stewing chickens instead of one because of the smaller amount of meat you will get. But believe me when I say that this chicken meat will be some of the most flavorful chicken you’ve ever eaten. During the hot, grilling and outdoor picnic days of summer, you can make some crock pot shredded stewing chicken BBQ that will taste wonderful. You can find one recipe for it here.  This will be a recipe you want to repeat many times.

Paleo Chicken Enchiladas

Your cooked and shredded stewing chicken meat will be great for many Tex-Mex recipes, including tacos and enchiladas. If you are predominantly Paleo, as I am, and many others are also, you have probably missed the chicken enchiladas stuffed with not only chicken, but also cheese and heaped in a corn tortilla. Well, now you have a new recipe you can try for Paleo Chicken Enchiladas that may satisfy that longing you have. You can find the recipe here. 

Or you may want to do what my family does most often and just fix a big bowl of Taco Salad, using that delicious stewing chicken meat. Use your own creativity to create a delicious salad, or you may want to try my Green or Red Chile Pork Taco Salad (found here) and substitute your delicious chicken meat for the pork in the recipe.

Whatever cooking process or recipe you decide to use, it’s time to conquer your stewing hen fears and get to making some delicious meals from the cranky old hen or rooster no longer needed in your barnyard.

How to Cook a Stewing Hen

Sources:

  1. https://www.granny-miller.com/cooking-old-stewing-hens/
  2. https://www.thepauperedchef.com/2008/04/on-stewing-hens.html
  3. https://wholenaturallife.com/2011/11/14/how-to-cook-stewing-hens/
  4. https://wholenaturallife.com/2011/11/14/how-to-cook-stewing-hens/
  5. https://www.springrainfarmandorchard.com/wp-content/uploads/2012/03/What-Do-I-Do-With-a-SpringRain-Farm-Stewing-Hen.pdf
  6. https://www.theprairiehomestead.com/2014/07/cook-old-chicken.html
  7. https://www.theselfsufficienthomeacre.com/2013/11/how-to-cull-your-old-laying-hens.html


Filed Under: Uncategorized

Essential Oils On a Farm

July 11, 2015 by Jackie Ritz 5 Comments

One of the statements I can remember my mother saying whenever she counseled with someone about a problem in a marriage relationship was: “You have to always remember that you bought the farm!” So what does that mean? It means that in relationships, just as in farming there are cute, cuddly animals and bountiful harvests; there are also weeds, predators after your chickens, fleas and ticks on your barnyard animals (and sometimes your kids), and lots of manure to deal with. However, I’m coming to realize that essential oils can be used for so many things and so in this post I’m going to share with you how to use essential oils on a farm. 

I know that truth a lot better today after just a few short years of homesteading, than I knew it in my head before I experienced it…homesteading is NOT easy, nor is it glorious. I want this post to help us find ways that we can deal with some of the more negative factors in homesteading through the use of essential oils.

Yes, that’s right, you can use essential oils on your livestock and in the care and management of your farm. But you don’t just start using essential oils indiscriminately wherever and however you choose. Just as you want only to better the health of your family members with your essential oils, so too that’s your goal with your animal family, and it takes a bit of forethought and knowledge to get it right.

If you are interested in my trusted brand and how to get started using essential oils, then CLICK HERE! 

I want to concentrate in this post on using essential oils on animals. There are many other uses for essential oils in farming, but we’ll start with our animal family in this blog. Let’s consider briefly the use of oils with:

  • Flies, Fleas and Ticks
  • Cats and Dogs
  • Chickens
  • Goats
  • Dairy cattle
  • Pigs

Flies, fleas and Ticks

OK, I know we are not choosing to raise flies, fleas and ticks, but every barnyard animal will have to do battle with these pests. Flies are a major health concern all across the globe. The common housefly is a serious threat to people and animals alike because of the many infectious diseases they carry. Fleas and ticks like blood of any flavor—human, animal, or poultry.

Researchers in India did studies testing essential oil usage for dealing with flies. They discovered that peppermint oil successfully repelled larvae and egg laying, with ginger oil, cinnamon oil, and gooseberry oil also giving respectable assistance. (Source) You can find a Homemade Fly Spray Recipe using essential oils here. 

Finding a nontoxic insect repellent to use on your barnyard animals is not easy. Chemicals like prallethrin and piperonyl butoxide are often used in livestock sprays, as well as the proven toxic chemical, deet. These chemicals accumulate in the liver and put our animals at risk. However, researchers seeking organic and naturally healthier ways to get rid of insects and have developed nontoxic sprays using essential oils. You can find four of these natural livestock spray recipes here. 

Cats and Dogs

cats

There is a wealth of helpful research available online to help you find nontoxic, natural solutions for the health problems experienced by your household pets. It is important to remember that the essential oils blends and aromatherapy that humans can enjoy and handle might not produce the same reaction in our pets. Some oils can be quite dangerous. If used correctly, however, essential oils contain a host of biologically active and powerful compounds and are an indispensable part of integrative medical care. (Source)  You will need to research carefully to learn how to successfully use essential oils on your pets. 

There are cautions and principles for safe use you will need to be aware of. Do your research before trying anything. One veterinary who uses aromatherapy in the treatment of his animal patients has recommended the following essential oils that are safe for use. You need to see his recommendations for use and to know what they are used for here.  The oils he considers safe for use are:

  • Lavender
  • Cardamom
  • Fennel
  • Helichrysum
  • Frankincense
  • Spearmint

Once you are familiar with the essential oils safe for your pets, you can begin to develop essential oil remedies. You can find several suggestions for sprays, shampoo, flea collars, ear problems, paw pad care, skin irritations, doggie smell deodorizer, and calming mists here.  

Chickens

chic

To be successful using essential oils on chickens you must first understand that chickens breathe differently than mammals. They do not have a diaphragm, and use the rib cage and breast bone to move the air in and out of the body. Their lung rely on air sacs to distributed oxygen to their bodies. As a result, chickens breathe in higher concentrations of oxygen and whatever else in is the air. (Source) 

A buildup of fumes from chicken droppings, spilled water and cleaning products irritates their breathing system and leads to illness. So using a coop cleaner made with natural products will clean the coop without irritating the chicken’s respiratory system.

Lemon essential oil and other citrus fruits have natural cleaning and disinfecting capabilities. You can easily make a homemade coop cleaner that is easy on your nose and easy on the chicken’s respiratory tract. Use the recipe you will here for cleaning out the old shavings and coop bedding, and to spray down the coop. 

You can also make a salve ointment with essential oils for chicken care. You will find one recipe using lavender and frankincense essential oils here.  Coconut oil is also a great carrier oil to use for homemade chicken ointment.

Heavily diluted oregano essential oil is used by many chicken owners for many uses. Using essential oils for chicken care is a wonderful natural approach. Just make sure you do your own research so you are comfortable with the choice that is right for you to use.

You can also find a recipe for Natural Garlic Juice Spray  here. 

We like to add a few cloves of garlic to our chickens waterer. The garlic infuses the water and provides a good immune support every time they take a drink of water. 

Goats

One essential oil that has proven success in improving health issues in goats is lavender oil. It has traditionally been used for everything from respiratory problems, to skin health, and even as a natural aid during labor. Emotional issues in goats can also be alleviated with the help of lavender oil. (Source) 

j


If a goat is being kept in a stall due to illness, you can put drops of oil around the stall to help eliminate some of the animal’s stress. Some goat farmers will also add a few drops to a vaporizer or diffuser to alleviate respiratory issues. Lavender oil can be very hard on the liver and kidneys of animals, so avoid internal use. You can research all aspects of raising goats here. 

Dairy cattle

Essential oils with dairy cattle is now being considered as a way to improve or alter rumen fermentation (the cow’s first stomach) in order to reduce methane gas production. If you are interested in learning more about using essential oils with dairy cattle, one resource lists the essentials oil that may be helpful along with their properties, and possible uses. (Here)

Essential oils can benefit cattle during summer months with heat stress and pesky insects. Flies, fleas, and lice irritate cattle. Strongly scented essential oils like rosemary, cedar, lavender, and eucalyptus naturally repel pests and lessen the stress on the herd. Cinnamon oil, known as a “hot oil,” and along with garlic oil, clove oil, and oregano oil can help to reduce fermented protein in the rumen. Garlic oil can help to relieve digestive upset and the production of methane gases. You can find specific instructions for their use here. 

Pigs

One non-conventional use of essential oils with pigs is in animal feed. Some time ago Porcine Epidemic Diarrhea Virus (PEDv) was spreading rapidly throughout pig farms and causing a drastic impact on pork supply and prices at the meat counter. To combat this epidemic, many pig farmers began using a pig-feed ingredient that contained essential oils, oregano, and chili powder along with other all-natural organic ingredients. There has been a big boost in immunity to PEDv as a result. Essential oils are known for their aromatic effect, and the combination of essential oils, oregano, and chili powder have made pig barns at feeding time smell like and Italian pizzeria. (Source) 

It’s so encouraging to Frank and I as newbies in the business of raising farm animals to find that more and more farms are putting essential oils into practice. A number of companies are even selling plant extracts as feed additives, but very few big companies are willing to readily offer that information. Essential oils are truly a secret weapon, an unsung hero being used successfully, but not quite openly. Our farm plans to continue openly trying to find more and more uses for these powerhouse essential oils in our farmyard.

If you are interested in my trusted brand and how to get started using essential oils, then CLICK HERE! 

Essential Oils Around Your Farm

Sources

  1. https://www.theprairiehomestead.com/2014/07/essential-oils-livestock.html
  2. https://www.hobbyfarms.com/crafts-and-nature/4-diy-bug-repellents-for-you-and-your-animals.aspx
  3. https://www.optimumchoices.com/animals_essential_oils.htm


Filed Under: DIY Home Recipes, Dogs, essential oils, Homesteading, Living Sustainably, Natural Living

« Previous Page
Next Page »

Footer

Our Blog

The Paleo Mama blog provides simple answers for healthier families through research, tutorials, recipes, and simple remedies for daily needs!

  • Health
  • Essential Oils
  • Recipes
  • Remedies
  • Natural Living
  • Meal Plans

Stick around!

You’ll get instant access to a library of natural remedies and real, paleo food, including our ebooks and free guides we send out.

  • Home
  • Disclosure/Disclaimer
  • Privacy Policy
  • Advertise
  • Contact Me

Copyright © 2025 · Wellness Pro on Genesis Framework · WordPress · Log in