• Skip to primary navigation
  • Skip to content
  • Skip to footer

The Paleo Mama

Homegrown and Handmade

  • About
  • Blog
    • Podcast
  • Meal Plans
  • Essential Oils
  • Our Farm
    • Great Pyrenees Puppies
    • Goats
      • Goats for Sale
      • Goat Sales Policy
      • Nigerian Dwarf Bucks
        • Ranchocabra Lunar Eclipse

Blog

Why Raise Heritage Livestock Breeds?

August 12, 2015 by Jackie Ritz 2 Comments

Why Raise Heritage Breeds

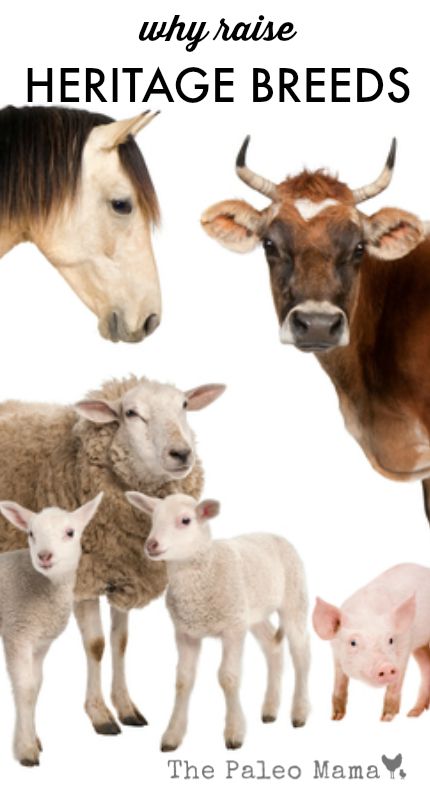
Gather Heritage Farm, our new 10-acre farm we recently purchased, has chosen to concentrate on growing tomorrow from the heritage of yesterday. We are concentrating on choosing heritage breeds (rare livestock breeds) for our homestead menagerie, and on filling our gardens with heritage and heirloom plants. We understand the importance of heritage—because we are the benefactors of our own rich heritage from our ancestors and I’m excited to answer all the common questions on why raise heritage livestock breeds.

Martin and Mary Kidder, my ancestral grandparents from the 1800s, also raised plants and animals on a farm probably much like ours. I have her diary from 1879, and find I can draw inspiration from the record of how she lived her life. Farming was hard then, probably much harder than anything I will have to face. On one particularly busy day she wrote:

Martin gone down to ditching and I have been into almost everything. Cleaning house. Taking care of butter. Doing all the chores both outdoors and indoors. Making tomato preserves, and last—but not least—drawing water out of the well. It was not no little chore either, but done. But O my how my back aches. Good-bye, I am going to bed.

There have already been nights when I felt exactly like that—my back ached, but my chores were done and all I wanted to do was to crawl into bed. But her heritage to me is much more valuable than identifying with her aching back. Her indomitable spirit is what gives me strength. On June 12th, her 28th birthday, she wrote:

How swiftly time onward doth roll and brings us nearer eternity. May I not have to at the close of another year look back and regret, but may it be a year well spent.

She kept that spirit on good days and bad days. On January 7th, she wrote:

O dear, a little bad luck. Our nice fat hog is dead. Think it was blind staggers ailed him. Makes us feel rather blue. But then it might have been worse. Let us count our blessings.

So for us—the Ritz family of Gather Heritage Farm—raising heritage plants and animals allows us to help preserve essential genetic traits, things like self-sufficiency, foraging ability, maternal instincts, and resistance to diseases and parasites. Heritage breeds store a wealth of genetic resources that are important for tomorrow—heritage animals and plants are the seed of yesterday that will build a better tomorrow.

Let me introduce you to some of our current heritage-laden animal family members and some of the other animals we chose to raise.

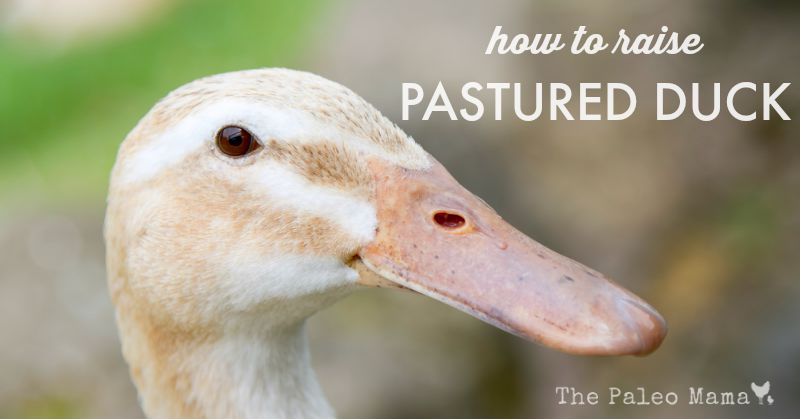
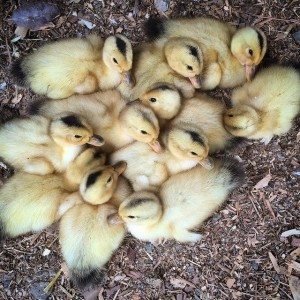
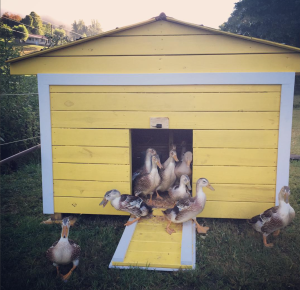
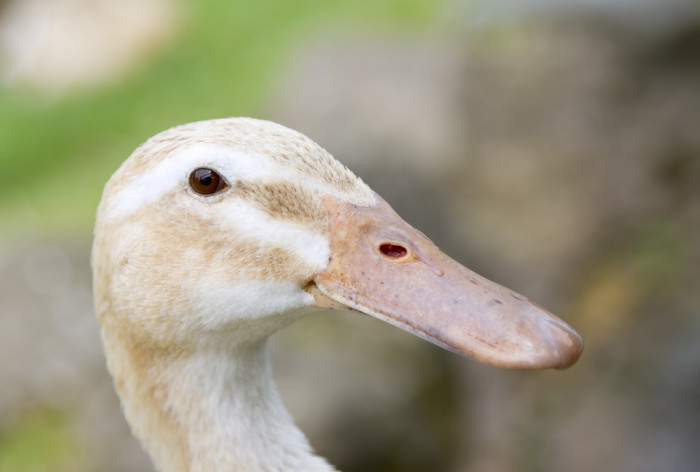
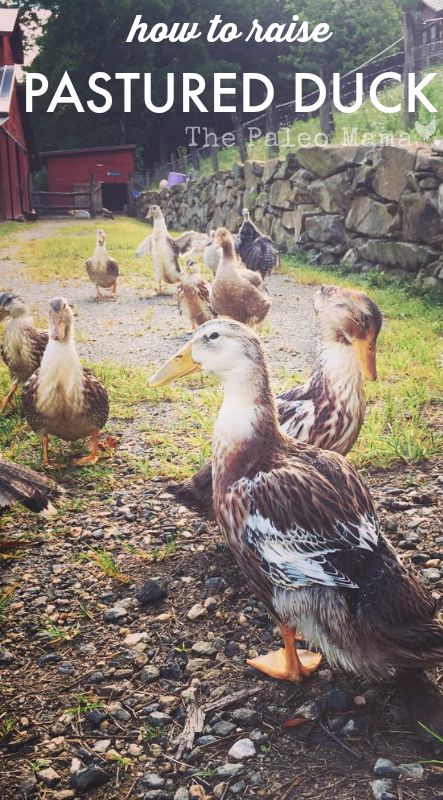
Silver Appleyard Ducks

Silver Appleyard Duck

We have eleven Silver Appleyard ducks, a critically endangered breed of ducks. In a 2000 census of domestic waterfowl in North America, only 128 Silver Appleyard ducks were reported. The Silver Applewood is named after Reginald Appleyard, who developed it in England. His ambition was to create a very attractive breed of large duck that would also be a prolific producer of white, large eggs.

According to the American Livestock Breeds Conservancy, “there is a critical need for more conservation breeders of Appleyards. Their excellent laying ability, meaty carcasses, and lovely plumage make them a great addition to any small farmstead.” (Source) 

American Buff Geese

We have two American Buff geese, a critically endangered breed, which we hope to raise and breed se we can help to preserve this wonderful breed. The American Buff goose was developed in North America and is descended from the wild Greylag goose, found in Europe and Northern Asia.

The American Buff geese, unlike other geese, are very calm and have a wonderful disposition—qualities I find important in animals and humans alike. They are good parents, attending well to their goslings. These attributes make the breed well suited for the average home flock. They are very smart, very friendly, and very affectionate.

Heritage Breed Chickens 

Chantecler (critically endangered)- The Chantecler originated in the Quebec Province of Canada and is a fine example of a dual-purpose breed. This breed is noted for its ability to withstand harsh winters. The lady I purchased my Chanteclers from mentioned that they will continue to lay large brown eggs when in the coldest of winters. 

Rhode Island Red (recovering)- these chickens are American’s best known breed is the most successful dual purpose bird, and remains an excellent farm chicken. 

Black Java (threatened) -the Java is considered the second oldest breed of chicken developed in America. The Java is a great homesteading bird and thrives in a free range environment. 

Orpington – this dual purpose American chicken breed bird is reaching the “recovering” status according to the Livestock Conservancy. They have a fast growth rate which makes them an excellent breed for meat, and also lay large light to dark brown eggs. 

Freedom Ranger Meat Chickens

Although not a true heritage breed, Freedom Ranger Chickens are a hybrid breed (a cross between commercial and heritage breeds) and a good alternative to the fast-growing commercial Cornish Cross. This breed is perfect for free range environments. They are active and robust birds with tri-colored feathers, and thrive in foraging and pasture environments. They produce tender, succulent meat with more yellow omega 3 fat and less saturated fat than fast growing breeds.

Freedom Ranger breeding stock is imported from the regions of Burgundy and Brittany (France). The genetic stock is derived from the American and European old heritage breed of chicken and was developed in the early 1960s to meet the highest standards of the French Label Rouge Free Range program. They are said to have a superior taste because they are a slower growing bird than the fast-growing commercial brands.

Turkeys

Narragansett (threatened) – this turkey is a descendant of the English and European colonists beginning in the 1600’s. Narragansett turkeys have traditionally been known for their calm disposition, good maternal abilities, early maturation, egg production, and excellent meat quality. As recently as 50 years ago, they were well regarded for production qualities.

Royal Palm (watch list) – The Royal Palm is a strikingly attractive and small-sized turkey variety. They are white with a sharply contrasting, metallic black edging on the feathers. Royal Palms are active, thrifty turkeys, excellent foragers, and good flyers. Standard weights are 16 pounds for young toms and 10 pounds for young hens.
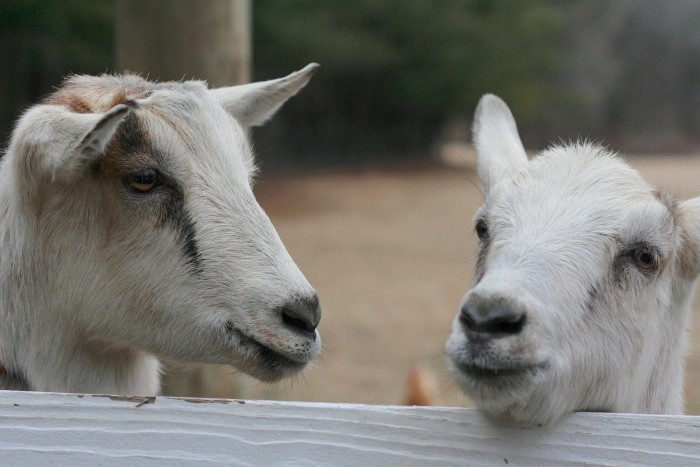
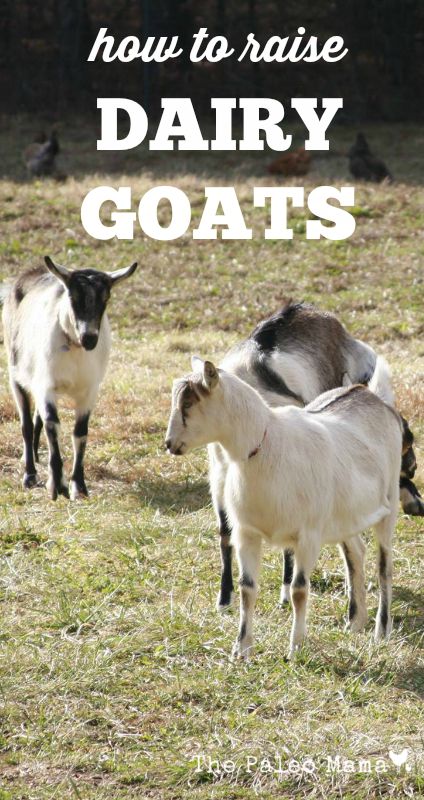
Nubian Goats

Nubian Goat

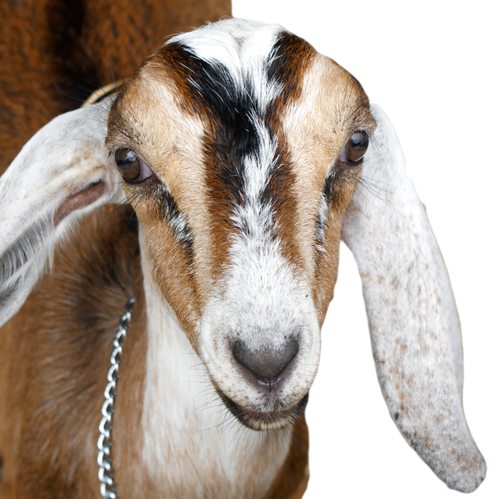
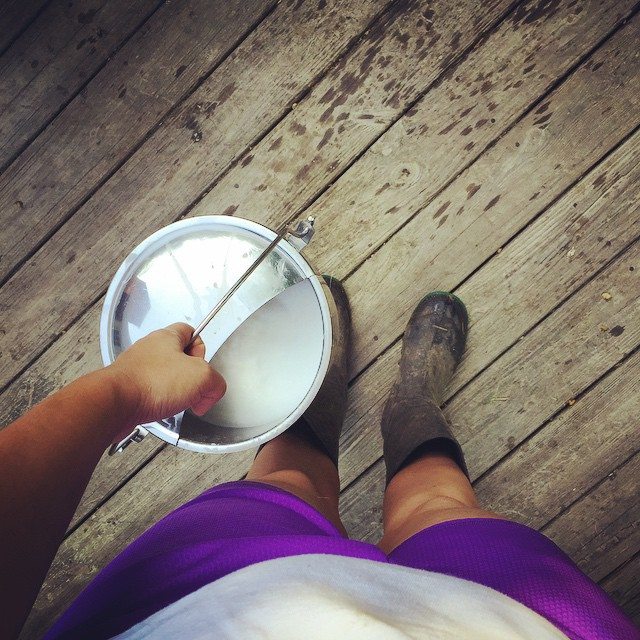
Although not a heritage goat breed, we chose our Nubian goats because they produce lots of yummy milk high in butterfat—and because they are just so darn cute. The Nubian is a relatively large, proud dairy goat of mixed origin. The ancestors of today’s Nubian have African and Indian heritage, developed further in England, where they are known as Anglo-Nubians. They have long, floppy, wide ears that are longer than their heads.  

They are very intelligent and personable, and love the attention you give to them. They have fun personalities, and can be very talkative. They are natural escape artists, so you need strong fencing. They provide lots of milk, and I’ve made wonderful tasting cheeses and creamy soaps with their milk.

Alpine Goats

Our Alpine goats originated in the Swiss Alps, and are excellent milkers with large, well-shaped udders. Alpines first appeared in America in 1922. They are hardy and agile, and adapt to just about any climate. Like our Nubians, they have a talent for escape, so sturdy fencing is needed. We count on the services of Esme, our LGD, to watch over and tend to the antics and wandering habits of our family goats.

Because of their fun colors, milk output, and friendly dispositions, raising our goats has become a Gather Heritage Farm delight.

Great Pyrenees Livestock Guardian Dog

esme

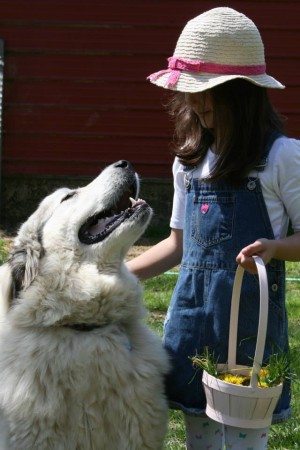
Esme, our Great Pyrenees LGD, has developed into a fantastic guardian dog for our barnyard menagerie. Great Pyrenees are one of the oldest dog breeds in the world. They were bred as dogs of war and then used during peacetime as sheep guarding dogs. They are one of the least aggressive of the large guardian dogs (LGD), so often people cherish them as family dogs. They are regal, independent and aloof compared to other dogs breeds, traits necessary to spend days alone guarding flocks.

Investing in a Livestock Guardian Dog was the BEST decision we made when we started our homestead. We found our puppy on Craigslist and she came from a working farm with working parents. We have invested hours of training into her and I couldn’t imagine our farm without her. The ultimate satisfaction of this investment comes when I look out the window and I see her laying down near where the goats are grazing and our free-range chickens are pecking happily in the dirt beside her. 

As you can tell, Gather Heritage Farm takes heritage very seriously. We know that one of the best ways to ensure a better tomorrow is to plant the heritage of yesterday firmly in the soil of today and watch it bloom in the harvest of tomorrow.

Why Raise Heritage Livestock Breeds

Filed Under: Homesteading, Living Sustainably

How to Raise Pastured Ducks

August 11, 2015 by Jackie Ritz 1 Comment

How to Raise Pastured Duck

A few months ago we added eleven heritage breed Silver Applewood ducklings to our homestead menagerie. These are a critically endangered breed of ducks, and we are raising them both to breed them for others to raise, and for meat and delicious eggs. They will be able to free range and forage in the pasture all day, and we have cleared an area of our creek and damned it up a bit to give our ducks and geese easy access when they want to go for a swim. I hope this post will help you answer those questions of how to raise pastured ducks so that you can enjoy all the fun things duck can bring to a homestead. 

There are many good reasons for choosing to raise ducks, including:

  • Control of aquatic weeds
  • Ease of containment
  • Eggs and meat
  • Pest Control
  • Manure provides nutrients for garden areas

We are hoping to be able to help others begin the exciting and so needed experience of raising this critically endangers heritage breed of duck, thus keeping it safe from extinction. There are five critically endangered duck breeds, and the following lists their unique characteristics:

  • Ancona—this dual-purpose, medium-sized (6 – 6-1/2 lbs.) breed has tasty meat and lays 210-280 white, cream, or blue eggs annually. Its plumage is white mixed with varying shades of lavender, black, or other colors.
  • Cayuga—this medium-weight breed (7-8 lbs.) lays an average of 100-150 eggs a year. It is one of the hardiest domestic breeds, and has a calm personality and beautiful black feathers with a green sheen.
  • Campbell—an active, lightweight breed (4 – 4-1/2 lbs.), it lays a whopping 250-330 eggs annually. It come if four varieties: khaki, white, dark, and pied (2 or more blotched colors).
  • Welsh Harlequin—a 5-6 pound lightweight that lays 240-330 eggs annually. Its stunning plumage resembles a mallard.
  • Silver Appleyard—this large breed (6-8 lbs.) lays plenty of white eggs and has silver-frosted, mallard-like plumage.

There are five basic things that you need to be aware of before you begin raising your duck family members.

  1. Your ducklings need specialized brooding time.
  2. Your mature ducks need ample, relatively-clean water to drink and bathe in.
  3. Ducks need a combination of forage and balanced feed to eat.
  4. Ducks need shelter and protection from predators.
  5. You need to keep your ducks in good health.

1. Your ducklings need specialized brooding time.

ducks

For their first two or three weeks, your ducklings will need to be brooded in a clean, heated (95 degrees) environment. They will need to be fed a 20-22 percent protein, non-medicated chick mash, and have plenty of clean fresh water.  Make sure the ducklings can get their bills in the water, but nothing else! Medicated poultry feed will kill ducks and geese. A gamebird starter/grower crumble like this one will work well. You need an escape-proof pen with a good, dry litter such as wood shavings or sawdust. You must keep the pen and litter clean and dry. Your ducklings (and mature ducks) will produce a lot of wet manure that stinks, and you will need to continually change the deep bedding to reduce the odor. After two or three weeks of brooding you can safely move them to your pasture to free range.

2. Your mature ducks need ample, relatively-clean water to drink and bathe in.

Ducks are voracious and sloppy consumers of feed and water. Keeping them in clean water can be a chore. In contrast to folklore, they do not need a pond, lake or creek in which to swim (but if they do, so much the better!). They need their drinking water in a container deep enough to submerge their heads. In this way they are able to clean out their nostrils from any dirt or forage they get in them.

Ducks and mud seem to go hand in hand.  Ducks eat by grabbing a mouthful of food, or a mouthful of mud, bugs and worms, and then dunking their bills into the water and swishing it around, so keeping ducks’ water crystal clear just isn’t possible.  The important thing is that the water be refilled daily, kept free of fecal matter and algae and that the waterers be cleaned regularly. You also need to keep the area surrounding the waterer as clean, dry, and mud free as possible. You can find some very helpful information on how to do that here. 

To satisfy their need and desire to swim in water, they can use a kiddie pool or other tub large enough that they can submerge their bodies. Ducks have an oil gland at the base of their tail that is activated as they splash water over their backs. This gland helps distribute waterproofing oils over their feathers as they preen their feathers, so providing them a place to bathe is critical. Be sure to rinse out their pool or tub often, especially in the summer.

3. Ducks need a combination of forage and balanced feed to eat.

Ducks relish hunting for slugs, insects, and tender, succulent grasses, and allowing your flock to grub for some of their own food will save money on your feed bills while reducing your pest population. And as a bonus to you, they will fertilize as they forage. 

In confinement situations or to complement forage, you’ll need to provide your ducks with a balanced, nutritious chick (or flock) raiser feed.  When they start laying eggs, switch to a layer feed. A grown duck will eat 4-6 ounces of feed per day. Feed them in containers that can’t be tipped over, and use enough so that all ducks can eat at the same time. Leafy greens are an important part of a duck’s diet. In addition to the grasses and weeds in the pasture, you can supply them with lettuce and Swiss chard. However they won’t eat wilted greens, so try putting their salad in their water tub. It will stay nice and fresh and will keep them occupied dabbing for the leafy treats. They also enjoy peas, corn kernals, cucumber pieces, watermelon and cut tomatoes. Always provide grit (coarse sand or dirt) to assist in grinding the food in their gizzard.

Keep in mind that a duck’s nutritional needs change with age and at certain stages of its life. Egg layers should receive a calcium-packed laying ration (crushed oyster shell or eggshell, here is one you can use) , and meat ducks need a high-protein diet that promotes fast growth.

4. Ducks need shelter and protection from predators.

Ducks

Most domestic ducks can’t fly. They have been bred heavier so they can’t fly away from the farms where they are raised. They can only waddle around slowly and awkwardly on pasture, and aren’t able to escape from predators like foxes, raccoons, and roaming dogs. It will be your responsibility to keep them safe and secure.

Provide them with a covered, fenced-in coop at night. If you have a barn, herd them inside for the night and put them in a barn stall. Choose fencing that is sunk deep enough, is meshed small enough, and is covered or electrified on top to keep foxes and raccoons from digging under it or climbing it to get inside to the ducks. Some homesteaders, including us, provide the safety of a livestock guardian dog to protect our chickens, ducks and geese. We have come to rely very heavily on the serious way that Esme protects our menagerie. You can read my blog on Training a Livestock Guardian Dog here.

We built a duck house that is raised off the ground for our ducks to go in at night. Once they are over 3 months old, you can remove the food and water from in the duck house to help minimize the mess. Pine shavings can be put on the bottom of the floor and raked through daily to help keep the mess down. I like to turn the shavings each morning and put DE down once a week to keep the flies away. 

5. You need to keep your ducks in good health.

Silver Appleyard Duck

One of the best ways to raise healthy ducks is to give them plenty of space to exercise, plenty of good nutrition, and plenty of water. Ducks are hardy birds, and seldom need vaccinations, deworming medications or routine veterinary care when you manage them well. They are not as susceptible to external parasites (ticks, lice, mites) as chickens because they spend time in the water, which drowns any parasites that are present. But there are a few duck health issues that you should be aware of.

  • Angel Wing – a non-life threatening condition in which the wing doesn’t lie flat against the body. Caused by overfeeding high protein food which causes the wing to grow too fast, angel wing can be reversed by switching to a lower protein feed, providing plenty of exercise and putting the wing in a sling.
  • Aspergillosis – Caused by fungal spores, aspergillosis causes heavy, labored breathing, but is easily preventable by removing wet feed and bedding promptly.
  • Bound Crop – Foreign objects, strings or long grasses can get lodged in the upper part of the digestive system (the crop).  The duck’s throat area may look swollen or feel hard. Massaging can help, as can a regimen of vegetable oil to try and break up the mass and allow it to pass.
  • Botulism – Prevalent in warm weather, botulism thrives in decaying waste or pools of water. It is important to keep water sources clean (we use white vinegar and a scrub brush on the water tubs and pool regularly) because botulism can cause death within hours.
  • Bumblefoot – Probably the most common affliction of ducks, affecting mainly the heavier breeds.  Bumblefoot is an infection that manifests itself in a black scab and swelling on the underside of the foot. It needs to be treated to prevent the infection from spreading and causing potential lameness.  Bumblefoot is usually caused by a cut on the underside of the foot, so keeping the duck pen free of sharp stones, branches and other foreign objects is helpful.
  • Egg Binding – This occurs when a duck is unable to pass an egg. Often it is possible to soak the duck in a warm bath and then apply vegetable oil around the vent to encourage the muscles to relax enough to let the egg out.
  • Eye Infections —Saline rinses can help clear this up as can access to a clean pool or tub of water. Ammonia buildup as well as dust can also cause eye irritations so clean straw or rice hull bedding in the duck house is important.

Scary as some of these conditions sound, lots of good preventative care and clean duck yard sanitation can ensure that you have a healthy duck flock. Take good care of your flock and they will thank you daily in their own cheerful, quacking, tail-wagging duck fashion. Many people believe them to be the happiest animals in the barnyard!

How to Raise Duck

Sources

  1. chatham.ces.ncsu.edu/…/pastured%20duck%20presentation.ppt
  2. https://www.hobbyfarms.com/livestock-and-pets/raising-ducks-26820.aspx
  3. https://www.countrysidemag.com/92-1-steve-edwards/
  4. https://www.hgtvgardens.com/ducks-and-geese/raising-ducks-a-primer-on-duck-housing-diet-and-health

Filed Under: Homesteading, Living Sustainably

Essential Oils for Your Garden

August 10, 2015 by Jackie Ritz 5 Comments

It’s so exciting to me to know that I can combine two of my passions—gardening and essential oils—to assure that I am going to reap a harvest of vibrant, healthy, pest-free fruits and vegetables. There are many wonderful essential oils for your garden and this post is going to show you a few of them!

You can purchase essential oils directly from me by going here. 

Essential oils can be a very important part of natural gardening. We live in a world where we are bombarded by chemicals that many time are not safe to use. Using essential oils in your garden can deter pests from ruining your precious plants. You will end up with strong and healthy plants that resist disease, and produce a higher yield and more fragrant crops. Can you just imagine how fragrant a walk at dusk will be in your garden?

I thought it would be very interesting to do some research and give you a post that covers three areas for merging essential oils and gardening together.

We will look at:

  1. Plants and Essential Oils that go together very well
  2. Using Essential Oils to drive away mold and fungus and those pesky insects and bugs
  3. Essential Oils that are very beneficial to you—the gardener.

1. Plants and Essential Oils that go together very well

Just as there are plants that work very well together and are garden companions, so too there are specific plants and specific essential oils that can become great companions in your garden. These essential oils are often the extracted oils from the companions plants that like to grow next to each other.

You will need to so your own research to really learn all there is to know about companion plants and essential oils, but let me list some of the garden fruits and vegetables that have a particular companion essential oil that you can use.

You can purchase essential oils directly from me by going here. 

Vegetables Essential Oil
Asparagus Basil
Green Beans Lavender, Basil
Broccoli Basil, Thyme
Cabbage Peppermint, Thyme, Clary Sage
Carrots Sage
Cauliflower Sage
Cucumbers Sage
Leeks Celery, Hyssop
Lettuce Carrot
Onion Chamomile
Peas Geranium
Potatoes Basil, Sage
Radishes Parsley
Tomatoes Basil
Fruits Essential Oil
Apples Lavender
Grapes Lavender, Hyssop

The best way to add the essential oil for the benefit of the vegetable or fruit plant is to add the oil to water. You can mix 6 drops of the companion essential oil to 2 gallons of warm water, then let it cool. Fill your watering container half full with the essential oil water, then top it off with cold water, stir again and water as usual.

Essential oils aren’t just for repelling unwanted creatures from your garden. You can also use certain fragrant essential oils to attract pollinators to your garden. The scent of orange blossom is an irresistible attractant for bees, as are the essential oils of small-blossomed flowers like lavender, hyssop, marjoram, helichrysum, basil, sage, and rosemary. You can also use lavender, fennel, helichrysum and sage essential oils to attract more butterflies to your garden.

How much fun would it be to create a private little nook near your garden where you go to relax after a long a stressful day. You will be able to take in the fragrance from your plants and oils, but you could also add an essential oil diffuser (I like this diffuser but you can get it much cheaper directly from me here)  and fill it with aromatherapy oils to enhance the calming effects of your secret garden.

2. Using Essential Oils to drive away environmental threats and those pesky insects and bugs

Essential oils are invaluable when it comes to dealing garden threats. About 85 percent of all plant diseases are rooted in fungi. Fungi poison and kill cells, block stomata (breathing pores), and steal nutrients from the plants. That’s where powerful essential oils can help you with these fungi. Tea tree oil (melaleuca) is a natural oil with the power to not only limit fungal growth, but to kill existing fungi. Try mixing a few drops of oil (up to a tablespoon) per cup of water in a spray bottle. Spray directly on your plants a couple of times a week. Avoid spraying leaves in very hot weather because the sun-heated oil can easily burn the leaves.

There are a wide variety of essential oils that can be used to repel unwanted insect pests from your garden. You can see some suggestions in the list below, but be sure you do your own research to find specific protocols for your own garden.

You can purchase essential oils directly from me by going here. 

Insects Essential Oil
Ants Peppermint, Spearmint, Garlic, Orange
Aphids Peppermint, Spearmint, Cedarwood, Hyssop, Orange
Beetles Peppermint, Thyme, Garlic
Cabbage caterpillars Rosemary
Chiggers Lavender, Lemongrass, Sage, Thyme
Cutworms Thyme, Sage
Fleas Lavender, Lemongrass, Peppermint, Orange, Rosemary
Flies Basil, Clove, Eucalyptus, Lavender, Peppermint, Rosemary
Gnats Patchouli, Spearmint
Mosquitoes Lavender, Lemongrass, Rosemary
Moths Peppermint, Lavender, Hyssop, Cedarwood
Plant Lice Peppermint, Spearmint, Cedarwood, Orange
Roaches Cedarwood, Eucalyptus, Cinnamon, Thyme
Slugs Cedarwood, Pine, Hyssop, Patchouli
Snails Cedarwood, Garlic, Pine, Patchouli
Spiders Peppermint, Lemon, Lime, Orange, Lavender
Ticks Lavender, Lemongrass, Thyme, Sage, Tea Tree
Weevils Patchouli, Cedarwood, Sandalwood
Wooly Aphids Patchouli, Pine

There are a number of ways you can apply the essential oils to your plants. Some ideas are:

  • Sprays–4-8 drops essential per gallon of water
  • Hanging strips of cloth—1 drop of undiluted essential oil per strip. Hand from a branch, using multiple cloths to cover desired area.
  • Cotton Wool—Bury small cartons, such as yogurt containers, in the ground keeping the top level with the soil. Add 4 drops essential oil to cotton balls and insert in the containers.
  • String—Soak a string is a solution of water and essentials oils then string between plant rows to deter flying insects.

You can create your own all-natural insect repellent by mixing equal parts of rosemary, peppermint, thyme, and clove oils (about 10 drops of each) in a spray bottle filled with water. Shake well before using, and apply anywhere you want to get rid of pesky garden insects and bugs.

In addition to the suggestions above, you can find several specific homemade formulas to use here. 

3. Essential Oils that are very beneficial to you—the gardener

Gardening can be beneficial to you in many ways. Being outdoors, close to nature, and active in growing your own food feeds you on all levels. However there will be days when gardening comes with sore muscles, dry skin, sunburns, bug bites, and respiratory congestion. Fortunately your essential oils are as beneficial and healthy for the gardener as they are for the garden.

You can do your own research to find effective ways to treat each of the ailments that sometimes come with gardening. Here are some simple ideas:

  • Sore muscles—All-purpose Salve (here).
  • Occasional skin irritations—Lavender oil is a must have and can be used to soothe dry occasional skin irritations. You can also use Peppermint oil for its “cooling” properties. You can make either a compress by adding 3-5 drops of Lavender oil to cool water and soaking a washcloth in the mixture and applying it to the sunburned area for 3 minutes. You can also mix 25 drops Lavender oil in a 1 ounce Spritzer bottle, fill with purified water or aloe vera juice, shake and spritz over the areas of need.
  • Respiratory Support and Clear Breathing—Add a drop or two of a respiratory blend of oil to a cotton ball and inhale as needed. Peppermint works well too! 
  • Seasonal distress from pollen—Mix 3 drops each of Lavender and Lemon and 3-5 drops Peppermint in a carrier oil and rub it into your palms, then inhale deeply for several seconds.

Using essential oils in your garden does so much to increase the positive rewards of gardening. Your plants will be healthier, your garden are will be wondrously fragrant and be home to busy bees and singing birds, and you will reap the reward of knowing you have contributed greatly to the continuing health and wellness of your family.

You can purchase essential oils directly from me by going here. 

Essentials Oils in the Garden

Sources

  1. https://essentialthree.com/blog/?p=595
  2. https://www.theseedsupply.com/using-essential-oils-in-the-garden/
  3. https://www.naturallivingideas.com/9-clever-ways-use-essential-oils-garden/
  4. https://simply-living-simply.com/gardening-essential-oils/


Filed Under: DIY Home Recipes, essential oils, Homesteading, Living Sustainably

How to Raise Dairy Goats

July 24, 2015 by Jackie Ritz 3 Comments

If you have followed me for awhile, you already know that my entire family has fallen in love with goats! We’ve been raising dairy goats for a couple years now and I’m excited to share with you how to raise dairy goats. I guarantee you will enjoy them! 

Regardless of whether your property is one acre (we got our first goats when we lived on 3 rented acres) or hundreds, sloping or flat, completely forested or filled with green pasture land, you can still raise dairy goats for milk. If you have just 2 dairy goats, which will give you an average of 1-2 gallons of milk a day for 10 months, it will keep your family in wonderful raw dairy goat milk all year. You will, also, have milk  for making cheese, yogurt, and even ice cream.

Goats are hardy and adapt well to changing climates. They forage and graze, require little space, and are reasonably inexpensive to keep. But best of all, they are highly intelligent and very friendly. Because they are extremely curious and agile, their antics can keep you laughing for hours. We believe our goats are the perfect addition to our homestead.

Why raw milk?

Finding delicious raw milk is not an easy thing to do in most states, which is why I decided to just raise my own goats for raw milk. Raw milk, from pastured cows, goats, and sheep, contains all the fat and has not been processed in any way. Real Milk tells us that pasteurization destroys enzymes, diminishes vitamin content, denatures fragile milk proteins, destroys vitamins C, B12 and B6, kills beneficial bacteria, promotes pathogens and is associated with allergies, increased tooth decay, colic in infants, growth problems in children, osteoporosis, arthritis, heart disease and cancer (source). 

If you can’t raise your own goats or cows for raw milk, then you can check HERE to see if there is a recommended farmer near you. 

I want to introduce you to the responsibilities and pleasures of raising dairy goats in this blog. We will consider these six aspects of raising dairy goats:

  1. What kind of goats should I consider for my dairy goat adventure?
  2. What kind of shelter and fencing do I need for my goats? 
  3. What should I feed my goats? 
  4. What do I need to know about my dairy goats’ milk production?
  5. What health considerations do I need to be sure I’m providing to my goats?
  6. What are a few sample things I can do with the raw goat milk my goats give me?

1. What kind of goats should I consider for my dairy goat adventure?

There are more than 200 different goat breeds worldwide; seven primary breeds dominate the dairy goat arena:

  • Alpines—originated in the Swiss Alps, and has a long neck and two-toned coat. The Alpine averages the highest milk output of any breed
  • Oberhaslis—native to Switzerland, and relatively rare in North America. It has a gentle disposition and a reddish brown coat with black markings.
  • Saanens—this is the most popular breed worldwide, and is a big goat with a very mild temperament and a white or cream-colored coat.
  • Toggenburgs—this is a friendly, gentle goat with white ears, white face stips, and white stockings and a brown coat.
  • LaManchas—the La Mancha is considered the calmest and friendliest of the dairy breed, and comes in just about any color a goat can be.
  • Nigerian Dwarfs—this miniature dairy breed produces less milk, but is ideal for a small family with a small backyard. Its teats are smaller so milking may be difficult for someone with large hands. It comes in all goat colors.
  • Nubians—the Nubian is popular among makers of cheese and ice cream because its milk is richer than that of other full-size goats. It comes in many colors, and is the most energetic and vociferous of the dairy breeds. You can easily distinguish it by its rounded face and long floppy ears.

We have a mixed herd of Alpines and Nubians. The Alpines give a ton of milk, which is why we chose that breed. Our Nubians are probably the most adorable goats I have ever seen. We love their personality and their milk definitely is higher in butterfat, making it a great resource for cheesemaking. 

It is SUPER important that you purchase your dairy goats from a reputable dairy goat breeder and that you ensure that you start with healthy stock that has been tested for CAE with proven genetics. We purchased ours from Ziggy at Sunrise Farm in North Carolina and made sure they were registered with the American Dairy Goat Association. Yes, we spent a little bit more than what we would have for a dairy goat on Craigslist or the stock yard, but I KNOW that my goat comes from good stock and is healthy. We, also, used Sunrise Farm’s proven buck to breed our girls last fall. 

goats 1

2. What kind of shelter and fencing do I need? 

Your dairy goats will need some kind of shelter. It doesn’t have to be fancy, but it does have to be clean, dry, and draft-free, yet well ventilated. It can be anything from an old outbuilding to a small shed or barn. Experts recommend at least 15 square feet of housing per goat. Stalls should be equipped with a rack for hay, a trough or box for grain, and a water pail holder. Include extra space for storing feed and other supplies, as well as a stand for milking. (See my blog on a homemade milking stand here.) Keep the goats’ bedding clean and dry. Remember that goat manure and bedding are great for the garden.

They will need plenty of outside space to play, exercise, and forage to their hearts’ content. Some experts suggest 200 square feet as a minimum, but more is even better. Remember that goats with room to roam come with a  price: good, sturdy fencing. They can squeeze through openings, nudge their way through weak areas, and hop a fence. Keep your woven wire or high-tensile electric fence at least 4 feet high. We have used galvanized fencing wire that is about 4 feet high with no electric fence and it worked perfect. In our new house, the previous owners had a smaller breed of goats and the fencing wasn’t 4 feet tall. Our large dairy goats have been able to jump right over it and make their way over to my beautiful garden for a snack. 

We’ve solved that problem by adding a line of electric fence over the top of the galvanized fence. They do NOT like getting shocked by the fence now and avoid it like the plague! 

3. What should I feed my goats? 

It’s really best to let your goats forage in the pasture for 90-100% of their food intake. They are opportunistic feeders, and will eat whatever they find. Be aware that some plants, such as oleander and wild onions are poisonous to goats. You can find a comprehensive list of plants to keep out of their pasture area here. 

If you don’t have pasture and forage available, then you will need to supply quality hay for them at all times. You can do this by putting the pellets in feeders free choice. 

In addition to pasture and forage, a milking doe can receive some extra grain every day to supply extra protein (12-16%) and give their milk supply a small boost. Grain is only given to our milking does when we are milking them. They get about 1 cup of our homemade grain for each quart of milk they are giving us. We have always left the kid/kids with the milking doe too, so if they are feeding their baby and giving us milk, we remember to give them a little bit more than 1 cup of grain per quart of milk we are getting. We also add a scoop of alfalfa pellets or Chaffhaye to the feeder when we are milking them. 

Provide fresh water at all times. 

Our homemade feed recipe for milking does (12% protein before adding Chaffhaye or alfalfa pellets):

  • 3 parts whole organic barley
  • 3 parts whole organic oats
  • 1 part black oil sunflower seeds.
  • *We add a scoop Chaffhaye or alfalfa hay to each feeder when the doe is on the milk stand providing even more nutrition and protein. 

We purchase these through Azure Standard and it’s the easiest and cheapest organic goat feed I have ever used. Plus, my goats love it! Also, only our goats in milk receive feed. If they are not in milk, they forage and eat alfalfa hay in the winter. 

We make sure our goats have a red mineral block and a white salt block (with selenium) to supply the extra nutrients that they need. 

When you are making the decision to begin raising dairy goats, you will want to consider the costs involved for you. It will be important for you to determine your own costs and budget, but I am inserting the following Cost Table to give you some idea of the costs you will incur.

Table 1. Hobby Enterprise: 10 milking dairy goats per year. Average 2050 lb milk per lactation.
  Cost Per Doe % of Total
1825 lb hay @ 200/T (5 lb daily) $182.50 18
1025 lb grain mix @ $0.21/lb
(3.3 lb average during lactation, 1 lb while dry)
$227.85 22
Bedding (straw – 100 bales @ $2.50 bale) $250.00 3
Breeding (cost of keeping a buck) $41.78 4
Vet costs $50.00 5
Operating expense (supplies, utilities, maintenance) $150.00 15
69.4 hours of labor @ $5/hr $347.00 33
 
Total $1024.13 100
Cost of producing 100 lb milk $49.96  
Cost per gallon $4.30  

(Source) 

4. What do I need to know about my dairy goats’ milk production?

You will want to breed your does once a year in order to keep the milk supply flowing. You can find complete information about breeding your goats here. During the milking period, you and the kids can share the milk: the doe will provide plenty. After the kids are 2 weeks old, separate them overnight and milk the doe in the morning. After her morning milking, leave the kids with the doe to nurse all day and then separate again each night.

Some people will say, “Oh, it’s easy to milk a goat!” That may be true once you’ve learned how to do it, but your first experience may be a lot like mine! (Read here) It may not be rocket science, and you may soon think it is simple, but there are a few practical principles that you will need to know when you start. You can find complete instructions to get you started here. 

milk

5. What health considerations do I need to be sure I’m providing to my goats?

As I already mentioned earlier, goats are naturally hardy animals, but most breeders follow routine vaccination and worming programs for optimal health. Diseases that are commonly vaccinated for are Clostridium Perfingens Types C & D (also known as Overeaters Disease) and Tetanus. Goats are susceptible to parasites, including intestinal parasites (worms), coccidia and external parasites such as lice. Good management practices such as alleviating overcrowding and keeping pen areas and water and feed containers clean will help, but a regular program of deworming is usually necessary. A complete body clip at least once a year in the spring not only helps keep the goats clean and comfortable, but will rid them of any lice as well. Hoof trimming is often a neglected task, but it should be done every 1-3 months depending on rate of hoof growth. Long, ragged untrimmed toes are detrimental to both the goat’s appearance and her long-term health. A sharp pair of pruning shears will make a quick job of trimming feet to their proper shape, which should resemble that of a kid’s hoof.

6. What are a few sample things I can do with the raw goat milk my goats give me?

One of the first things you should be aware of are the steps to keeping your goats’ milk fresh and delicious. Here are some simple steps, but be sure you research thoroughly so you are prepared to protect that precious raw milk.

Start with a clean seamless stainless steel bucket. (Here is one I like)  After milking rinse with cool water, then spray your bucket with a natural cleaner and use hot water to rinse.

Filter the milk as soon as possible. It’s probable that dirt, hair, bugs, and flecks of whatever can get in your milk as you milk. It’s important to strain every little speck out. I recommend special disposable milk filters and a stainless steel strainer to hold the filters. (I like this one.) 

Chill the milk as soon as possible and keep it between 35-38 degrees. Be sure you know what temperature you fridge usually shows. You may want to purchase a mini-fridge for just your goat milk. A standard mini fridge can hold 4 gallons of milk. I like to strain my milk and then submerge it in an ice bath for 30 minutes. The faster you can chill your milk, the longer the milk will stay fresh. 

Store the milk in glass jars. I like to use these half-gallon mason jars  and plastic lids.

There are so many ways that you can use your raw goat’s milk in your family’s meal plans. You can drink it, make goat milk yogurt and cheese, make kefir and egg nog, serve your family goat milk ice cream, pudding, smoothies, and milk shakes, and use it in your cooking recipes that call for milk. You can investigate these practical uses for your goat milk…and more…here. 

In addition to these dietary ways to use goat milk, I am addicted to making goat milk soap. Goat milk is packed with vitamins, minerals, natural fats, and protein. Those who have very sensitive skin find that paying over $5 for a bar of goat’s milk soap is worth it. But you can learn to make it for yourself! See my blog with a Traditional Goat Milk Soap Recipe here. 

Deciding to raise daily goats was one of the best homesteading decisions we have made. Our goats have become a part of our family, and we’d find it hard to be without them. I can just about guarantee that you will feel the same way if you try it.

How to Raise Dairy Goats1

Sources

  1. https://www.motherearthnews.com/homesteading-and-livestock/benefits-of-goat-milk-zmaz02jjzgoe.aspx
  2. https://www.countrysidemag.com/94-6-selecting-a-dairy-goat/
  3. https://www.americangoatsociety.com/registration/pdf/BeginnersGuidetoDairyGoats.pdf
  4. https://www.weedemandreap.com/goats-milk-keep-fresh-store/

Filed Under: Homesteading, Living Sustainably

Homemade Comfrey Salve

July 23, 2015 by Jackie Ritz 11 Comments


One of my favorite things about my new homestead is our very own comfrey patch. Of course, you don’t need to grow your own comfrey to make a nourishing salve with it. There are several places online that you can purchase dried, organic comfrey leaves to make this simple and homemade comfrey salve. 

Comfrey has been in use as a medicinal herb for more than 200 years. The allantoin content of comfrey aids in healing wounds, sores, burns, swollen tissue, and broken bones. It can be applied externally to bruises, sprains, arthritic bones of any inflamed tissue, and acts as an anti-inflammatory and pain reliever.

**Comfrey should never be taken internally and caution should be taken if using while pregnant.**

Homemade Comfrey Salve 

INGREDIENTS: 

  • 1 cup of dried comfrey leaf or roots (where to buy) 
  • 1/2 cup coconut oil (where to buy)
  • 1/2 cup olive oil (where to buy) 
  • 1/4 cup (2oz) of beeswax (where to buy) 
  • 25 drops of Lavender essential oil (where to buy) 
  • 25 drops of Melaleuca essential oil (where to buy) 

DIRECTIONS: 

  1. Put the coconut oil, beeswax and olive oil in a double boiler. Melt on medium heat. 
  2. Macerate the comfrey into small pieces with a food processor and a small amount of olive oil. 
  3. Add the comfrey and simmer on low for 1 hour if using comfrey leaves and 2 hours if using comfrey roots. Make sure to stir a few times during the process. 
  4. Strain the mixture into a bowl through a cheesecloth making sure to squeeze out all the oil. 
  5. Let cool for a few minutes. 
  6. Add the essential oils and stir.
  7. Pour into a glass or tin jars and store for up to a year! Makes 1 cup!

Homemade Comfrey Salve The Paleo Mama


Filed Under: DIY, DIY Beauty Recipes, essential oils, Homesteading, Living Sustainably

Homemade Echinacea Tea

July 21, 2015 by Jackie Ritz Leave a Comment

Soon after we moved onto our farm and began investigating all the bountiful plants and vegetables already growing there I started observing how the cycle of life evolves in both our plants and insects’ lives. I already know one big secret—our honey bees are really attracted to our Echinacea plants, more so probably than to any other plant in our gardens. Now I’ll let you in on another little “Ritz farm” secret—I am really attracted to the wonderful homemade Echinacea tea that I can brew from my perennially blooming Echinacea plants! 

Echinacea is one of the best-known herbal remedies, and Echinacea tincture was the first “snake oil” sold by old-time peddlers as a cure-all for everything from cancer to snake bites. There has been such a high demand for the plant, that two of the nine species are now listed on the endangered plant list.

Echinacea is a lovely perennial flower that can brighten up your garden and goes by the alternate name purple coneflower. Although some species may be other colors, purple is most common. Today, more than fifty hybrids have been developed from the nine distinct species.

Let’s look at five important things about this beautiful and beneficial garden plant.

  1. The medicinal benefits of Echinacea
  2. How to grow the Echinacea plant
  3. Harvesting Echinacea
  4. Making Echinacea tincture
  5. Brewing Echinacea tea

1. The medicinal benefits of Echinacea

The benefits of consuming Echinacea (known also as the purple coneflower) have been known for hundred of years, but only studied recently by science. Historically it has been used as a antimicrobial to help fight infections, and to treat snake bites, and relieve pain. Native Americans used it to soothe coughs and sore throats. Some modern science studies have shown it to be effective in shortening or preventing colds, and that it boosts the immune system. Today you can find on WebMD that “Echinacea is also used against many other infections including the flu, urinary tract infections, vaginal yeast infections, genital herpes, bloodstream infections (septicemia), gum disease, tonsillitis, streptococcus infections, syphilis, typhoid, malaria, and diphtheria.” (Here) 

2. How to grow the Echinacea plant

It isn’t difficult to grow and cultivate Echinacea. You can purchase plants from a gardening center, or take cuttings or root divisions from a friend’s garden, or grow it from seeds, which will germinate in ten to twenty days. Hopefully you are interested in preserving these at-risk plants, and will make sure you are getting organically cultivated plants instead of wildcrafted ones.

Echinacea is an herbaceous perennial that tolerates droughts fairly well. The plants grow up to three or four feet tall, and have straight stems that do not branch. A light fertilizing when you plant is all that is needed, and you will rarely need to water well established plants. Weeds will not destroy your plants, but they will compete heavily for soil with Echinacea, so you need to pull out the weeds as they begin to grow around your plants.

The plant takes two years to flower and become large and potent enough to harvest when grown from seed, but may flower the first year if you plant indoors first or have an exceptionally long growing season. Pick a moist, sunny spot with room to grow. Your plants will self-seed and spread where you let it.

3. Harvesting Echinacea

You will have several options for benefiting from the medicinal properties of your plants. Tincturing the fresh plant is highly recommended for getting the most out of the herb. The amazing thing about the echinacea plant is that the entire plant  plant can be dried (roots, stems, leafs, flowers) and used as tea, but you lose some of the benefits by drying. I’ve included some instructions for making Echinacea tincture in the next section. The flowers or leaves should be harvested right after the flowers begin to bloom. Cut each stem right where the first set of leaves is growing. Rinse the flowers, and hang them to dry or lay them flat on a screen. If hanging, tie a paper bag around the flower as the petals will drop. When the leaves and petals are completely dry, store them in a sealed glass jar, and keep them in a cool, dark, and dry location.

You can use your dehydrator if you like, and I’ve even heard of people using their car to dry herbs because, let’s face it, if your car is outside in the summer, it gets to be an oven in there.

4. Making Echinacea tincture

Making a concentrated liquid form of an herb (a tincture) is a great way to take advantage of the health benefits of that herb. Echinacea tincture is easy to make and easy to take. The tincture has a very long shelf life, and is ready to use when needed. Tinctures preserve and concentrate the properties of the herb, making them more effective and longer lasting.

All you will need to make your Echinacea tincture is:

  • A clean glass jar (pint size) and lid
  • A consumable alcohol (80 proof vodka, apple cider vinegar, or food grade vegetable glycerine)
  • Your Echinacea herb (use the root, flower, and leaf)

Be sure you rinse all the dirt off your plant roots, and make sure no bugs are hiding under the petals or leaves. You can find the specific instructions of making your tincture here.  The Wellness Mama website can also recommend three distinct kinds of tinctures (find here):

  • Chamomile Tincture
  • Digestion Tincture
  • Sweet Dreams Tincture

5. Brewing Echinacea tea

Screen Shot 2015-07-21 at 11.27.30 AM

You can use either fresh Echinacea herb parts or dried parts to make Echinacea tea. Echinacea tea is excellent for strengthening the immune system and fighting off infections, colds and flu.

There are many different kinds of Echinacea tea that you can make. They all start with a basic recipe, and then add additional items or essential oils to create healthy and beneficial flavors. I want to share with you my favorite recipe for making Echinacea tea. I’m sure I will be developing new and fresh recipes for Echinacea tea for as long as my wonderful perennial Echinacea plants continue growing. (Believe me, I plan to keep them growing!)

  • Where to buy dried organic Echinacea
  • Where to buy Echinacea Tincture
  • Where to buy Echinacea Tea


Homemade Echinacea Tea: 

Ingredients: 

  1. 1/2 cup Fresh or dried leaves, roots, flower (1/4 cup if using dried)
  2. 8 oz of water 
  3. 1-2 teaspoons of raw honey 

Directions: 

  1. Simmer 8 oz of water in a small pot over medium heat. 
  2. Add the fresh or dried Echinacea
  3. Cover and simmer for 15 minutes. 
  4. Strain tea into a mug and add honey! 

Homemade Echinacea Tea 1

Sources

  1. https://www.offthegridnews.com/alternative-health/growing-and-using-echinacea/
  2. https://homegrownandhealthy.com/grow-your-own-echinacea/
  3. https://wellnessmama.com/25999/echinacea-benefits-uses/
  4. https://loveplantlife.com/2012/02/echinacea-how-to-grow-and-use-this-powerful-antibiotic-and-immune-stimulant/
  5. https://www.terranovanurseries.com/gardeners/echinacea-c-82_22.html

Filed Under: DIY, DIY Home Recipes, Homesteading, My Recipes

« Previous Page
Next Page »

Footer

Our Blog

The Paleo Mama blog provides simple answers for healthier families through research, tutorials, recipes, and simple remedies for daily needs!

  • Health
  • Essential Oils
  • Recipes
  • Remedies
  • Natural Living
  • Meal Plans

Stick around!

You’ll get instant access to a library of natural remedies and real, paleo food, including our ebooks and free guides we send out.

  • Home
  • Disclosure/Disclaimer
  • Privacy Policy
  • Advertise
  • Contact Me

Copyright © 2025 · Wellness Pro on Genesis Framework · WordPress · Log in