• Skip to primary navigation
  • Skip to content
  • Skip to footer

The Paleo Mama

Homegrown and Handmade

  • About
  • Blog
    • Podcast
  • Meal Plans
  • Essential Oils
  • Our Farm
    • Great Pyrenees Puppies
    • Goats
      • Goats for Sale
      • Goat Sales Policy
      • Nigerian Dwarf Bucks
        • Ranchocabra Lunar Eclipse

Blog

Our Homeschool Routine

October 7, 2015 by Jackie Ritz 17 Comments

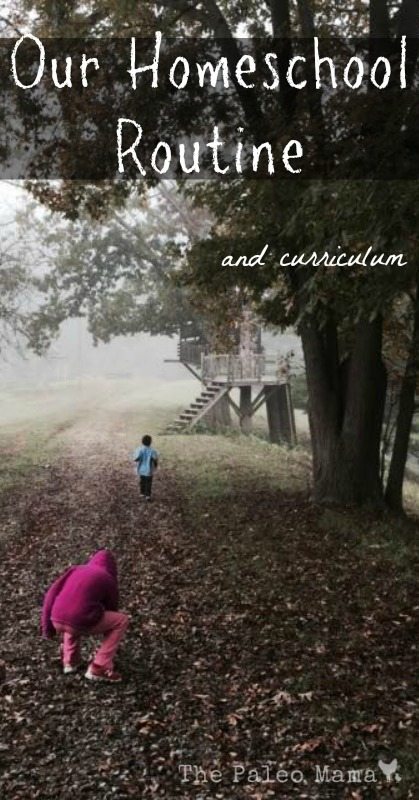
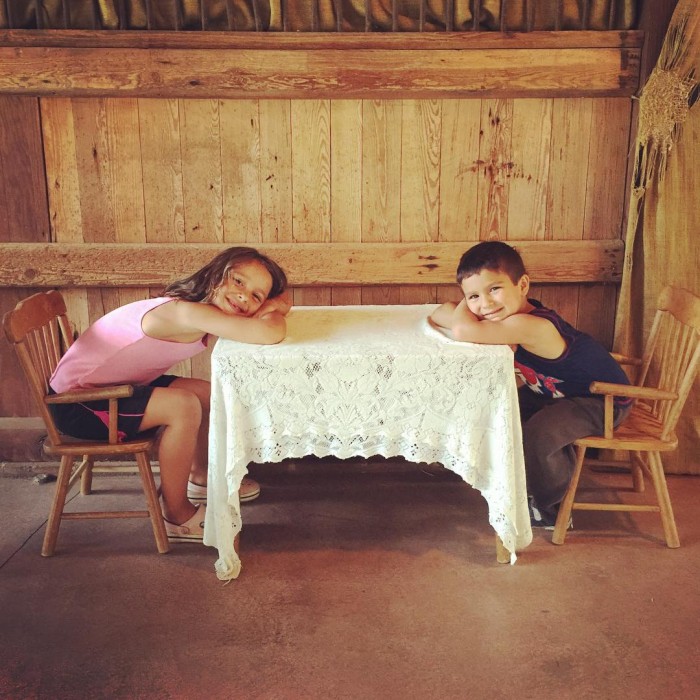
It’s been over a year since I’ve been homeschooling. I am, by far, not an expert at this yet, but I’ve had so many of you ask me about what our homeschool routine and curriculum that we use are, so here it all is! 

I had always planned on homeschooling my little ones. My mother homeschooled me in my early years, and it is some of the most memorable times of my life. I remember doing so much with my older brother and younger sister during my homeschooled years and I had always hoped to do give the same memories to my children. 

There was a month where I had a moment of freak out. I didn’t think I would be able to do this and felt so much self-doubt. I actually ended up putting my daughter in public school during this panic and regretted it so much. She wasn’t even in public school a month before we pulled her out. It just wasn’t a good fit for our laid back, farm life. 

Our Style of Homeschooling: 

There are many different approaches to homeschooling, but here are the top 5: 

  1. Traditional – this is probably the that most of us grew up with. You have separate textbooks and workbooks for each subject and usually the workbooks contain multiple choice answers and fill-in-the blanks. 
  2. Classical – this style of education teaches children according to the Trivium (3 stages): the Grammar Stage, the Dialectic stage, and the Rhetoric Stage. 
  3. Unschooling  – also called “Child-Led Learning” this follows the interest and pace of the child and has no set curriculum. 
  4. Unit Studies – Unit studies take a theme or topic and incorporate all the school subjects (language arts, history, science, music, art, etc.) into that topic.
  5. Charlotte Mason – this style of education uses rich literature, also called “living books”, rather than textbooks. This approach uses a generous curriculum, rich in nature, art, music, and narration, that “spreads the feasts” throughout the week, leaving lots of room to digest what the child is learning. 

Want to find out which type of homeschooler you are? TAKE THIS QUIZ! It’s fun and you might want to see what fits your family’s personality before you go spending money on an expensive curriculum. 

Our family is Charlotte Mason through-and-through! We have a deep love and appreciation for good books, art, and leaving lots of room for thought and processing. We don’t like to rush ideas, thoughts, or check things off the list. We appreciate good books, known as living books. These are books that come alive! I’m sure you all can think of a childhood book you love. Most likely it is a “living book”! Oh and, we really do not like textbooks. We would rather learn from nature, or from stories, than a textbook. So, this philosophy fits us perfectly! 

Our Curriculum & Routine: 

We have a first grader and a 4 year old who participates in our school day. Our 4 year old takes part in the morning basket (I’ll explain later) and the literature reading we do. Other than that, he mostly plays outdoors or does artwork during our formal hour of school. 

It’s important to remember that we believe that learning takes place all throughout the day, not just during “formal school hours”. With our first grader, it takes us about an hour in the morning to finish the daily studies, and the rest is done throughout the day whenever learning opportunities spring up. 

A few things today that prompted learning:

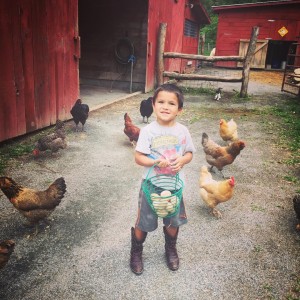
  • Retrieving the hen’s eggs and counting them
  • Learning from a local farm about proper horsemanship and respect of animals
  • We watched a documentary on the most dangerous animals and an Australian crocodile was one of them. We got out the air-dry clay (best stuff in the world!) and made alligators.
  • We spelled out new words from our reading on our refrigerator during dinner prep. 
  • We put up a new vinyl wall decal with 73 different stickers. Little farm girl did it all herself, counting and making sure she staying in order.
  • We listened to Bach in the car and talked about how he used to teach piano

We use some of the Simply Charlotte Mason materials, along with using a lot of the recommendations on Ambleside Online. So make sure you check out those two amazing websites! Ambleside Online links to MANY online books, so you could homeschool for pretty much free! I prefer books I can hold in my hand, and find lots of the recommended reading books at thrift stores and used on Amazon for a good price. 

Our Morning Basket:

This is a basket of books I keep on the dining room table and do with the kids during breakfast or “morning tea” (morning snack). It includes our poem book, our Bible, a stack of famous art from an artist (we are doing Constable right now), and a few CD’s. We read a poem everyday, talk about our Bible lesson for the week (this week it’s the ladder that reached heaven), play a folksong or hymn, and just take advantage of the early morning opportunity to learn (while the kids are sitting still eating!). 

If you want to see exactly what is in our morning basket, feel free to take a peak at my weekly schedule HERE. This is where I keep track of what we are doing and making sure we are getting through our materials. 

We don’t do all of these every, single day. We kind of rotate through different books, finding our own pace, and making sure the kids are understanding what we are reading. I go at their pace.

What exactly is in our morning basket? 

  • A Child’s Book of Verses
  • The Child’s Story Bible 
  • Bach Music Study
  • Shakespeare for Young Readers
  • Jeremy: The Honest Bunny (our current literature book) 

Everyday Work: 

After we finish breakfast we head to our homeschooling room and do the “formal” stuff. These are the materials that I make sure we do everyday. And just a note, we don’t spend more than 10-15 minutes on each of these subjects. Less is more!  The everyday subjects include reading/phonics, copywork (handwriting practice), math and history. I’ve pieced together materials that work for us and these include: 

Math Curriculum: Math-U-See – we LOVE this math curriculum and the simplicity of it. We have tried 2 other curriculums that didn’t work for us and fell in love with Math-U-See. 

Copywork: this is handwriting activity is essential to the early years. We use various poems or folksongs that we are learning and write a few lines from them. We do this everyday. I believe that less is more in this and I make sure that my first grader is taking her time and writing neat. Right now we are writing the lines from a folksong we are loving called, “The Bold Grenadier“. Here’s a short part of it: 

“As I was a-walking one morning in May 
I spied a young couple a-making of hay. 
Oh, one was a fair maid, and her beauty shone clear, 
And the other was a soldier, a bold grenadier.”
 
Phonics: We love the phonics curriculum from Easy Peasy. Easy Peasy is a free, online curriculum and uses much of the Charlotte Mason method. We have almost completed the phonic lessons from “Getting Ready 2“, which will complete our phonics. 
 
Reading: My first grader is reading through the Pathway Readers. I HIGHLY recommend this series, but make sure you start at the first book. These readers are so delightful and help so much with sight words…plus they are the cutest stories ever! When we come upon a new word, we talk about it, build it with her letters, and move on. 

History: You can take a peak at our schedule HERE and see all the great books we are reading for history. Paddle to the Sea is the main one we are reading; making sure to track Paddle’s journey on our map as he journeys from the Great Lakes to the St. Lawrence River, and finally the Atlantic Ocean. It’s full of geography, nature, drama, and adventure that all children (even us adults) love reading! 

Literature: We make sure to read various fairy tales and great literature books everyday. We don’t read all these every, single day. We pick one book a day for mandatory reading and then the kids usually beg for more. Our 4 year old enjoys sitting in and listening to most of these. Right now we are reading a wide variety, including Aesop’s Fables for Children (the kids ADORE these) , Jeremy, The Honest Bunny, Blue Fairies, and a few others. You can see them all HERE on our schedule. We follow the reading lists on Ambleside Online for most of these. 

Weekly Work: 

This is the part I love about the Charlotte Mason approach. You spread out a lot of the work throughout the week, making sure that the child is retaining it all. We do most of this stuff once a week. We do art everyday, but I’m putting it in this section because it’s encouraged to do at least once a week. 

Picture Study: Each term (3 terms in a year) we focus on a new artist. Right now we are studying the masterpieces of Constable. I use a picture-study portfolio from HERE and we pick a new picture to study each week. WE talk about it and then hang it up on our classroom wall. 

11144944_10153303083257013_5670139855513589938_o

Nature Study: Though encouraged to do at least once a week, this is a daily thing we do. We live on a farm and the kids enjoy so much time outdoors. We use the Handbook of Nature Study and try to study things in season. We will rotate the various animals and things of nature in this book for the next five years! This book is a beautiful investment! 

Geography: We usually cover geography in our history reading of Paddle to the Sea, however, our first grader LOVES maps and learning about location. We are taking “Visits to Africa” using THIS BOOK and diving into the culture of Africa. We are enjoying reading about what they eat in Africa and the various countries using this Hungry Plant book. 

Some days are better than others when you are homeschooling, but overall, we are so in love with being able to share our day with our children. I, personally, am enjoying the fact that I am going through school again! I love all the books my children are reading, and I love the special moments and conversations that develop because of our time together! 

Our Homeschool Routine and Curriculum

Filed Under: family, Homeschooling, Natural Living

How to Grow Elderberries and make Elderberry Syrup

September 28, 2015 by Jackie Ritz 5 Comments

Elderberries are one of the most sustainable crops, and is being farmed by many farmers who are interested in nutritious, home-grown and organic farming. It is packed with Vitamins A, B, and C, iron, potassium, and powerful antioxidants. The plants are a hardy perennial, and are naturally disease resistant. Surprisingly, only 10 percent of the elderberries consumed in the United States are actually grown here. Making a elderberry syrup recipe is a great way to get all the nutrition from these delicious bushes into our body! 

Our farm wants to be a part of the group that wants to change that statistic. We are so happy to have some elderberry bushes on our farm already, and we plan to add more. I’ve already made my own homemade Elderberry Syrup and hope to have many more elderberries to harvest next Fall.

In this blog post I want to cover some of the basics in elderberry growing and harvesting and then using the berries to make an elderberry syrup. We will take a look at:

  1. Elderberry varieties to consider growing
  2. Planting new elderberry bushes
  3. Taking care of your elderberry bushes
  4. Harvesting your elderberries
  5. Nutritious, healthy ways to use your elderberry harvest
  6. Elderberry Syrup Recipe

1. Elderberry varieties to consider growing

There are several varieties of the American elderberry that are especially good fruit producers. Here are some of the best selections to try in your yard or farmland.

  • Adams—This American variety grows 8 to 10 feet tall. The large, juicy, dark purple fruits ripen in August and are great for making pies. The strong branches hold the berries upright. Plant a pollinator variety such as ‘Johns’ for maximum fruiting. This variety is often sold as “Adams No. 1” or “Adams No. 2.” There is little difference between these two selections.
  • Black Beauty—This striking European variety features purple foliage and lemon-scented pink flowers. It grows 6 to 8 feet tall and wide and can be grown in perennial borders or as a foundation plant.
  • Black Lace—This eye-catching European selection looks like a Japanese maple with its dark purple, deeply cut foliage. Like “Black Beauty,” this variety also grows 6 to 8 feet tall and wide, producing pink flowers and dark purple fruits.
  • Johns’—This early-producing American variety produces an abundance of berries that are especially good for making jelly. Growing 12 feet tall and wide, this variety is a good pollinator for “Adams.”
  • Nova—This American variety can be self-fruitful, but does best with another American elderberry growing nearby. Large, sweet fruit are produced on compact, 6-foot shrubs.
  • Variegated—This European variety has attractive green and white leaves and grows 6 to 8 feet tall and wide. The plant is less vigorous and productive than other elderberry varieties, but the foliage is attractive all season long.
  • York—This American variety produces the largest berries of all the elderberry selections. It matures in late August and only grows 6 feet tall and wide. It pollinates “Nova” well.­1

2. Planting new elderberry bushes

While your elderberry berries will grow on your bush the first year they are planted, you will want to be aware that the berries will do better the second year and each year after. The bushes will grow best in well-drained loamy soil. If your soil is sandy, you will need to add organic matter to prepare your soil. Before you plant, be sure to check your soil pH. Your local County Extension Office can supply you with the information you need for doing this.

All elderberries require cross-pollination with other varieties. Either plant two different varieties in their own spots close to each other in your garden, or plant two varieties in one hold. Since Nova and York are the two cultivars that grow the biggest crops, you may want to begin with these two, cross-pollinating them as you plant.

Here are some excellent planting tips:

  • Pick a location with full sun
  • Add manure or compost to your soil before planting
  • Plant your elderberry bushes 6-8 feet apart in rows 10 feet apart.
  • Water the plants thoroughly
  • Don’t apply any fertilizer during the first year.
  • Elderberries are shallow rooted: Keep them well watered the first season.

3. Taking care of your elderberry bushes

After the first year, your elderberry bushes will grow best if you fertilize annually using compost. Because they have shallow roots, mulch around the plants to control weeds that compete for water and nutrients.

Your bushes will grow suckers freely, sending up new branches each season. In the second and third years, these new branches will produce side branches that fruit heavily. In late winter, prune out branches that are more than 3 years old, leaving equal numbers of one- two- and three-year-old branches. Prune out dead or diseases branches as well.

There aren’t many significant pests or diseases affecting elderberries. However you will want to watch for cane borers and Japanese beetles. Be aware that birds love elderberries, and will compete with you to eat them before you can harvest the berries. To avoid the birds getting your harvest, cover the shrubs with netting once they begin to berry. If you are also raising chickens, your chickens can be one of your best defenses against both weeds and insects. You can also handpick the beetles, or use a natural, organic control such as AzaMax. (Here) 

4. Harvesting your elderberries

In most climates, there will be a 5-15 day period in mid-August through mid-September when the berries are ripening. Be sure to pick them before the birds do! Let them ripen on the shrub to a dark purple color. Prune off the entire cluster when ripe, and strip the berries into a bowl. You will need to keep the harvest refrigerated and process the berries as soon as possible. You can get 12-15 pounds of berries from one mature 3-4 year old shrub.

5. Nutritious, healthy ways to use your elderberry harvest

As I mentioned at the start of this post, elderberries are packed with vitamins, minerals, and antioxidants. One of the best-known benefits of the black elderberries is its power to boost the immune system, because of it strong, antiviral properties. The medicinal parts of the elderberry bush include the roots, bark, young shoots, leaves, flowers, and berries. Yup—the entire plant! 

The flowers are effective at reducing phlegm and encouraging sweating. They are also good for strengthening the upper respiratory track. The flowers help to soften the skin and are often added to lotions and creams. You can also make a flower poultice with them too! (Here) 

Elderberries can also be used in cooking, and there are many good, nutritious elderberry food recipes that you can research for yourself.

Elderberry Syrup Recipe

If you cannot grow your own elderberry bushes, then you can still reap the benefits of this plant by purchasing dried elderberries from HERE.

I want to really encourage you to find a local honey farmer and get the MOST local raw honey you can find. It’s not necessary to have local honey, but it is essential to have RAW honey that has not been pasteurized (to destroy it’s many health benefits). I am lucky enough to have our own honeybees, so we used the honey that we harvested in July from our backyard! 

INGREDIENTS:

  • 2 cups of filtered water 
  • 2/3 cup of dried elderberries or 1.5 cup of fresh
  • 1 cup of your most local raw honey you can find
  • 1 teaspoon of whole clove 
  • 1 stick of cinnamon
  • 1 knob of fresh ginger, peeled 

DIRECTIONS: 

  1. Bring the water, elderberries, and spices to a boil. Reduce to simmer on low for 30-45 minutes with a lid on. 
  2. During the simmering, use a potato masher and frequently mash the elderberries while simmering.
  3. Remove the saucepan from the heat.
  4. Pour the honey in a separate glass jar.
  5. Filter the hot syrup through a sieve or cheesecloth into the honey. You might need to grab a funnel. You will want to make sure you squeeze all the liquid out from the elderberries. This is why I like using a cheesecloth and twisting to make sure it’s completely drained out . 
  6. Stir the honey until it is dissolved. Make sure you use the hot syrup to dissolve the honey. 
  7. Date and label the bottle and then place in the refrigerator. The honey acts as a natural preservative so you syrup should be good for several months in the fridge. 

NOTES: 

  • Adults can take 1 tablespoon daily and children (over 1 years old) can take 1/2ts-1 ts daily. 
  • If feeling under the weather, adults can take 1 teaspoon every 2-4 hours and children can take 1/2 teaspoon, every 2-4 hours. 
  • Remember honey can cause botulism in infants! 
  • Cost/Savings: It cost me $2.17 if purchasing dried elderberries to make this recipe and only $$0.97 if using your own homegrown elderberries!
  • This recipe makes over 3 cups of elderberry syrup! You won’t beat that price anywhere! 

You will never regret your decision to try raising and harvesting elderberries. Elderberries are even better nutritionally than blueberries. They are wonderful for pies, jams, jellies, and homemade medicinal remedies. The flowers are delightful breaded and made into fritters. Join us at bringing these wonderfully versatile berries back as homegrown American treasures and enjoy the delicious and nourishing Elderberry Syrup Recipe! 

Elderberry Syrup Recipe

Sources

  1. https://www.garden.org/ediblelandscaping/?page=july_elderberry
  2. https://normsfarms.com/aboutus/our-story/
  3. https://www.gardeningknowhow.com/edible/fruits/elderberry/planting-elderberry.htm
  4. https://www.starkbros.com/growing-guide/how-to-grow/berry-plants/elderberry-plants/planting
  5. https://www.healing-from-home-remedies.com/elderberry-benefits.html

Filed Under: beekeeping, DIY Home Recipes, Homesteading, Living Sustainably, Natural Living

GIVEAWAY: Sew Grown Essential Oil Clutch

September 24, 2015 by Jackie Ritz 7 Comments

EO Clutch Giveaway

I’m so excited for this giveaway! I’ve been enjoying my Sew Grown essential oil carrying clutch for a few months now. I finally can roll in style when we are out-and-about! 

This essential oil carrying clutch holds (12) 15ml bottles of all your favorite essential oils. No longer do you need to leave the house without your precious oils. 

These handcrafted essential oil clutches are made in the USA using high quality materials and timeless Liberty of London fabric.  The clutch is designed with classic prints from the Liberty of London fabric collection that have stood the test of time and will never go out of style!

How to Enter to Win: 

  1. Sign up for Sew Grown’s newsletter by clicking here. 
  2. Fill out the Rafflecopter below for extra entries to win! 

Terms and Conditions: Giveaway is open to US and Canada residents only. Winner will be announced on October 8th on this blog, my Facebook page, Instagram and through an email. Winner has 48 hours to respond to and claim their prize! 

a Rafflecopter giveaway

Essential Oil Clutch Giveaway

Filed Under: essential oils, Giveaways

How to Raise Pastured Meat Rabbits

September 22, 2015 by Jackie Ritz 6 Comments

It is the basic intent for our title homestead to develop our farm on the principles of self-sufficiency, self- reliance and good stewardship of the resources God has given to us. We have recognized the negative effect of the consumer-based lifestyle of most Americans on both the quality of life and the health of this planet, and made the conscious decision to do everything we can to be self-sufficient in all ways. That’s why we are involved in homesteading, raising and preserving our own fruits and vegetables as much as is possible, using only natural and organic products both in our home and in our barnyard, and deliberately choosing only Heritage Breeds (endangered species) of animals and poultry to raise for both breeding and eating.

Part of that choice has been to raise pastured rabbits. Before we moved to this beautiful 10-1/2 acre farm we lived on a rented 3 acre farm, and raised meat rabbits as part of our barnyard menagerie there.

We have plans to again begin raising and breeding rabbits for meat and as a way to help preserve those rabbits that are part of endangered species. In this blog we hope to answer these questions on how to raise pastured meat rabbits:

  1. Why raise rabbits?
  2. What are the choices of rabbit breeds?
  3. What are the basic requirements for housing and feeding rabbits?
  4. When and how do you cull the rabbits for meat?

1. Why raise rabbits?

There are some considerations you need to confront before you choose to raise rabbits. These include:

  •  How much time do you have to dedicate to this project?
  • How much space is needed to raise rabbits?
  • Do you want to find a market for your animals?
  • How easy is butchering the animal?

Rabbits can be raised in both suburban area and on farms. They are not always considered livestock by governmental agencies, so may be permitted with other animals are not. However do check with your local zoning authorities first. Rabbits are fairly easy to raise. The does take care of themselves, so no special equipment other than the cages are needed.

However it can be fairly difficult to find a market for rabbit meat. While you may be permitted to process your own rabbit meat, regulations can prevent you from processing it to sell to others. In addition, because rabbits are so cute and cuddly, many people will be repulsed at the idea of killing and eating them. You may even grow to consider them as pets, and find that you are unable to follow through with the culling.

2. What are the choices of rabbit breeds?

Choosing to raise pastured rabbits allow your animals to exercise and behave as rabbits are meant to behave. It improves their overall quality of life, and gives the rabbit farmer a way to manage rabbit housing easily. Choosing the right breed for pasturing is important, because you want your meat rabbits to reach a good size on pasture.

A rabbit destined for meat should be compact and short, with a blocky appearance. There should be no visible hip bones, and it should be as wide as it is tall.

There are several typical meat rabbits, which include:

  • Californian
  • American Chinchilla
  • New Zealand
  • Standard Rex
  • Silver Fox Flemish Giant

A larger boned breed such as the Flemish should be bred with a less boney breed such as the Rex. Otherwise you will have more bone than meat on your processed rabbits.

If you are interested in raising heritage breeds, like we do, then these two breeds of rabbits are a great choice: 

  • American Chinchilla—on the critical list, this is the most rare of the Chinchilla breeds. Despite the breed’s fine meat producing qualities, today’s producers prefer an all-white rabbit. The American Chinchilla is a large, hardy, gentle animal, with a mature weight of 9-12 pounds. They produce large litters, have good mothering instinces, and reach market weight quickly.
  • Silver Fox—a threatened breed, the silver fox is a beautiful rabbit. Does have large litters, produce plenty of milk, are excellent mothers, and make wonderful foster mothers. Silver Fox are known for their docile and gentle nature. They are born either solid black or bue, and begin to show the silvering of their fur by 4 weeks. The Silver Fox will reach 9-12 pounds when mature.

3. What are the basic requirements for housing and feeding rabbits?

It is not difficult to raise pastured rabbits. The rabbits should live in wire cages placed right on the ground. Bucks and does are housed individually. Each morning you will need to move each cage one length down the pasture to a new patch of grass. In the evening you can offer them hay, fresh vegetables, and pellets. This method is the same as maintaining a chicken tractor.

The rabbits will eat the grass—approximately six square feet per day per rabbit—to a close crop. When you shift the cage in the morning, the manure is spread, providing yesterday’s patch of grass instant organic fertilizer. You should not return the cases to those spots for at least a few months up to a year to allow the grass and other plants to recover.

There are many benefits to raising meat rabbits on pasture. Here are a few:

  • Moving cages, checking water bottles and providing food takes less than ten minutes daily.
  • The rabbits eat significantly less purchased food, preferring lush pasture. The adult rabbits only eat about half a cup of pellets a day while on pasture, and are sleek and muscular.
  • The areas on which the bunnies have been are lush and healthy compared to non-grazed areas. They are helping you to have a pasture that is a productive ecosystem with no synthetics and no mowing.

Your rabbits will thrive on this lifestyle from day one. Rabbits have a reputation for having delicate digestive systems, but pastured rabbits rarely suffer upsets from the pasture nutrition.

If you are breeding your rabbits, you will want to remove the does who are ready to give birth from the pasture and keep them in indoor cages. Keep the does and kits together for about five weeks after birth. At five weeks you can return the doe to pasture, but keep the kits indoors for one more week. After a week alone, you can put all the bunnies in a cage together on the pasture.

Each rabbit pen should be approximately 3 feet by 8 feet and about 2 feet high. The one critical aspect of the wire cages used to house your rabbits is the construction of the floor. You can make the roof from corrugated aluminum roofing, and the sides from wire mesh. The bottom of the pen should have thin, wooden slats running the 8-foot length of the pen, with a reinforcing middle cross bar. The slats should be about 2-3 inches apart.

The pen should always be moved in the direction of the slats (moving the 8-foot sides forward each time). This is because rabbits will only feed on the tips of grasses and plants that are point upwards. They like to nibble from the tips down toward the roots. If the stalks are bent downwards, the rabbits will ignore the greenery and only eat whatever other feed is provided.

Your pasture will supply 25-40 percent of the rabbit’s dietary needs. They will eat clover and grasses, but prefer “stemmy” or “scrubby” plants like beet greens, comfrey, and other plants with developed stalks. During the winter months when they are unable to be on the pasture, they will do well with root crops like carrots, parsnips, rutabaga, and hay. Alfalfa pellets (non-medicated) will supply the additional needed nutrition.

When and how do you cull the rabbits for meat?

Culling your rabbits for meat is nobody’s favorite part of raising rabbits. It is good to remember that the methods used to slaughter small and large livestock in factory farming is far worse that culling your own rabbits. Killing your own meat is a respectful and honorable thing to do. You gave the rabbits a good life and will be giving them a clean death, which is better than either factory life or wild life for a rabbit.

Your meat rabbits will be ready for butchering at 10 to 12 weeks, and will dress out to about 4-5 pounds of meat. Humane rabbit killing is very important, as any stress during the process can result in the release of adrenaline and other endocrine hormones that may negatively affect the flavor of the rabbit meat, and will toughen the meat.

There are three preferred methods for butchering. I will list each, and will give you the source where you can begin your own research into the specifics of this process. (Source) 

  • The broomstick method (our preferred method)
  • The Arterial Bleed
  • A fatal blow

If your farm’s rabbit meat tastes sweet like chicken, that means the rabbit died peacefully and humanely. 

If the butchering process scares you but you still want to give raising meat rabbits a go, you can usually find a small processor near you who will butcher and dress your rabbits for a fee. 

Raising pastured meat rabbits is a great for the backyard homesteader with very little acreage and great for the homesteader with lots of land. I’m confident you will love the taste of home-raised rabbit meat and the delicious stock and pate’ you can make with the bones and organs! 

How to Raise Pastured Meat Rabbits

Sources

  1. https://www.rudolphsrabbitranch.com/rrrpt1.htm
  2. https://www.mofga.org/Publications/MaineOrganicFarmerGardener/Winter20092010/Rabbits/tabid/1392/Default.aspx
  3. https://www.livestockconservancy.org/index.php/heritage/internal/conservation-priority-list#Rabbits
  4. https://www.motherearthnews.com/homesteading-and-livestock/rabbits-on-pasture-intensive-grazing-with-bunnies-zbcz1504.aspx
  5. https://www.outofthismess.com/animals-1/rabbits/rabbit-culling/


Filed Under: Homesteading, Living Sustainably

20 Fall Diffuser Blends

September 21, 2015 by Jackie Ritz 1 Comment

Fall Diffuser Blends

Summer is screeching to a stop here in the mountains of Western North Carolina. The leaves are beginning to evolve into the the most beautiful colors and I find myself reaching for my sweater each morning as I head outside to do the farm chores. 

For a homesteader, Fall brings a period of urgency to prepare for the winter ahead. It, also, brings a relief that most the garden work is done and the period of harvest is nearly over. 

I love the smell of autumn and pumpkin pie and the sweet smell of homemade applesauce. It’s deeply nourishing to me and warms my soul. 

It, also, reminds me of my childhood and oatmeal spice cookies and gingerbread men who get their head bitten off. 

As, Autumn sweeps into our lives, I want to share with you all a few blends I love making with essential oils to diffuse around the house. 

Diffusing essential oils is a safe, non-toxic and therapeutic way to:

1) make your house smell good, and

2) boost your immune system during the months our bodies need it.  

I wish you the best autumn season, filled with lots of joy and memories spent with those you love! And I want to thank my amazing essential oil team who helped me put this round-up post together! 

Fall Diffuser Blends

You can purchase all your essential oils that you need and diffuser here.

Cozy Home Blend

  • 3 drops of Wild Orange
  • 2 drops of Cassia
  • 2 drops of Cedarwood 

Pumpkin Pie Diffuser Blend

Pumpkin Pie diffuser blend

  • 3 drops of Cardamon 
  • 2 drops of Cinnamon Bark or Cassia
  • 1 drop of Wild Orange 
  • 1 drop of Clove 

Trick or Treat Blend 

  • 2 drops of Wild Orange 
  • 2 drops of Frankincense
  • 2 drops of Cassia 

Crispy Autumn Blend 

  • 3 drops of Wild Orange 
  • 3 drops of Patchouli 
  • 1 drop of Clove 

Spiced Apple Cider Blend 

Spiced Apple Cider diffuser blend

  • 3 drops of Wild Orange 
  • 2 drops of Cinnamon or Cassia
  • 2 drops of Ginger 

Cozy Holiday Blend 

  • 2 drops of Wild Orange 
  • 2 drops of Cassia 
  • 2 drops of White Fir 

Thanksgiving Joy Blend 

Thanksgiving Joy Diffuser blend

  • 3 drops of Cypress
  • 2 drops of Sandalwood 
  • 2 drops of White Fir

Cool Nights Blend

  • 3 drops of Cedarwood 
  • 2 drops of Bergamot 
  • 2 drops of Wild Orange 

You can purchase all your essential oils that you need and diffuser here.

Warm Spice Blend 

  • 2 drops of Cardamon 
  • 2 drops of Cinnamon or Cassia 
  • 2 drops of Clove 

Spiced Chai Blend

  • 3 drops of Cardamon 
  • 2 drops of Cassia
  • 2 drops of Clove 
  • 1 drop of Ginger

A Walk Through the Forest Blend 

  • 2 drops of Lime
  • 2 drops of Lemon
  • 1 drop of Wild Orange 
  • 1 drop of Bergamot 
  • 1 drop of White Fir

Oatmeal Cookie Blend 

  • 2 drops of Cedarwood 
  • 2 drops of Cassia 
  • 2 drops of Wild Orange 

Apple Pie Blend 

  • 2 drops of Clove 
  • 2 drops of Cinnamon 
  • 2 drops of Ginger 

Give Thanks Blend 

  • 2 drops of Ginger 
  • 2 drops of Coriander 
  • 2 drops of Cinnamon 
  • 1 drop of Clove 

Cuddle by the Fire Blend 

  • 3 drops of Cinnamon 
  • 2 drops of Clove 
  • 2 drops of White Fir 

You can purchase all your essential oils that you need and diffuser here.

Orange Pomander Blend

  • 3 drops of Wild Orange 
  • 2 drops of Clove 
  • 2 drops of Rosemary 

Fall Leaves Blend 

  • 5 drops of Wild Orange 
  • 1 drop of Patchouli 
  • 1 drop of Ginger 

Log Cabin Blend 

  • 2 drops of Cassia 
  • 2 drops of Cedarwood 
  • 2 drops of Wild Orange 

Fall Romance Blend 

  • 3 drops of Sandalwood 
  • 2 drops of Patchouli 
  • 2 drops of Rose (or Geranium) 

Holiday Joy Diffuser Blend 

  • 3 drops of Frankincense 
  • 2 drops of Wild Orange 
  • 2 drops of Peppermint 

Sweet Baby Jesus Blend 

  • 4 drops of Frankincense 
  • 4 drops of Myrrh 

You can purchase all your essential oils that you need and diffuser here.

Fall Diffuser Blends


Filed Under: DIY Home Recipes, essential oils, Homesteading, Living Sustainably, Natural Living

The Different Types of Coconut Oil

August 20, 2015 by Jackie Ritz 2 Comments


It’s no secret that coconut oil has been used for centuries in many different ways. There are so many different types of coconut oil, but most of them are 100 percent natural oil, and full of antioxidants and saturated fats—the good ones—that contain medium chain fatty acids (MDFAs) that provide so many good things:

  • MDFAs burn fast and are used as energy
  • MDFAs help to avoid weight gain
  • MDFAs will not raise cholesterol
  • MDFA have no risk of heart attack, strokes, or heart disease
  • MFDAs help to boost the metabolism

At one time it was very popular in the United States. But a strong propaganda campaign in the late 1970s promoted the use of corn oil and soy oil, and spread the message that because coconut oil was high in saturated fat it should be considered harmful for the human body. Fortunately today we understand the good benefits of the saturated fat content of coconut oil, and it is slowly being accepted as the powerfully healthy oil it is.

Coconut oil is used extensively in tropical countries like India, Sri Lanka, Thailand, Jamaica, New Guinea, Samoa, and the Philippines. These countries use it for:

  • Treatment for illnesses
  • Healing for injuries
  • Moisturizer for hair
  • Massage oil for babies
  • Even as a drink to boost the immune system

In this blog post I want to remind you of how healthy coconut oil is for you and your family. There are so many benefits to it, and so many ways to use it. We will take a closer look at some of these benefits and uses.

The Types of Coconut Oil

What kind of coconut oil is best to buy? How do I choose a coconut oil? These are the questions we all have when we begin to add this nutrient to our lives. Today there are many choices when it come to buying coconut oil. Let’s briefly review some of these choices.

There are two basic categories of coconut oil: those that are mass produced and need to be refined, and those that start with fresh coconut and are much less refined. All coconut oil is refined because oil doesn’t grow on a tree…coconuts do.

Virgin Coconut Oil

This is the least refined oil. It is coconut oil produced without starting with dried coconut (called “copra”) that has been removed from the shell and is inedible and needs more refining to produce coconut oil. The types of Virgin Coconut Oils include:

  • Extra-virgin coconut oil—There are no commonly understood or accepted definitions for “extra” virgin coconut oil, as there are in the olive oil industry. It is simply a marketing term and nothing else. 
  • Virgin coconut oil produced using a “wet-milling” process whereby the oil is extracted from fresh coconut meat without drying the meat first. This is the best kind of coconut oil for you!
  • Virgin coconut oil produced by pressing the oil out of dried coconut. This is the most common type of coconut oil found online and in stores today.

Refined Coconut Oil

Copra-based refined coconut oils are called “RBD coconut oils” (refined, bleached, deodorized). The RBD refining process does nothing to alter the fatty acid profile of coconut oil, so all the medium chain fatty acids are kept intact. There are several types of refined coconut oils available:

  • Expeller-pressed coconut oils
  • Hydrogenated coconut oil
  • Liquid coconut oil

As you examine your choices for coconut oil in the market today, your choice will largely be determined by how you intend to use the oil, and your budget. If you want the highest quality virgin coconut oil possible, this chart summarizes what is currently available in the market and rated on a scale of 1 to 10.

types-coconut-oil-rating

The Benefits of Coconut Oil

There really are so many healthful benefits to coconut oil. Because most of us very interested in filling our menus with as much real food and natural and organic products as possible, we have probably begun using coconut oil in our daily menus. It is solid like butter at room temperature, and it doesn’t break down or become rancid like many other oils. It even smells good to most people. 

But there are many other uses as well. Let’s look closer at some of them.

  1. As a cooking oil—It can be used for nearly any cooking use, including stove-top cooking and sauteéing, for stir frying, baking grain-free cookies, muffins, cakes, etc., and even for adding to your smoothies or using it to make home-made, sauces, and desserts.
  2. In coffee or tea—I’d been hearing rumors about people putting butter in their coffee. Supposedly, this is called a Bulletproof Coffee. Why on earth would someone want to put butter in their coffee??? I took the plunge! And I must say, IT IS UN-friggin-BELIEVABLE! It came out frothy, smooth, and filling! I love my coffee in the morning, in fact, it’s one thing I have always said I will never give up. I’ve given up enough in my life…my coffee is staying! 
  3. As part of a daily cleansing and beauty regimen—It can be used making toothpaste or used in oil pulling. It’s a wonderful foundation for my all-purpose healing salve, I add it to the nightly detox bath my kids take, it is great to use in your shampoo or as shave lotion, and it can be used in home-made deodorant.
  4. As nature’s perfect massage oil for babies and infants—Mothers around the world have been using coconut oil to massage their babies for centuries. It prevents so many irritating skin problems in babies, and keeps them soft and smooth as butter. 
  5. To help in weight loss—The medium-chain fatty acids in coconut oil help to get rid of excessive weight. It is easy to digest, and it help your thyroid and endocrine systems operate in good health. It increases the metabolic rate by removing stress on the pancreas, and lets you burn more energy and lose the weight. Many people trying to lose weight made and drink a “weight loss supplement” daily containing coconut oil, raw apple cider vinegar, and honey.

 There are so many additional benefits to coconut oil that I highly recommend you doing your own additional research to discover ways you can incorporate it into your family’s lifestyle. You won’t regret it!

Where to buy coconut oil?

I purchase all my coconut oil through Tropical Traditions. For cooking, I prefer the Gold Label coconut oil, however if you do not like the taste of coconut, then I recommend you get the expeller pressed. For making soap and salves, I like to get the 100% pure coconut oil. 

Different Types of Coconut Oil

Resources

1. https://wellnessmama.com/2072/benefits-of-coconut-oil/

2. https://www.organicfacts.net/health-benefits/oils/health-benefits-of-coconut-oil.html

3. https://coconutoil.com/what-type-of-coconut-oil-is-best-how-to-choose-a-coconut-oil/

Filed Under: DIY, DIY Beauty Recipes, DIY Home Recipes, essential oils, Natural Living, Starting Paleo

« Previous Page
Next Page »

Footer

Our Blog

The Paleo Mama blog provides simple answers for healthier families through research, tutorials, recipes, and simple remedies for daily needs!

  • Health
  • Essential Oils
  • Recipes
  • Remedies
  • Natural Living
  • Meal Plans

Stick around!

You’ll get instant access to a library of natural remedies and real, paleo food, including our ebooks and free guides we send out.

  • Home
  • Disclosure/Disclaimer
  • Privacy Policy
  • Advertise
  • Contact Me

Copyright © 2025 · Wellness Pro on Genesis Framework · WordPress · Log in