• Skip to primary navigation
  • Skip to content
  • Skip to footer

The Paleo Mama

Homegrown and Handmade

  • About
  • Blog
    • Podcast
  • Meal Plans
  • Essential Oils
  • Our Farm
    • Great Pyrenees Puppies
    • Goats
      • Goats for Sale
      • Goat Sales Policy
      • Nigerian Dwarf Bucks
        • Ranchocabra Lunar Eclipse

Blog

The Decision to Stop at Two and MTHFR

November 13, 2015 by Jackie Ritz 12 Comments

I’m not sure if every woman goes through this emotional struggle. As I look back over my blog the past year, I can sense how busy I must look and how unattached I have been. Sometimes it’s easier to pump out lots of information and be completely and emotionally detached. It’s been a year that has been filled with so much joy and peace…except in this one area…this one nagging question…should we try again for another baby?

You see, I always envisioned our family have three kids. Frank comes from a family of three children and so do I, so naturally, we always wanted three kids. And we tried…we could keep trying…but it’s tormenting. 

A year and a half ago I wrote a very emotional and raw blog post on my natural miscarriage. I said that I was done and and “100% positive that I cannot go through this again.” But the truth is, I did. 

Eight months ago we wanted to try for a third child. I wasn’t really ready, but it happened and I was pregnant. Then I wasn’t. And then all the emotions, anger, and the memories of my previous miscarriage all overcame me again. I was so mad at myself for letting myself get pregnant…and I questioned why my body ALWAYS got pregnant but just couldn’t keep the baby. 

After reading a book that my friend Emily from Holistic Squid gave me called, “Feed Your Fertility“, and I saw a little snippet in there about MTHFR gene mutation and miscarriage. It peaked my interest and I started reading more and more about this MTHFR stuff. 

The genetics home reference explains what the normal function of the MTHFR gene does…

The MTHFR gene provides instructions for making an enzyme called methylenetetrahydrofolate reductase. This enzyme plays a role in processing amino acids, the building blocks of proteins. Methylenetetrahydrofolate reductase is important for a chemical reaction involving forms of the vitamin folate (also called vitamin B9). Specifically, this enzyme converts a molecule called 5,10-methylenetetrahydrofolate to a molecule called 5-methyltetrahydrofolate. This reaction is required for the multistep process that converts the amino acid homocysteine to another amino acid, methionine. The body uses methionine to make proteins and other important compounds.

There is a long list of the conditions of the MTHFR gene mutation and what they can cause, but the one that stood out to me was miscarriages. I wondered if my history of three miscarriages had anything to do with this MTHFR stuff. 

So, what does any woman with a strong intuition that something wasn’t right, do? Well, she gets to the root of what’s going on and I sent off to have my genetics tested through 23 and Me. Sure enough I have one of the most problematic mutations.

The two most problematic mutations that can occur are  C677T and A1298C.  The most common forms of MTHFR mutation are below:

  • Homozygous: the same gene passed on from both parents and occurs when both parents pass on the 677 mutation, or the 1298 mutation.
  • Heterozygous: one parent passed on the 677 mutation or the 1298 mutation but the other parent passed on a normal gene.
  • Compound Heterozygous: one parent passed on the 677 mutation and the other passed on the 1298 mutation.

I was found to be compound heterozygous, which means I have a 677 mutation and a 1298 mutation. The largest problem that women of childbearing age can have who carry a MTHFR mutation is that they do not properly break down folic acid, and they also have a very hard time detoxing from heavy metals. 

BAM.

Could I have found the reason for my miscarriages? Tears…peace. 

I took my findings to a specialized MTHFR doctor that was recommended off of MTHFR.net and have been seeing him for the last year. I have discovered lots of interesting things about my health. I was crucially low in my B vitamins…I mean crucially. I am VERY low in my folate…rightly so since my body doesn’t even process it correctly. I carry a chronic virus that tells my body to constantly fight. And here I was…I thought I was a healthy 34-year old woman. 

So, with the help of my MTHFR doctor, we have been addressing the issues of my health. But lately…and loudly… my emotions are taking hold of me and needing closure. 

I think I am one of those woman that will ALWAYS want another baby. As long as I can have kids, I want kids. 

The downside is, in this “want”, I have never been satisfied with the two amazing, beautiful children that I have. I want another one…but they should be enough for me. 

So through tears and frustration, we have decided that I can’t go through this all the time. I can’t go through the agony of a monthly period coming late and the hope that this “might” stick. 

I want to move on and be content with my children…the two children that have made me MOM. I don’t need anything more than what God has already given me. And the complete agony of “trying” is more than my body can take. 

11
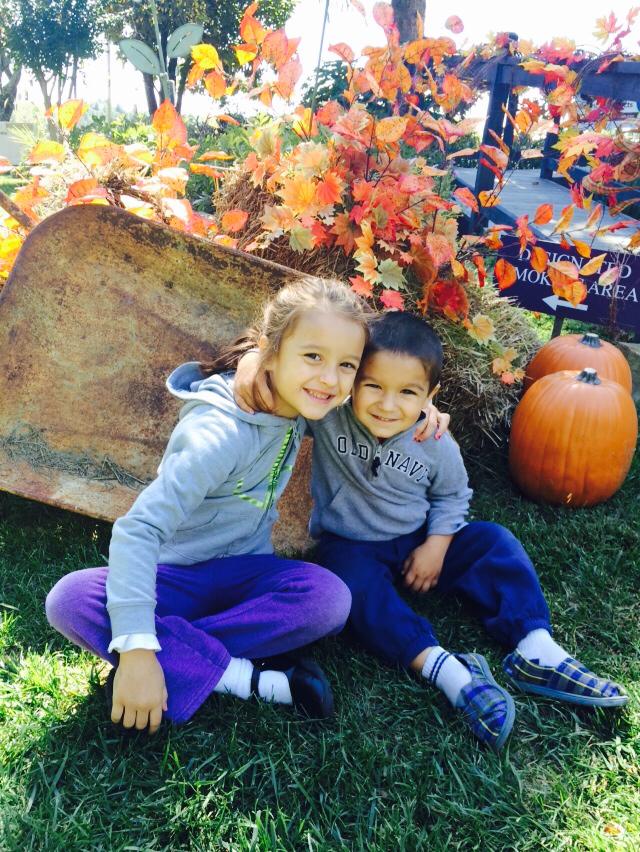
So, it’s done. I’m a mother of two delightful and precious children. Little Farm Girl is almost 7 years old and is quickly becoming my greatest friend. She’s sensitive to my emotions and always wants to please me. Little Farm Boy is 4 years old. His birth and life has been during the most difficult time of my life, but the past year we have felt a breath of fresh air…renewal…promise…and the ability to create joy within our lives. 

I couldn’t be happier. Will I always want another child? Probably. Have we thought about adoption. Absolutely. But I want to learn to be satisfied with the life that I am living right now and the two living blessings that need all of their mommy. 

I could die today and know that I have lived a full life. I know my miscarried babies will meet me in heaven. I, also, know that my husband and I are making the right decision. Is it hard? For sure. Do I long for another baby? I do…but I long more for contentment with the wonderful two children that I have. 

MTHFR Video: 


Filed Under: About Me, Natural Living

My Husband, My Best Friend

November 12, 2015 by Jackie Ritz 6 Comments

Laura_Coppelman-12

My husband, Frank, is an amazing man. He has gladly taken the back seat over the last few years of this blog becoming very successful, and has let me shine through it. 

But Frank deserves the spotlight today because he has changed my life in so many ways. 

Frank has chased my dreams over the past 8 years of marriage, he has made it his life’s mission to make me happy, and he has seen me at my EXTREME worse. 

Frank is 37 years old, born to a Sicilian mother and an Italian father. His family migrated over to the United States and his family’s name was quickly changed from Rizzo to Ritz…because it sounded way too “Italian”. 

I, absolutely, adore his Italian family. They talk loud. They argue a lot. But they make GOOD food. 

Frank is the youngest of three boys. When he was 4 years old, his mother found him watching shows on TV from doctors performing surgeries and she knew right away that he would do something amazing with his life (and he did!). 

He excelled in school…way better than I ever did. He easily made straight A’s, and even in college when he barely attended classes, he made over a 4.0 GPA. I’m praying our kids have his brilliance! 

He attended the University of Florida and graduated with a degree in Exercise and Sports Science. Made sense since he had a deep rooted love and appreciation for understanding how the human body works. One month before he graduated from UF, his life was filled with tragedy as he received a phone call that his father passed away from a heart attack. He walked for graduation with honors and pride that he completed something that would have made his father proud…probably the hardest day of his life. 

Laura_Coppelman-19Frank is one of the most loyal Americans I have ever met. He loves his country deeply. He prays for his country fervently…so many times I have heard his quiet prayers as he is watching the news or a new story on YouTube. He is so faithful and believes in this nation. He’s taught me so much about respect and love in this way. 

Frank learned how to be a Physician Assistant because of his passion and desire to help others. 

I knew how amazing my husband was…but it wasn’t till 4 years ago that I truly understood what it meant to have unconditional love for someone. I’ve told this story several times on my blog, but for those who are new, here’s the super short version and the role Frank played. 

I got a phone call my younger sister lost her boyfriend in a car accident. I talked with my sister and decided that I would go be with her. I took my newborn son and my 2 year old on a 4 hour road trip and spend the morning with my sister as she grieved and cried. Later that day, with my children in tow and our mother with us, we found my sister….she had taken her own life. 

Frank is the first one I called. And in less than 4 hours, Frank was by my side. The following months after her death are a blur, but I do remember the countless meals my husband made for me. I remember laying in bed while he sat in the living room folding piles of laundry. I remember him so effortlessly loving me through the devastation of losing a sibling. I remember all the kisses, the warmth of his strong hug, and I know several times he caught me when I couldn’t stand through the tears. 

Frank served me in every way a human being could serve. He never told me to “get over it” or had ANY expectations of what I should be doing…as a mother…as a wife….as a daughter of parents who lost their baby….as a sister. He got me and he saved my life. Our son was a newborn and Frank got up EVERY SINGLE night to care for him. Frank never expected me to do anything…he just served and served and served our family. He was God’s Hands taking care of me, holding me, and loving me through. 

Frank is passionate about teaching. He’s been a college professor recently and taught Physician Assistant Studies at a local college here in North Carolina. 

12096490_10153460592327013_4079013258144998304_n

Frank watched me shine over the last few years. If it wasn’t for his love and encouragement, I would probably still be that depressed, grieving mother. But he encouraged all the crazy ideas I had. He encouraged me to write how I felt and to start blogging. He told me that there were people who wanted to hear my story. 

He allowed my dreams to become his dreams and my city-boy Frank Ritz is now a happy and content farmer. He let me buy goats and chickens and sheep….and the rest is history! 

He told me to keep going in my business online…and when my income surpassed his, he stepped down from his job and came home as a full-time father. 

Frank homeschools our daughter. He does all our laundry. He cooks 50% of our meals. He has knelt down at my feet next to me while I wasweeping on the toilet and miscarrying our baby….holding my hands…holding my heart…cleaning me up. 

He wakes up early and does all the morning chores. 

He does our grocery shopping…WITH BOTH KIDS…while I have some quiet time and work from home. 

Frank is all I could have prayed for in a husband, in a best friend. 

He blows my mind daily by his continual random acts of kindness and his humor. HIS HUMOR…how could I have forgot! 

Frank is funny. No he isn’t just funny…he makes me pee myself (thanks for those vaginal babies hun!). Oh and his smile……

He melts me. 

I love you Frank. 


Filed Under: Uncategorized

How to Make a Simple Chocolate Mousse

November 5, 2015 by Jackie Ritz Leave a Comment


Ever wondered what kind of blogs bloggers like to read? Well, I have a few that top my list and The Elliott Homestead is one of them. I love Shaye’s writing style, her posts are always encouraging, and the way she connects with her readers. Bonus — she’s a real life friend of mine and when she asked me if she could share a post on my blog on how to make a simple chocolate mousse, I — of course — said yes! Welcome Shaye! 

Hello fellow homesteaders! So glad to meet you… even if it is digitally. I’m always humbled by the community that exists around a common love for animals, farms, and good food. Which is obviously why you’re reading Jackie’s blog in the first place! It’s a beautiful place to hang out and be inspired. I’m humbled she’s invited me to share in a bit of that love. 

In the spirit of celebrating the farm and all the goodies it gives us, I wanted to share with you my super-simple chocolate mousse, make fresh with cream from the family cow and eggs from the chickens. It’s a sweet celebration and whips up in just a few minutes! 

I hope you enjoy it’s simplicity – from my farm to yours! 

Simple Chocolate Mousse Recipe 

Ingredients
  1. 8 oz. high quality dark or semi-sweet chocolate
  2. 4 Tbsp. butter
  3. 2 cups cold cream
  4. 3 egg whites
  5. Pinch sea salt
  6. Garnishes: Berries, powdered sugar, shaved chocolate, pistachios, maple syrup etc.
Instructions
  1. Melt chocolate and butter in double boiler. Meanwhile, whip the egg whites with a pinch of sea salt until stiff peaks form. Set aside. Whip the cream until fluffy and stiff.
  2. Gently fold in half of the chocolate mixture into whipped cream. Then gently fold in the other half of the chocolate. Lastly, gently fold in the whipped egg whites.
  3. When combined, refrigerate for 1 hour.
  4. Garnish with fresh berries, nuts, shaved chocolate, maple syrup, additional whipped cream etc.
      By Shaye Elliott

Filed Under: Homesteading, Living Sustainably, My Recipes

Raising Irish Dexter Cows

October 27, 2015 by Jackie Ritz 5 Comments

Irish Dexter Cows

We recently added Cleo and Rosalind to our family. These two girls are registered Irish Dexter cows, an endangered heritage breed that gives great milk and tasty meat. We are so excited to finally have cows in our barnyard heritage menagerie!

In this blog post I want to introduce you to this wonderful breed of cattle, and to share some of the pros and cons for raising Dexters. Cleo and Rosalind have already endeared themselves with each of our family members, and I know you would have the same pleasant experience if you were able to bring some Dexters into your family.

We will take a look at:

  1. The heritage breed of Irish Dexter Cows
  2. Why would I choose to raise Dexters?
  3. What specific benefits will my Dexters provide?
  4. The Buyers’ check list when purchasing Dexter cattle.

1. The heritage breed of Dexter Cattle

dexter prize

Today’s Dexter cattle descend from a herd of hardy Irish mountain cattle assembled by Mr. Dexter, agent to Lord Hawarden, around 1750. Dexter roots trace to the tiny Celtic cattle of ancient Eire. Irish fanciers established a Dexter registry in 1887 and an American version followed in 1911. Yet North American Dexters were ever scarce; today they’re included on the American Livestock Breed Conservancy’s Conservation Priority List, classified as rare. (If you’d like to help preserve an endangered heritage livestock breed, consider raising Dexters. They need your helping hand.)

Dexters are strikingly small cattle. Most Dexters are colored in shades of deepest ebony to sun-tinged, reddish-black. Reds and duns are far less common and grade from palest red to darkest mahogany; reds have black and pink noses, while duns have brown noses. Black-tipped white horns usually accent their small, neat heads, although a line of polled (hornless) Dexters now exists. There are two types: a longer-legged version (Kerry type) and a Dexter with shorter legs.

Dexters are dual-purpose cattle. Thanks to the breed’s foraging ability, and its high feed conversion and meat-to-bone ratios, a grass-fed Dexter steer will finish in 18 to 24 months, dressing out at 50 to 60 percent live weight. Dexter beef is fine-textured, tender and delicious. And Dexter cows give 1.5 to 3 gallons of roughly 4 percent butterfat milk daily, at a rate of up to one quart of cream per gallon.

Dexters are famous for their strong maternal instinct, easy calving, sweet dispositions and longevity. They do, however, occasionally throw dwarf “bulldog” calves.

2. Why would I choose to raise Dexters?

Rose

There are some very practical reasons to choose to raise Dexter cattle. Raising a Dexter cow has been compared to eating one potato chip—it’s almost impossible to settle for just one! Here are some of the benefits you will find:

  • If you want to have a cow, you’ll need less pasture and far less space to house a mini version like a Dexter.
  • If you must pen her and feed cut-and-carry forage, it’s doable.
  • Her wee hooves and bantam weight equate with far less pasture damage, and she’s designed to eat grass, not concentrates.
  • She’ll neatly thrive on one half the feed of her full-size kin and use it to produce much less waste for you to cart away. 
  • Come autumn, you’ll haul less hay. And you’ll tote fewer buckets of water to quench her thirst during the deep, hard winter freeze.
  • If you are a small-scale farmer hoping to qualify land for ag-tax breaks or to turn a profit, this is a very good thing indeed.

3. What kind of care do I need to give my Dexters?

The care of your Dexter cows will not put a huge strain on your homestead budget. Your barn facility and pasture area will not need to be as strong and large as what you would need for larger breeds.

Dexter cattle are not as susceptible to cattle diseases as other breeds. They will rarely need to be attended to by a veterinarian. Dexters are also highly intelligent and have a steady temperament, which means they are not hard to handle. Some additional specifics related to their care includes:

  • While they so not need as much housing as other breeds, they will need a place to get out of the wind and snow if you live in a cold winter climate.
  • You will need to be certain you have secure fencing.
  • You can get by on 2-3 acres for them, but your forage needs to be nutritious and in excellent shape.
  • They may require additional hay, which you will need to have ready.
  • Make sure you have a veterinarian to help you learn about cattle care and preventative medicine, and who will come to your property if needed.

4. What specific benefits will my Dexters provide?

Looking after a Dexter can be fun for children and can give them a sense of accomplishment. With proper attention and training, a Dexter can be easily handled by even the greenest homesteader. Dexters can be trained like oxen to plow or pull wagons, and their strength belies their size. At the same time, that size makes them less intimidating to children and adults.

They’re the perfect size for the family homestead. One Dexter cow will give about 1 to 2 gallons of milk a day, a much more manageable amount for a single family than the 8 to 10 gallons a typical Holstein yields.

If you raise a Dexter for beef, you’ll need room in the freezer for about 400 pounds of meat, rather than 600 to 800 pounds you’d get from a typical full-size steer. They are known as prolific milkers and produce a significantly higher milk yield than other breeds. Their milk is of very high quality and has high levels of protein and butterfat.

The meat from Dexter cattle has a pleasantly unique taste and texture that makes it suitable for boutique meat markets. Grain-fed Dexters will yield 250 pounds at 12 months, and 475 to 500 pounds at 24 months, dressing at about 60 percent of their live weight. These results can be obtained by supplemental feeding of only 5 to 7 pounds of grain per day for the last two to three months. Grass-fed animals yield about 55 percent of their live weight.

Dexters typically live long lives and can be bred until the ages of 14 or 15. Considering that a Dexter can be bred from as early as a year old and through harsh weather conditions, this trait is a clear advantage over other breeds.

Dexters are known as “easy calving cattle.” This means that they can successfully give birth without assistance and that they rarely experience any birthing difficulties. Also, the rate of live births of this type of cattle is relatively high. Because of these characteristics, Dexter bulls are often used instead of valuable heifers of larger cattle for breeding. This almost always results in larger numbers of safe, unassisted births.

1. The Buyers’ check list when purchasing Dexter cattle.

Dexter Cattle

The American Dexter Cattle Association (ADCA) has given some valuable information in its Buyers’ check list (Here) that the wise homesteader will review before purchasing any Dexter cattle.

Buyers’ Check List

  • Never buy an animal sight unseen.
  • Be sure the animal is registered (registration certificate in Dexter Owner’s Handbook). 
  • If the animal is not registered, ask for it to be registered BEFORE you purchase it, at the very least make sure it can be. Animals without registration papers may not be able to be registered. If there is any question about the registration paper of the animal to be purchased, its sire or dam, the buyer may be buying a grade animal. (Avoid disappointment later.) If there is a question about registration, contact the Registrar. Remember, there are animals that cannot be registered.
  • Heifers and cows over one year and bulls over two years may require Parentage Verification. (Avoid costly bills later or worse not being able to register them)
  • Be sure the tattoo number on the paper matches the number in the animal’s ear.
  • Make sure the animal can meet your state’s health requirements (for example blood testing for brucellosis, etc.)
  • As a precaution, ask that the animal receive any necessary shots (such as for B.V.D.) prior to shipping.
  • If buying a bull, you may want to request semen testing.
  • Be sure the price is right–shop around—call other breeders—don’t buy the first Dexter you see—go visit several herds if possible.
  • Ask to see progeny or sire and dam, of the animal you are buying. Anything you can see will be helpful to you in making your decision. Hint check the online pedigree pages, there may be pictures posted.
  • Be sure if you purchase a bred cow that you get the proper signatures on the white application for registry so you can get your calf registered.
  •  Make sure the animal fits your needs (if you want to milk the animal make sure she has a good sound udder).
  • Make sure to see copies of any genetic testing that you deem important such as Chondrodysplasia, PHA, Color, A2 Beta-Casein, or Genotyping. Make sure they are on file with the ADCA and will be printed on your registration certificate.

Remember these valuable buyer-beware points. Look at the herds of several breeders before making your decision to buy.  You will see the differences in management as well as differences in the animals themselves.  Beware buying animals at the sale barn as you are buying someone else’s problems or culls—those animals are there for a reason.

The more you know the better decisions you will make, and identifying breeders who are willing to provide advice and service after the sale will make your transition much smoother, helping you on the learning curve that always comes with a new adventure.

But once you have your Dexters, they will very quickly charm their way into the hearts of each family member. They will be much more than homestead cattle—they will become family pets!

Irish Dexter Cows


(PHOTO CREDIT: Image 1, 2, and 3 used with permission from Kirkhaven Farm)

Sources

  1. https://www.livingthecountrylife.com/animals/livestock/raising-dexter-cattle/
  2. https://www.hobbyfarms.com/livestock-and-pets/raising-small-cows-15001.aspx
  3. https://raisingbeefcattle.wordpress.com/raising-dexter-cattle-for-beginners/
  4. https://www.motherearthnews.com/homesteading-and-livestock/all-about-irish-dexter-cattle-zbcz1312.aspx
  5. https://www.dextercattle.org/PDF%20files/ADCA%20membership%20book.pdf

Filed Under: Grassfed Beef, Homesteading, Natural Living

The Deep Litter Method for Your Winter Chicken Coop

October 17, 2015 by Jackie Ritz 7 Comments

If you’ve been following me online, you already know that during the last six months or so I’ve been decluttering our home and farm using the KonMari Method (HERE) for simplifying, organizing, and storing only those things that “spark joy” for us. It’s been a real eye-opening time, and we’ve gotten rid of tons of stuff! SO…this post on The Deep Litter Method for your winter chicken coop may at first sound like an oxymoron! But I assure you it isn’t—what it is is one of the easiest and healthiest ways to prepare your chicken coop for the cold winter months.

You see, my chickens are a real source of joy for us and make the perfect pet. We are raising heritage breeds, and thoroughly enjoying the ability to help protect these endangered breeds, as well as being thrilled with the dozens and dozens of eggs they give us, and the tasty chicken meals we are able to have from their gift of life to us when needed. Taking the best care of them at all times is our prime goal—especially during the cold months of our North Carolina winters.

The deep litter method allows your coop litter to build up over a period of time. As the chicken manure and bedding litter compost, it helps to heat the coop, keeping your chickens warmer. This is also called “The Old-Timers Method,” because it’s been used successfully by many chicken farmers for decades. And an added benefit (“joy” for us KonMari followers) is lots of beautiful compost for our spring gardens.

Let’s take a look at these things:

  • Preparing Your Coop for the winterizing Deep Litter Method
  • Managing the Deep Litter method in your coop through the winter months
  • Doing spring cleaning of your coop when winter ends
  • The Benefits of the Deep Litter Method

1. Preparing Your Coop for the Winterizing Deep Litter Method

You prepare your coop for the winter months by beginning with a deep cleaning. Pick a nice, sunny day and shovel out all the soiled straw and litter in the coop. This is also a great time to check the exterior of the coop for loose screws, hinges, shingles and to make any repairs necessary before winter.

Once your coop is cleaned thoroughly, put a fresh 6-inch layer of pine shavings down on the bare floor. This is the best bottom layer for the Deep Layer Method because they are small and will compost fairly quickly. Put a thin layer of straw over the shavings. Note: Do not use Diatomaceous Earth (DE) for this method. It will kill the good microbes and just is not beneficial to have in your composted soil.

Now you begin deep littering. Each morning turn over the pine shaving and straw, adding more straw as needed until you have a 12-inch layer. You are not removing anything, simply turning it over to expose new straw. You can also add leaves, grass clippings, and weeds during this initial preparation period. You may need to add a 12-inch board at the door of your coop to keep the litter inside for the winter.

Chicken manure is very high in nitrogen.  Mixing it with a source of carbon (either straw, shavings or dry leaves) will balance the mixture and hasten the rate of decomposition.  It is important that your composting material contain oxygen, so turning is crucial. Fortunately the hens will help you with that part, especially if you get in the habit of tossing some scratch or sunflower seeds into the coop for them before bedtime. They will learn to scratch through the litter to find the scratch when they wake up in the morning.  You can also turn the material with a rake. The turning and introduction of oxygen will reduce the chance of ammonia buildup.

After just a few weeks, the droppings, shavings and straw will start to decompose and you will end up with a fine dirt on the bottom.  As anyone who composts for their garden knows, when properly done, composting does NOT smell and does generate quite a bit of natural heat.  This is the same idea as you would do in a compost pile or bin, you’re just doing it inside your coop!

2. Managing the Deep Litter method in your coop through the winter months

Once you have your healthy 12-inch layer of litter on your coop floor, you are set for the winter months. You will need to follow some simple steps to keep your chicken coop in good health throughout the winter:

  • Stir up the bedding to break up any clumps every few days.
  • Keep layering clean bedding on top of the old bedding or any moist spots.
  • To keep your girls happily scratching, toss in a bit of chicken feed when you layer in the fresh straw.
  • If the floor becomes frozen (only in very cold climates), break it up with a pitchfork so your girls can begin scratching again.
  • You should be able to kneel down on the floor and your knees should remain dry.

3. Doing spring cleaning of your coop when winter ends

Your perfect opportunity for decluttering your chicken coop will come with the entrance of spring. Now you get to do your thorough spring cleaning in the chicken coop. Clean out most—not all—of the litter. Leave a base layer (1-2 inches) to inoculate new material with the established beneficial microbes.

As with any decluttering of junk (in this case poop) it’s not fast, easy or fun. It’ll take quite a while to shovel out 1-2 feet of poop encrusted litter. So, with each scoop of poop, just remind yourself that these few hours of pain make the long winter months so much more tolerable for you.

If the litter you remove is thoroughly decomposed and odorless, you can work it directly into your garden beds. If some of the fresher manure hasn’t thoroughly decomposed, simply add it to your other compost pile. If you want to speed up the composting process by helping to keep the compost pile hot, try some Chicken Poop Tea! To make the tea, just fill a couple of buckets half full of water, and then add in the poop until the buckets are full. Stir frequently—holding your nose–and keep the buckets covered. Your chicken poop tea is extremely strong, and should not be applied directly to your garden plants. Use it to keep your compost pile doing its thing—composting.

4. The Benefits of the Deep Litter Method

By now you understand the reasons why using the Deep Litter Method during the winter months is a win-win solution for your chicken’s health and happiness. So let me just finish by listing the main benefits for using this method.

  • It is the most natural and most rational method for manure management.
  • It brings winter happiness to the chicken owner because it lessens the need to do cold weather cleaning of coop.
  • It relieves winter boredom for the chickens who love having a place that is warm and safe, and which allows them to scratch around endlessly in the deep litter floor.
  • The microbial action in the litter turns a potentially disease-causing problem into a substrate for health—studies have shown that this method has positive feeding benefits.
  • The deep organic duff insulates the floor of the coop, while the warmth of its decomposition moderates the chill.
  • Finally, this process captures the fertility in the manure for soil building in your spring garden—the key to food self-sufficiency.

Need I say more? I love the Deep Litter Method of sparking joy for both my chickens and for me. No oxymoron here! 

The Deep Litter Method for Your Winter Chicken Coop

Sources:

  1. https://www.backyardchickens.com/a/deep-litter-method-the-easiest-way-to-deal-with-chicken-litter-dlm
  2. https://www.fresheggsdaily.com/2012/02/deep-litter-methodcoop-cleaning.html
  3. https://www.grit.com/animals/chicken-health-deep-litter-zm0z13jazgou.aspx?PageId=6
  4. https://www.motherearthnews.com/homesteading-and-livestock/deep-litter-method-zb0z1208zmat.aspx
  5. https://chickenjunkie.com/chicken-coops/cleaning-the-coop/chicken-poop-control-the-deep-litter-method/


Filed Under: chickens, Homesteading, Living Sustainably

How to Raise Turkeys

October 16, 2015 by Jackie Ritz Leave a Comment

Raising the turkey you will eat on Thanksgiving Day may be something you want to consider doing. Turkeys can be a fun addition to a small farm or homestead and I’m going to share a few things I have learned on how to raise your own turkeys. But before you start, there are a few things you need to consider.

  • If you are hoping to save money on your Thanksgiving bird by raising it yourself, you are likely to be disappointed. It will be hard to compete with the sale price of the commercially grown supermarket turkeys.
  • You will be challenged to keep your turkey free from predators. Just about every wild critter (even some domesticated ones) is on the prowl for a big, juicy turkey meal.
  • Turkeys have really cute personalities and love to be around people. It may be hard to decide if they are your family pet or your Thanksgiving Day meal.
  • Turkey raising is a challenge—get rid of your romantic notions about it. There will be great days, and there will be difficult days. If you succeed, you will produce a Thanksgiving turkey meal that is way more flavorful than any storebought bird could give you. But if you blow it, you’ll be buying that last minute, dried out bird at the market, hoping no one will notice.

If you’ve been reading our Natural Homestead blogs and posts, you know that we decided that raising our own pastured turkeys—including one for our Thanksgiving dinner—was just what we wanted to do. We purchased 5 2-month old turkeys (yes, we decided to skip the infant stage this first time around) to join our menagerie and forage to their heart’s content out in our pasture.  We built a turkey roost for them to use in the pasture during the day, and they will be able to roost in the closed barn at night.

In this blog I want to share some of our firsthand experiences, and more of our research into how to raise turkeys to help you make a choice about raising your own. We will consider:

  1. What are the differences between a standard breed and a heritage breed?
  2. What kind of shelter do I need to prepare for my turkeys?
  3. What do I need to know about feeding my turkeys?
  4. Are there special preparations I need to make in my pasture?
  5. What health issues could I face with my turkeys?
  6. When will my turkey be ready for eating?

1. What are the differences between a standard breed and a heritage breed?

Frank and I have made the decision to raise only Heritage Breeds of homestead animals on our Gather Heritage Farm. We want to have a part in saving endangered livestock from extinction. When we moved into our forever farm we knew that we could provide the necessary elements to be a part of this endeavor.

Heritage turkeys are raised outdoors, freely roam on pasture, and eat the varied diet nature intended them to eat. Most supermarket turkeys today are raised in crowded indoor pens, and are fed a constant diet of grains, fillers, and supplements like antibiotics—just to fatten them up to meet the demands of American shoppers.

While supermarket turkeys tend to be tasteless and dry, heritage birds are juicy and flavorful. They taste the way a turkey is supposed to taste. Heritage breeds include:

  • Beltsville Small White
  • Black
  • Jersey Buff
  • Narragansett
  • Royal Palm
  • Bourbon Reds
  • Slate
  • Standard Bronze
  • White Holland
  • White Midget

Heritage breeds will take longer to raise. If you raise one from early spring to fall it will weigh approximately 15-18 pounds. But the meat is denser, and more flavorful. There tends to be more leg meat and less breast meat.

2. What kind of shelter do I need to prepare for my turkeys?

If you decide to start with turkey poults (infants), you will need to provide the same basic care you would give to your baby chicks. When you bring them home, dip their beaks in water to teach them how to drink. They need to be in warm temperatures (95 degrees) for the first week, and gradually less heat as they feather out.

Heritage turkeys are more spunky than standard breeds, and can figure any way out of their pen—up, under, through, between. Make sure the fencing around your turkey pen is secure and can keep your turkeys in and their predators out! Fencing should be as high as possible, at least four feet. Use woven-wire fencing and metal T-posts or wooden posts.

If you are raising turkeys to breed or places for broody hens to sit on eggs, you will need a pen with solid sides and separate housing for toms and hens. Allow the toms and hens to forage separately.

Provide your growing turkeys with a turkey roost with a roof to keep them safe. The higher you make it, the safer they will be. Wild turkeys roost way up high in trees. A 5 by 8 foot roost will house about 20 turkeys.

We raise free-range turkeys so we don’t even have housing for them. They usually wind up sleeping on a barn stall or on their turkey roost that we built to go outside and is next to our yellow duck house. The turkey roost is over 7ft high so there is no way a predator can get them at night. 

3. What do I need to know about feeding my turkeys?

Their first food should be a high protein ration with about 28 percent protein fuel their fast growth. By 8 weeks they can be switched to a 20-22 percent feed, and after they begin foraging you can use a 18-20 percent protein, and give them some cracked grains to help their digestive systems utilize their feed.

When you are fattening them up for the Thanksgiving table, toss in excess or bug-infested apples, tomatoes, and other produce as treats. You can find full information on feeding your turkeys here.

4. Are there special preparations I need to make in my pasture?

If you have a large, lush pasture, your turkeys will be able to free range, moving from area to area as they deplete the grasses and eat the bugs. If you have a smaller pasture, you may want to consider whether you can provide enough food material for the birds to thrive. For pastured or limited range turkeys, alfalfa, clover, and grasses such as orchard grass serve turkeys very well; however, fescue is not recommended. Contact local Cooperative Extension agents to ascertain the best choice of pasture browse crops and planting strategy for your locale.

Remember that turkeys are very sensitive to numerous mycotoxins  (toxins produced by fungus and mold), so moldy grains and grasses should be avoided at all cost. Turkeys are excellent insect foragers. The only insects they will not eat are the ones they cannot catch.  

5. What health issues could I face with my turkeys?

Turkeys are pretty hardy, but there are some potential health concerns in raising them. Some of these include:

  • Blackhead (Histomoniasis)—a parasite found in earthworms from poultry droppings. Symptoms include bright yellow droppings and droopiness, diarrhea and weight loss.
  • Coccidiosis—a parasitic disease more common to commercial turkeys, recognized by watery diarrhea and malaise. It must be diagnosed by a vet.
  • Lice—turkeys get lice just like chickens. Make sure you treat them regularly with a lice powder that is suitable for raising organic turkeys.

With careful maintenance and diligence, you should be able to raise your turkeys disease-free and healthy.

6. When will my turkey be ready for eating?

Turkeys for meat are ready for slaughter at 24-28 weeks for standard breeds, but heritage breeds normally take longer to raise to slaughter readiness. Most will weigh 14-18 pounds by Thanksgiving time. You will need to keep that bird around another year to get it to a larger size.

Processing a turkey is more difficult than chickens because they are heavier, more energetic and more intelligent. They are also loaded with much more personality, and it may be very hard for you to consider doing anything hurtful to that family member. You can bring them to a processor to do the hard work for you or have someone else do the hard deed. 

Fortunately, if you choose to raise heritage breeds, you can allow your turkey family to grow and expand so you will always have some of these beautiful birds in your pasture. That’s having your turkey and eating it too!

How to Raise Your Own Thanksgiving Turkey

Sources

  1. https://smallfarm.about.com/od/farmanimals/tp/How-To-Raise-Turkeys.htm
  2. https://sagebrush-mama.hubpages.com/hub/The-Good-The-Bad-And-The-Ugly-Sides-Of-Raising-Your-Own-Turkey
  3. https://www.theselfsufficienthomeacre.com/2013/11/how-to-raise-turkeys.html
  4. https://www.sustainabletable.org/432/talking-turkey
  5. https://www.communitychickens.com/thinking-about-raising-turkeys/
  6. https://www.albc-usa.org/documents/turkeymanual/ALBCturkey-3.pdf

Filed Under: Homesteading, Living Sustainably, Natural Living

« Previous Page
Next Page »

Footer

Our Blog

The Paleo Mama blog provides simple answers for healthier families through research, tutorials, recipes, and simple remedies for daily needs!

  • Health
  • Essential Oils
  • Recipes
  • Remedies
  • Natural Living
  • Meal Plans

Stick around!

You’ll get instant access to a library of natural remedies and real, paleo food, including our ebooks and free guides we send out.

  • Home
  • Disclosure/Disclaimer
  • Privacy Policy
  • Advertise
  • Contact Me

Copyright © 2025 · Wellness Pro on Genesis Framework · WordPress · Log in