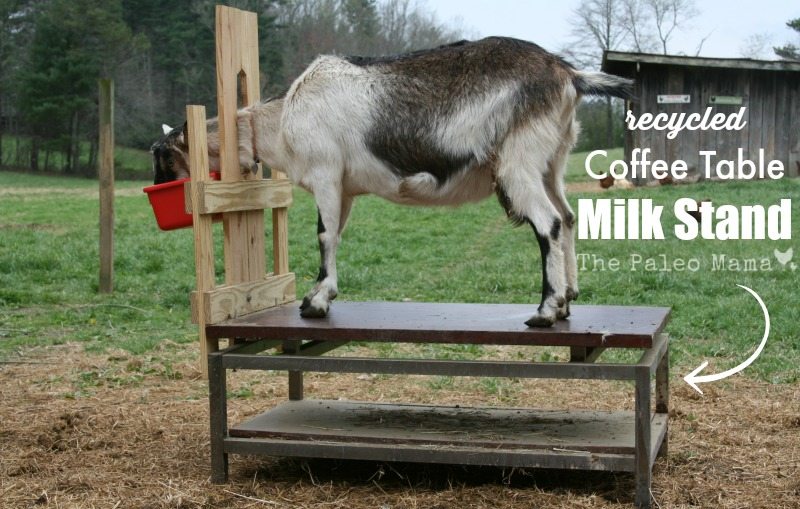
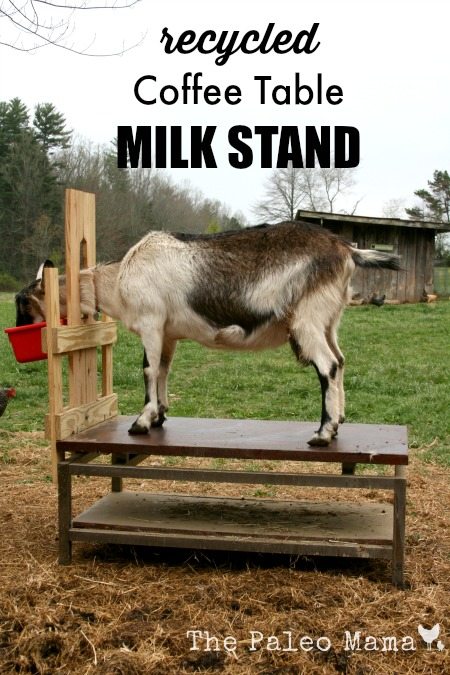
We had the fantastic pleasure of moving over 4 times in one year! Yippee! I think I would rather poke my eyes out than move another time with 2 small kids. However, out of all the broken furniture, dings, scratches, missing pieces, came a beautiful creation that my husband made for me — my very own Recycled Coffee Table Milk Stand!
My amazing and creative husband is going to share how we made this simple, recycled creation! Welcome hunny!
Thank you for the introduction, Jackie! I’m so excited to be sharing my first, official blog post ever!
What can we do with a bed that is missing one of the components to put it back together, a desk that is completely busted, or a coffee table that has a gash on it so big that no table cover can mask it…making you too embarrassed to use it ever again?
Well put that together with a move to the mountains of western North Carolina, and have a wife that desires raising goats for the wonderful, nutritious milk they make…what do you have?
A recycled coffee table milk stand!
This recycled coffee table milk stand has proven to be exceptional, best part is, I did not have to create it from the floor up – just designed a stanchion that attaches to the side of the existing table, and voila – a milking stand!
What is a stanchion? Well, for non-milking folks, it is the portion of the milk stand that holds the goat’s head steady (without pinching!) and a food trough, allowing the milker to keep the goat occupied while they efficiently resource that wonderful milk!
So like any budding homesteader coming from the city, where did I go first? Of course, Google and YouTube! A quick search of “milk stand stanchion” brought up hundreds of ideas that others have done, allowing me to get the gist and inspiration to make one that works for me.
Starting with the coffee table mentioned above, the other supplies you will need will depend on your final design. But, to get those creative juices flowing, here is the example of what worked for us:
Materials (yours WILL vary based on your design and coffee table/piece of furniture!):
- 2 – 1”x4” board cut to 2 pieces measuring 42” each (figured this out by measuring the distance needed to brace my stanchion against the coffee table, comfortably stabilizing the stanchion)
- 1 – 1”x4” board cut to 4 pieces measuring 38” each (figured this for the cross-pieces needed to stabilize and secure the stanchion to the rest of the stanchion) (see pictures)
- 1 – 1”x6” board cut to 2 pieces measuring 38″ each (figured this by measuring from the surface top of the table to where the goat’s neck could comfortably fit through to get to the food)
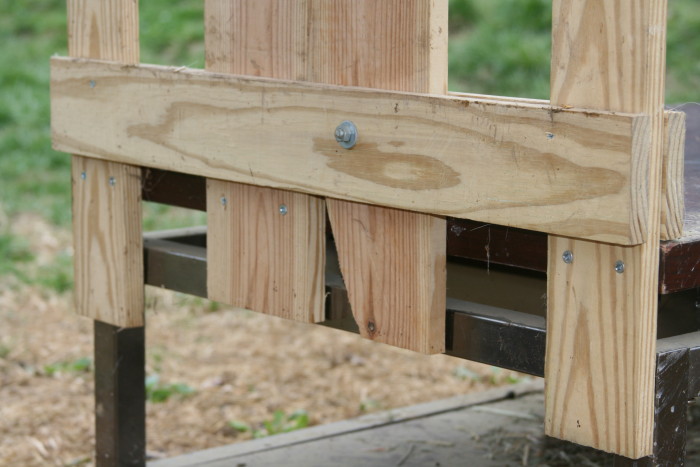
- 1 – carriage bolt with washers and nut (ours was 3 1/2 inches long. Make it long enough to fit through cross-pieces and 1×6 board to serve as a pivot for the board to latch it in place during use) (see pictures)
- 2 – “L” brackets with screws for supporting the stanchion onto the surface of the table
- Find a hanging bucket (at a local feed store) or online (we have this one).
- You will need 1-2 inch wood screws for screwing the boards together and also we used (4) 3 and 1/2 inch screws to fully secure the stanchion to the existing table wood surface, for further strength.
Step-By-Step:
Step 1: Secure the 1″x 4″ (42 inch) boards to the table, using (4) 3 1/2 inch wood screws.
Step 2: Screw the “cross” pieces (1″x 4″ by 38″) to the pieces you just screwed into the coffee table. Make sure that one of the pieces rests onto the coffee table top as to provide a surface to further use the “L” brackets to stabilize the stanchion later to it.
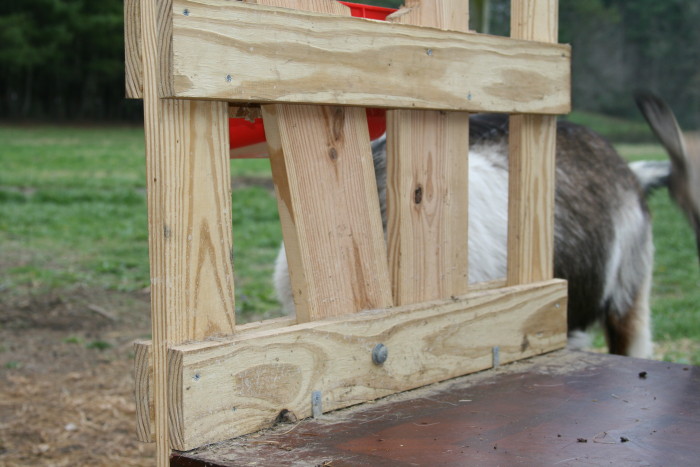
Step 3: Using a jigsaw, cut into the 1″ x 6″ pieces, making sure to “mirror” the cuts to make a hole for the goat neck. We cut about 2″ into the plank, then down about 8-9 inches, making this hole. ENSURE to notch one of the planks by cutting a section off of the inside corner (where the two planks touch when the hole is made). This will allow the plank to pivot on the carriage bolt, allowing it to open the planks, giving you more room to maneuver the goat’s head into position when the planks are pushed together to secure the goat’s head and neck!)
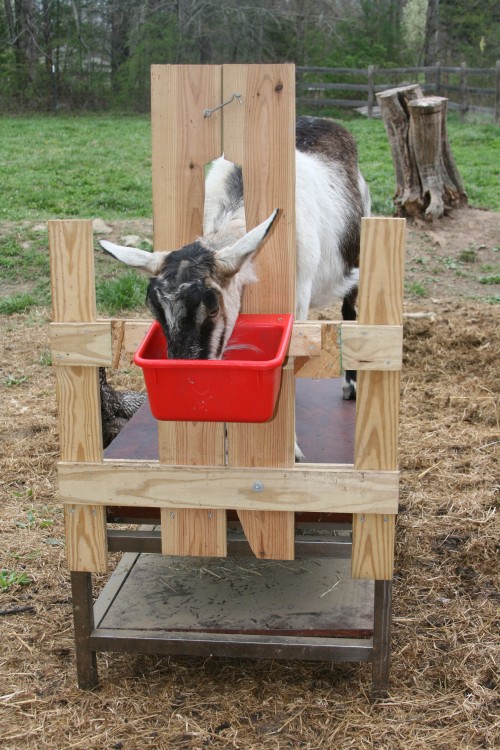
Step 4: Slide the 1″ x 6″ planks down toward the surface of the coffee table. Drill a hole big enough to slide the carriage bolt through to create your pivot for the plank. Screw the other plank into the coffee table surface. Only screw the plank without the bolt to the cross pieces for additional support.
Step 5: Drill and screw the “L” brackets onto the bottom cross piece and to the surface of the coffee table.
Step 6: Attach the hanging feed bucket to the stanchion with a couple of scrap pieces of wood, to create a gap to hang it from. Further secure the bucket by screwing it into the stanchion.
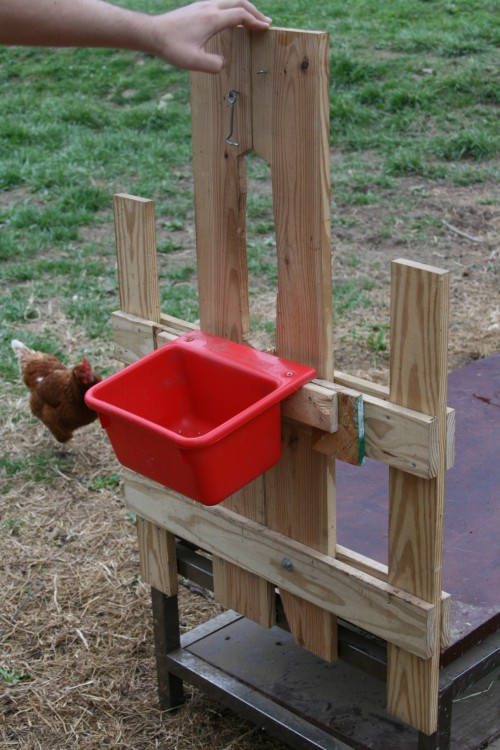
A couple of quick caveats for making your recycled coffee table milk stand: of the two boards used for holding the goat’s neck, you will need to cut out a section into each of the board (either by hand or by jig saw) to create a “hole” for holding the goat’s neck with a wide enough berth to comfortably allow the goat to move their head around! In addition, if you look at the pictures, I point out where I additionally cut a diagonal section to allow one of the boards to pivot, opening more room for the goat to be held by the stanchion.
Overall cost was about $30 – in addition, if you do not happen to have a table saw to cut the longer boards, most home improvement stores will cut them for you for free! Bonus!
I hope this gives you that final inspiration needed to get started repurposing that old, tired, scratched coffee table or piece of furniture into a hard-working functioning recycled coffee table milk stand of your very own!
How clever. So, enlighten me since I don’t have goats. Is there a reason you’ve designed the milk stand in such a way where the goat has to put its head through? Is it better than just simply hanging its head into a bucket? Probably a stupid question but I’m curious.
Well done! 🙂
If they put their head through it keeps them stationary, otherwise they are free to jump off the table at any time, which gets old real quick when you are milking!
I just found this on Pinterest. I built something like this for sheering my sheep to save my back. I like how you added the latch on the close brace. Great idea, going to add that feature to mine.
Carole
I’m glad you found something you can use in my “invention.”
Very interested to hear.
We did the same thing with our milk stand! We had a cast iron and glass top coffee table, so we replaced the glass top with some barn wood and attached a premade metal stanchion. It is perfect!
Great reuse of furniture. One more little addition might help some folks. Goats will happily learn to jump up and down on this type of table but something to make that top not so slick may be helpful. A used floor mat like the “old fashioned” tire type or even a thin piece of not so smooth plywood, screwed down to give the nanny better footing.
You are right, and we did add a non-slip pad to ours…post picture taking.
an you please do a segment on country internet– how do the homesteaders keep blogs and run businesses out yonder? I know i would not be able to even consider going out in the country without the help of sites like yours–
Thanks